A to Z of Photoshop: Ideas, Methods & Hacks!

A is for Motion
Right here goes our first of many suggestions for Adobe Photoshop. A is for the actions that may automate something from easy processes like saving and exporting photos to creating immediate artistic endeavors in underneath 5 minutes.
Obtain an motion onto your laptop, Load Actions into the Motion panel, hit Play, after which watch them go!


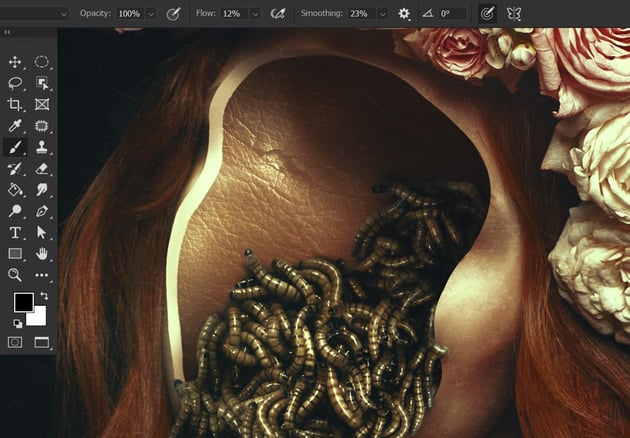
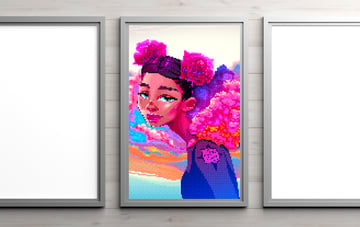
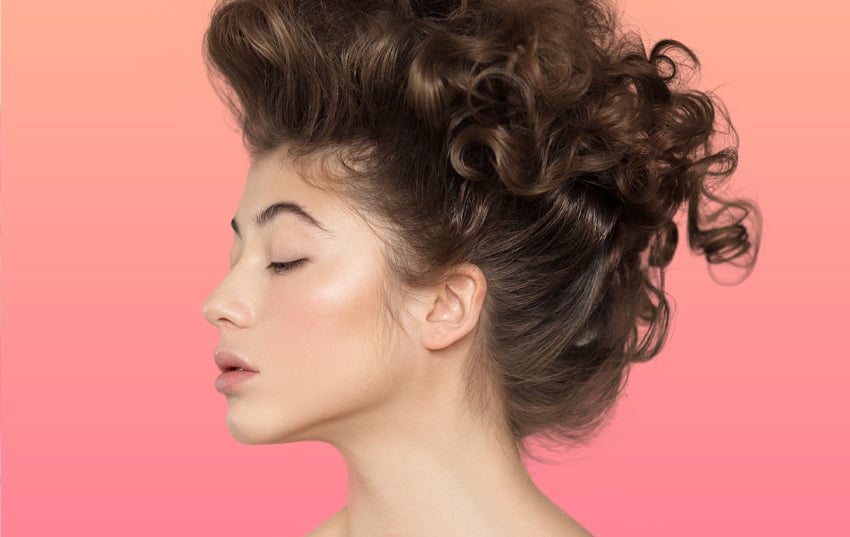
Pixel Artist – Photoshop Motion, Lady with Clouds and Roses within the Hair
B is for Photoshop Brushes
B is for Photoshop brushes. There are numerous brush suggestions for Photoshop that you may attempt. Flip nearly something right into a brush by turning the picture grayscale after which going to Edit > Outline Brush Preset.
Or obtain and Import Brushes utilizing the Brush panel. There are actually hundreds of brushes that exist already—a fundamental and all the time helpful Photoshop hack. Can you actually ever have too many nebula Photoshop brushes?

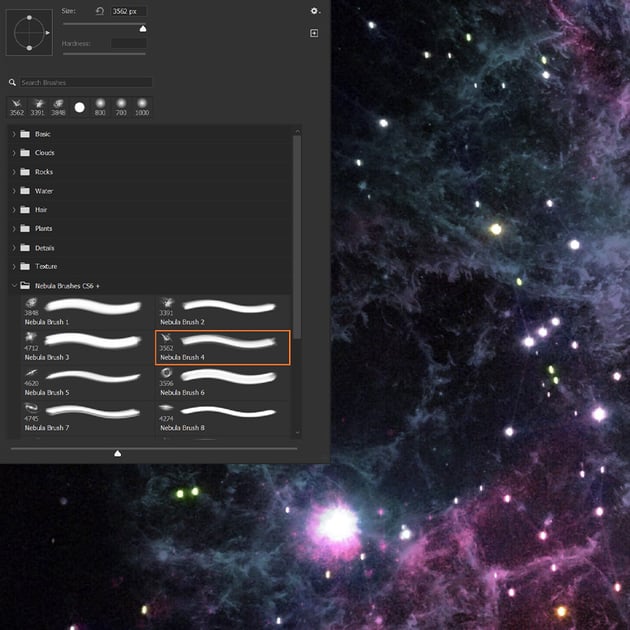

Nebula Photoshop Brushes
C is for Curves
C is for Curves. Want so as to add some fast distinction to your picture? Add the S curve to your bag of fast Photoshop results.
Create a Curves adjustment layer. Now, create an S form on the curve line utilizing simply two anchor factors. Prompt distinction—with flexibility!
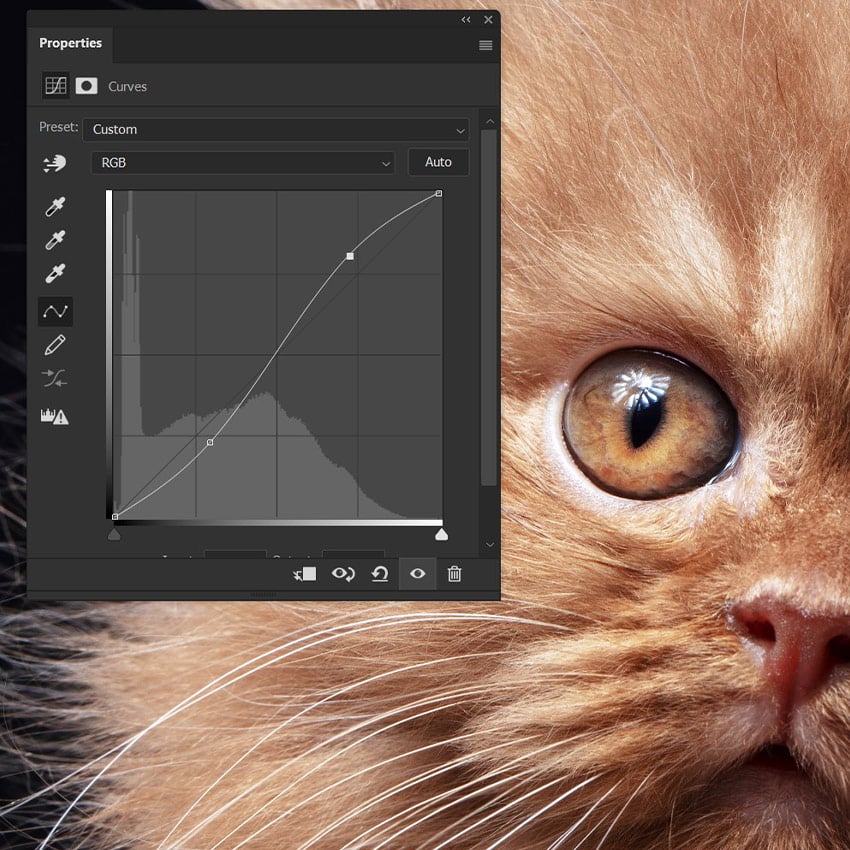


British Lengthy Hair Kitten
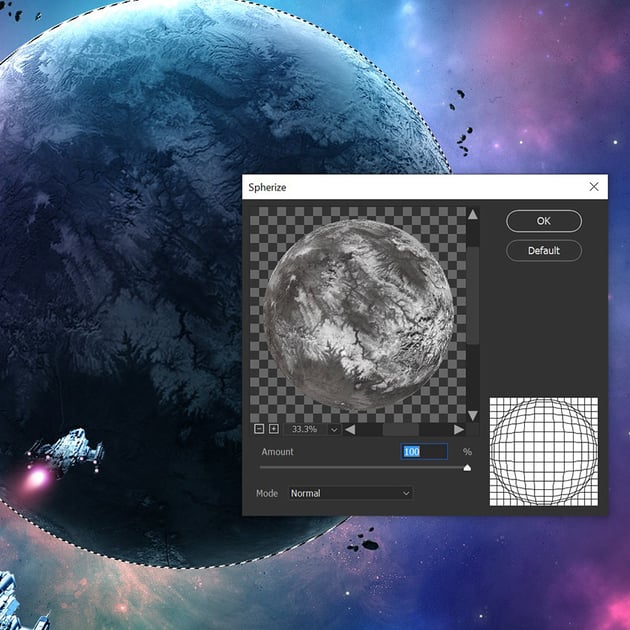
D is for Distort
D is for Filter > Distort. Should you’re in search of artistic suggestions in Adobe Photoshop, this is one.
Create complete planets by discovering a planet-like texture, utilizing the Elliptical Marquee Instrument to make a circle, going to Filter > Distort > Spherize, setting it to 100, after which including a Layer Masks to the feel.
You at the moment are the proud proprietor of your very personal planet.


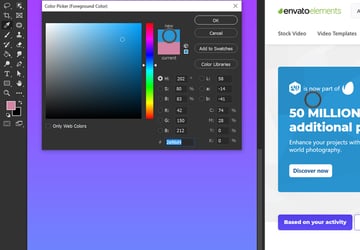
E is for Eyedropper
E is for the Eyedropper Instrument, excellent to pair together with your Photoshop brushes.
Do you know you may eyedrop a coloration from wherever in your display screen by deciding on the Eyedropper Instrument after which dragging it to the world whose coloration you wish to choose? It is one of many fundamental Photoshop suggestions.
Sure, this even contains areas outdoors Photoshop.


F is for Movement Charge
F is for Movement Charge. Ever marvel how folks get fantastically blended colours or lighting of their Photoshop tutorials? It’s by constructing these colours up slowly utilizing Movement Charge.
Do not miss this Photoshop hack: decrease the Movement Charge of the comb, after which paint in a shadow. Every go of the comb will lay down increasingly paint—making it excellent to make use of with each a pen pill and a mouse.

G is for Teams
G is for Teams. Teams will not be on the prime of most lists of Adobe Photoshop suggestions and methods, however they’re one of the simplest ways to maintain your layers clear and tidy.
Don’t overlook to color-code them by Proper-Clicking the group, going all the best way all the way down to the underside, after which selecting a coloration.


H is for Excessive Cross
H is for Filter > Different > Excessive Cross. Use the Excessive Cross filter to completely sharpen your photos earlier than posting them on-line. Convey out the element with zero worry of over-sharpening or artifacting.
Flatten your entire layers, measurement your picture down as wanted, duplicate the flattened picture, set that picture to Overlay, go to Filter > Different > Excessive Cross, and at last set the Radius to 3 or 4 pixels.


I is for Iris Blur
I is for Filter > Blur Gallery > Iris Blur.
Iris blur provides immediate depth to a photograph. However do you know you may add light-based bokeh as nicely? Should you did not, you’ve got been lacking one of many prime suggestions for Adobe Photoshop.
Go to the Results tab and select your Gentle Bokeh %, Bokeh Colour, and at last Gentle Vary. The darker the photograph, the extra you’ll want to pull the slider to the left.


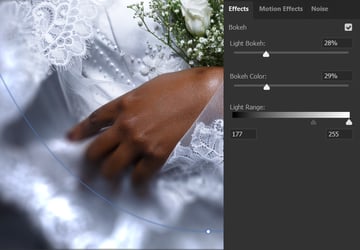


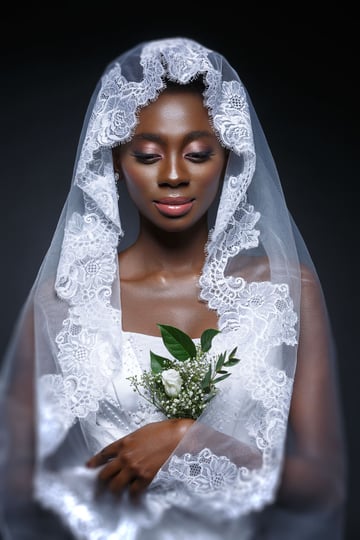
Stunning Bride with Veil
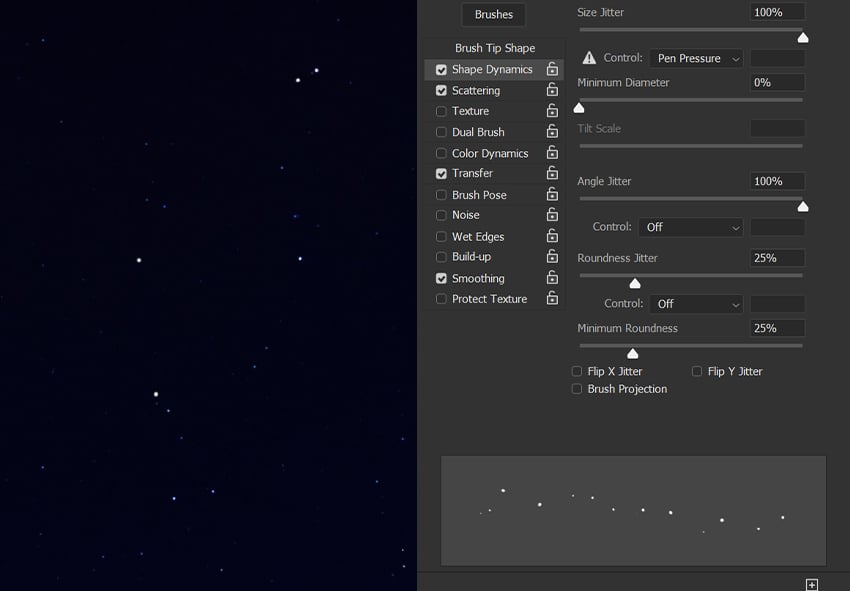
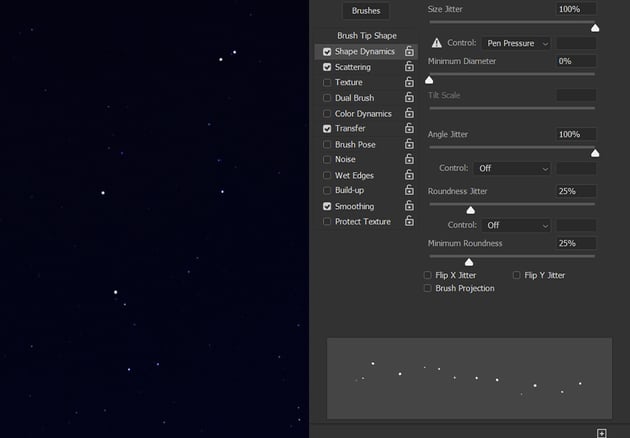
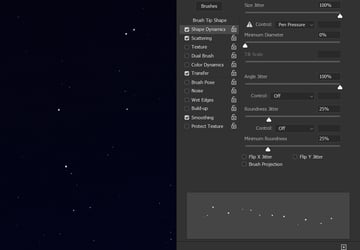
J is for Jitter
J is for Jitter. Want a fast star brush? That is yet one more of the important thing brush suggestions for Photoshop.
Choose a default arduous spherical brush, open up Brush Settings, and improve the Dimension and Angle Jitter to 100%.
Subsequent, set the Roundness Jitter to 25% and at last improve the Scatter to 100%. Paint in your stars.
Okay is for the Body Instrument, or it is a shortcut a minimum of! Simply masks photos utilizing the Body Instrument (Okay) Photoshop hack. Create a body, drop in a picture, after which freely transfer round your picture.
Double-click the framed picture to open it, much like a Sensible Object. It is a nice various to clipping masks if all you want is one thing fast and easy. That is positively one of many suggestions in Adobe Photoshop that you may’t miss.


Silver Frames
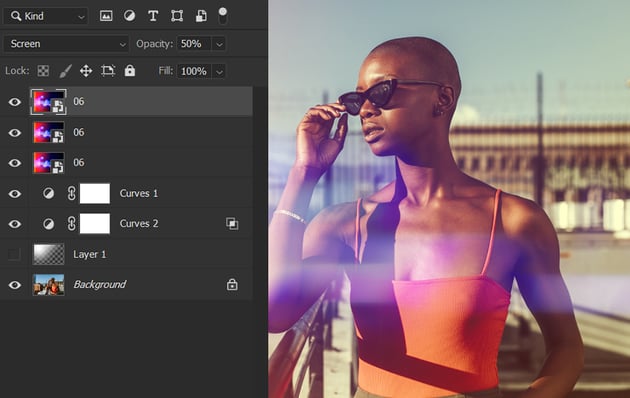
L is for Layer Modes
L is for the Layer Modes which are an artist’s finest pal. We already noticed how they’ll sharpen a picture when paired with our letter H, excessive go. However we are able to additionally warmth issues up by including fast hearth to any photograph, no extraction wanted.
To use this Photoshop hack, all you want is a photograph of a flame on a black background with a Layer Mode set to Display.

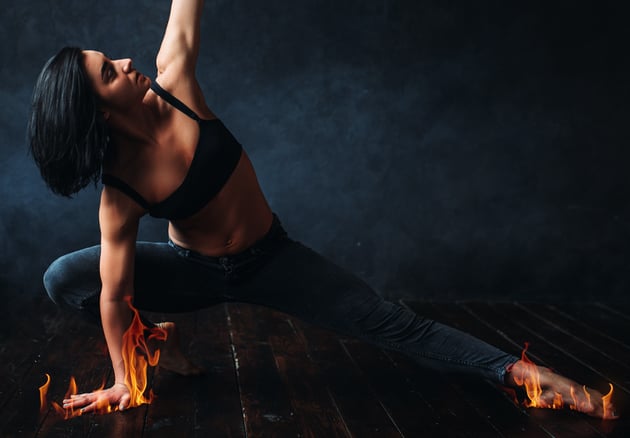
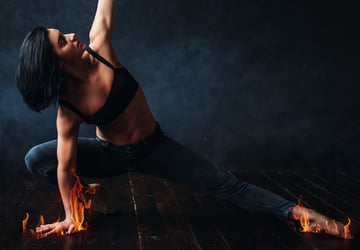
Dancing Feminine Performer, Burn Photoshop Motion
Dramatic Textual content on Hearth Impact in Photoshop

M is for Marquee
M is for the Marquee software, with one among our fundamental Photoshop suggestions. Create excellent rectangles, squares, circles, and ovals with the Marquee instruments.
You don’t must get the form proper the primary time, although—you may all the time maintain Shift so as to add to your choice and Alt to take away out of your choice.


N is for Noise
N is for noise. And whereas a variety of the time chances are you’ll be determined to eliminate it, including a contact of noise to inventory photos and Photoshop textures will assist add a sensible wash of grain in addition to eliminating annoying coloration banding.
Create a layer crammed with black, set that layer to Display, and add a small quantity of Filter > Noise > Add Noise. Then, place the layer between any layers which are inflicting the colour banding.


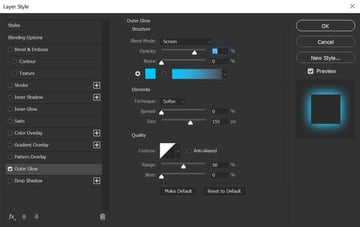
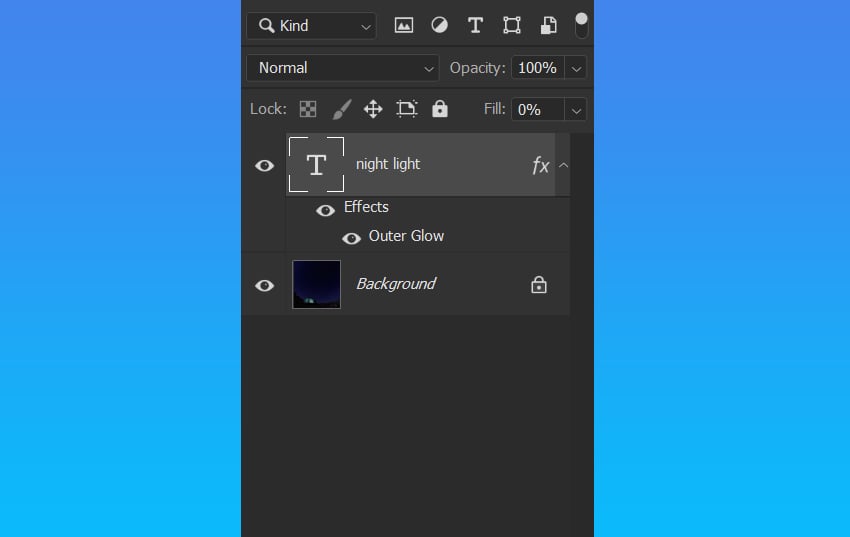
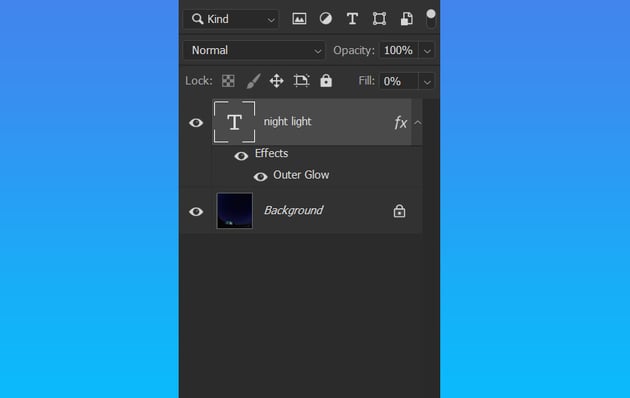
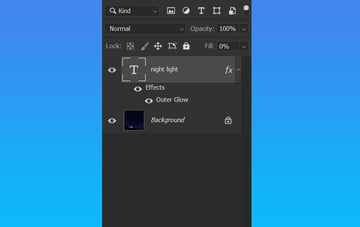
O is for Opacity
O is for Opacity and Fill. Ever questioned about the distinction between Opacity and Fill?
Opacity will have an effect on the entire layer and all the things on it, whereas Fill received’t have an effect on any Layer Results utilized to the layer. Under we’ve got some textual content with an Outer Glow, however a fill of 0% so that you solely see the glow. Each instruments are useful for making use of many fundamental Photoshop suggestions.


Tent Towards the Night time Sky
P is for the Pen Instrument. Should you adore it, you adore it. Should you hate it, it’s since you haven’t discovered how you can adore it but!
Chances are you’ll assume the Pen Instrument is only for strong shapes, however I like utilizing it to make ultra-accurate layer masks. That is on the prime of our greatest Photoshop suggestions. Set the Pen Instrument to Path, make a path round a topic, add a Layer Masks to that topic, after which Proper-Click on > Fill Path.


Lady within the Metropolis at Night time
Q is for Fast Choice
Q is for the Fast Choice software you employ if you end up too lazy to make use of the Pen Instrument. Or possibly that’s simply me?
Both method, the Fast Choice homes a bit of factor referred to as Topic Choose, Photoshop’s strongest AI choice software but.
Give it a attempt: simply click on and get an correct number of nearly any topic on a plain background, hair and all!
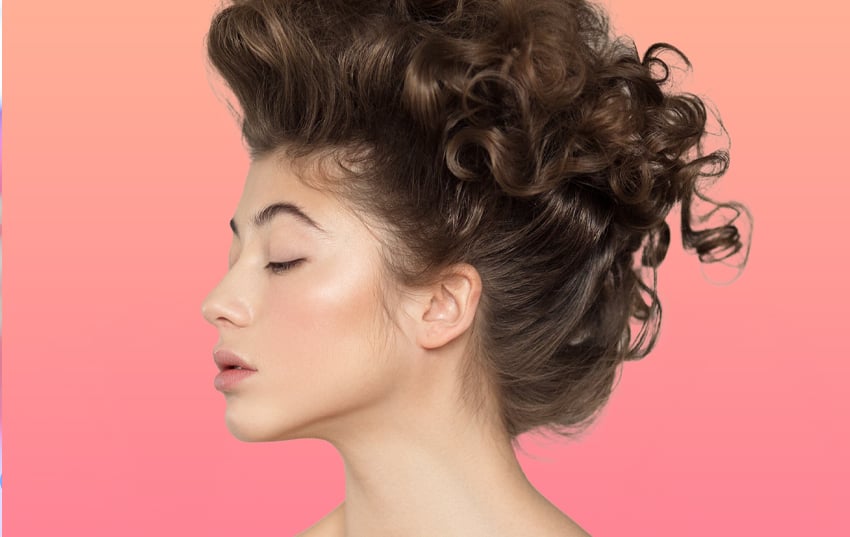


Younger Lady Portrait
R is for Refine Edge
R is for Refine Edge, the software that may save your choice if Topic Choose doesn’t go in addition to deliberate.
Masks your choice, and add a Layer Masks. Double-Click on the Layer Masks after which select Choose and Masks.
Examine Sensible Radius, setting the Radius to about 3px, choose the Refine Edge Brush, after which drag the comb throughout the sting of your topic.
Watch your masks go from OK to nice utilizing cool brush suggestions for Photoshop like this one.

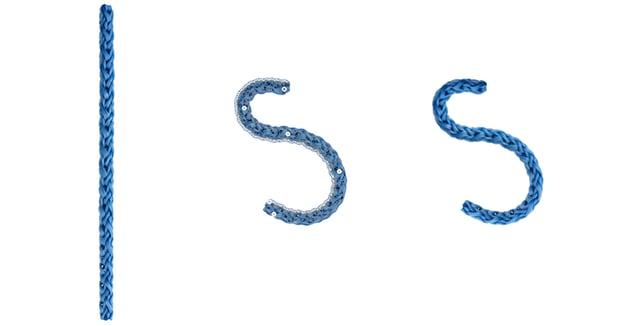
S is for Sensible Objects
S is for Sensible Objects, the software that may hold you from ever having to decide to any filter, adjustment, or layer measurement. It is most likely the commonest software in the case of Adobe Photoshop suggestions and methods.
Sensible Objects are additionally nice for double layer masks. Create your first Layer Masks, then Proper-Click on > Convert to Sensible Object, and add a recent new Layer Masks to your sensible object.
Entry the unique layer masks by double-clicking the Sensible Object layer. By no means fear about ruining a layer masks once more.


T is for the Sort Instrument. Not solely is downloading customized fonts principally a world pastime for many artists, however you may as well add immediate arches to textual content utilizing the Warp Textual content icon within the higher Instrument Choices bar.
Select a traditional Arch or get bizarre with the built-in Fish choice.


Oktoberfest Flyer Template
U is for Shapes
U is for the Shapes software. Hit U to rapidly entry your shapes. This is among the most helpful suggestions for Adobe Photoshop.
Create simple customized shapes proper in your individual doc by making a design utilizing a number of completely different shapes, like circles, after which choose every form layer and Proper-Click on > Merge Shapes.
They are going to be mixed into one form that you may then add constant Layer Types to. Nice for issues like gradients, drop shadows, or glows.


V is for Management-V (Paste)
V is for Management-V. As one of many fundamental Photoshop suggestions, if you realize your shortcuts, you realize meaning Paste!
A fast solution to improve the depth of any Layer Mode is to pick out the layer, Management-C to repeat, after which Management-V to stick. Repeat till the glow is as vivid as you need it to be.


W is for Warp
W is for Warp. And whereas there are a lot of methods to warp a picture in Photoshop, my private favourite is the Puppet Warp.
Go to Edit > Puppet Warp on any extracted picture. Click on to put pins the place you wish to make your bends. After which simply click on and drag. The pins act as anchor factors, holding the bend until moved.


Colourful rope
X is for Colour Swap
X is for coloration swap. That is as a result of it’s the shortcut for swapping your Foreground and Background brush colours.
Hit X to rapidly swap between your two colours. That is extremely useful when switching between white and black whereas masking.


Y is for Historical past Brush
Y is for the Historical past Brush software. Must undo, however solely in a single specific space? Then hit Y for fast entry to the Historical past Brush software.
You’ll be able to even change the comb tip form and measurement, identical to you’ll with the traditional Brush software. These brush suggestions for Photoshop are nice when you do not wish to mess with adjustment layers.


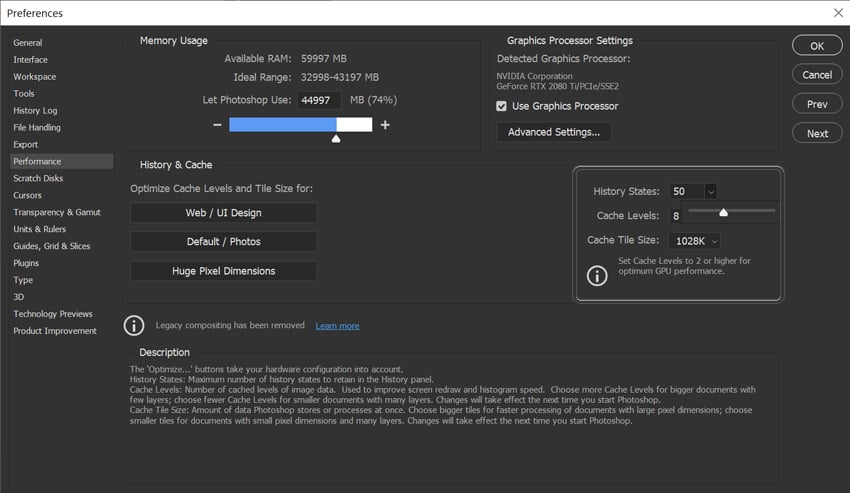
Z is for Management-Z, aka Undo
Lastly, Z is for Management-Z. Whereas Photoshop appears to assume 25 undo states is sufficient, you may all the time go into Edit > Preferences > Efficiency to give your self extra, going as excessive as 1,000 Historical past States.


That is It!
And that was the ABCs of Photoshop. 26 completely different Adobe Photoshop suggestions and tricks!
But when that wasn’t sufficient and also you’re in search of much more of the very best Photoshop suggestions, why not take a look at a number of the different glorious tutorials under:
