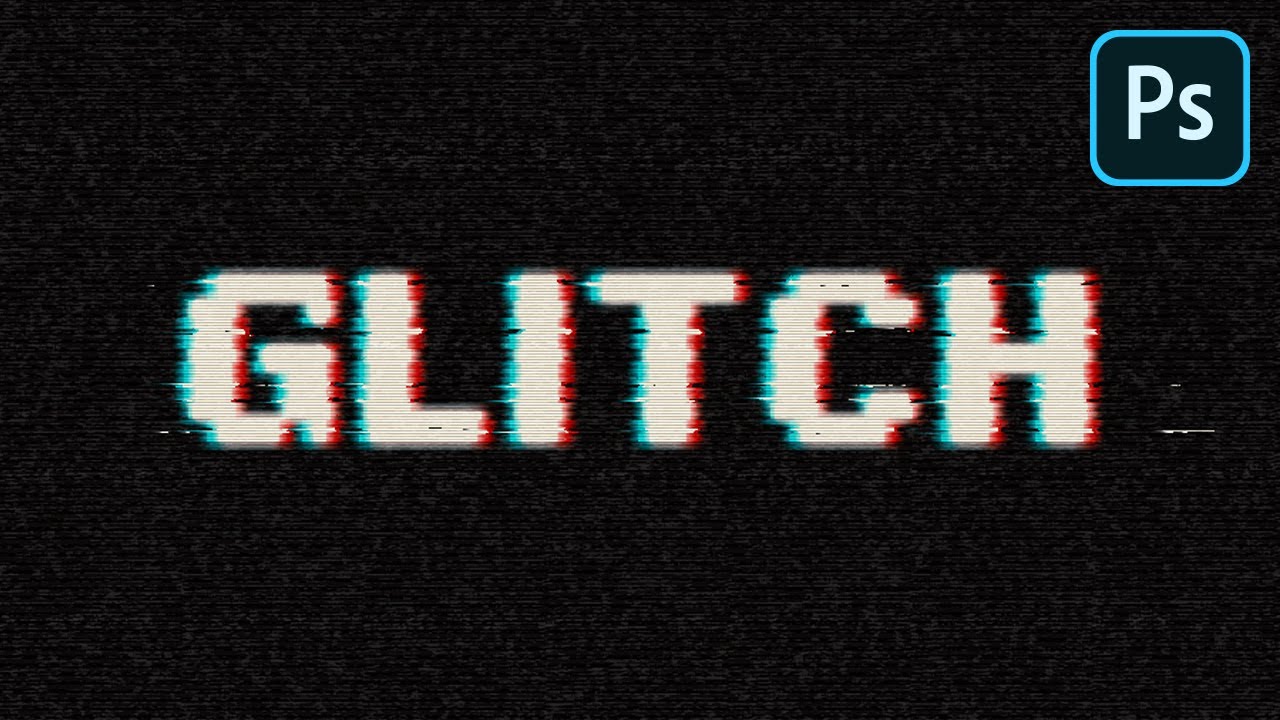
The way to Create an Simple Digital Glitch Textual content Impact in Adobe Photoshop

This tutorial will present you use Photoshop’s layer types, filters, and layer masks to create a fast and simple digital glitch textual content impact. Let’s get began!
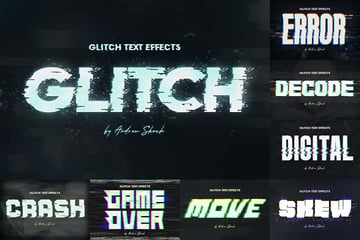
This glitch textual content impact was impressed by the numerous Layer Kinds obtainable on GraphicRiver. If you happen to’re on the lookout for a high-quality instantaneous glitch textual content impact, take a look at this wonderful bundle with 9 totally different glitch textual content types, obtainable on Envato Components:
Glitch Textual content or Emblem Results (PSD, PDF)

Tutorial Belongings
The next property had been used through the manufacturing of this tutorial:
Observe together with us over on our Envato Tuts+ YouTube channel:
1. The way to Create the Background and Textual content Layers
Step 1
Create a 900 x 700 px New Doc, click on the Create new fill or adjustment layer icon on the backside of the Layers panel, select Strong Colour, and use the Colour #101010.


Step 2
Create the textual content in White utilizing the font Pixel Digivolve, and set the Measurement to 170 pt.


Step 3
Rename the textual content layer to Textual content 01, right-click it, and select Convert to Good Object.


Step 4
Duplicate the Textual content 01 layer, and rename the copy to Textual content 02.


Step 5
Cover the Textual content 02 layer by clicking the attention icon subsequent to it.


2. The way to Apply Layer Kinds
Double-click the Textual content 01 layer to use the next Layer Fashion:
Step 1
Underneath Mixing Choices go to Superior Mixing, and uncheck the G and B Channels‘ containers.


Step 2
Add an Outer Glow with these settings:
- Opacity: 50%
- Colour: #ffffff
- Measurement: 10


This may model the pink a part of the textual content.


Present the Textual content 02 layer, and double-click to use the next Layer Fashion:
Step 3
Underneath Mixing Choices, go to Superior Mixing, and uncheck the R Channels field.


Step 4
Add an Outer Glow with these settings:
- Opacity: 50%
- Colour: #ffffff
- Measurement: 10


This may model the blue half, which is not going to be seen now, however we’ll work on it subsequent.


3. The way to Create a Primary Glitch Impact
Step 1
Choose the Transfer Device, and use the Arrow Keys to barely nudge the Textual content 01 and Textual content 02 layers in reverse instructions to indicate the pink and blue colours and glitched-out textual content till you get a consequence you want.


Step 2
Duplicate each the Textual content 01 and Textual content 02 layers.


Step 3
Create a New Layer on prime of all layers, title it Filters 01, and press the Possibility-Command-Shift-E keys to create a stamp of all of the layers you’ve got.
Proper-click the Filters 01 layer, and select Convert to Good Object.


Step 4
Press-hold the Possibility key and click on the Add layer masks icon on the backside of the Layers panel so as to add an inverted layer masks.


Step 5
Duplicate the Filters 01 layer and rename the copy to Filters 02.


4. The way to Work With Layer Masks
Step 1
Choose the Rectangular Marquee Device, create some random alternatives that cowl elements of the textual content, and ensure to increase the alternatives to succeed in outdoors the left and proper sides of the textual content.
Maintain sufficient vertical area between the alternatives as we’ll create some extra alternatives between them.


Step 2
Choose the Filters 01 layer masks’s thumbnail, and Fill the choice with White.
Press Command-D to Deselect.


Step 3
Maintain the Possibility key and click on the Filters 01 layer masks’s thumbnail to indicate it. We’ll use this as a reference to create the alternatives between the strains we have already got.


Step 4
Use the Rectangular Marquee Device once more to create narrower strains between those you’ve got, however maintain some unselected areas as properly.


Step 5
Maintain the Possibility key and click on the Filters 01 layer masks’s thumbnail once more to get the unique content material, choose the Filters 02 layer masks’s thumbnail, and Fill the brand new choice with White.
Deselect if you’re completed.


5. The way to Apply Glitch Impact Filters
Step 1
Choose the Filters 01 layer, go to Filter > Pixelate > Mezzotint, and set the Kind to Brief Strokes.


Step 2
Choose the Filters 02 layer, and go to Filter > Distort > Wave. This could be a difficult filter to use, so that you would possibly have to attempt totally different values till you get a consequence you want.
The values used listed below are:
- Variety of Mills: 1
- Wavelength:
- Amplitude:
- Scale:
- Kind: Sine
- Undefined Areas: Repeat Edges Pixels


Step 3
Go to Filter > Pixelate > Mezzotint, and set the Kind to Lengthy Strokes.


Step 4
Go to Filter > Stylize > Wind, and set the Methodology to Wind and the Course to From the Proper.


Step 5
If you’ll want to take away any undesirable elements, choose the layer masks’s thumbnail, choose the Brush Device, and select a delicate spherical tip.
Set the Foreground Colour to Black, and paint over the undesirable areas to cover them.


6. The way to Add Scanlines
Step 1
Click on the Create new fill or adjustment layer icon on the backside of the Layers panel, and select Colour Lookup.
Select the Fuji ETERNA 250D Fuji 3510 (by Adobe).dice desk from the 3DLUT File menu.


Step 2
Create a New Layer on prime of all layers, Fill it with White, title it Scanlines, and convert it to a Good Object.
Make it possible for the Foreground and Background Colours are set to Black and White.


Step 3
Go to Filter > Filter Gallery > Sketch > Halftone Sample, and use these settings:
- Measurement: 1
- Distinction: 5
- Sample Kind: Line


Step 4
Change the Scanlines layer’s Mix Mode to Mushy Mild and its Opacity to 50%.


Step 5
Click on the Create new fill or adjustment layer icon on the backside of the Layers panel, select Sample, and use the Sample 1 Fill from the fundamental scanline patterns pack.
Change the layer’s Opacity to 25%.


7. The way to Create a Noise Overlay
Step 1
Create a New Layer on prime of all layers, fill it with Black, title it Noise, and convert it to a Good Object.


Step 2
Go to Filter > Texture > Grain, and use these settings:
- Depth: 40
- Distinction: 50
- Grain Kind: Stippled


Step 3
Click on OK, and go once more to Filter > Texture > Grain and use the identical values because the earlier step.


Step 4
Click on the New impact layer icon within the backside proper nook, go to Sketch > Conté Crayon, and use these settings:
- Foreground Degree: 7
- Background Degree: 7
- Texture: Canvas
- Scaling: 100%
- Reduction: 4
- Mild: Prime


Step 5
Change the Noise layer’s Mix Mode to Linear Dodge (Add), and its Opacity to 20%.


Step 6
Use the Rectangular Marquee Device to create random alternatives everywhere in the doc, however attempt to keep away from creating huge alternatives over the textual content.


Step 7
Press Command-J to Duplicate the choice in a New Layer, rename it to Noise Strains, and alter its Mix Mode to Colour Dodge.


Congratulations! You are Finished


On this tutorial, we created a few textual content layer sensible objects, and used mixing choices and layer types to create the principle glitch impact.
Then, we created filter layers and adjusted their layer masks.
Lastly, we used a bunch of filters to complete off the glitch impact, in addition to including a fast noise overlay to make it extra life like.
Please be happy to depart your feedback, recommendations, and outcomes beneath. Do not hesitate to try the perfect glitch textual content model assortment from Envato Components:
Greatest Glitch Textual content Impact Assortment
Acid Glitch Textual content Impact (PSD)


This wonderful pack of Photoshop sensible PSD information will not disappoint you! Obtain 4 totally different results to create glitched-out textual content layers in your venture. All the results are prime quality (4500x3000px) and totally editable, and you will see a assist file with all the knowledge you want for a fast begin.
Animated Glitch Emblem Pack – Photoshop Templates (PSD, PDF)


If you happen to’re a fan of animated glitch impact textual content templates, this glitch textual content generator is the best alternative for you! You get six totally editable and easy-to-use PSD templates with full HD measurement, which might be simply used for each movies and GIFs. The detailed PDF information and well-organized construction of every template will enable you to to glitch out textual content or make a glitch emblem.
Photoshop Glitch Textual content Results (PSD, PDF)


On the lookout for a very huge glitch textual content motion Photoshop pack? This bundle comprises 16 totally different glitch impact textual content templates in PSD file format. All of the templates are totally editable and well-layered, so you would simply change the colours and parts of the results. A wide range of TV textures will enable you to to make your art work look much more like previous VHS tape.
Poisonous Potion Glitch Results Pack (PSD, ATN)


This glitch textual content generator supplies you with 14 totally different Photoshop actions impressed by road artwork and previous VHS tapes, which can enable you to to make your art work look contemporary and daring. This glitch textual content motion Photoshop pack consists of 10 PSD information and 14 Photoshop actions with a fantastic number of distortion, corruption, shade shift, and different fashionable results.
Wish to be taught extra about glitch textual content results? Take a look at these step-by-step tutorials:
