How one can Mild Up a Christmas Tree in Photoshop

With the vacation season quick approaching, it is time to make every little thing look extra festive. Whether or not you are emailing Christmas playing cards, texting your family and friends, or simply wish to boost your web site, an image of a adorned Christmas tree all the time does the trick.
But when your picture lacks the vacation spirit, don’t be concerned. We’re right here to indicate you tips on how to add colourful lights to a Christmas tree utilizing Photoshop. When you’re performed, it can look simply pretty much as good as the unique and possibly even higher. Here’s a step-by-step information.
Step 1: Select your Christmas tree image
For this tutorial, we’re utilizing a royalty-free picture of a pine tree from Unsplash. We are going to present the distinction between a totally naked tree and one with the lights on. Nonetheless, you possibly can apply this impact to an already adorned tree to make it much more Christmassy.
It is vital to recollect to discover a high quality picture. As a result of the lights are fairly small, they do not present up properly should you use a small picture. However something over 2000 pixels ought to work, whether or not you took the image your self or used one from a inventory picture web site.
You can even upscale a small picture with out high quality loss.
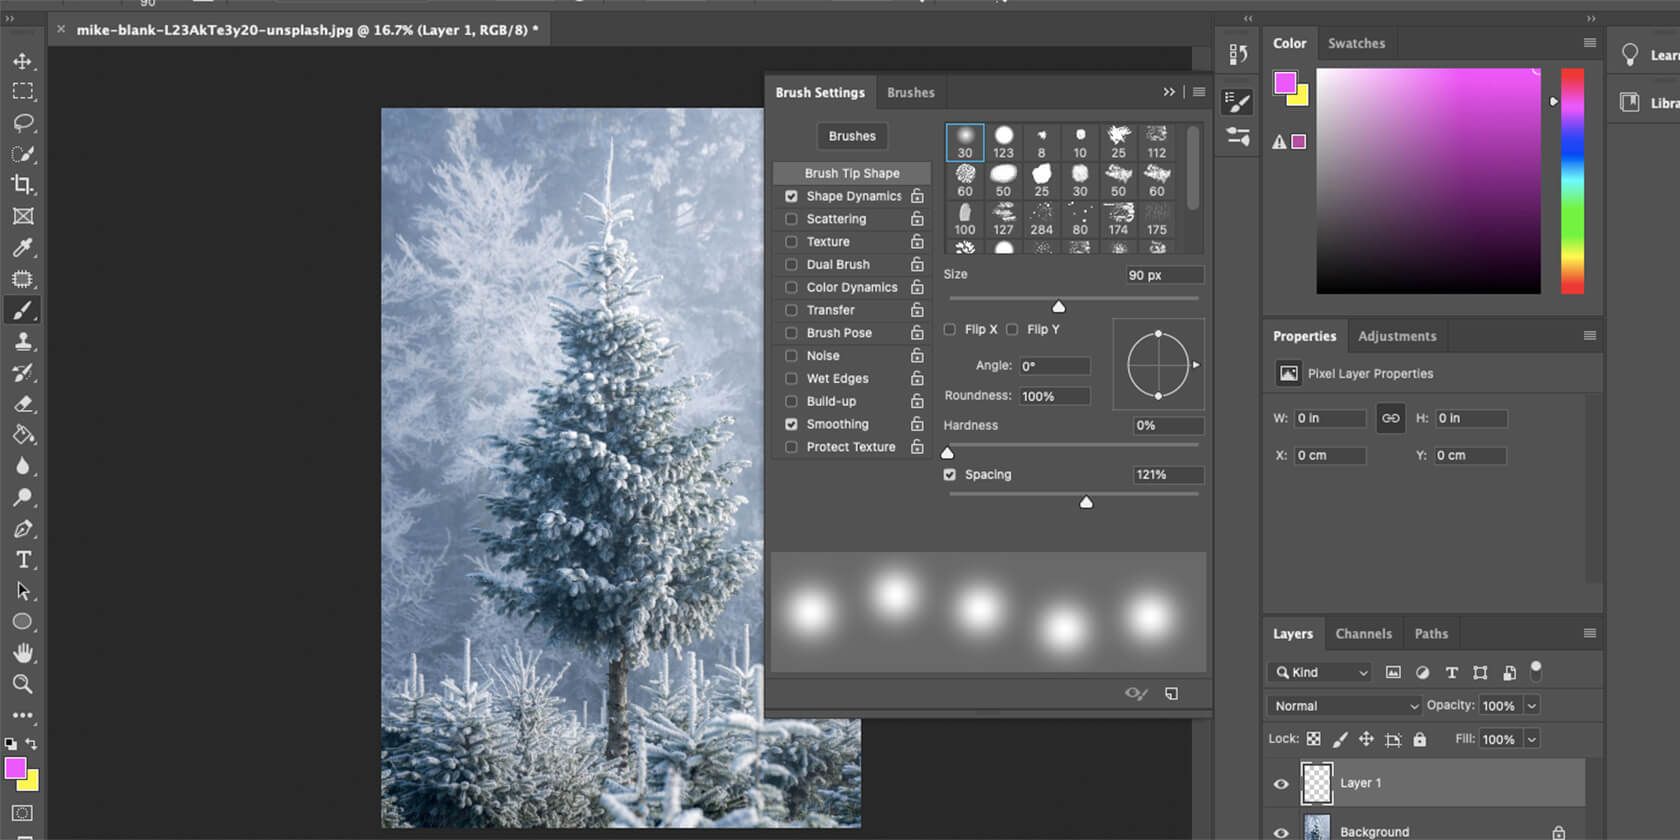
Step 2: Create a customized brush for the lights
So as to add lights to the tree it is advisable create a customized brush in Photoshop. First open your picture in Photoshop after which create a brand new layer on prime of it utilizing the button on the backside layers Menu.
Comply with these steps to create the comb:
- Select the brush device and go to window > brush settings to name up the menu.
- Below the tab Form of the comb tip, choose the primary common one.
- Resize to suit your picture. When the tree is way away, the lights are smaller. If it is tight, you will need them larger.
- On the backside of this window, transfer the Distance Slider to any worth between 80% and 120%. That is to imitate lights scattered on a string.
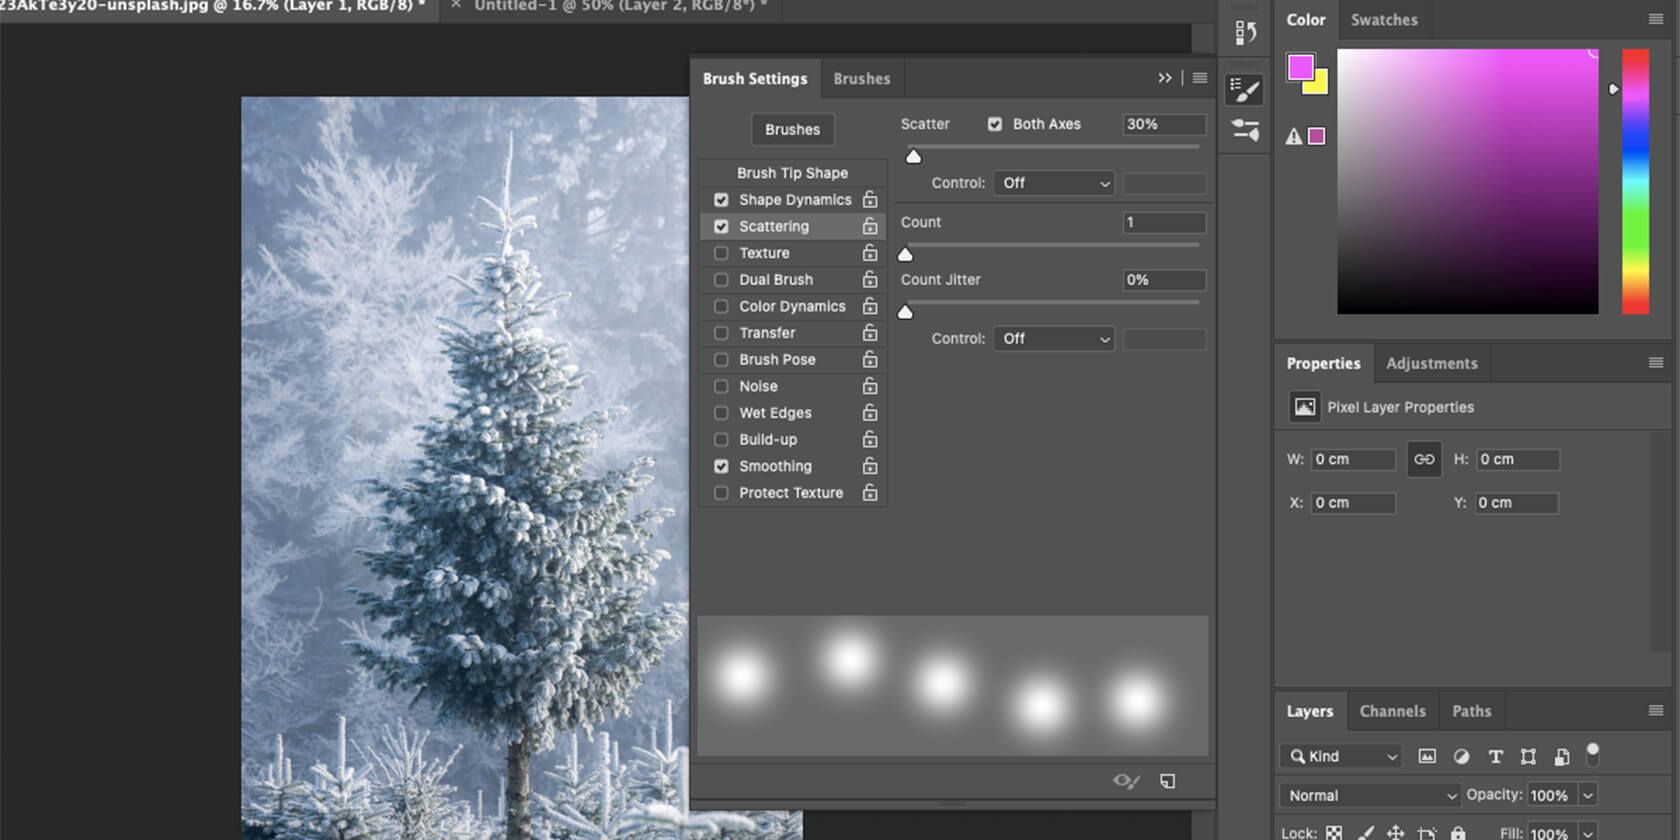
- Swap to the scattering Tab. Set it between 30% – 40% and tick it Each axes.
- Proceed to coloration dynamics. This tab is to make sure that Photoshop makes use of two colours to make the lights extra cheerful. To do that, transfer the slider for Foreground/Background Jitter to 100% and go away all different components at 0%. Additionally be sure to verify the field Apply per tip.
- Choose the colours you need for the lights. Do that with the colour picker on the backside left of the display. Change the foreground and background and be sure to select the lightest colours for it. Pastel or grey tones do not work properly for the highlights.
Now that the comb is prepared, it is time to get artistic. For those who loved this step, try our extra in-depth information on creating customized brushes in Photoshop.
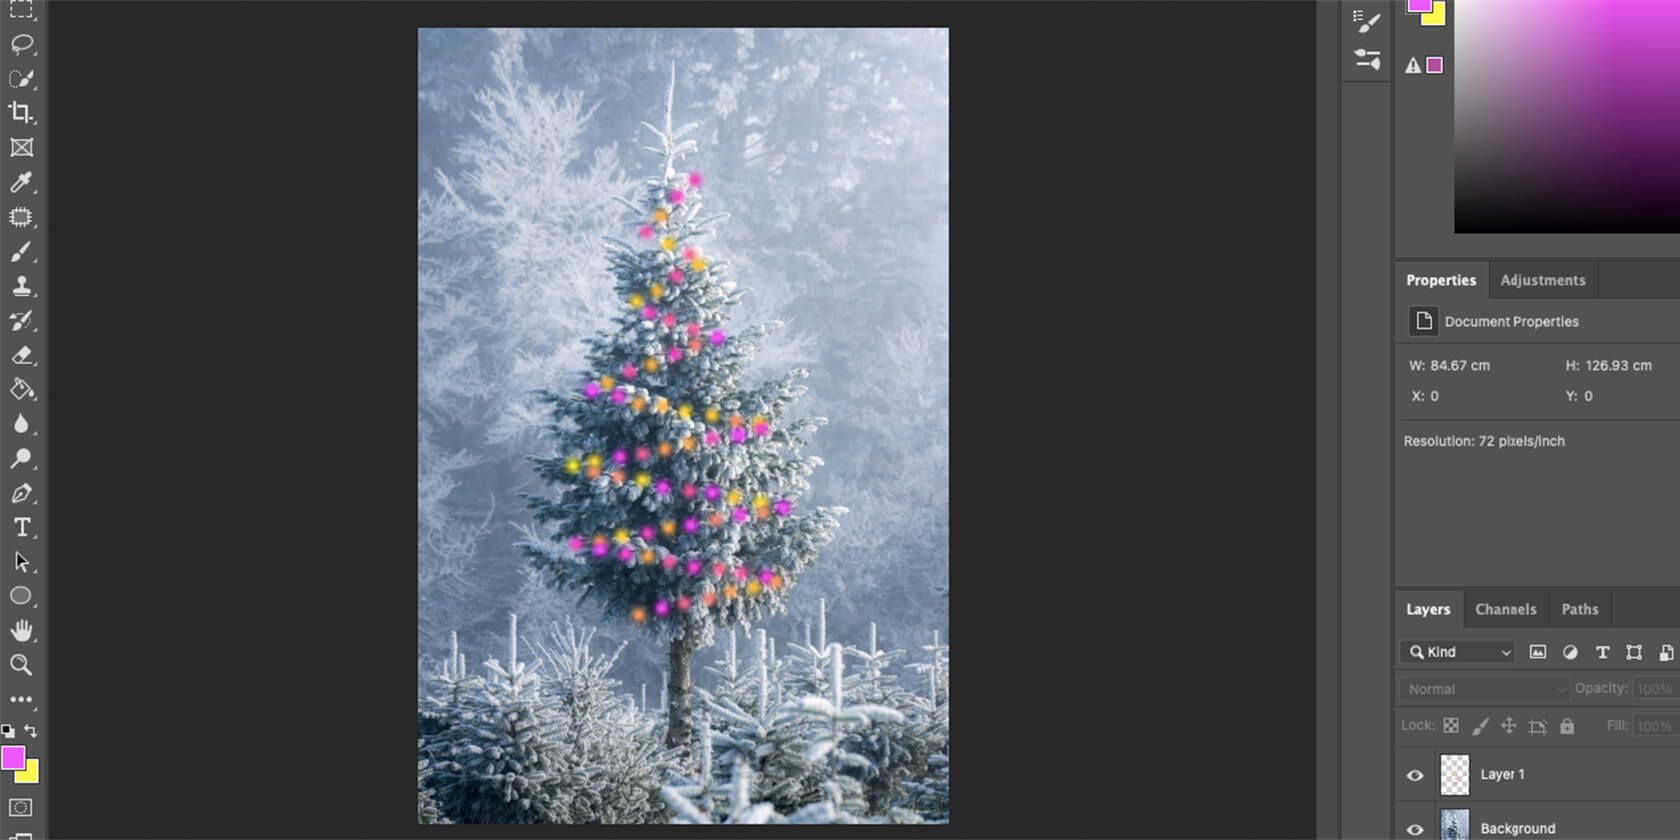
Step 3: Draw the lights on the tree
Now that the comb is prepared, it is time to create the lights. Conceal the comb menu and be sure to have the fitting brush dimension. If not, you should utilize [ or ] to expand or smaller.
You possibly can draw freehand and drag your cursor over the tree to make it seem as if the lights are draped round it. However in case you are not sure of your abilities, you possibly can draw straight traces in a zigzag form from prime to backside and add a curve to them to make them look extra pure.
To attract a straight line, press layer and click on as soon as for the start of the road and as soon as for the tip. The software program completes a straight line between them.
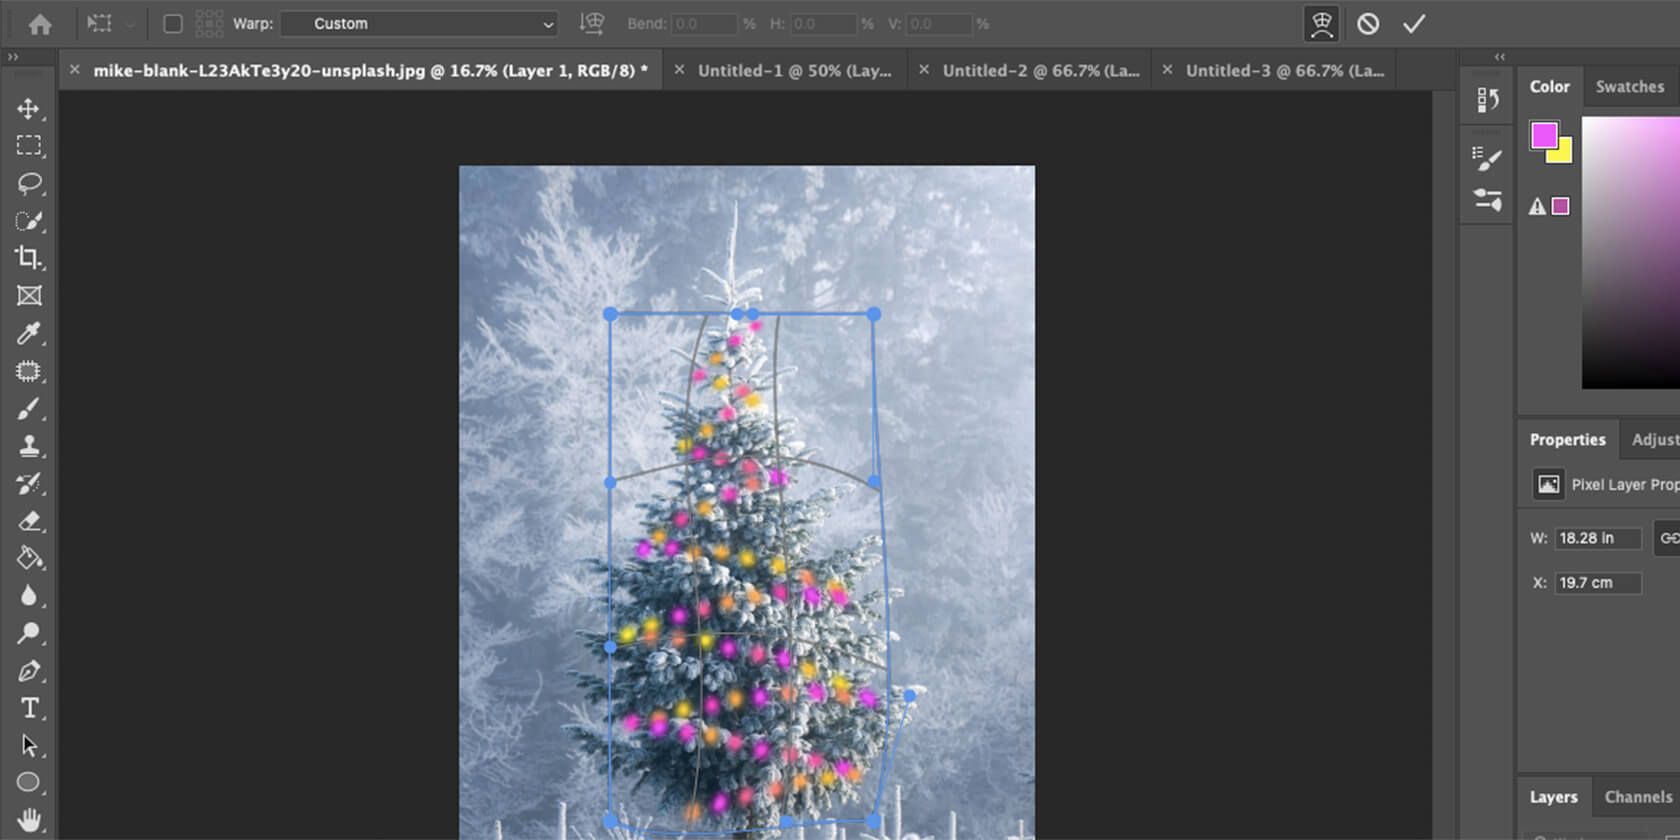
After you end the zig zag sample, navigate to transfer Software. Click on on one of many containers on the fringe of the lights, however do not drag them. This may convey up the scale menu. Choose there Swap between free remodel and warp modes. It’s the button that has a bow.
Now you possibly can drag the factors on the picture to curve the zigzag and make it look extra like draped lights. Press v while you’re performed
Step 4: Make the lights sparkle
The ultimate stage is to make the dots look extra like lights. To do that, observe these steps:
- double click on layer 1and navigate to Inside Glow Tab.
- put that mix mode as regular.
- Convey the Opacity to 100%.
- Change the colour to gentle yellow for a heat glow.
- Subsequent supply, click on middle.
- Convey the dimension all the way down to zero.
- within the contourChoose Gauss.
- Tick it Anti-aliased.
- the Vary might be between 30% and 100% relying on how shiny you need the sunshine to shine.
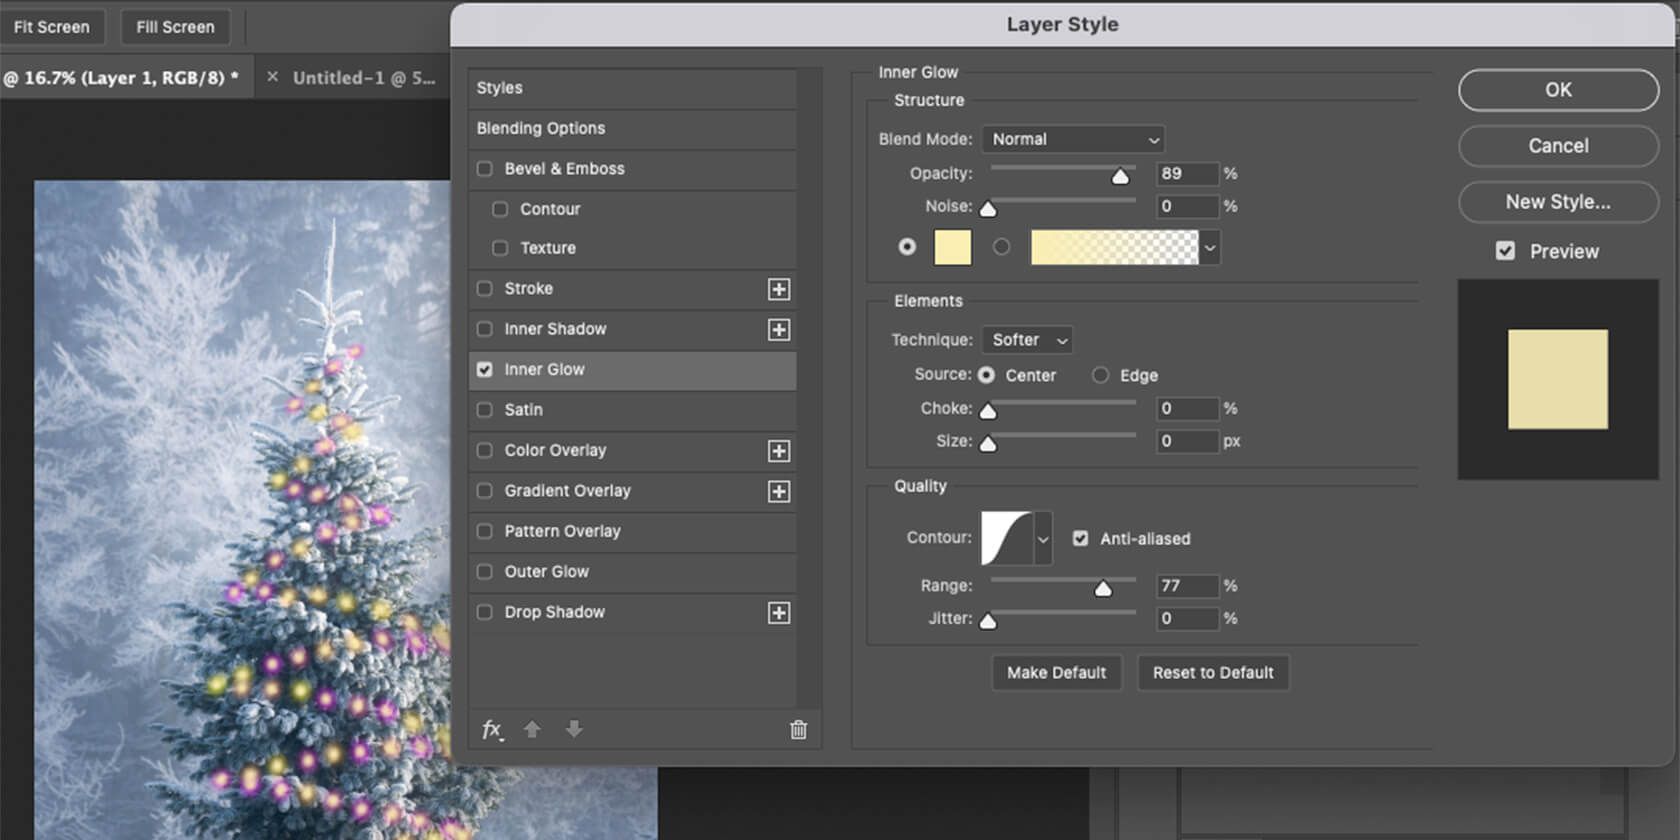
If you end up performed with all these settings, click on OK. The very last thing it is advisable do is mess around with this layer’s mix to make it look extra pure.
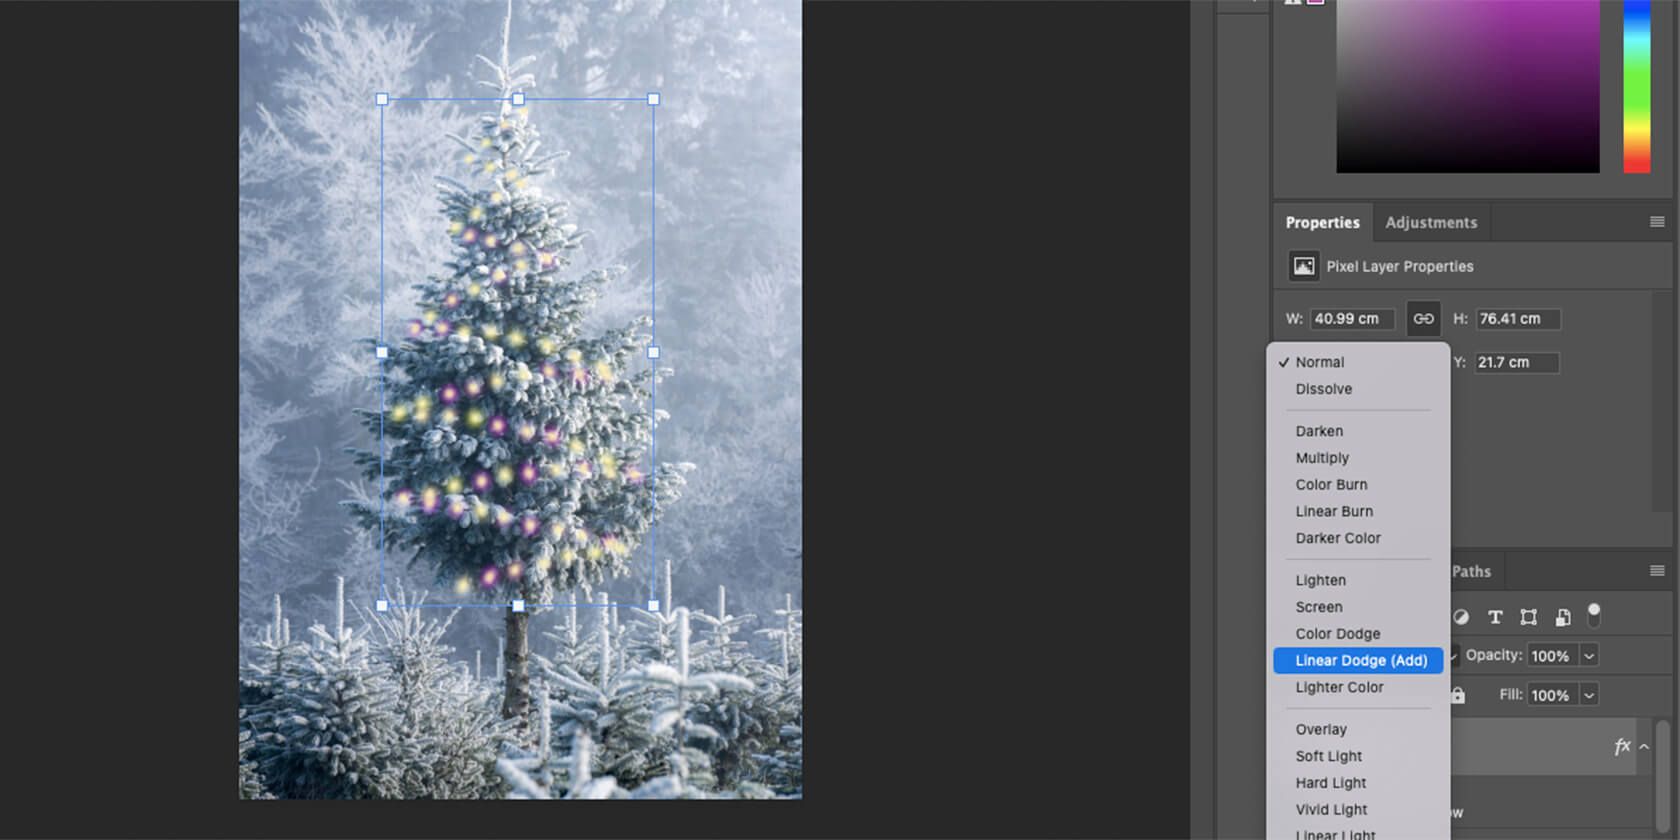
Click on on the aircraft and the place it says regular, open the dropdown menu. Undergo the completely different modes to see which one you want probably the most.
We selected Linear dodge, because it matches the aesthetic of the tree and makes it look fairly icy. However you possibly can mess around and see what fits your picture greatest. You can even cut back them To fill the layer from 100% to make them mix even higher.
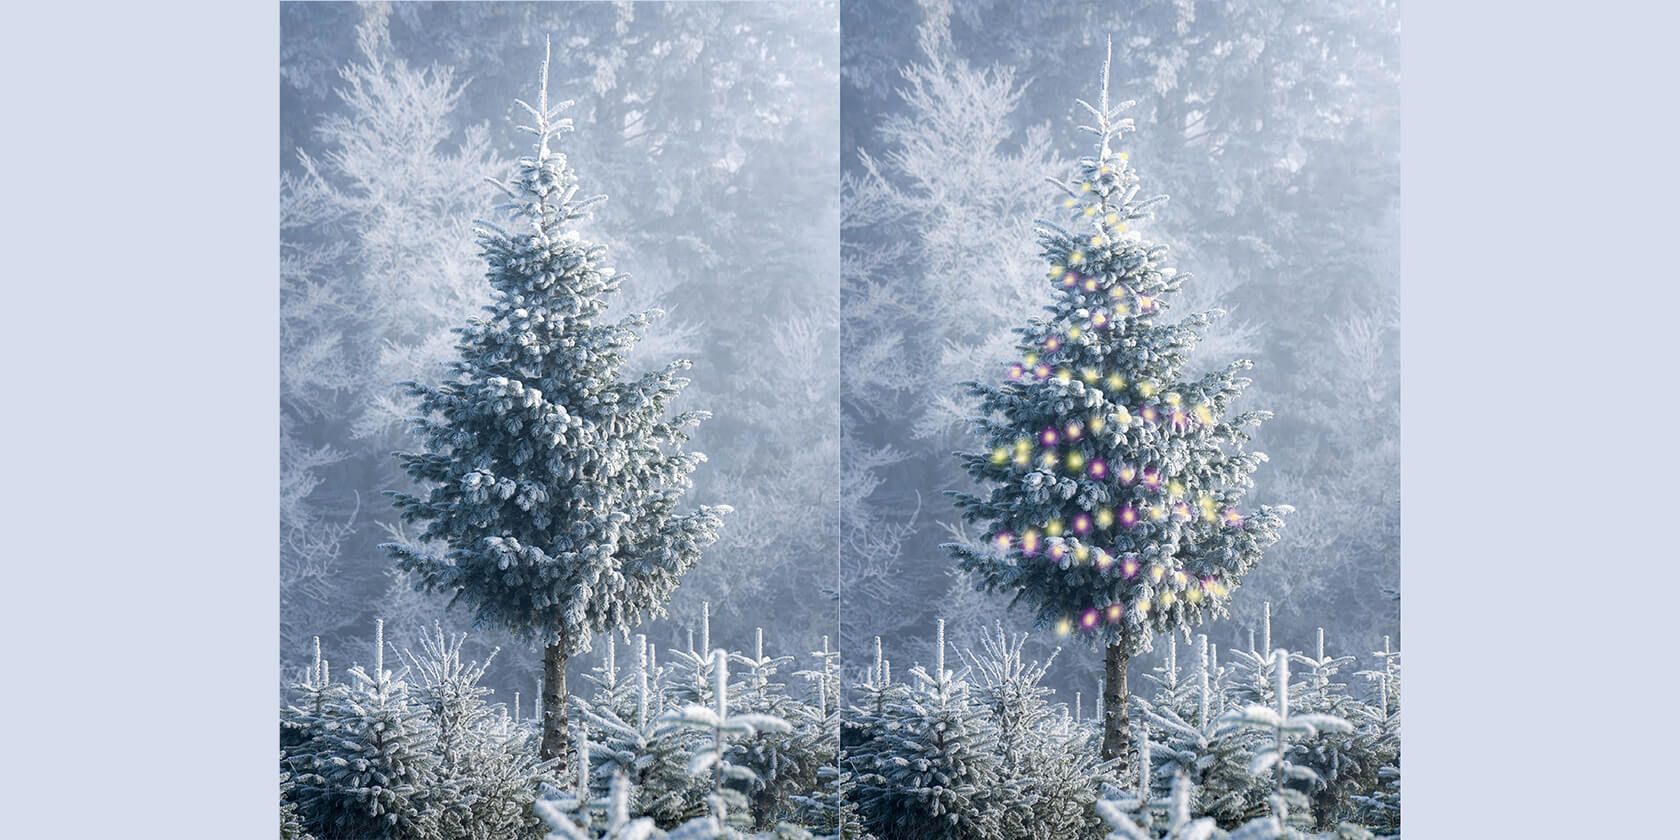
Beneath is the earlier than and after of our Christmas tree lights creation.
Mild up your Christmas tree with Photoshop
After studying this information it’s best to now have the ability to add lights to any Christmas tree picture. No less than just about.
Though we now have supplied you with particular directions for every step, that is solely to make the method simpler. When you get the hold of it, you possibly can mess around with the entire Photoshop settings to get the outcomes you want greatest.
You can even use this methodology so as to add lights to pictures apart from bushes. You possibly can put it on the entrance of homes, on automobiles, and even simply across the festive greeting card textual content.
