The best way to Take away Fog and Mist From Your Images Utilizing Photoshop
For all touring geeks, probably the most annoying issues could be once you go to an intriguing hill station however your pictures find yourself coated in fog, haze or haze. These naturally occurring problems may destroy a few of your greatest photos of the journey. Fortunately, you should use a filter referred to as the Digicam Uncooked filter in Photoshop to take away haze or haze out of your pictures.
The best way to take away fog and haze out of your pictures in Photoshop
The tactic proven on this article makes use of Photoshop model 24.0.1. Your outcomes might fluctuate barely relying on the model you employ. Nonetheless, it won’t be a groundbreaking challenge. You possibly can all the time replace your software to the newest model and make the most of the brand new Adobe Inventive Cloud options.
To take away fog and haze out of your pictures:
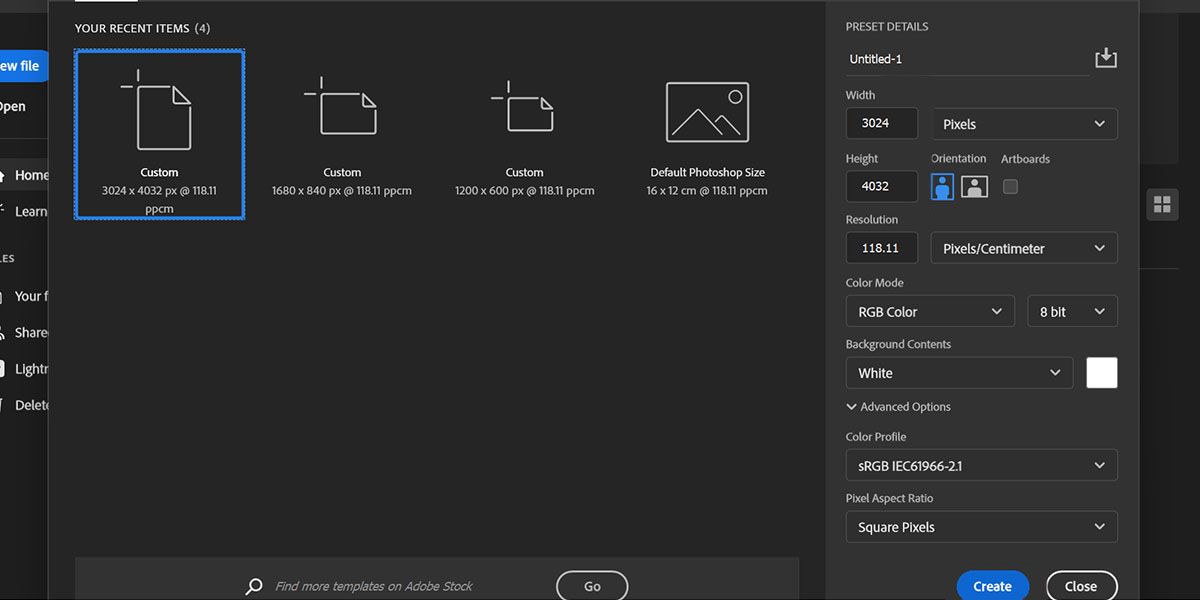
- Open Photoshop and create a brand new customized file with dimensions much like your photograph.
- Drag and drop your photograph onto the doc.
- Beat Enter as soon as you’re pleased with the location.
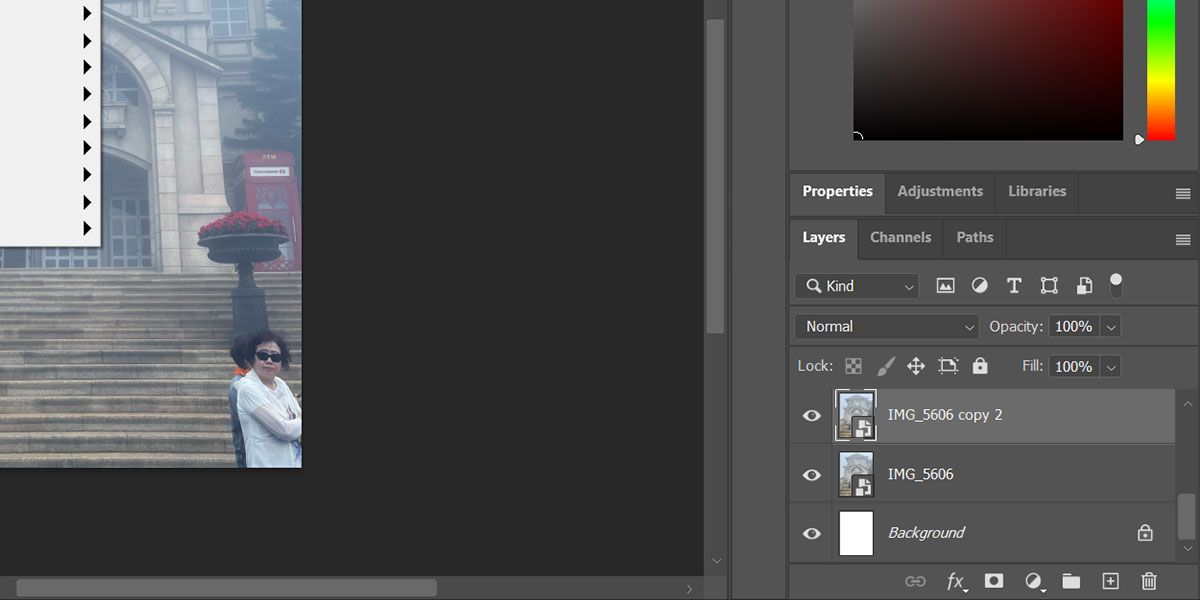
- Press ctrl + J to make a duplicate of your picture.
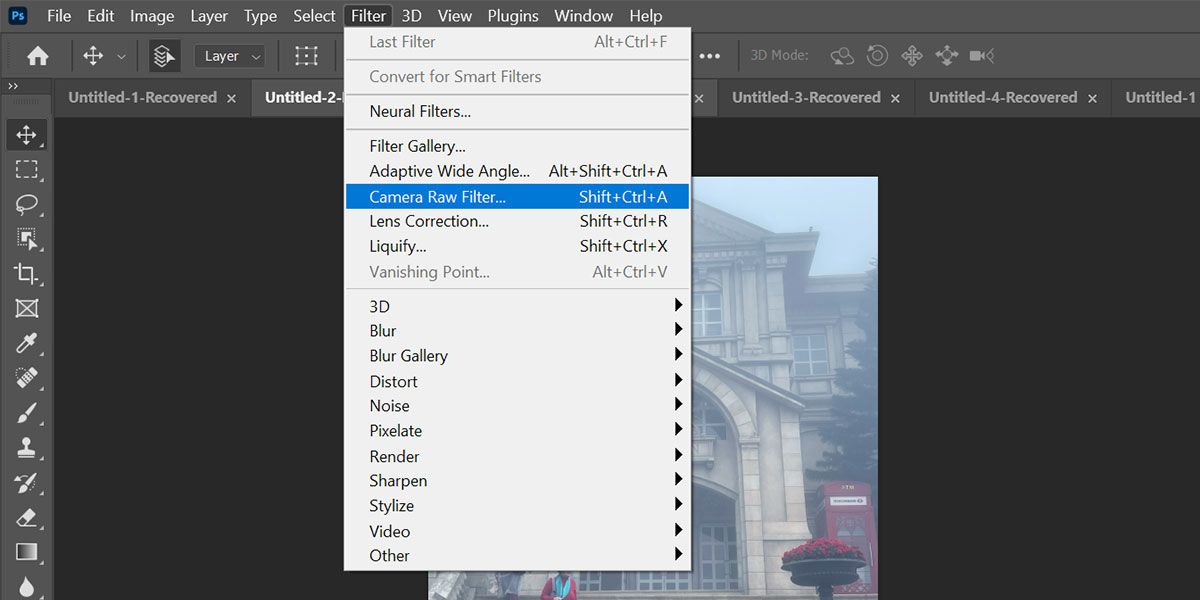
- Click on on filter and choose Digicam Uncooked Filter. Alternatively, you may also press layer + ctrl + A.
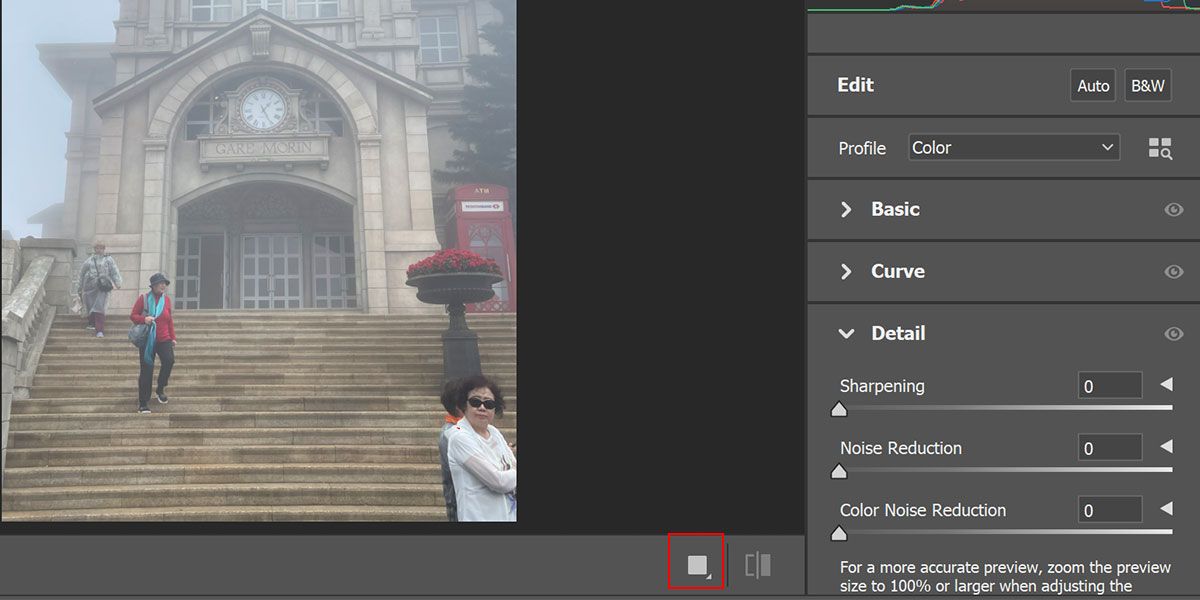
- click on on the sq. Icon under to view the unique and edited variations of your photograph aspect by aspect.
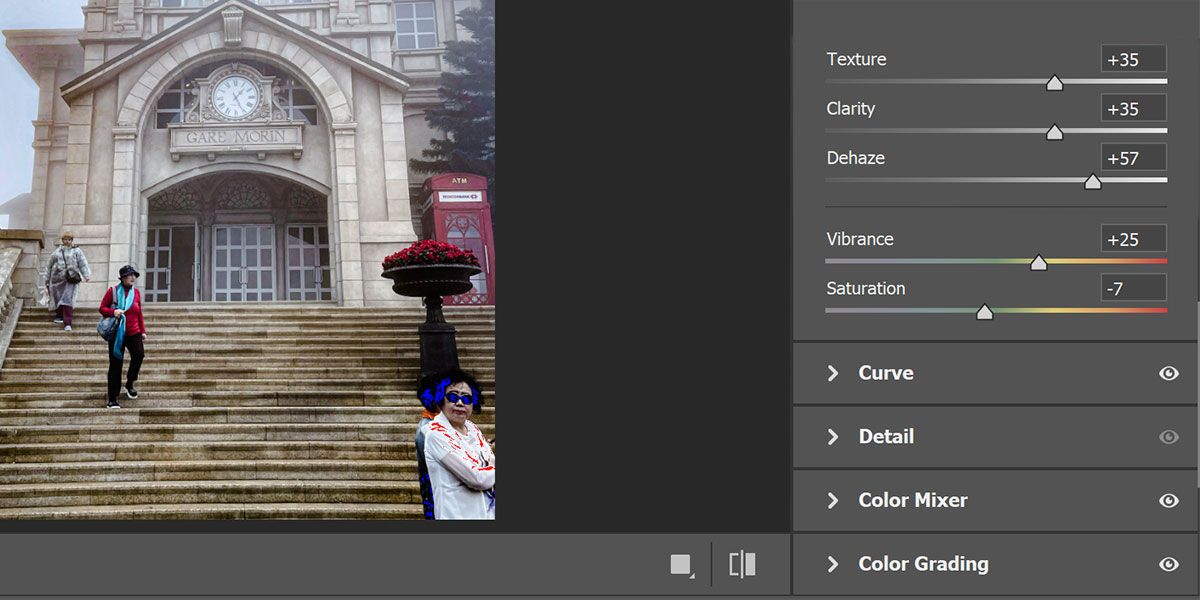
- Below the primary part, enhance texture and readability to about 40-70 items. enhance defogging to round 50 items. Rising the dehaze additional can destroy the colour stability of your photograph.
- Now alter the temperature to neutralize the slight coloration error attributable to dehaze.
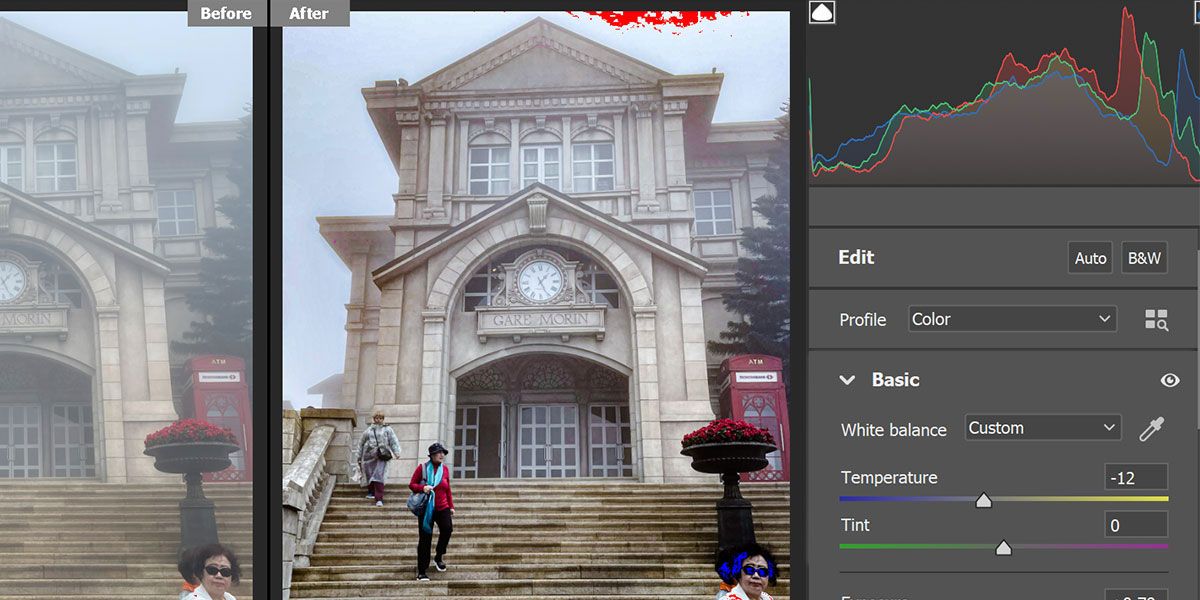
Fog and haze must be largely gone, however to make your picture look extra pure you must tinker with the essential enhancing elements like publicity, distinction, and so forth. All of those edits can be found within the Fundamentals part.
That is the way it’s achieved:
- Enhance the publicity. Publicity reveals the quantity of sunshine in your photograph. In order you enhance it, the weather in your picture will develop into extra seen.
- Enhance the distinction. Distinction determines how darkish the darkest components are and the way gentle the lighter components are. Rising the distinction removes the remaining layer of fog out of your picture.
- Enhance the highlights. Highlights are the lighter components of the picture. They make the naturally lighter components lighter to stability out the fog.
- Lower the The shades. Shadows are the darker components of your picture. The mist makes them lighter. So by lowering shadows you make the darker components darker like they need to be with out fog.
The most recent modifications on this part are white and black. The white setting offers with the highlights of the picture and the black setting offers with the underexposed areas of the picture. You possibly can tweak them a bit to see if it improves your picture. In any other case, you may go away them untouched.
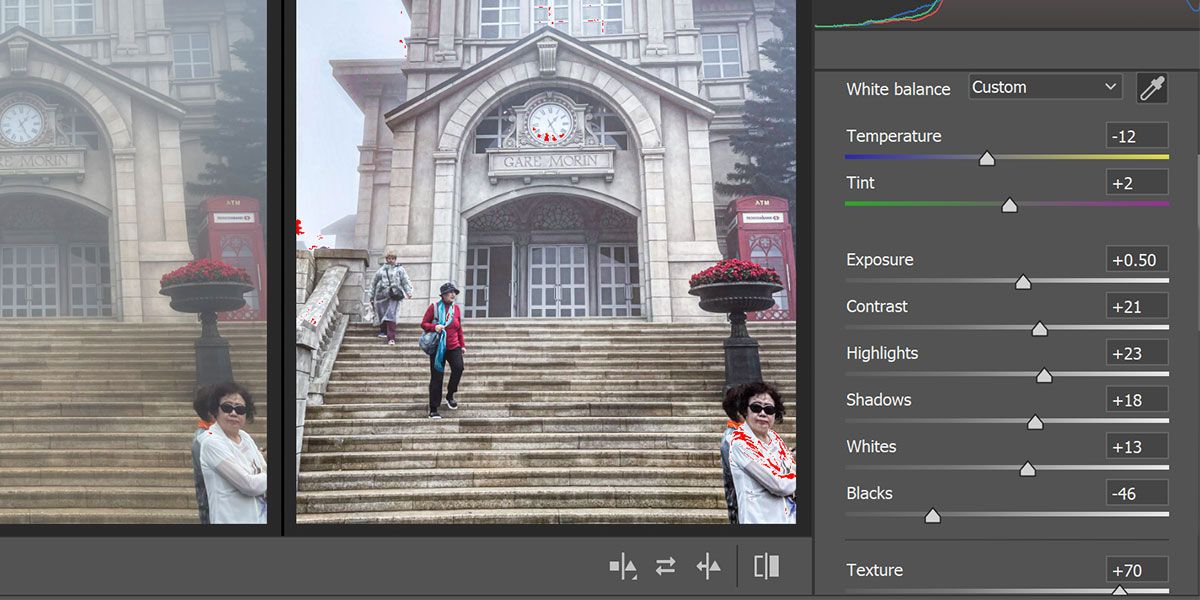
Throughout processing with the Digicam Uncooked filter, you may even see some purple or blue saturated components. Don’t be concerned about that; it resembles the damaged pixels that you would be able to repair with additional enhancing.
Further retouching to make your picture look pure
The above methodology will enable you do away with fog and haze in your pictures. Nonetheless, the outcomes can look unnatural. Due to this fact, it’s worthwhile to use two extra sections of this filter to reinforce your picture.
To retouch your picture:
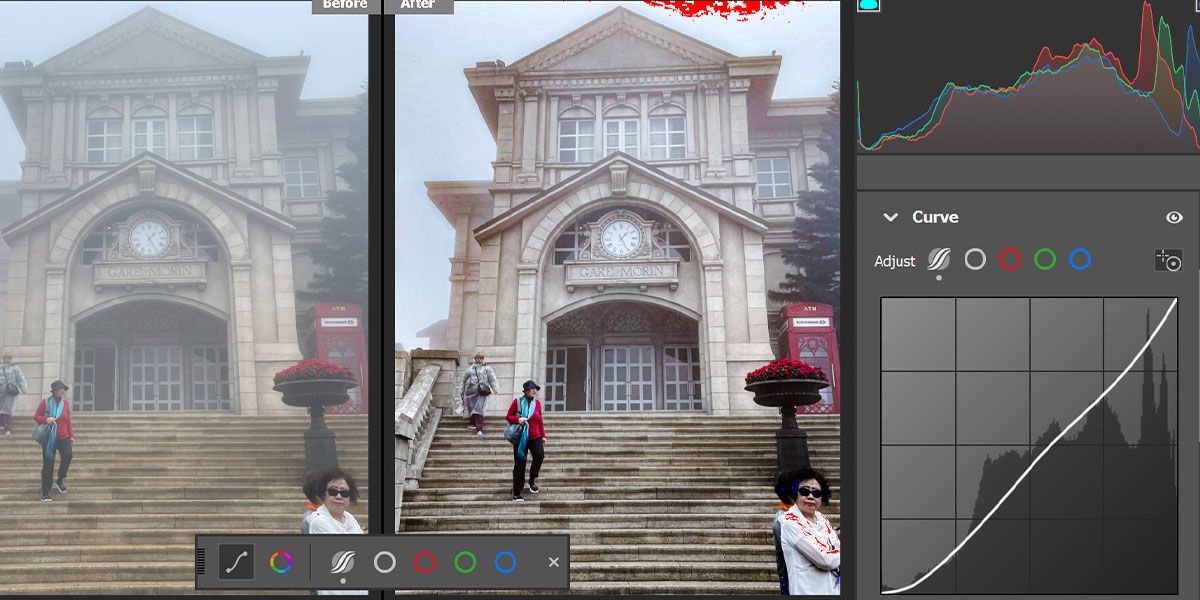
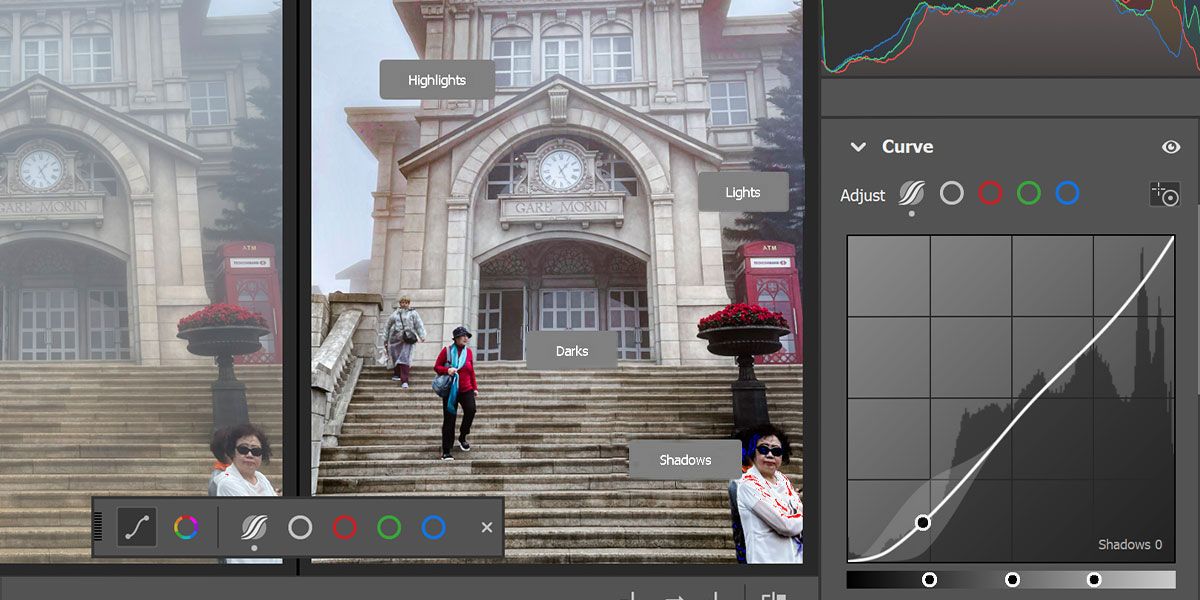
Use curves to regulate picture brightness
- Scroll down and click on the curves Part.
- Right here, click on on the primary customise possibility parametric curve.
- Now click on on the Focused adjustment of the parametric curve Instrument.
- The curve is split into 4 components: highlights, highlights, darks and shadows. You possibly can see which factor you’re adjusting as you mouse over the picture.
- To edit the highlights, select a spot with essentially the most gentle, just like the sky. Enhance or lower the setting by left-clicking and sliding left or proper.
- The darkest a part of the picture ought to resemble The shade. Use the identical methodology to outline luminance for shadows.
- Equally, alter the lights and Darkness Settings to make your image seem extra pure.
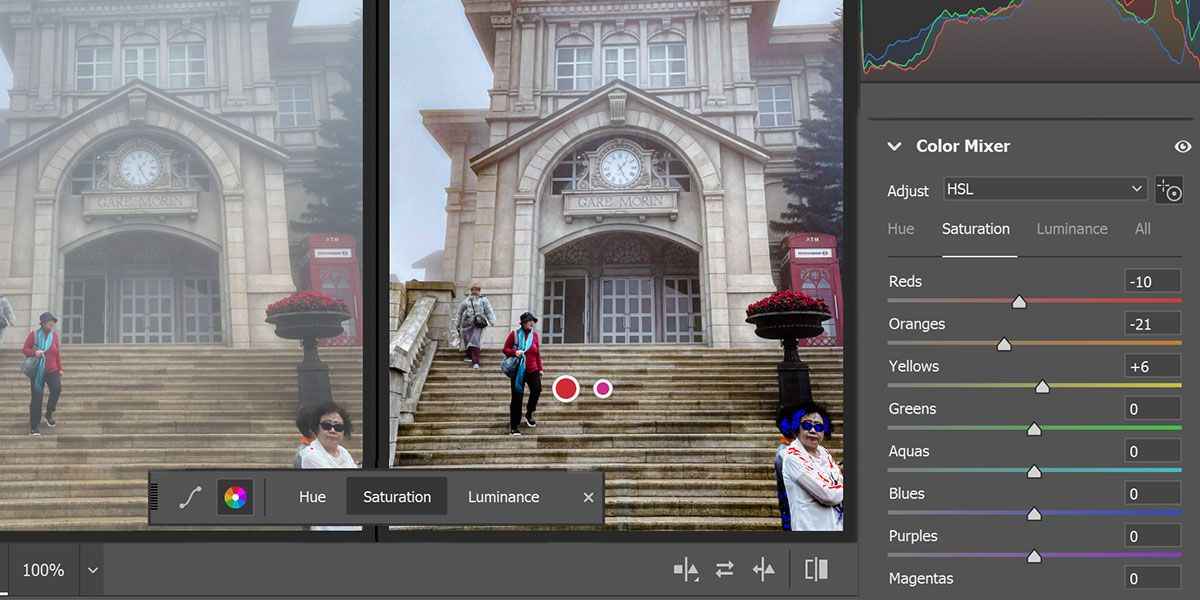
Use the colour mixer to make your picture stand out
The colour mixing operate means that you can selectively change colours or enhance/lower their luminance or saturation. Since altering the hue disrupts your picture colours, you must solely tweak the saturation and luminance settings.
Here is the right way to use the Coloration Mixer characteristic to boost your picture colours:
- Throughout Focused Customization software is chosen, click on the round icon on the underside toolbar to pick out it coloration mixer Chance.
- Now select luminance to make sure colours gentle or darkish.
- Hover over your picture and the software will present you which of them coloration you’re tweaking. Left click on and slide left or proper to lower or enhance luminance respectively.
- Equally, choose the saturation Setting from the underside toolbar and repeat the above step to set the saturation of particular colours.
- Beat Enter to finish your edit.
You’ve got efficiently eliminated fog and fog out of your pictures and brightened the colours to make your image look higher. Take a look at our in-depth information on utilizing Hue/Saturation in Photoshop to make higher use of the characteristic.
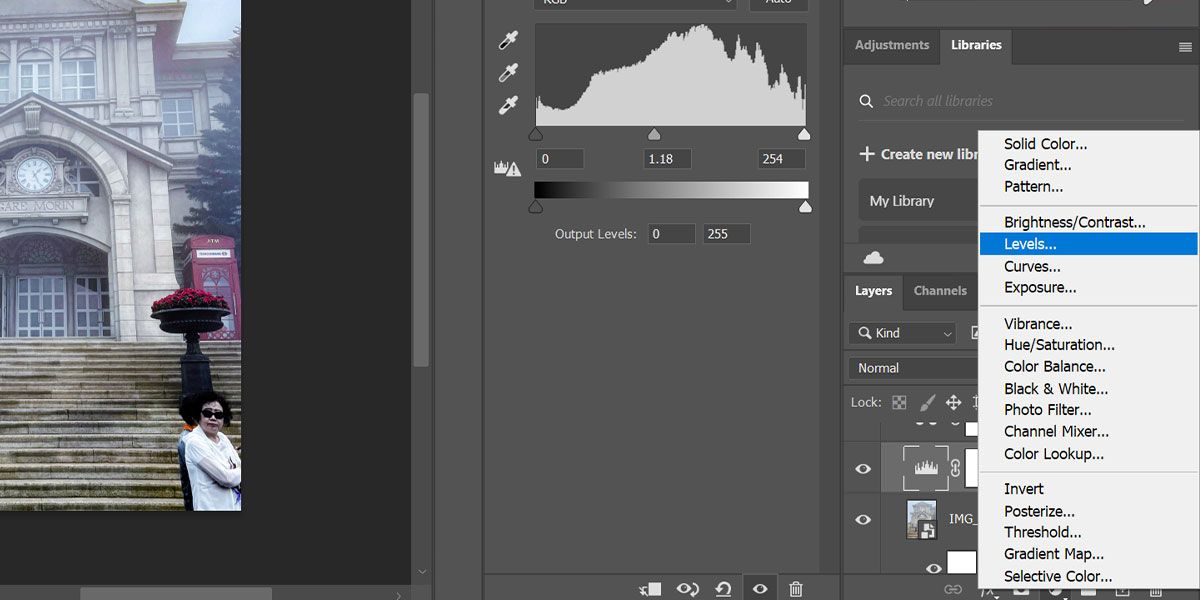
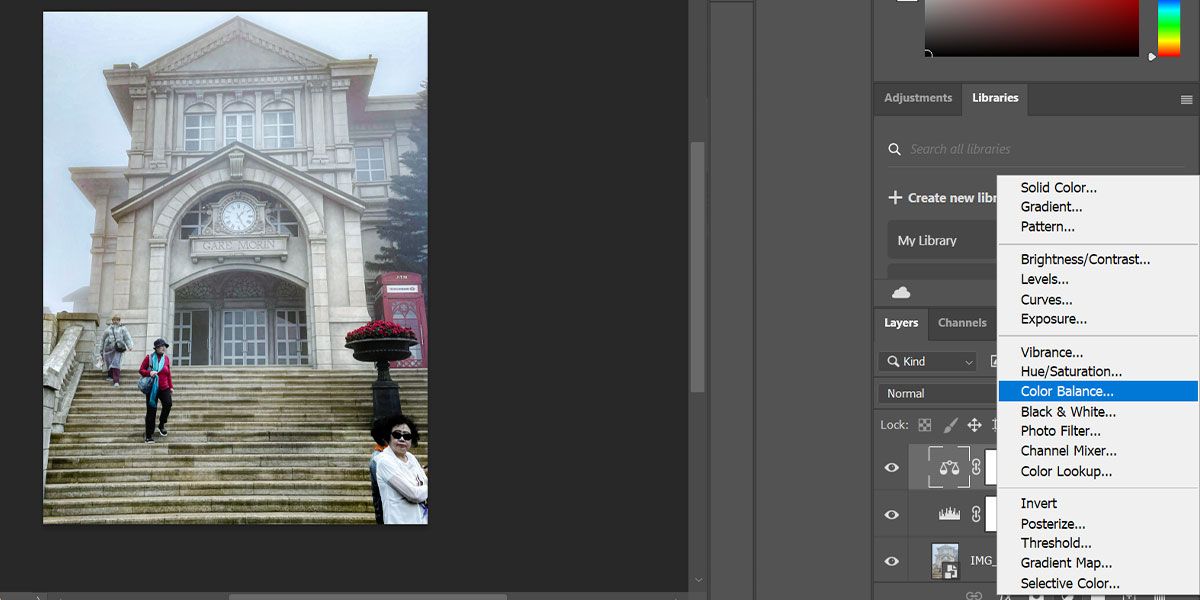
You may make different minor changes to appropriate any remaining unnatural phenomena in your photograph:
- Select ranges Adjustment layer and transfer the slider within the center to lighten or darken your picture.
- Select coloration stability Degree and tweak the pointers for various colours to make a last coloration adjustment.
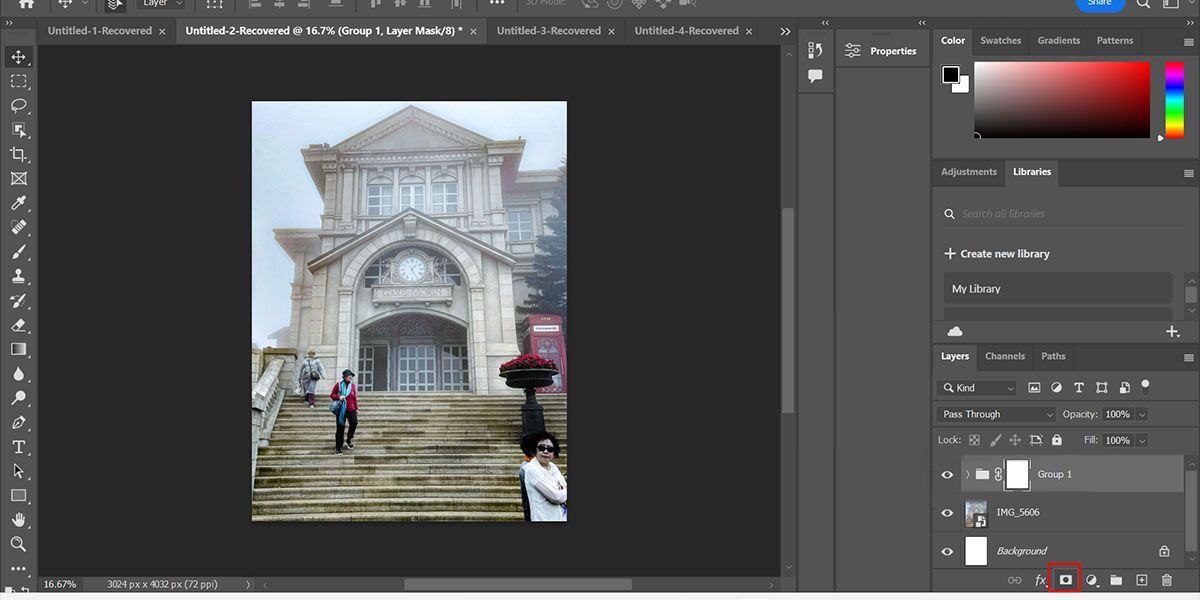
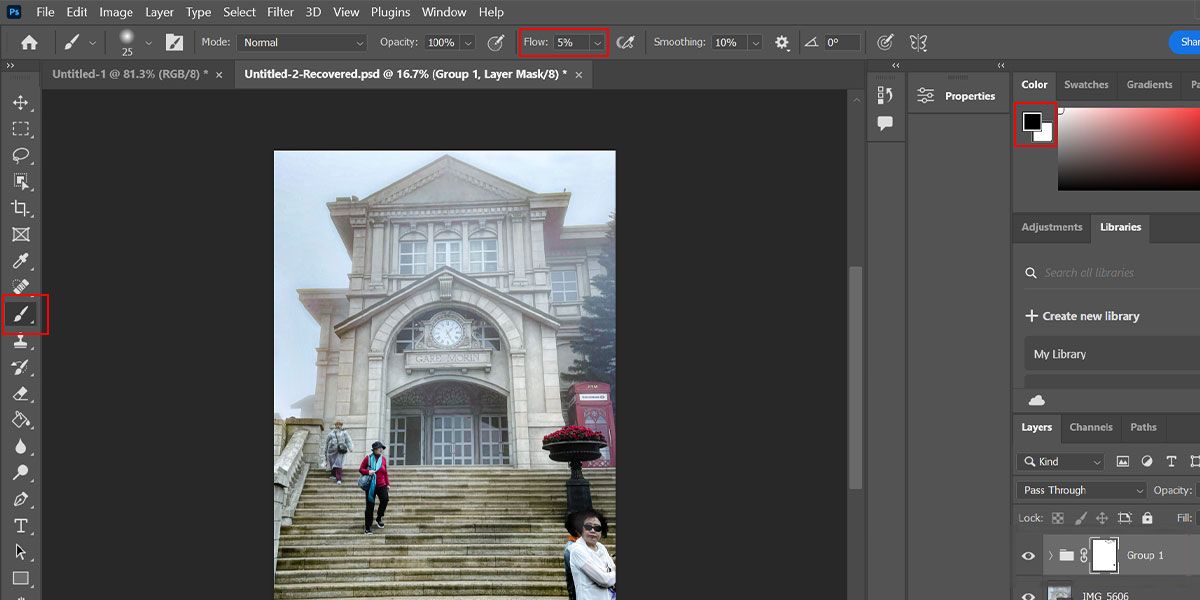
- Choose the highest layer and click on and maintain the Digicam Uncooked filter layer layer. Proper-click and add these layers to a single group.
- click on on the masks Possibility whereas the group is chosen.
- Now choose the brush software and set the foreground coloration to black.
- change that Move Set the setting to five% and erase any pixelated components that you just assume are over processed.

That is it. Not solely did they take away fog and haze, however in addition they made the picture look pure. For additional coloration enhancing, learn to take away undesirable coloration solid in Photoshop.
The restrictions of the Digicam Uncooked filter
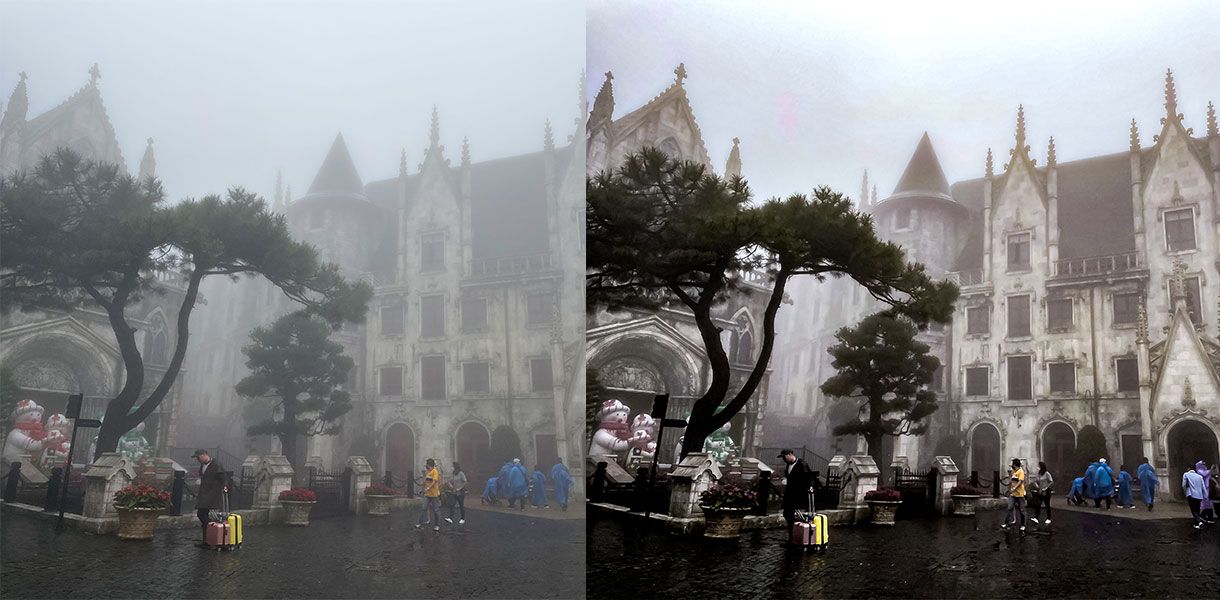
The Digicam Uncooked filter works greatest when the topic is nearer to your digital camera. The primary instance under reveals that the trick works like a allure.
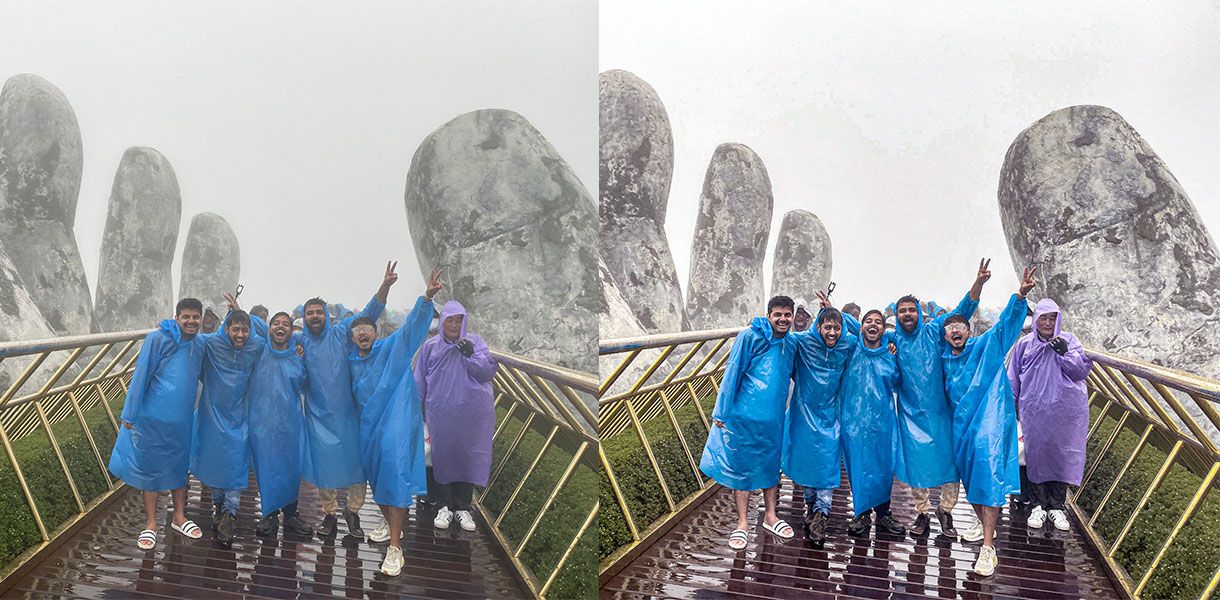
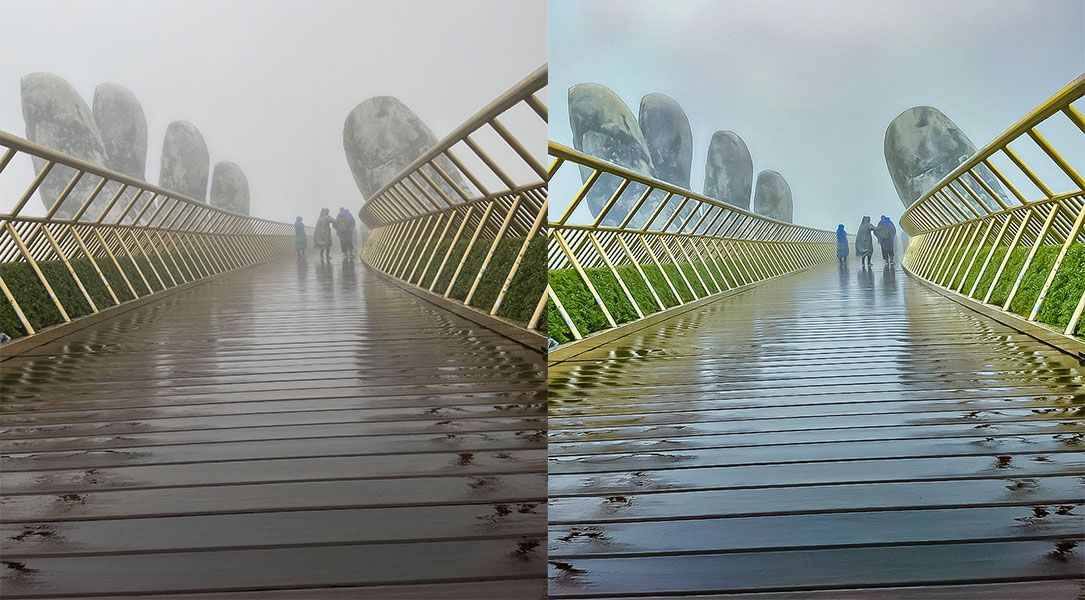
On this second instance, it is nonetheless potential to take away haze and haze with individuals somewhat additional away within the photograph, whereas nonetheless making the picture look pure.
Nonetheless, in case your topic is simply too far out of your digital camera or if the fog is simply too heavy, it may be troublesome to get the main points, as proven within the instance under.
Take away fog and haze to make your pictures stand out
Fog, haze, and fog are naturally occurring problems that you would be able to’t deal with once you click on on the photograph. Thankfully, you may edit your picture to take away these undesirable parts utilizing Photoshop.
Modifying has limitations, however you may take advantage of it by capturing your pictures in RAW format. So subsequent time you are in a foggy space and wish to click on some nice pictures, strive taking them in RAW format and are available again to this text to manually take away the fog and haze.
