How you can Take away Undesirable Shadows From Your Portraits Utilizing Photoshop

Shadows can damage your portrait pictures. Happily, there may be an efficient strategy to take away them utilizing Photoshop.
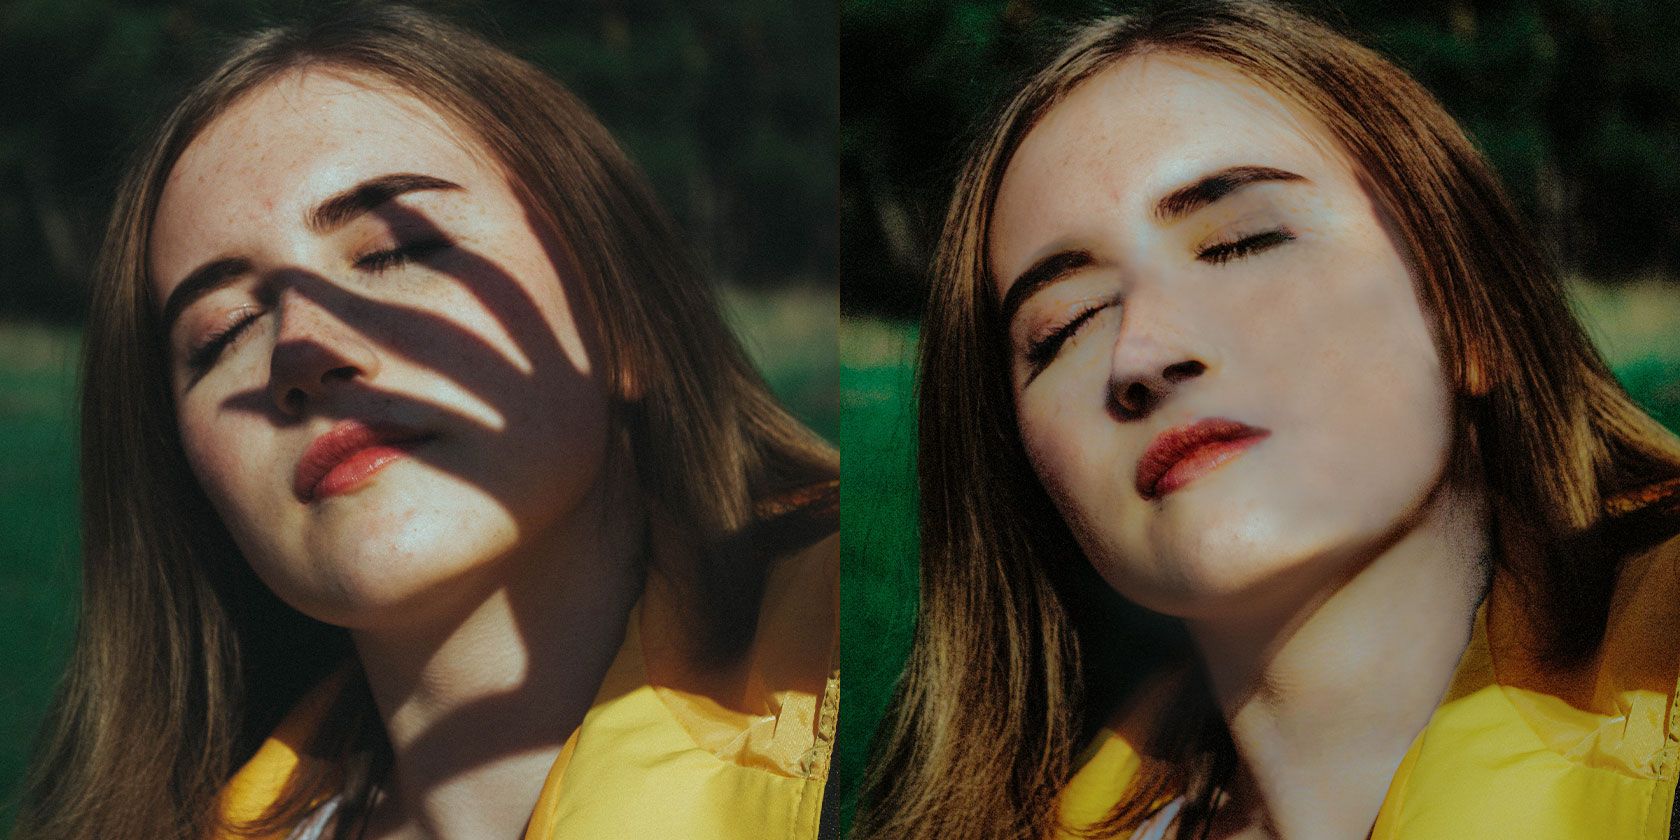
Whether or not you’re a skilled photographer or do it as a pastime, individuals count on you to click on good portraits. One of many recurring issues with portrait pictures is that when the picture is clicked, there may be an impediment between the topic and the sunshine supply. For instance, when somebody raises their hand when the sunshine supply is in entrance of them. It creates undesirable shadows which might be troublesome to take away.
On this article, you may learn to take away undesirable shadows out of your portraits in Photoshop with out dropping an excessive amount of picture element. The approach can also be helpful for eradicating shadows from different photographs.
How you can take away shadows from a portrait in Photoshop
Relying on the hardness of the shadow, the complexity and time required to take away it is going to differ. Observe these steps to take away shadows out of your portraits.
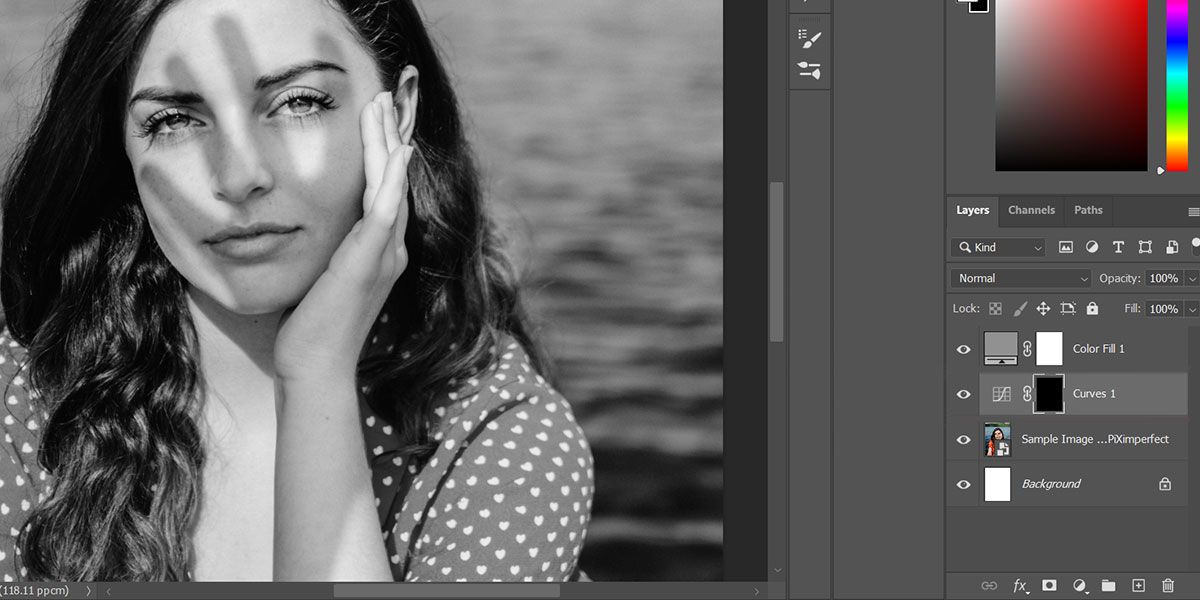
1. Create an inspection airplane
First let’s create a evaluate layer to higher see the undesirable shadow.
- Import your picture into Photoshop.
- A… create Monochrome Layer.
- Set the colour to any shade Grey. Keep in mind to maintain Hue and Saturation at zero; any brightness stage is okay.
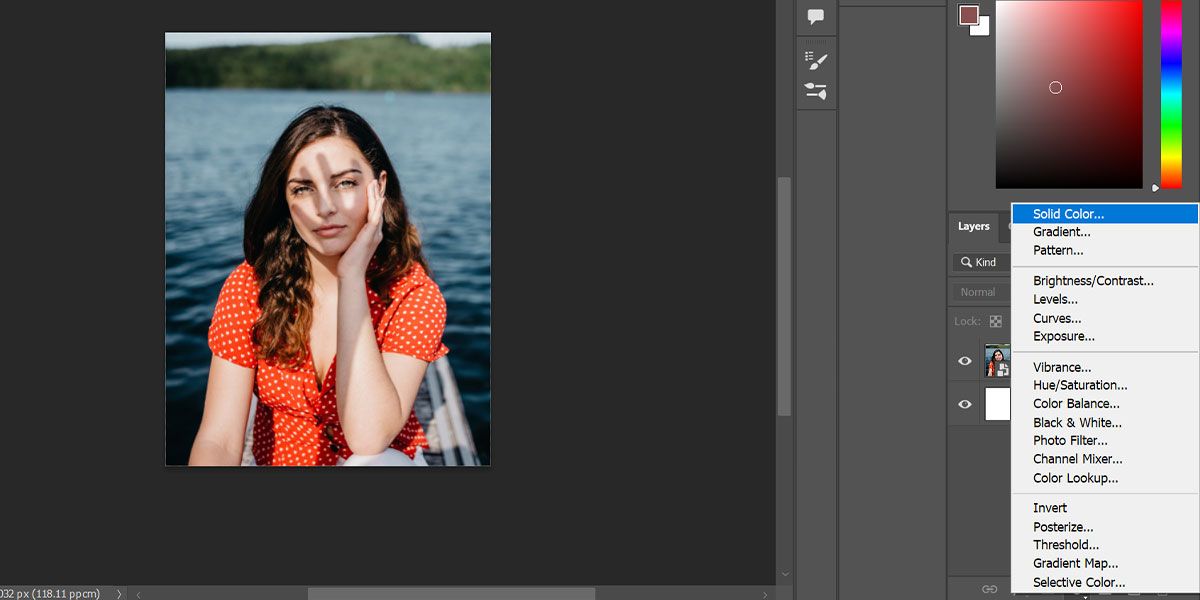
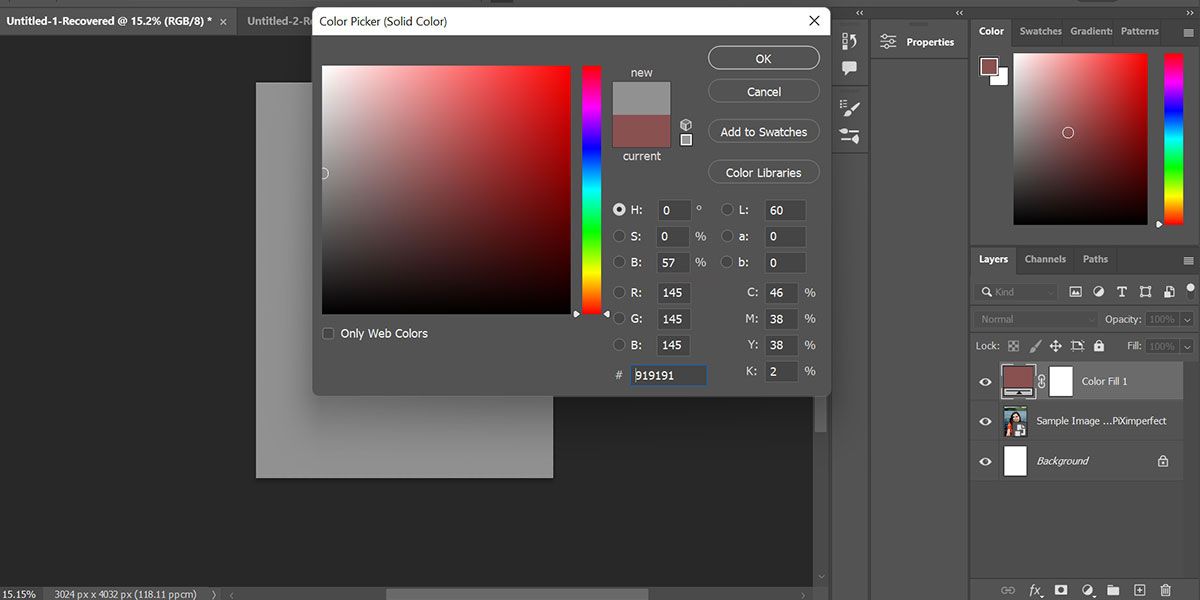
You created a evaluate layer to take away the colours when working with shadows. Since there may be some shade change within the darker space when lightening the picture, it’s best to make use of a management layer. After getting achieved that, proceed with the next steps.
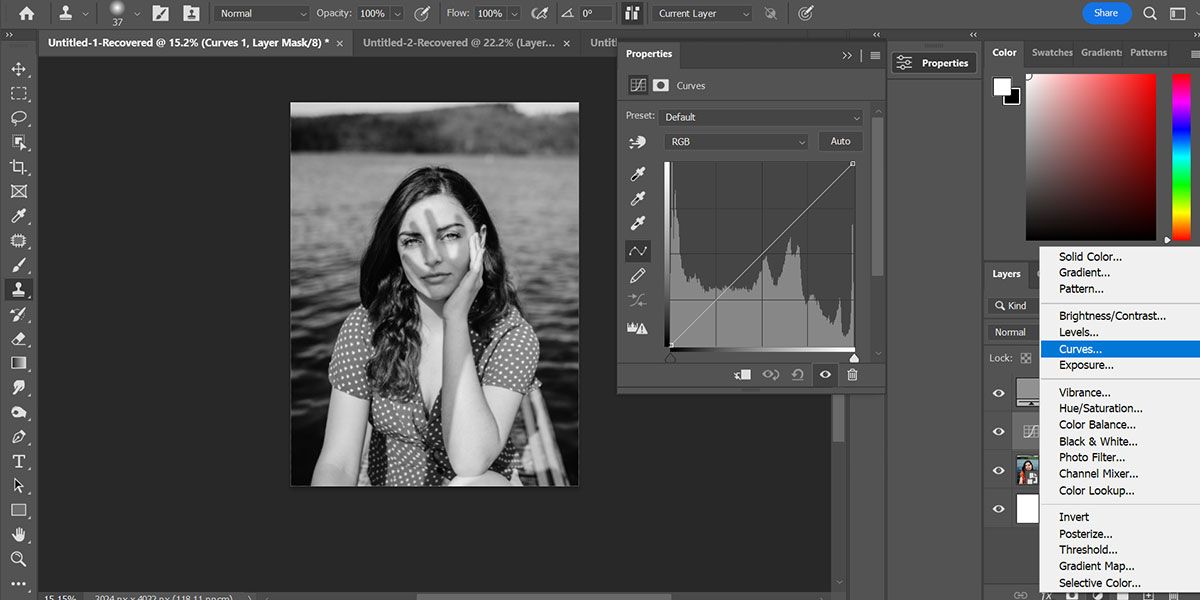
2. Appropriate the brightness
Now let’s take away the shadow within the portrait.
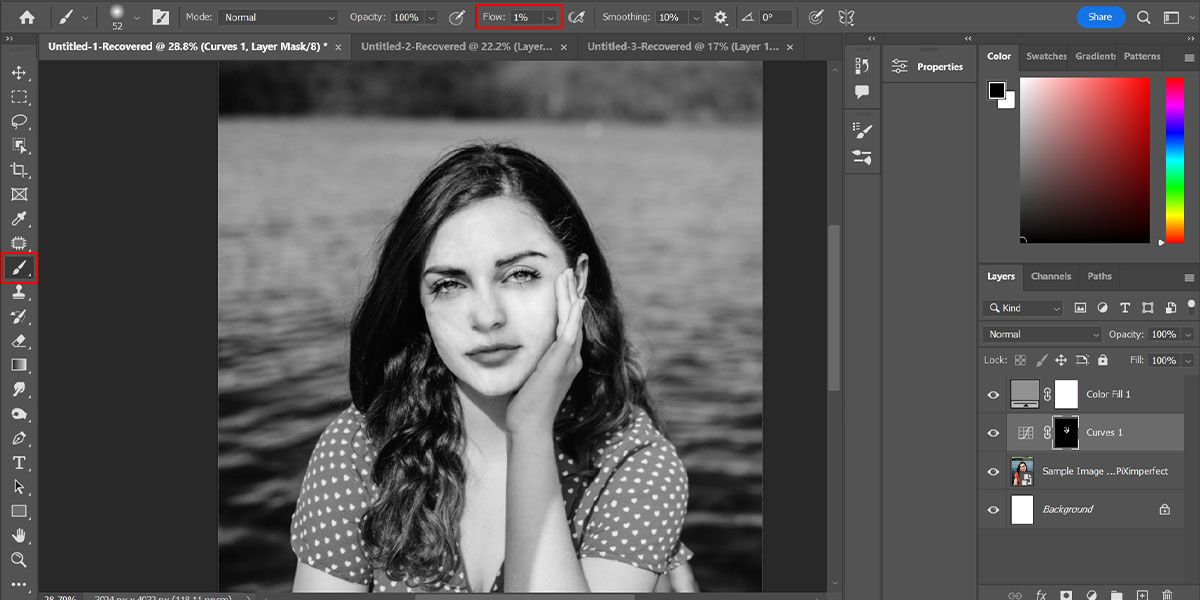
- A… create curve becoming stage and choose it hand Device. Place it on the shadow half and transfer it curves instrument to lighten it. You can even cut back the brightness of the brilliant areas if essential. In case you’re undecided how to do that, try our Photoshop curves instrument information.
- Click on on the masks in entrance of the Curves layer and press ctrl + I. It’s going to invert the masks and conceal the present edit.
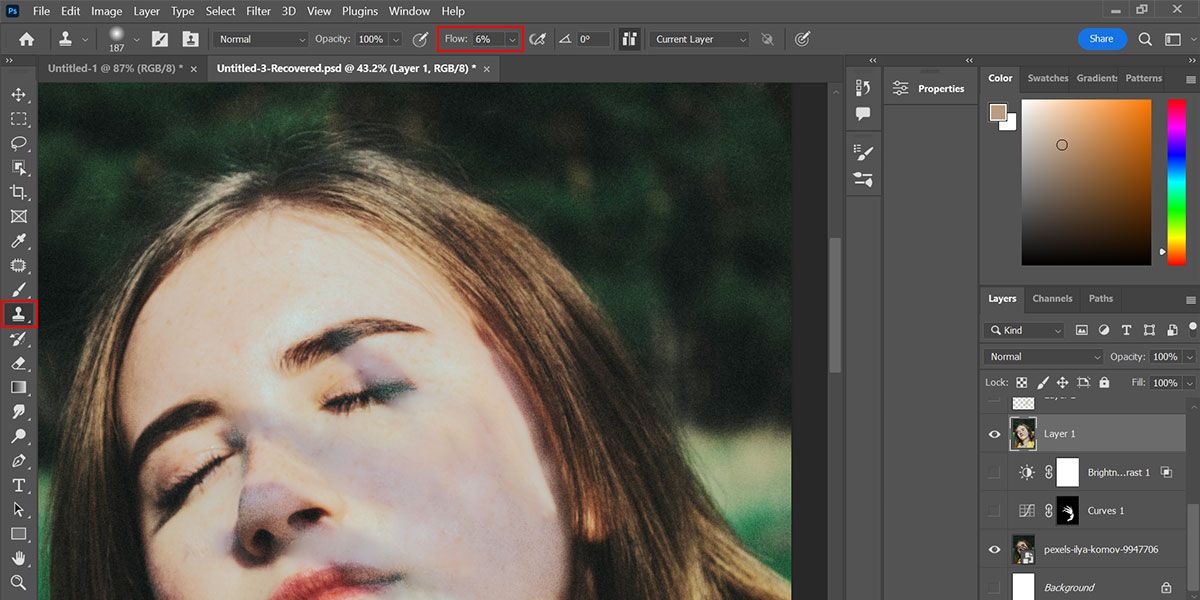
- Select a comfortable spherical brush and set the Move round 2-5%. Select white because the foreground shade and begin portray over the shadows to take away them.
- In case you’ve moreover lightened areas exterior the shadows, press X to alter the foreground shade to black and paint over the sunshine half Move to regulate 1%.
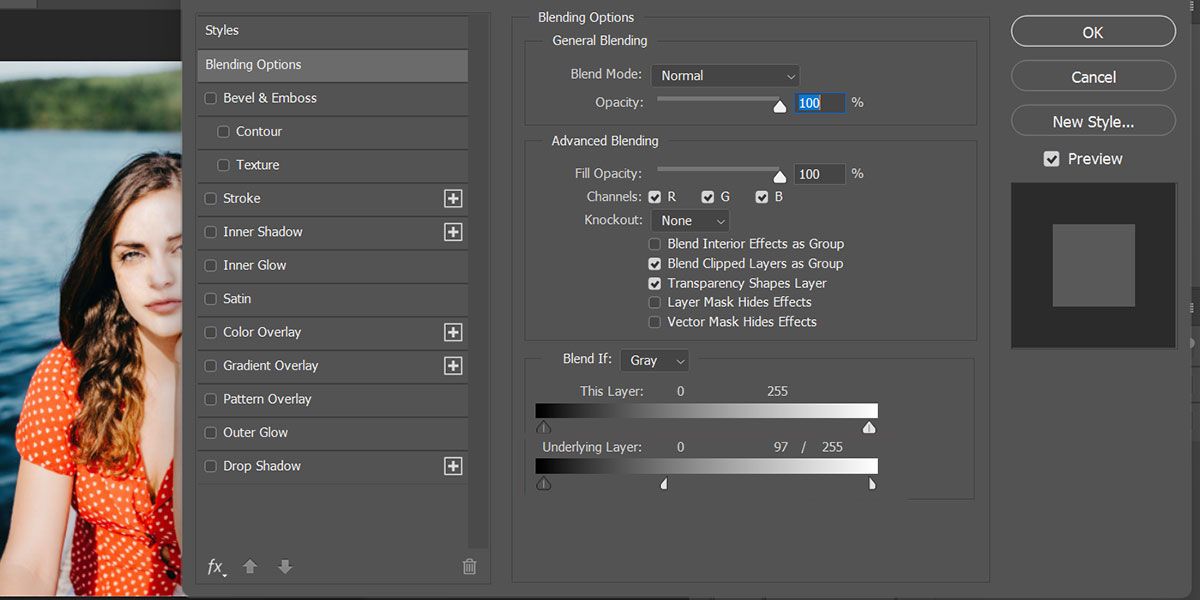
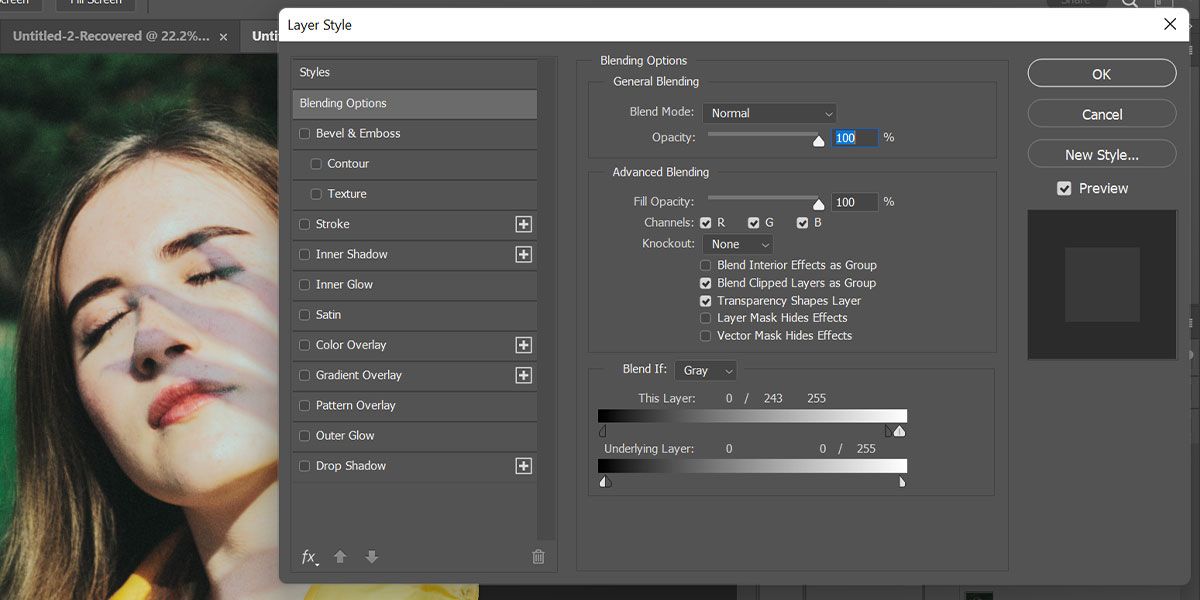
- Create one other curve becoming Stage, choose some extent in the midst of the curve and barely transfer it in the direction of the highest left nook. It’s going to additional brighten the picture for a pure look.
- Double click on on the appropriate aspect of the brand new Curves layer to open it combine ifand whilst you press the Previous button, click on the white pointer underneath the Underlying layer to interrupt it Now deliver a part of the pointer near the darker aspect. It solely impacts the shadow half to make it a bit lighter.
That is it. You took care of the shadows. Now you can cover the grey management layer to see what your picture seems like.
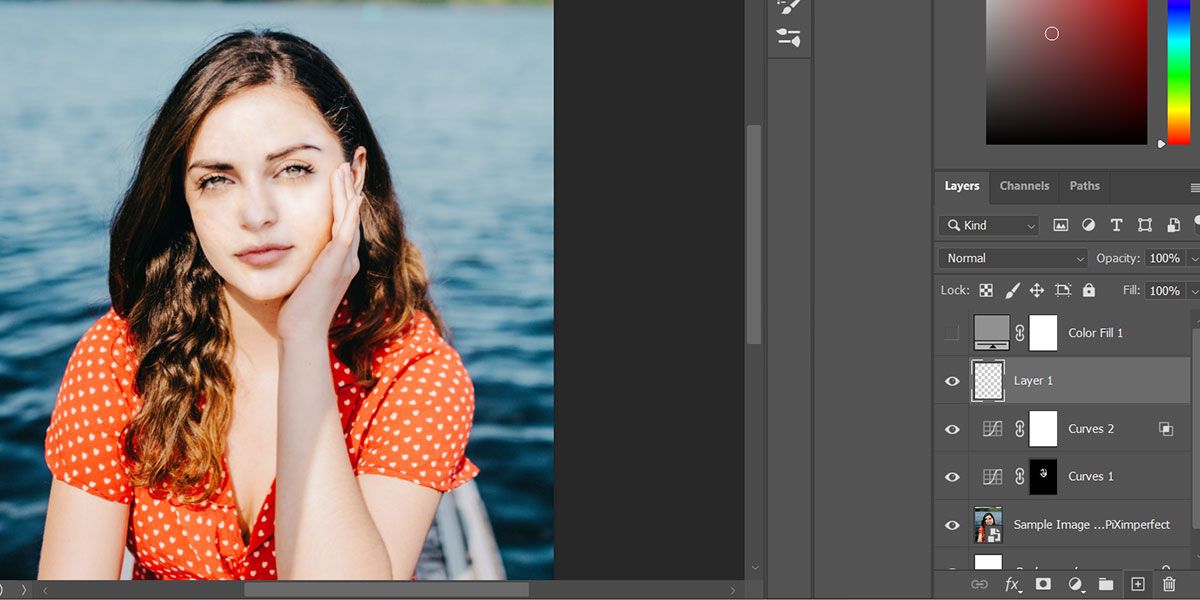
3. Appropriate the colour
When working with shadows, typically you miss the pure colours. Observe the steps under to take away blotchy shade out of your portrait.
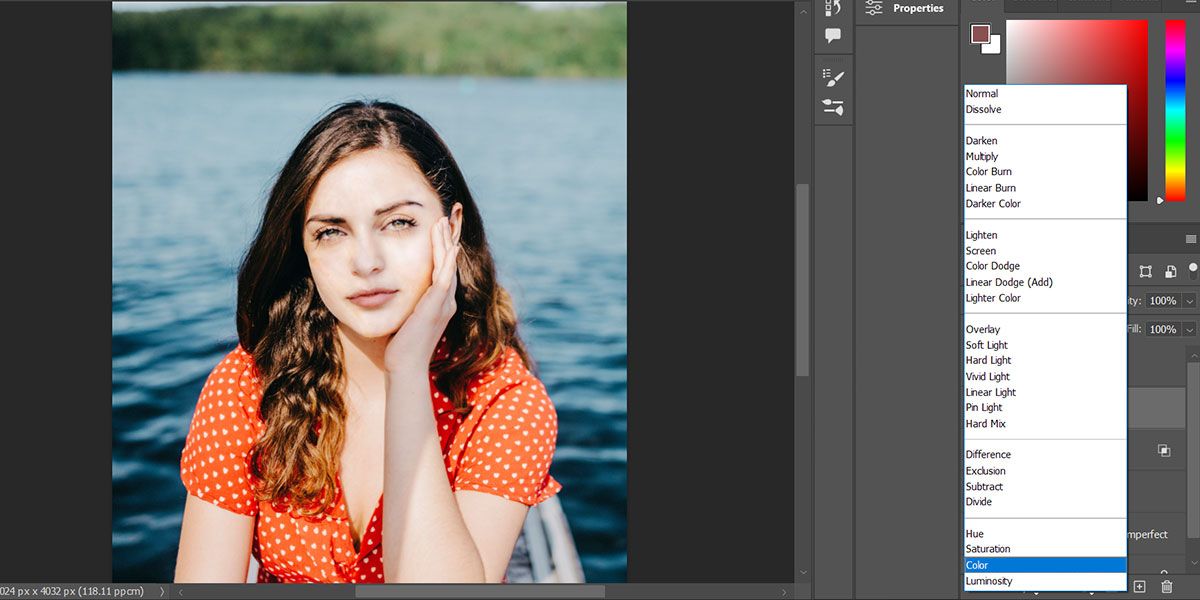
- Create a brand new empty layer.
- Set these mix mode to shade.
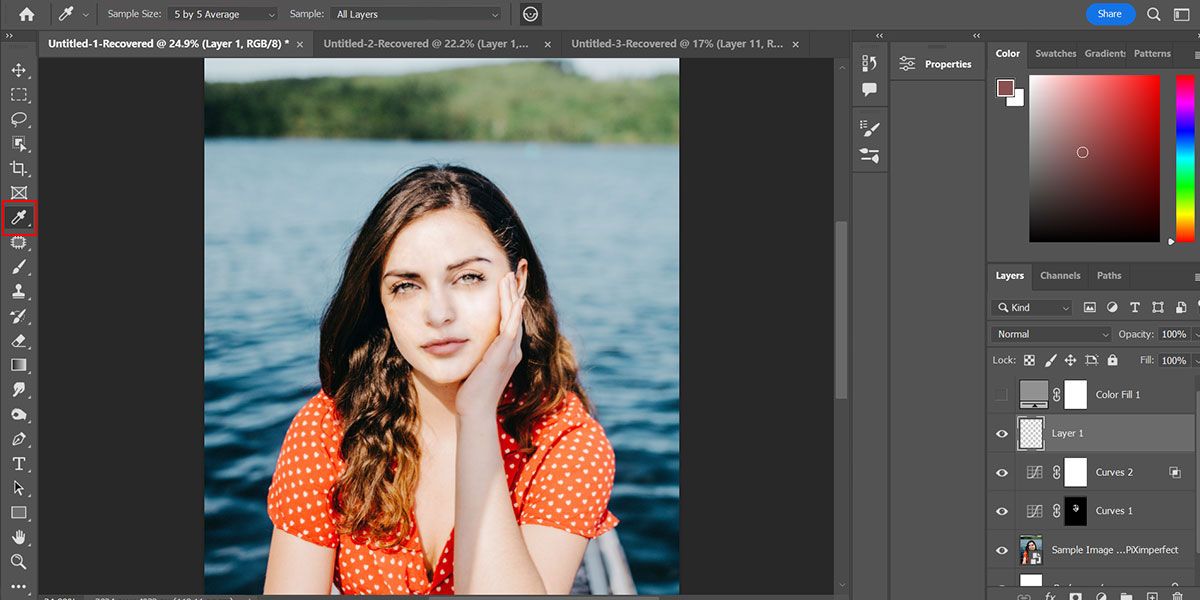
- Select pipette instrument and ensure the pattern measurement is 3 occasions 3 or 5 occasions 5 common. Additionally set the pattern stage as All shifts.
- Select brush instrument and whilst you press the Previous button, click on on the colour of the image you wish to copy.
- Begin by portray over your picture so the colours look as pure as doable. It’s possible you’ll must repeat this course of for small sections of your portrait, every time choosing a close-by shade.
- Press final layer + Previous + ctrl + E to create a brand new layer from all seen layers – it is going to create a layer from all of your edits.
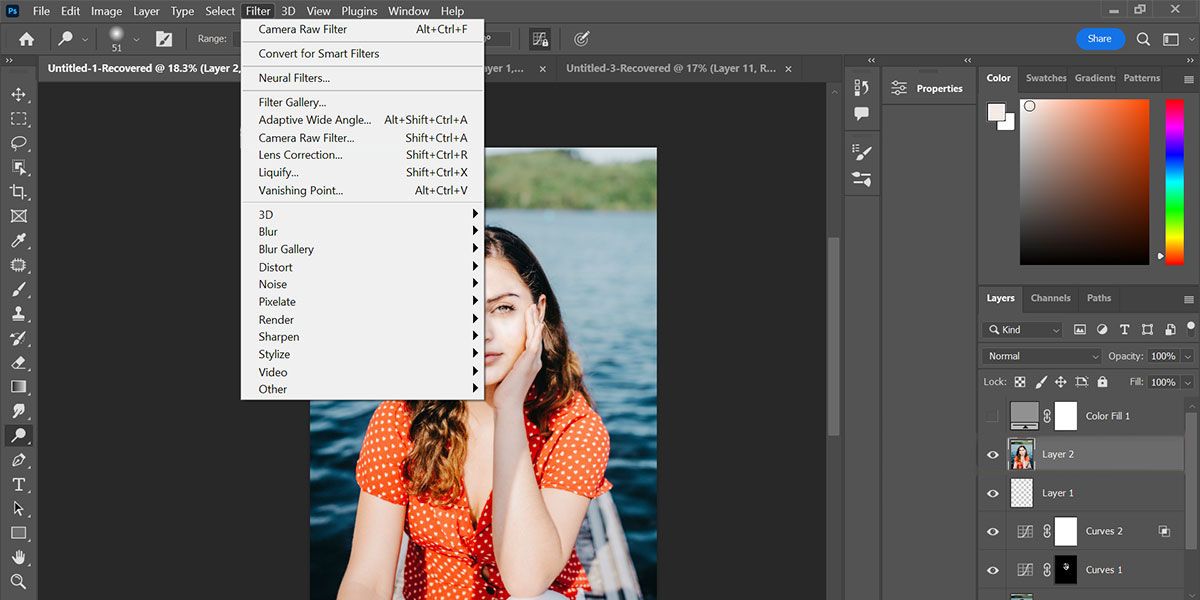
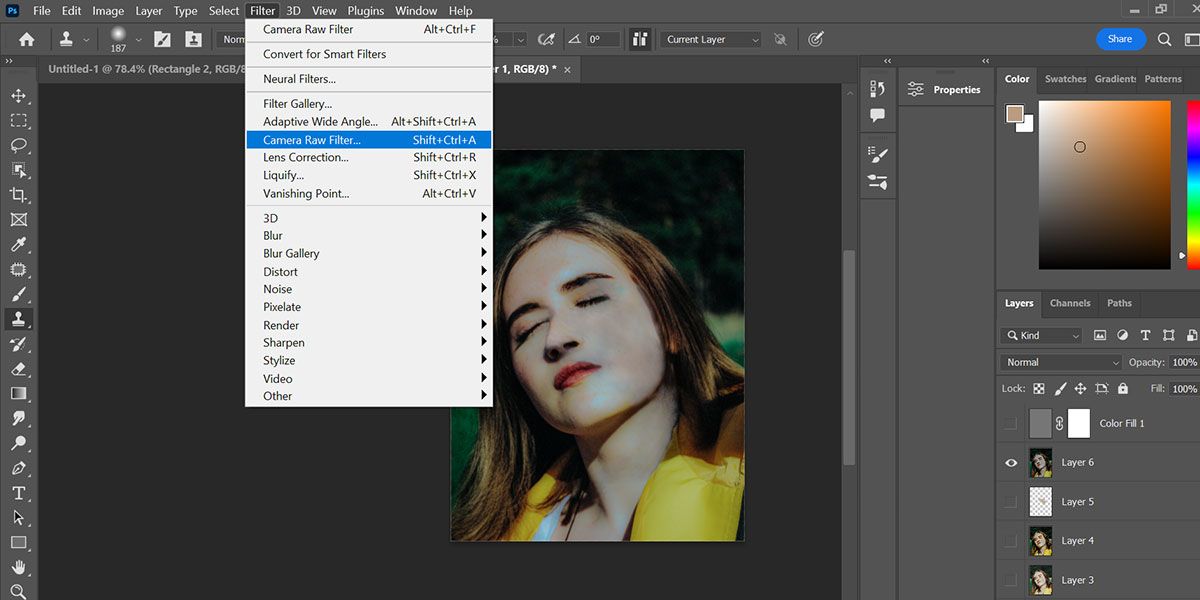
- Go to filter > Digicam Uncooked Filter, and tweak settings like publicity, shadows, texture, element, readability, and many others. so as to add the ending touches to your picture. Beat Enter as soon as you’re completely happy together with your edits. Take a look at our full information to utilizing Digicam Uncooked in Photoshop.
That is all. You’ve efficiently eliminated the undesirable shadow out of your portrait.
Relying on the depth of the sunshine supply, it could actually typically be troublesome to brighten the picture with out dropping element. On this case it’s good to take some additional steps…
What if the shadows are too laborious?
If the shadows are too harsh, ie the sunshine supply is just too robust or near the topic, it may be troublesome to get the appropriate brightness and shade. If in case you have adopted the steps above and you continue to can’t take away the shadow from the picture, you have to to recreate that a part of the picture.
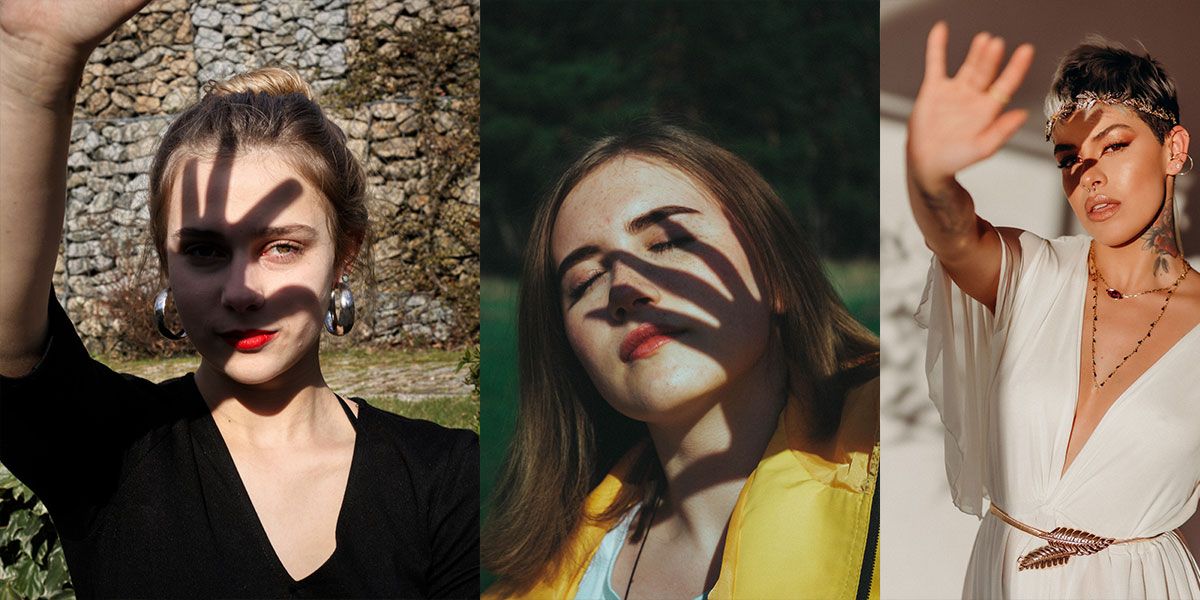
Within the following portrait examples, it’s inconceivable to take away the shadow utilizing solely the above methodology. Due to this fact you have to use the patch instrument and Content material-based fill that will help you take away the shadow utterly.
After finishing the above steps, comply with these steps:
- Create a number of curves Maintain leveling and lightening the picture to get the perfect consequence.
- Double click on on the appropriate aspect of your curves layer to open it combine if Traits.
- Break the white slider beneath that Underlying layer by clicking on it whereas urgent the Previous key and convey it to the left. Equally, break the black slider for this layer and convey it to the appropriate.
- press now layer + Previous + ctrl + E to create a brand new layer from all seen layers.
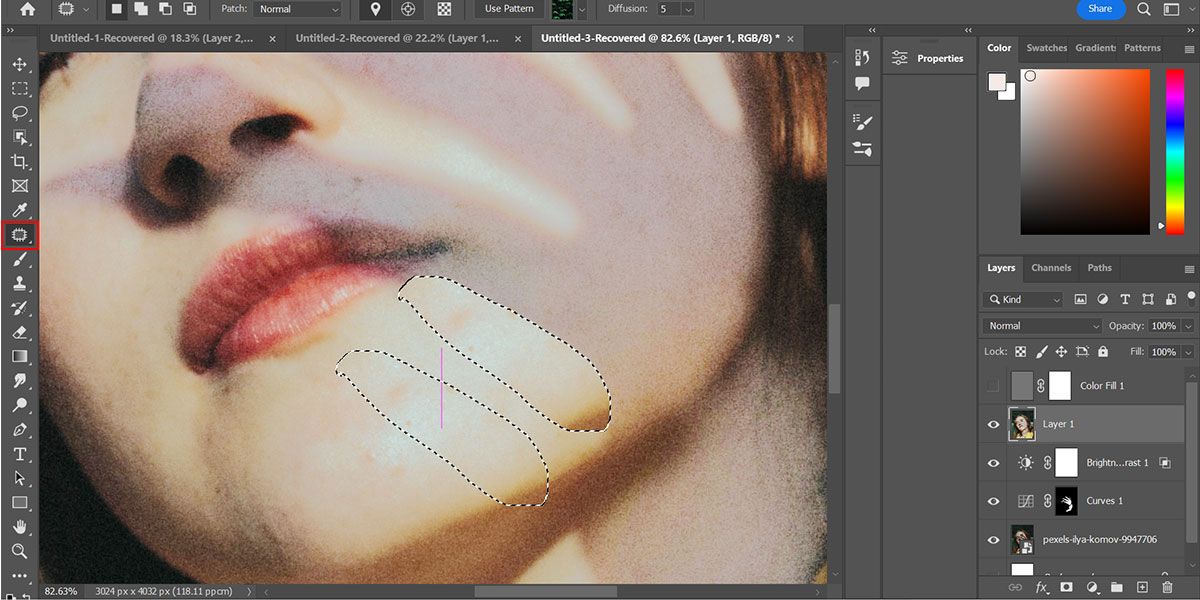
- Select patch Device.
- First, choose the shadow edges and exchange them with the close by pure pores and skin. There’s a combination of each areas. Due to this fact you get the pores and skin texture again within the shadows whereas eradicating the cruel contours. Repeat this course of till you may have eliminated all components of the shadow.
- Press layer + Previous + ctrl + E to create a brand new layer from all seen layers once more.
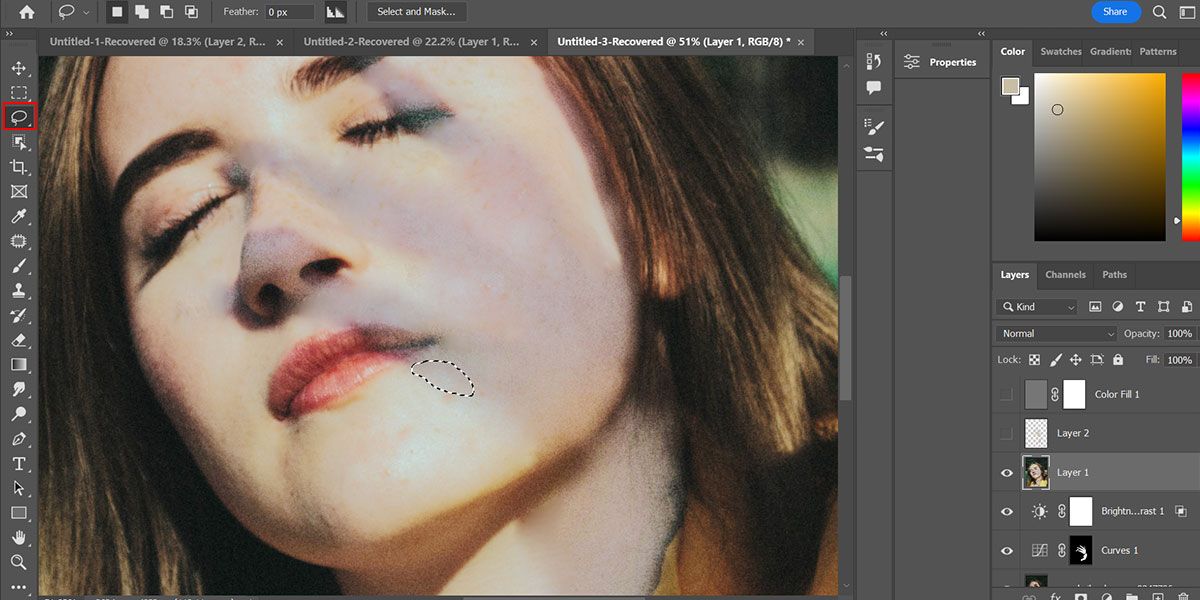
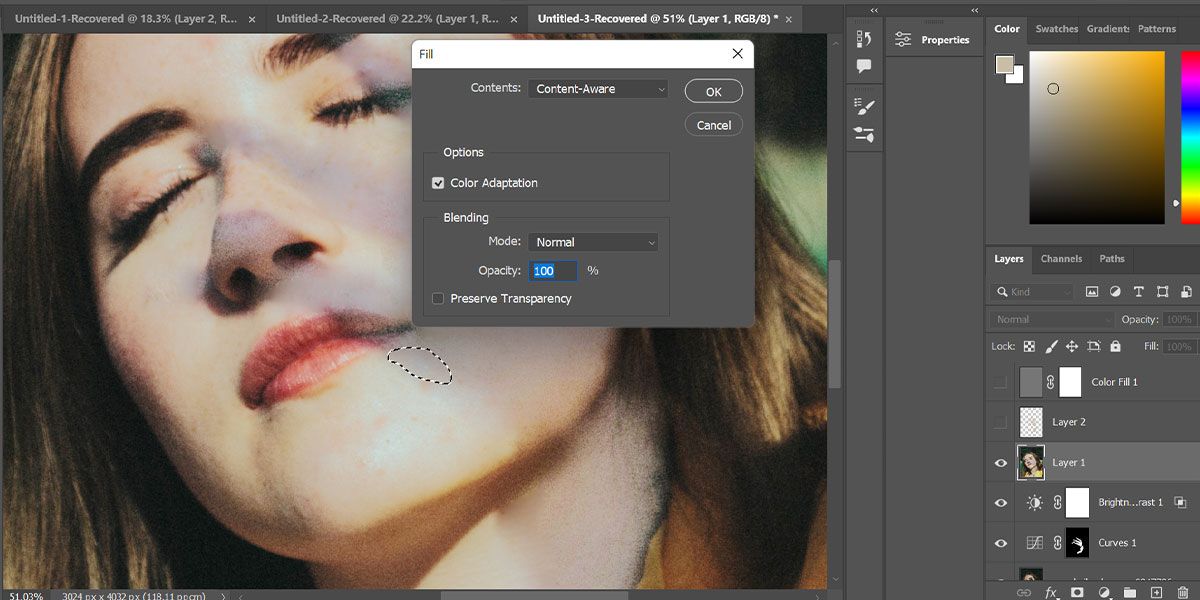
- Select lasso instrument and make small sections close to the shadow edges.
- Press layer + backspace activate Content material-based fill. Press Enter Proceed. Repeat this methodology till many of the shadow is eliminated.
- Some components might be troublesome to appropriate with this methodology. In such a case, use the clone stamp instrument and set the Move to 5-10%. Take a look at our in-depth information to study extra about utilizing Photoshop’s Clone Stamp instrument.
- Press the Previous button and click on an space you wish to pattern, after which click on an space you wish to exchange.
- As a of completion, press layer + Previous + ctrl + E to create a brand new layer of all seen layers and open it Digicam Uncooked Filter As soon as once more. Now you can make different minor changes like texture and readability.
Improve your portraits by eradicating undesirable shadows
Undesirable shadows in portraits might be the toughest half for a photographer to do away with. In case you are attentive sufficient, you’ll be able to keep away from this error on the recording stage. Nevertheless, if luck is not in your aspect, use this methodology to effortlessly take away shadows out of your photographs.
