Methods to Add a Smile to a Portrait in Photoshop: 4 Methods

Do you may have the proper picture of somebody however you simply want they had been smiling as an alternative of scowling? It is a straightforward repair in Photoshop. There are a number of methods so as to add a smile to a picture, and we’re right here to interrupt down every of them.
We’ll use the Liquify instrument, neural filters, layers and the Puppet Warp instrument. Let’s get in instantly.
1. Add a smile with one other image

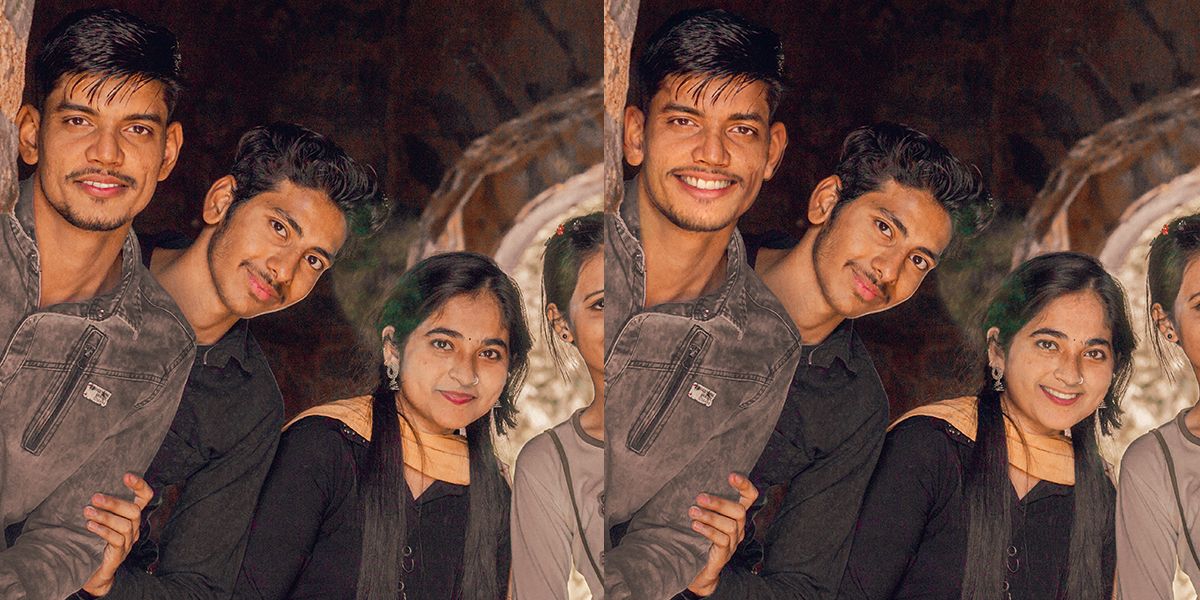
Overlaying photographs and utilizing Photoshop layers and the choice instrument is an older method to switch smiles. Though this method can work with nice success, it’s depending on applicable photographs.
It really works greatest to make use of a special picture of the identical individual quite than an identical picture of a stranger. There could also be instances once you’ve taken a number of photographs of a gaggle and most of your topics look good, however one individual is not smiling. You probably have one other shot of them smiling, it is simple to “switch” that smile to the higher shot.
If you do not have a photograph of the identical individual smiling, you might be able to replicate this with an image of somebody who appears to be like comparable from the identical angle. You can alter her pores and skin tone to sew the images collectively.
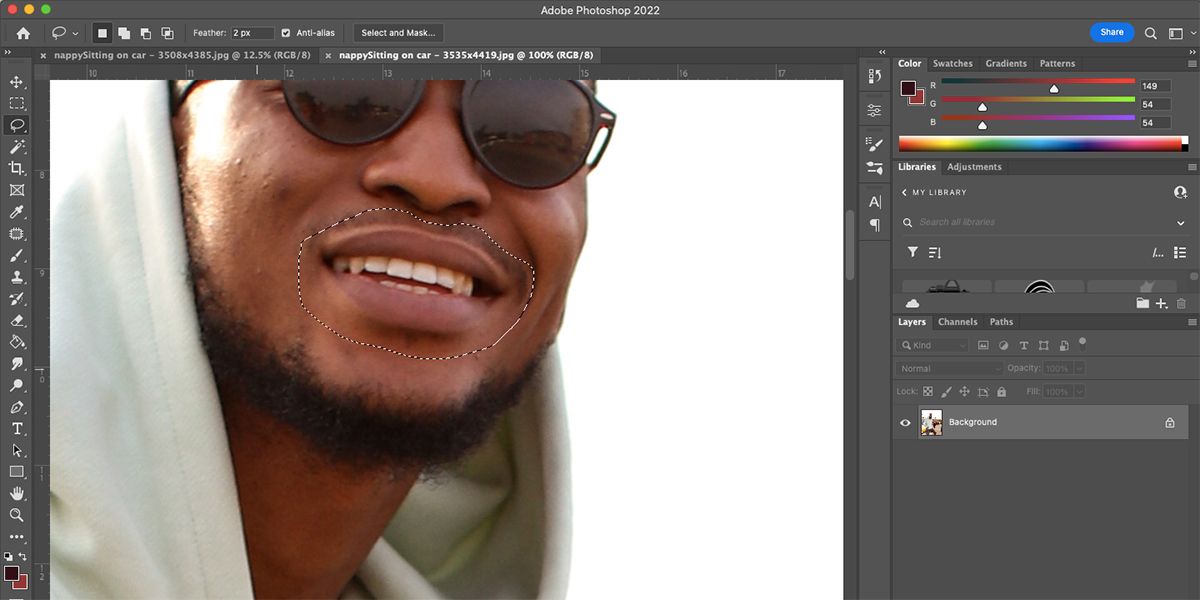
Open each photographs in Photoshop. On the smiling image, use the Magnetic lasso (L) to pick the smile after which copy the choice (Cmd + C for Mac and Ctrl + C for Home windows).
Paste your choice (Cmd + v for Mac and Ctrl + v for Home windows) to a brand new layer on the non-smiling picture. Use Free transformation (Cmd + T for Mac and Ctrl + T for Home windows) to pick the smile.
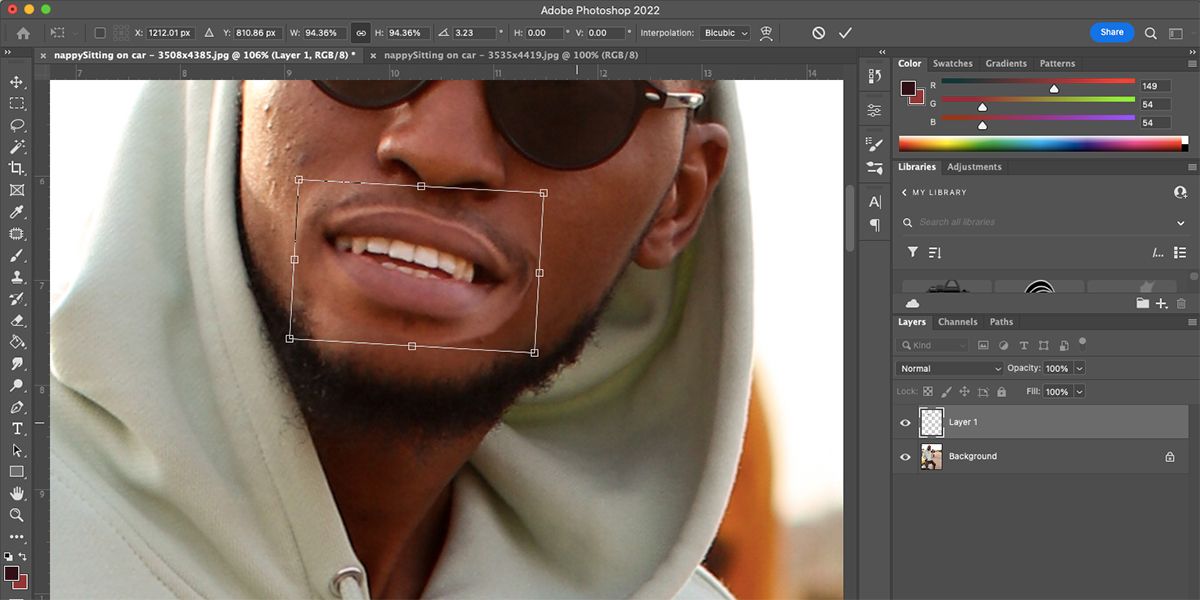
Transfer the smile in order that it matches completely over the non-smiling mouth. You may resize by dragging the nook nodes, and rotate the smile by hovering close to a nook till the cursor modifications to arrows, then click on and drag the nook to rotate it.
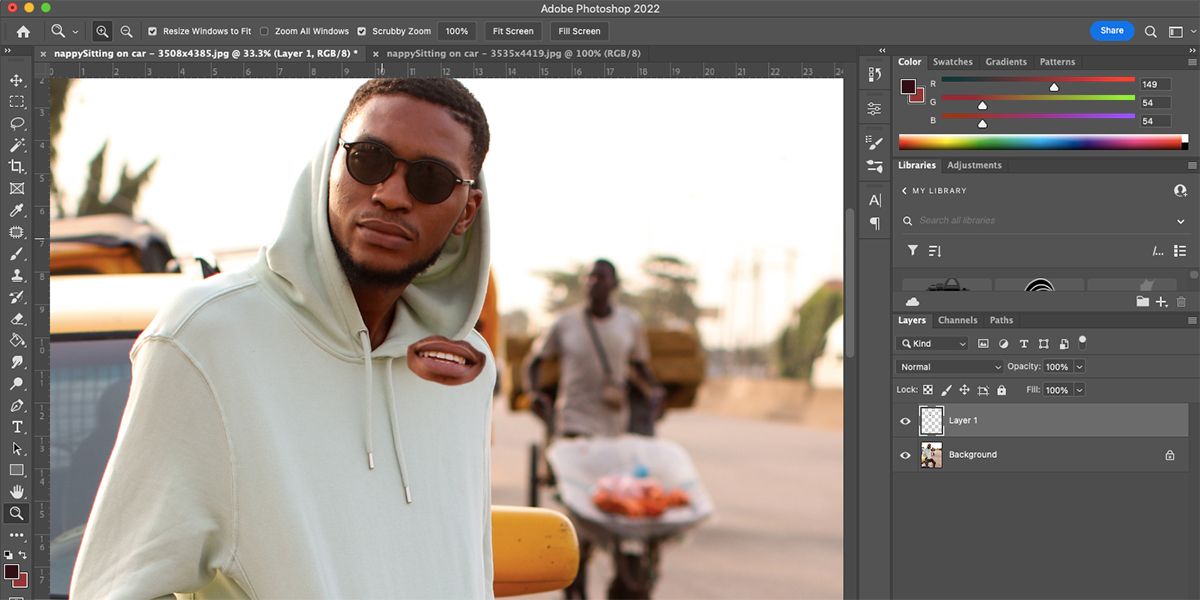
You could wish to flip the smile horizontally to replicate the brand new face angles. In Free Rework mode, proper click on on the smile and choose it Flip horizontally. Transfer the smile to match the brand new picture.
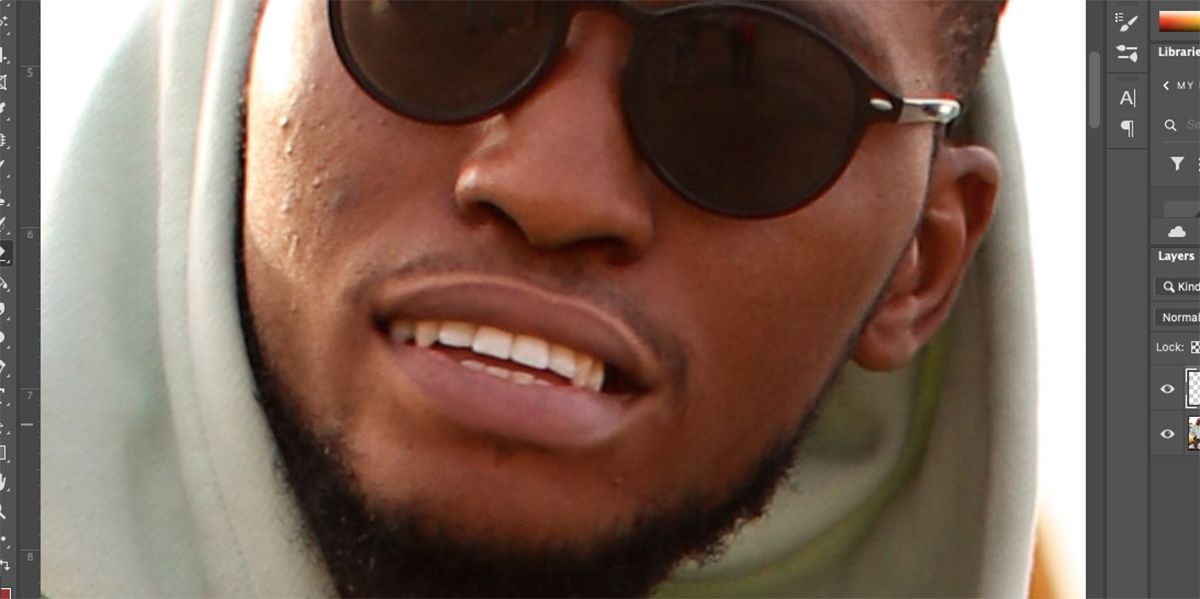
Once you’re proud of the position, double-click the smile to exit the Free Rework instrument. Use the eraser (E) to take away any undesirable components of the overlaid picture, e.g. B. Extra pores and skin across the mouth.
2. Add a smile by utilizing the Be Pleased! filter
Photoshop’s neural filters may give any portrait a pretend smile. Leveraging the Adobe Sensei instrument, this method supplies a fast and straightforward approach so as to add a smile to a photograph utilizing face recognition expertise. This will work for group or particular person portraits.
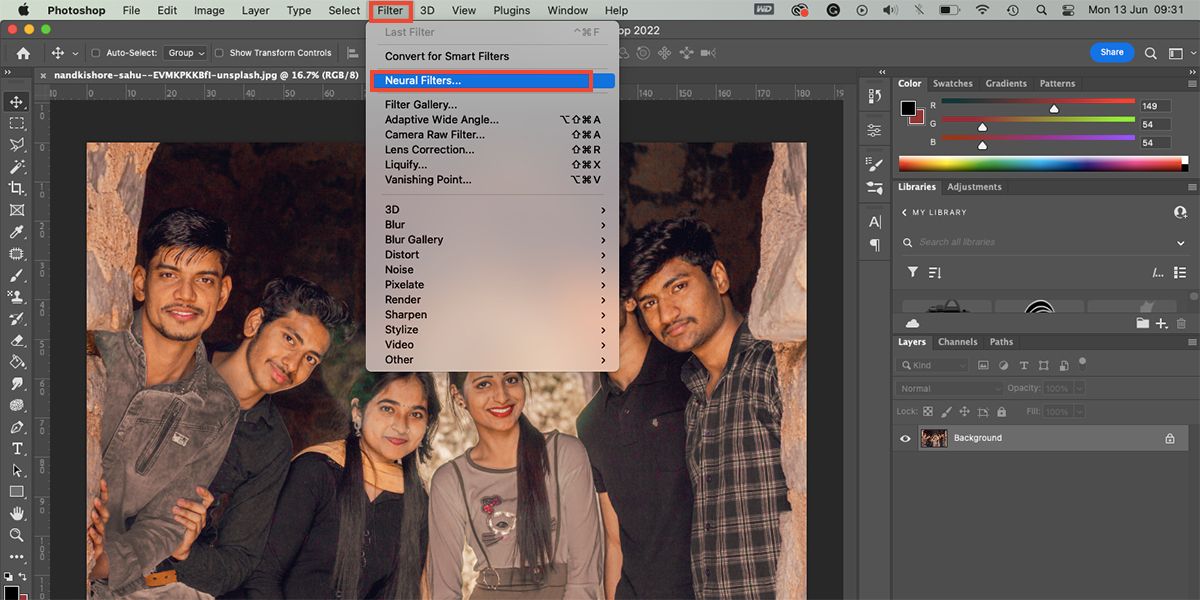
Go together with your picture on the artboard Filters > Neural Filters. If that is your first time utilizing the sensible portrait filter, you want to obtain it by clicking Cloud Button. Activate the filter.
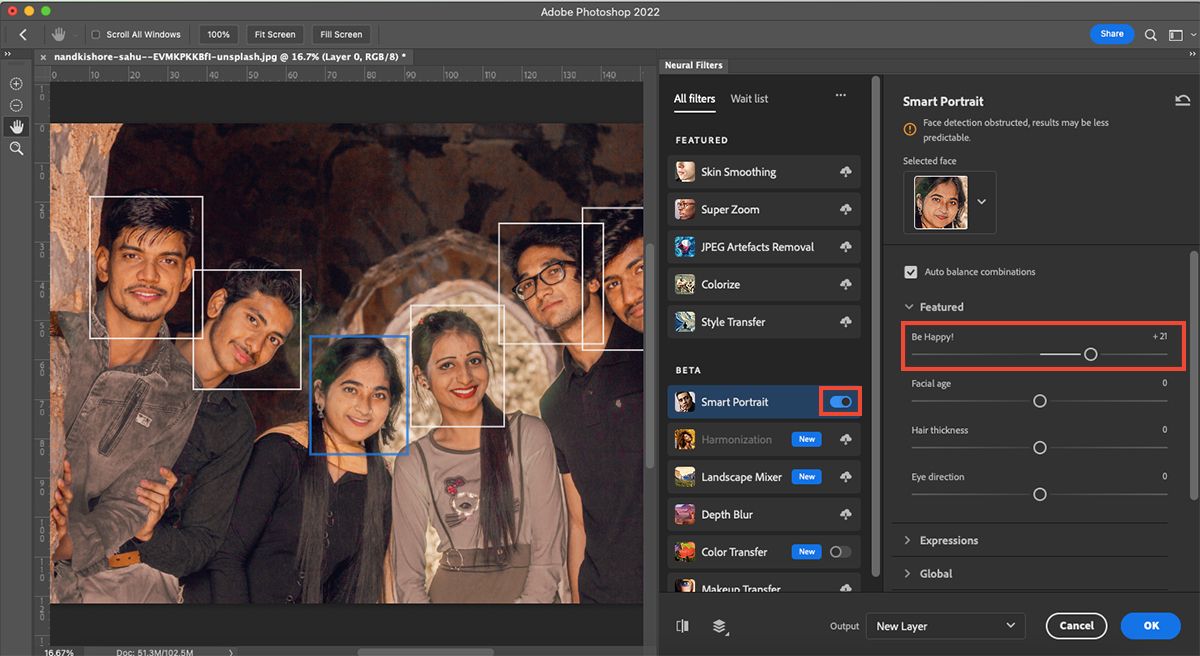
Underneath “Really useful” you will note the Be Pleased! Filter. Transfer the slider to the correct so as to add various levels of smiles to your portrait. When you find yourself proud of the smile, click on OK.
This filter makes use of just one smile picture, which suggests it is probably not for everybody. If the individual within the picture personally, it could not appear to be it after they smile. And once you apply this filter to a number of folks in the identical picture, it appears to be like like all of them have an identical tooth.
Nonetheless, for a fast and straightforward smile, this characteristic works nice as a result of you need to use the slider to regulate how broad the smile is.

Convert your picture right into a Sensible Object by proper clicking and choosing the layer within the Layers panel Convert to Sensible Object.
Go to the highest instruments Filter > Liquify. This opens the filter settings. Use the zoom instrument (Z) within the settings panel to zoom into the mouth of your picture.

Select face instrument (A) within the left toolbar. Transfer the cursor across the mouth and use the information to maneuver the perimeters of the lips up. You can even use the properties on the correct to vary these values.
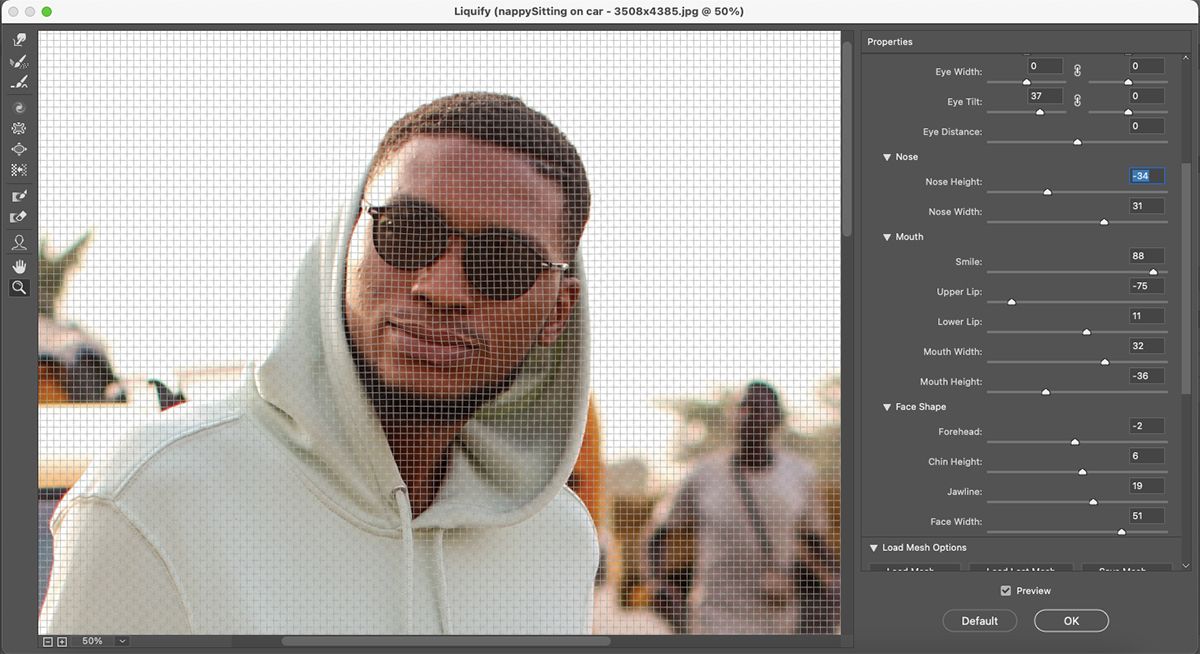
The opposite properties on the correct provide you with choices to shift eye place, develop jaw width, shift nostril, and extra. You may change these settings till the facial options work naturally with a smile. click on OK if you’re proud of the outcomes.

Photoshop’s Puppet Warp instrument is nice for treating a 2D picture as a shifting puppet. Whereas it really works greatest on a whole physique, you may also apply it to remoted physique components just like the mouth.
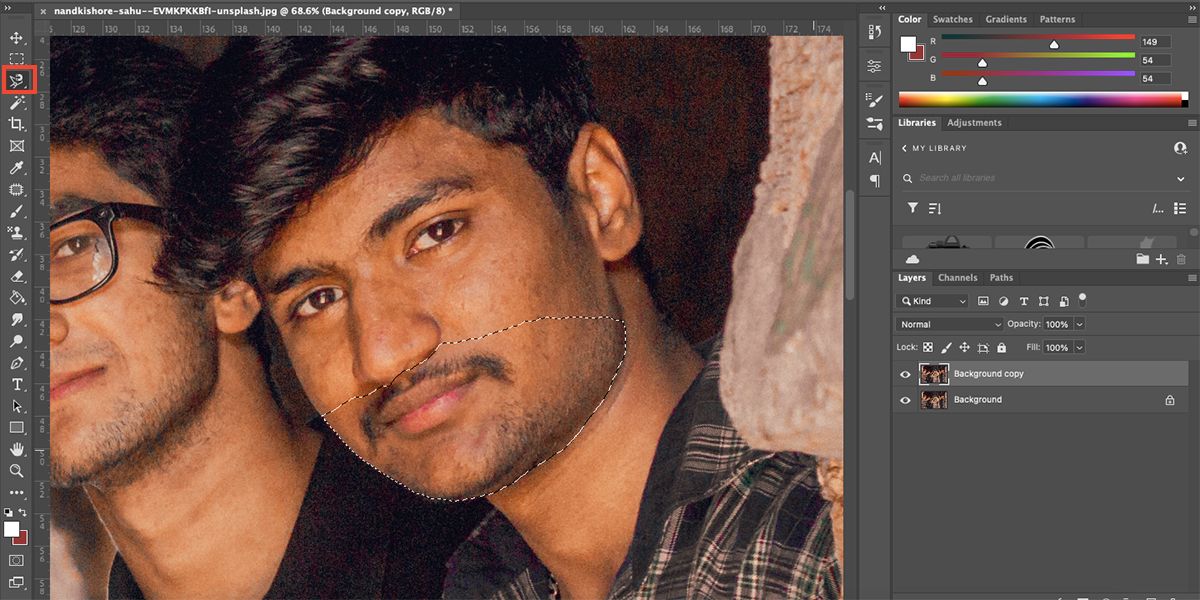
Duplicate the picture within the layers panel by proper clicking on the layer and choosing duplicate layer. Use the lasso instrument (L) to pick the underside half of the face.
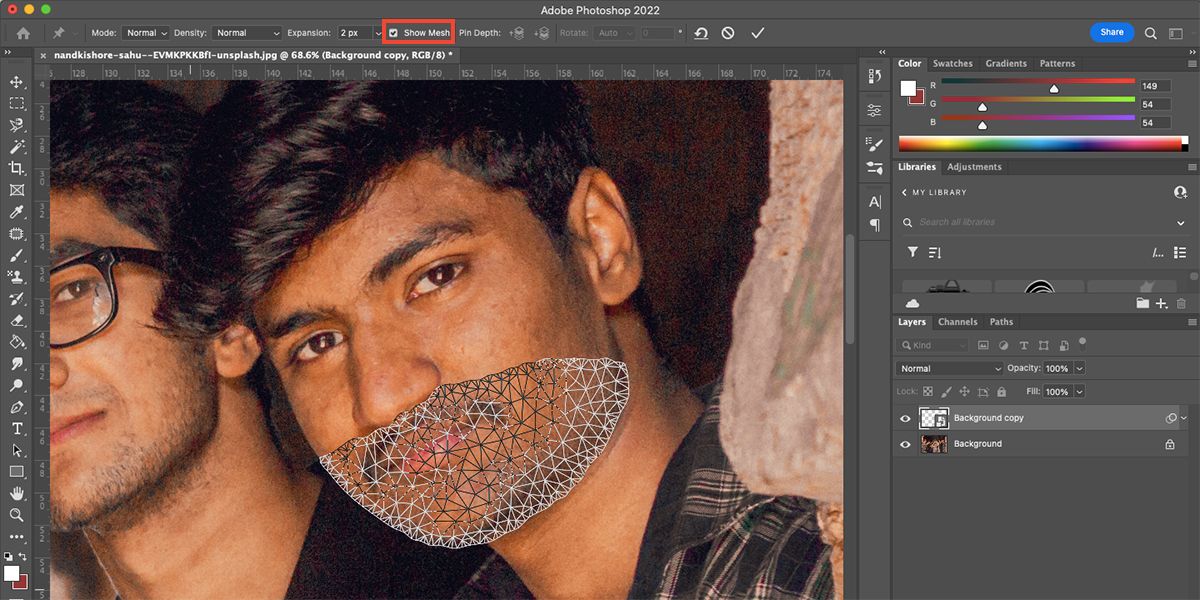
Go to Edit > Puppet Distortion.. It will apply a mesh to the chosen space. Deactivate present mesh within the high toolbar to make the face extra seen.
Once you hover over the puppet-deformed space, your cursor turns right into a pin. Use the pin to click on on areas that may transfer naturally throughout a smile, such because the again of the neck. B. the corners of the mouth and the center between each lips. You can even pin the cheek areas if they’re in your choice.
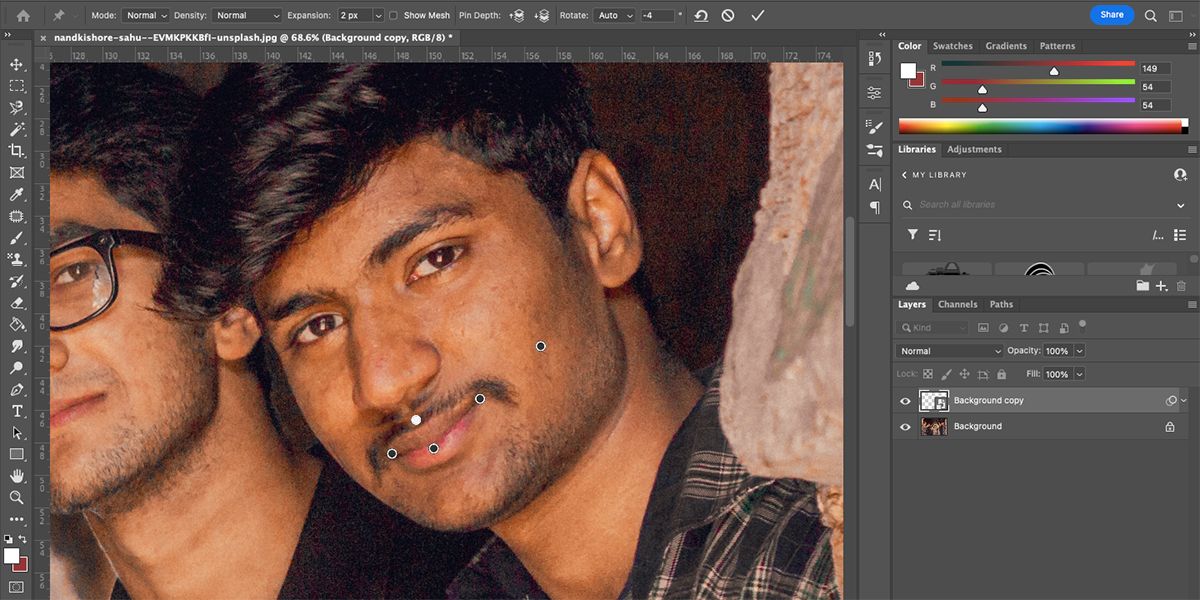
As soon as all of the pins are in place, subtly transfer every pin to disclose a pure smile place. In case you transfer an excessive amount of, warping will develop into apparent, so watch out. When you find yourself proud of the smile placement, click on some other instrument after which click on Use on the popup that seems.
To additional improve the picture, try our information on utilizing the Clone Stamp instrument in Photoshop.
Create a smile in Photoshop
If you do not get the proper smile in your picture, that is not the worst that may occur. With a wide range of totally different smile including strategies to select from, you are positive to search out one which fits your modifying wants.
The Liquify and Puppet Distortion strategies are greatest for including a delicate smile to your picture. However if you wish to showcase a smile with tooth, it is best to both overlay one other picture or use the Be Pleased! Filter.
