Find out how to Create HDR Photographs in Photoshop With Digital camera RAW

Excessive dynamic vary photographs are eye-catching, have depth, and are used much more typically than you suppose. Your iPhone in all probability has an in-camera auto HDR setting, and you’ll create pretend HDRs in Photoshop. However how do you create actual HDR photographs? let’s discover out
What do it’s essential to create HDRs?
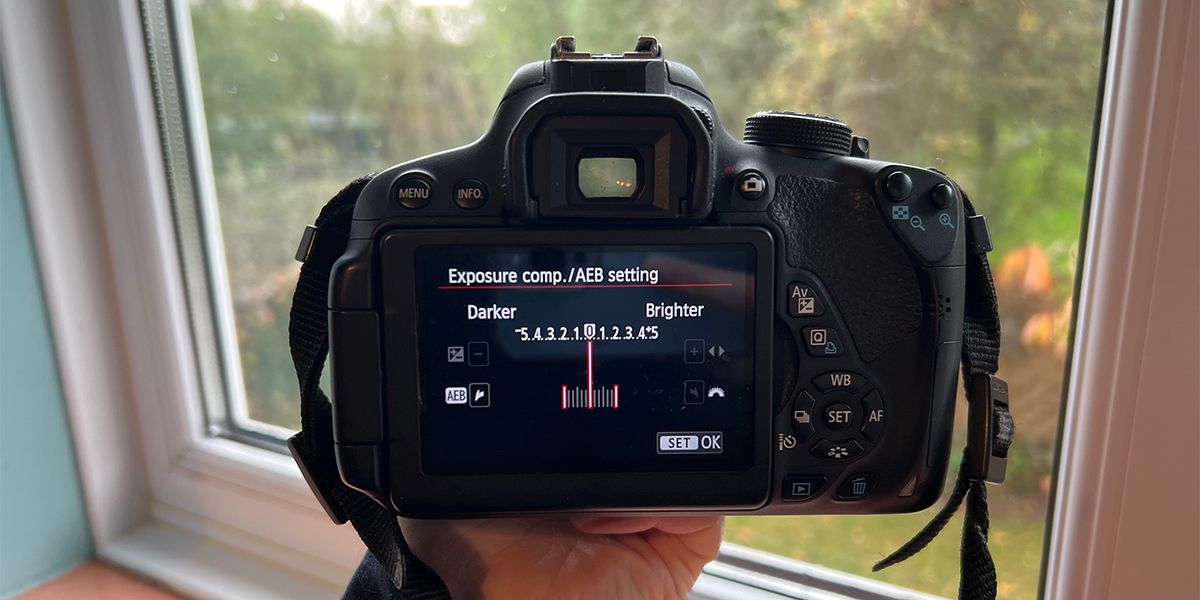
You will need to take three or extra bracketed photographs; This setting is current in most DSLR cameras. Primarily, you take three or extra photographs at completely different publicity ranges. And take your photographs in RAW format as an alternative of JPEG format.
You will need to additionally use software program that opens RAW photographs. We use Photoshop. To open RAW photographs in Photoshop, you want the Digital camera RAW plugin. That is included within the number of Adobe Inventive Cloud software program.
Now that you’ve got all the pieces you want, you’ll be able to create an HDR with Digital camera RAW.
Find out how to create HDR photographs in Photoshop
To open RAW photographs in Photoshop, it’s essential to import them utilizing Digital camera RAW, a Photoshop plugin. The Digital camera RAW plugin works very equally to Lightroom, so if you happen to’re a Lightroom consumer this has a shallow studying curve.
Step 1: Open your photographs in Photoshop
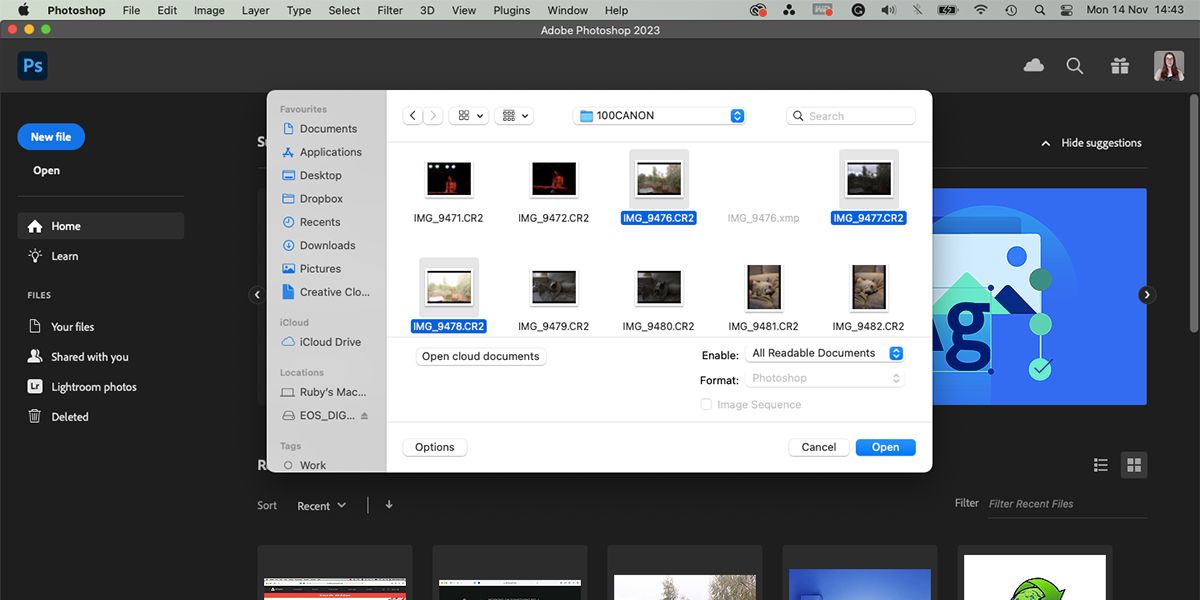
Open Photoshop. Choose on the house display Open. Find your RAW photographs within the dialog field and choose those you wish to use. Photographs in RAW format use the CR2 file format, so any picture on this format will be opened with Digital camera RAW by way of Photoshop. After choice, click on Open.
Step 2: View the photographs in Digital camera RAW

Digital camera RAW resides as a dialog field in your Photoshop window, it isn’t a separate software program or app. The filmstrip on the backside of the Digital camera RAW window exhibits which photographs you’ve got chosen to open.
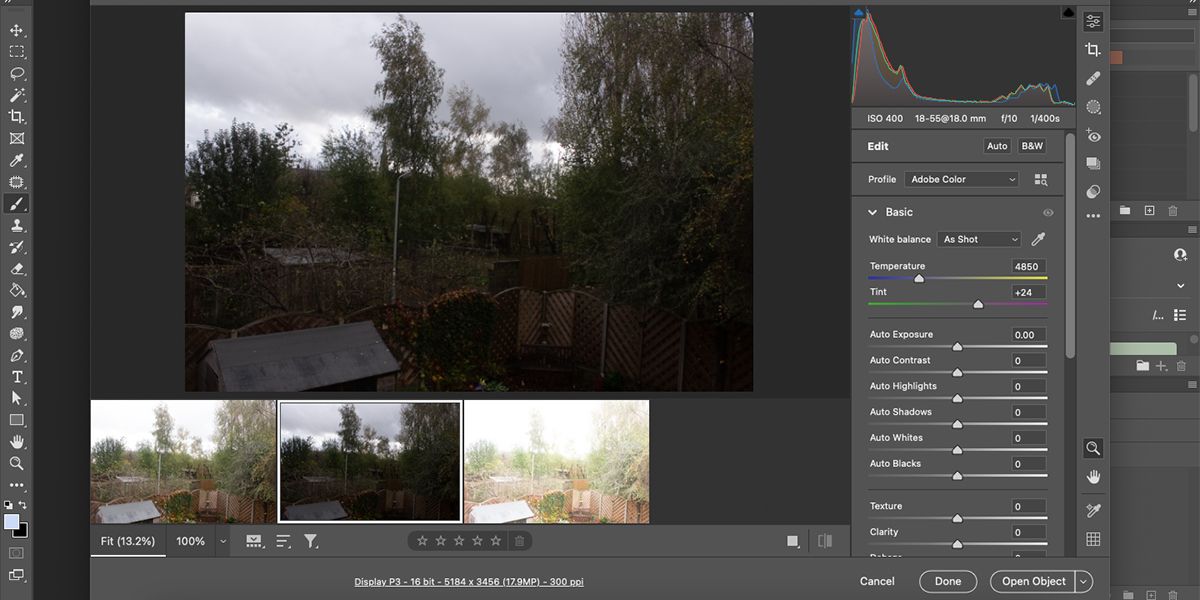
When opening photographs with three bracketed brackets, the filmstrip shows the pictures within the following order: the appropriately uncovered picture on the left, then the underexposed shot, adopted by the overexposed shot on the precise.
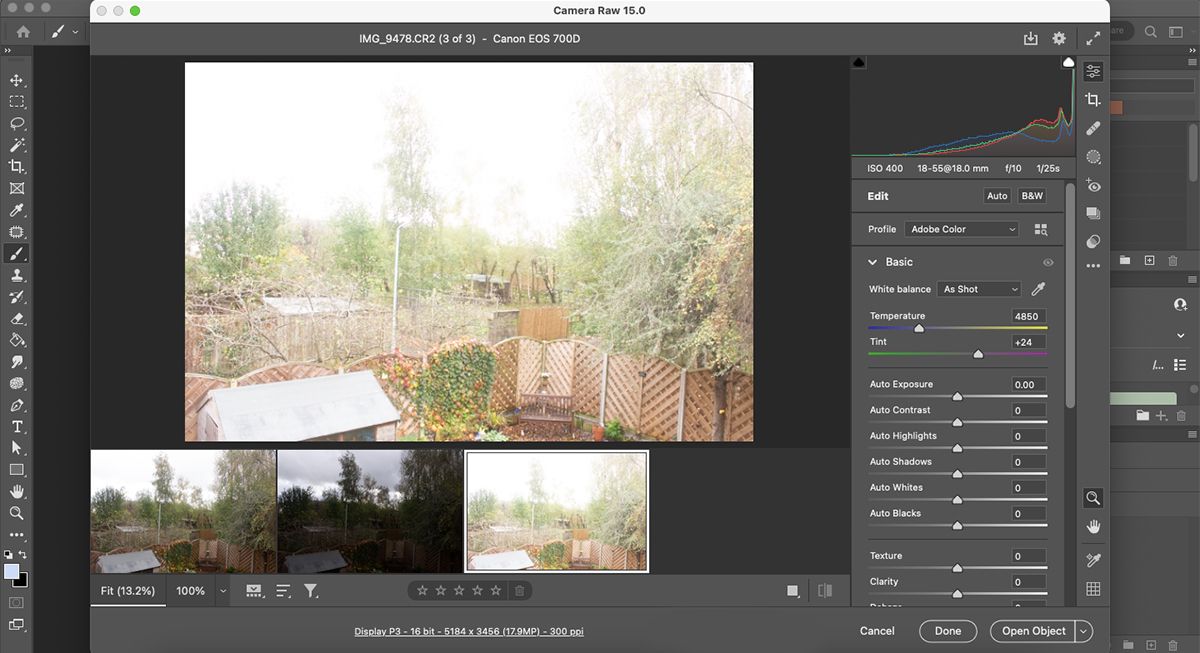
On the precise aspect of the dialog is a histogram chart that you should use to see the darkness and highlights of every of the otherwise uncovered photographs. Beneath the histogram are your different picture settings.
Step 3: Pre-edit the photographs
This step is optionally available. You should utilize the settings under the histogram to edit every of the person frames earlier than creating the HDR. You may improve or lower the publicity if you wish to add some additional drama to your HDR.
It is best to edit the picture after you’ve got created the HDR, however if you wish to change something beforehand, you are able to do it now.
Step 4: Do the HDR
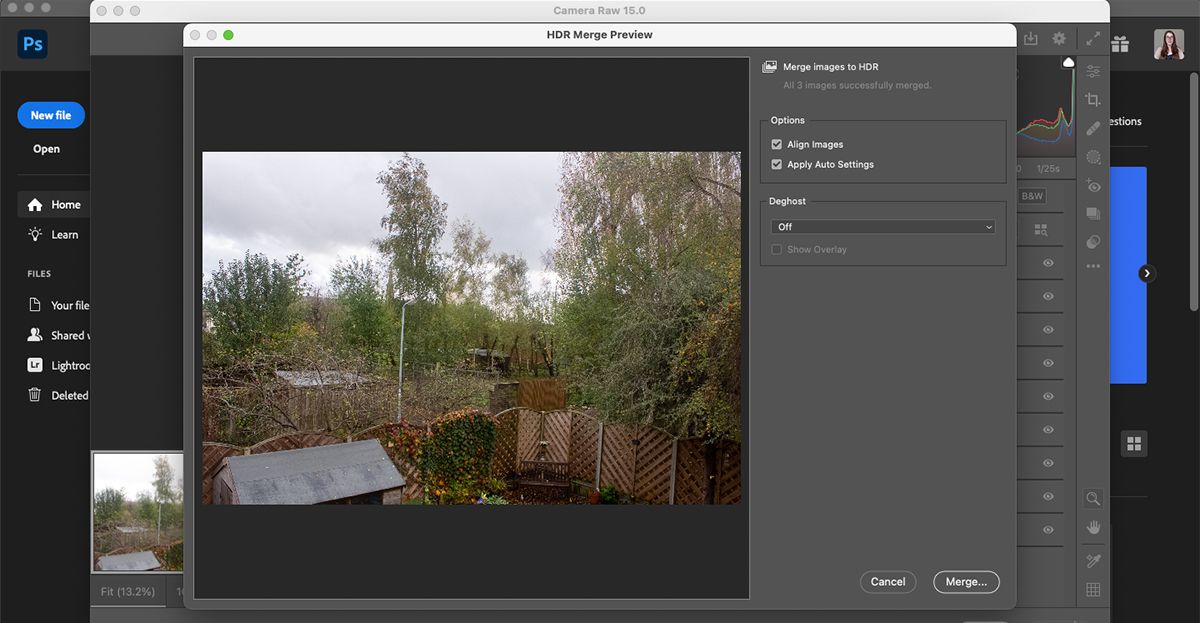
Choose and maintain the picture on the left change, after which choose the picture on the precise. This may choose all photographs. With all three – or extra, if any – photographs chosen, it is easy to create an HDR.
Proper-click on one of many chosen photographs and choose it Merge to HDR. This instantly brings up a brand new dialog field with a preview of the completed HDR. In case you are pleased with the preview, choose merge. In case you are unhappy, you’ll be able to cancel and edit any of your photographs to see if it helps after which attempt once more.
Step 5: Save your HDR
After deciding on Merge within the preview field, a dialog field will seem permitting you to save lots of your HDR to your system. Select a folder to save lots of, rename and choose Save on laptop. Your HDR might be saved as a picture in DNG format.
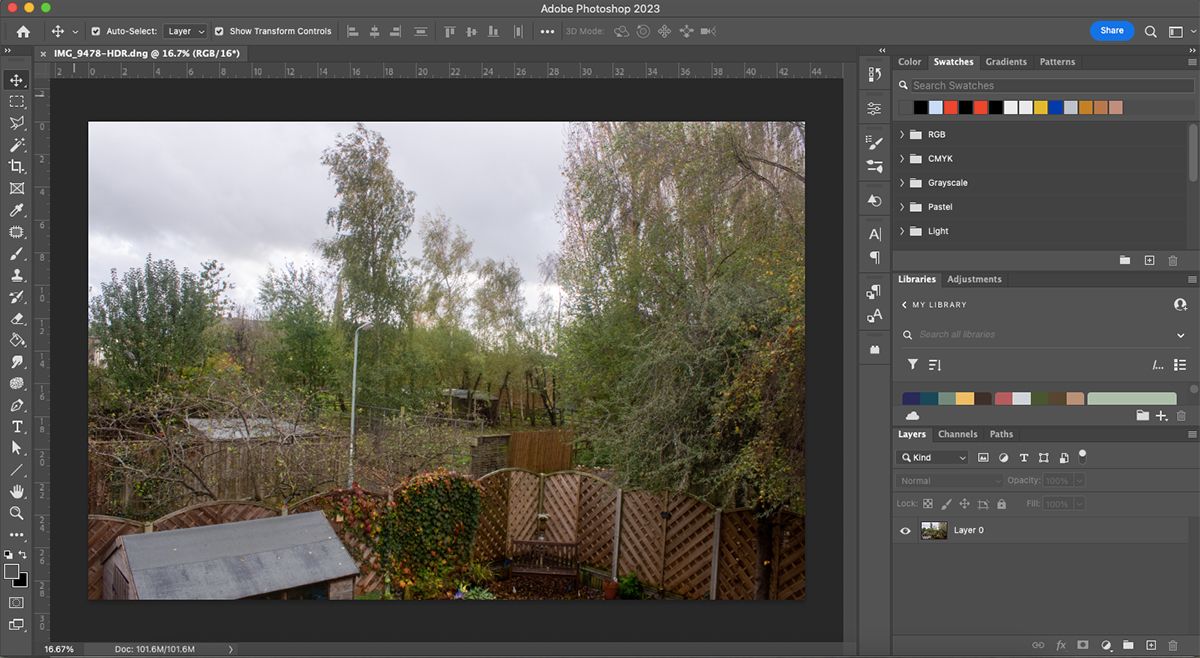
If you return to Digital camera RAW, your completed HDR is now the fourth picture to the precise of the filmstrip. The HDR now incorporates data from the earlier RAW photographs. This makes it lots simpler to edit if you need.
If creating your HDR this manner just isn’t potential since you do not use RAW photographs or do not have choices to use completely different exposures to your photographs, you’ll be able to create a pretend HDR picture in Photoshop.
Step 6: Return your HDR to Photoshop
There are three choices within the Digital camera RAW dialog field: Cancel, Completedand Open. Open then has three extra choices: Open, Open as objectand Open as a duplicate.
Select Cancel exits Digital camera RAW and takes you again to a clean Photoshop window. When you edited your HDR after merging, canceling won’t save these adjustments. Select Completed to save lots of the adjustments and exit Digital camera RAW.
The three open choices mean you can open and edit your HDR in numerous methods. Open opens the HDR as a standard Photoshop undertaking so you’ll be able to edit it as such. Open as object applies a Good Object to your new HDR so you’ll be able to deal with it like some other Good Object.
and Open as a duplicate opens your HDR as a duplicate slightly than the unique, permitting you to edit the picture individually out of your saved HDR.
Add excessive dynamic vary to your Photoshop photographs
Taking pictures in RAW lets your photographs shine, displaying depth and coloration not present in JPGs. Creating HDR photographs out of your RAW information provides much more depth.
It is a easy course of that many telephones or cameras can automate, however now you understand how simple it’s to do it manually. You may override the enhancing settings to get your excellent HDR with Photoshop and Digital camera RAW.
