Methods to Create a Water Reflection of Your Sky Substitute in Photoshop
Changing the sky in Photoshop is straightforward, however for real looking outcomes it’s worthwhile to add a mirrored image of your new sky to the water. This is how.
Photoshop has an awesome sky alternative instrument. However the one drawback is when there’s a physique of water within the picture there isn’t any computerized choice to create a mirrored image within the water to match the brand new sky.
On this tutorial we’ll present you the way to add an identical reflection of a sky substitute in water in Photoshop. Let’s begin.
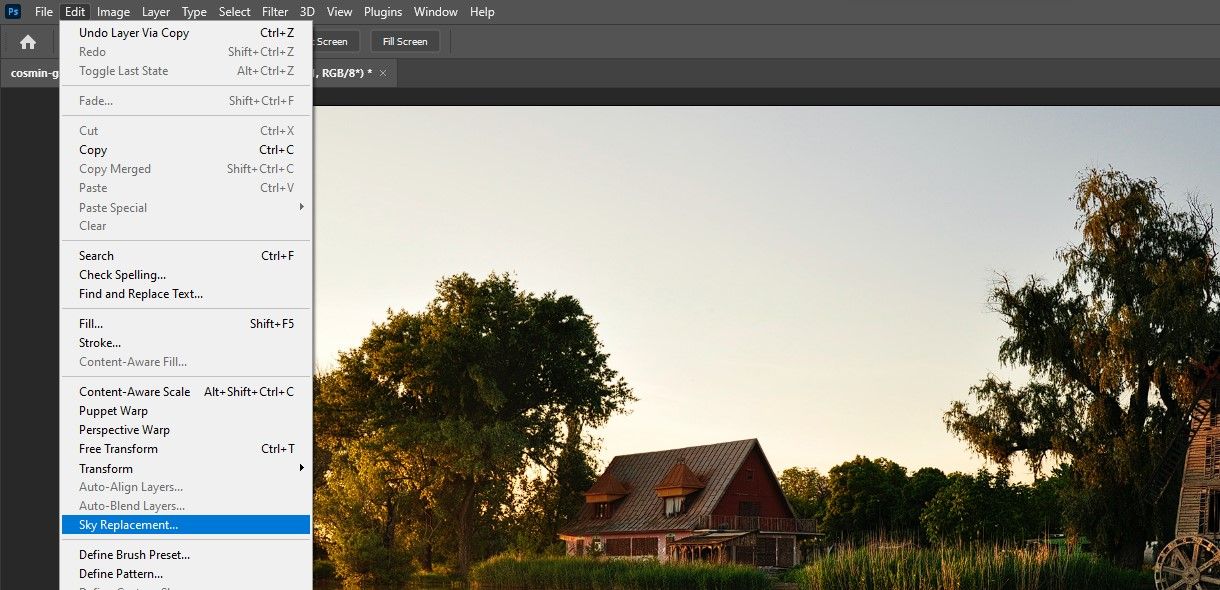
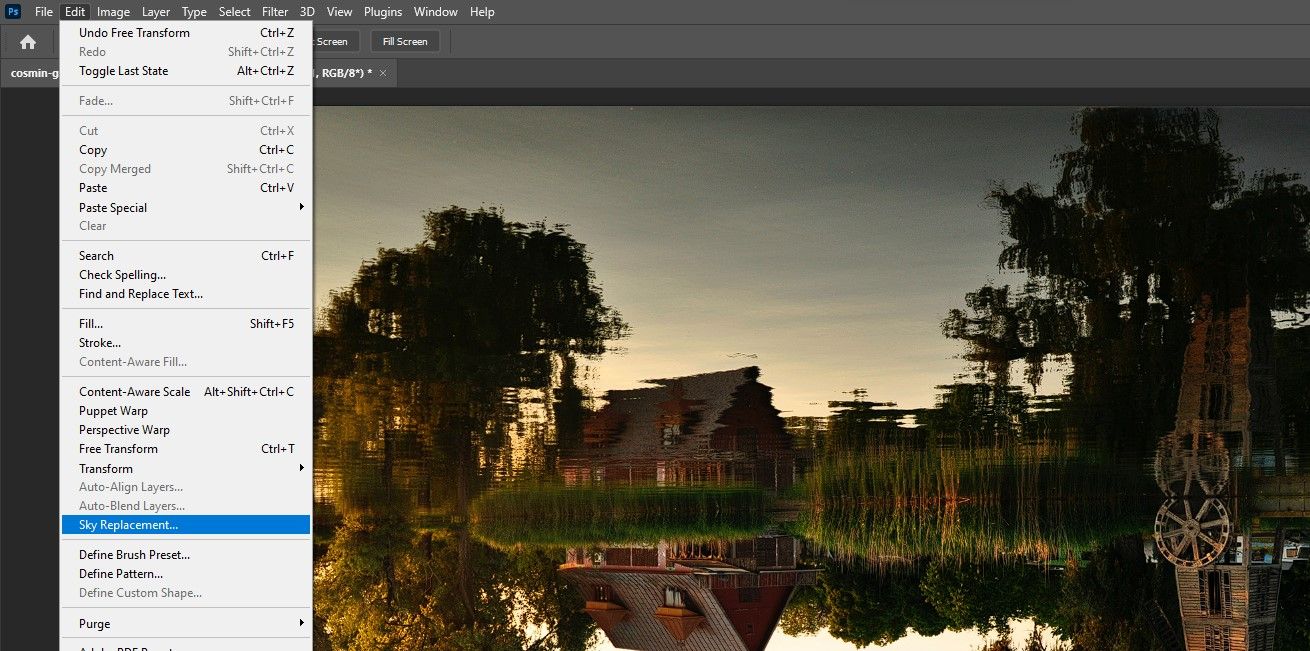
The issue with Photoshop’s Sky Substitute characteristic
Photoshop has made computerized choice very easy over the previous couple of years. However there’s nonetheless room for enchancment with the Sky Substitute characteristic. As you may see, there isn’t any means so as to add or regulate the brand new sky’s reflection within the water.
With sure pictures this may be fairly problematic as with out the suitable reflection the picture shouldn’t be real looking. This will likely point out to some viewers that pretend sky was used.
Allow us to present you the way to clear up this drawback.
Step 1: Make a flipped duplicate of the Sky alternative
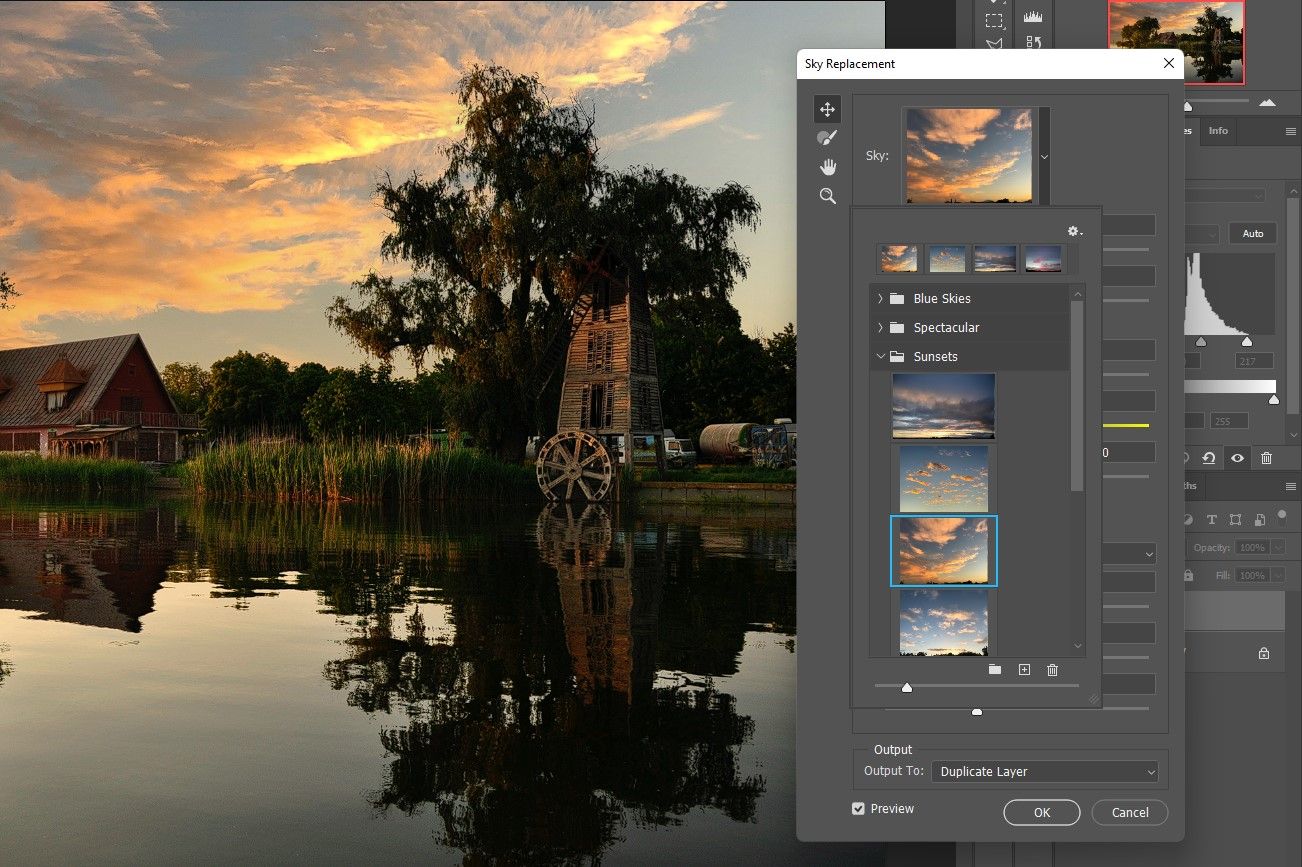
So as to add an identical reflection within the water, you will need to first undergo the fast sky alternative steps in Photoshop. Should you want a refresher, try the way to use sky alternative in Photoshop.
Then we duplicate the background layer and do one other sky choice on a vertically flipped model of the picture. Then we rotate the picture again to its authentic orientation.
If you wish to take part, you may obtain this pattern picture from Unsplash.
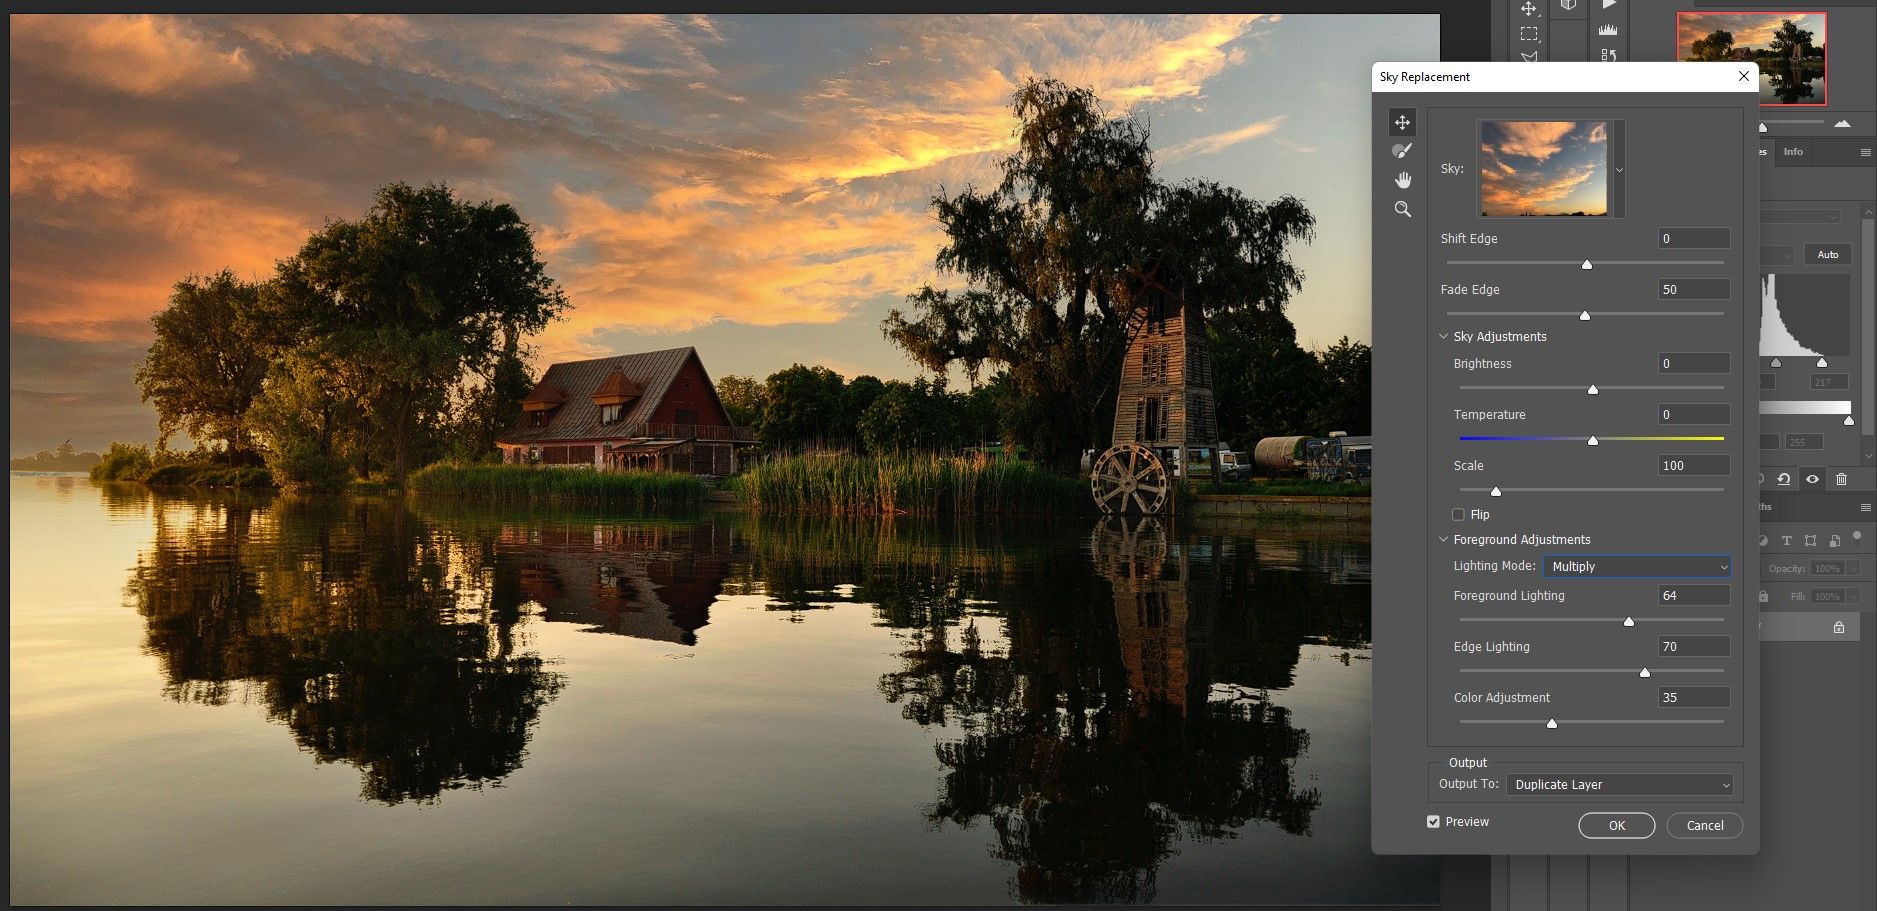
- When the picture is loaded in Photoshop, press ctrl + J to duplicate the layer.
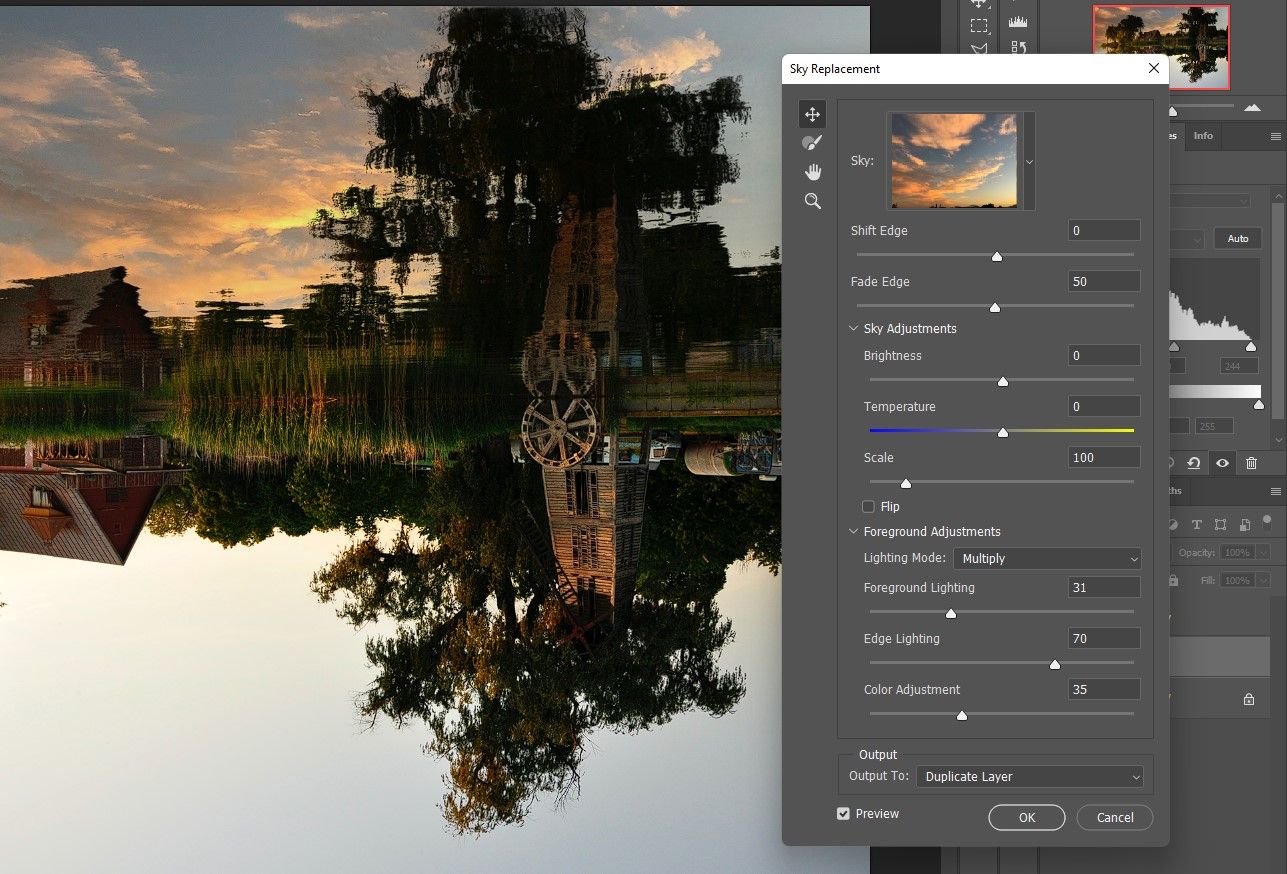
- Go to To edit > Sky alternative.
- Of the heaven Choose a sundown sky that most accurately fits your picture from the drop-down menu.
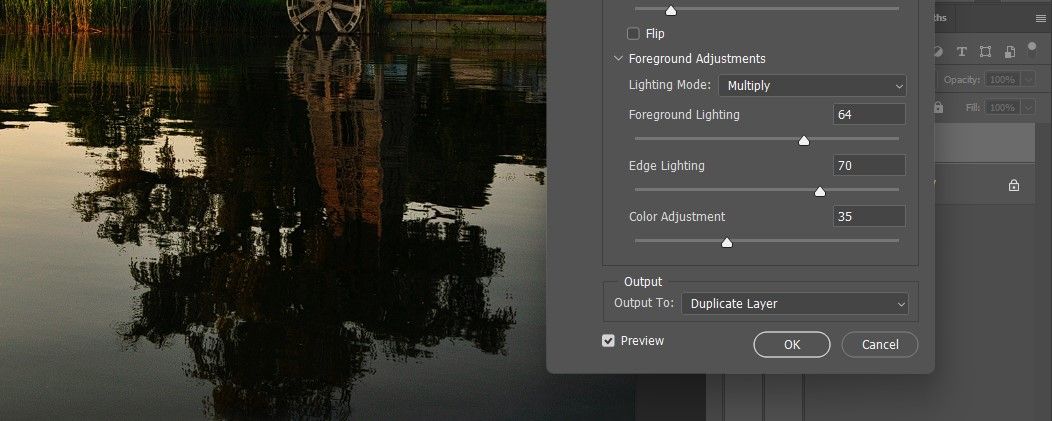
- For this instance, we can’t change any of the settings. However if you need, you must word the modifications to later apply the identical settings to the mirrored layer. We solely change these output to to duplicate layer. Then press OK.
- Disable these Copy stage 1 layer above.
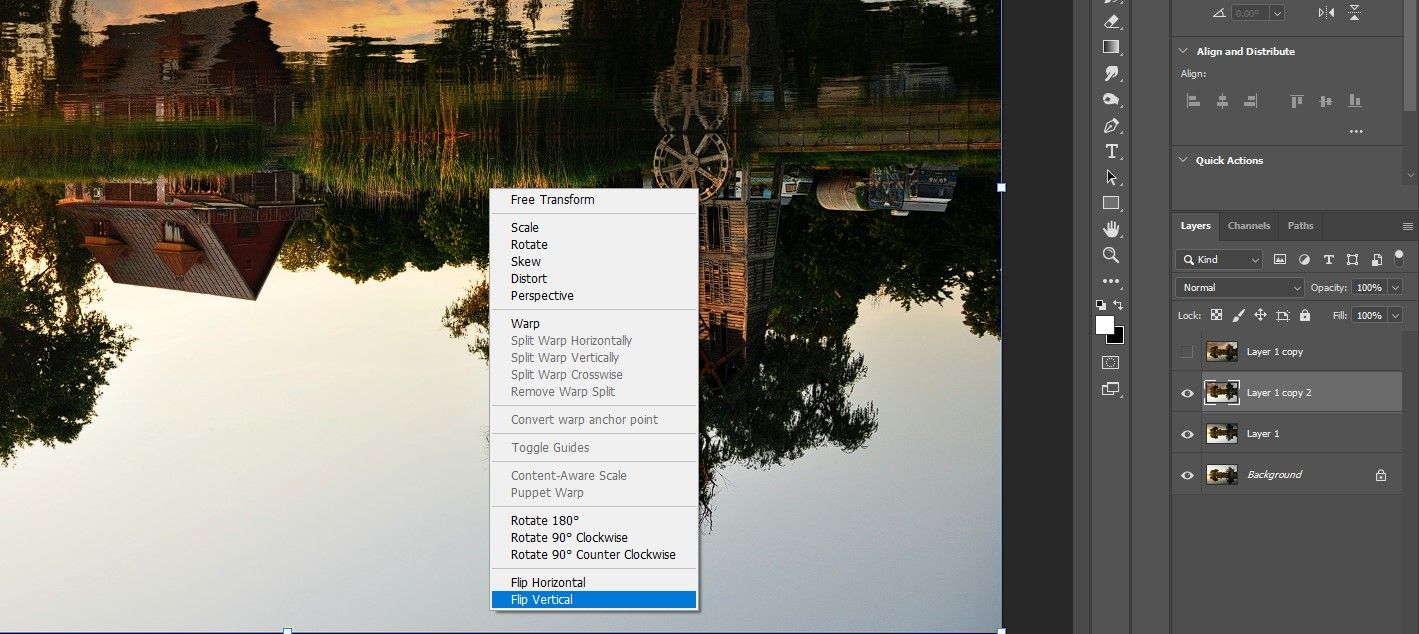
- Select layer 1.
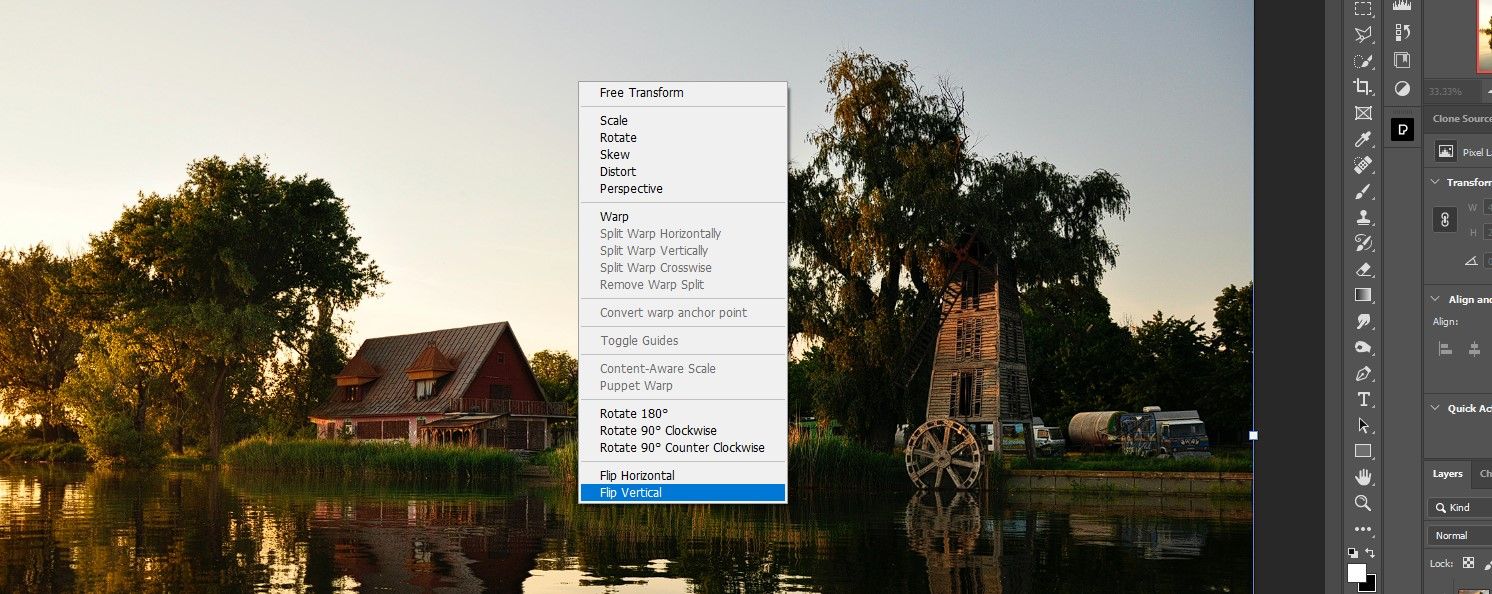
- Press ctrl + T to entry the rework Device.
- Proper click on on the picture and choose it Flip Vertical. Then press the checkmark or Enter in your keyboard.
- Once more, exchange the sky with go to To edit > Sky alternative.
- The identical sky and settings must be preinstalled within the menu. Simply press OK.
- Press ctrl + T for the rework instrument once more. Select Flip Vertical to return the airplane to its authentic orientation. Then press Enter.
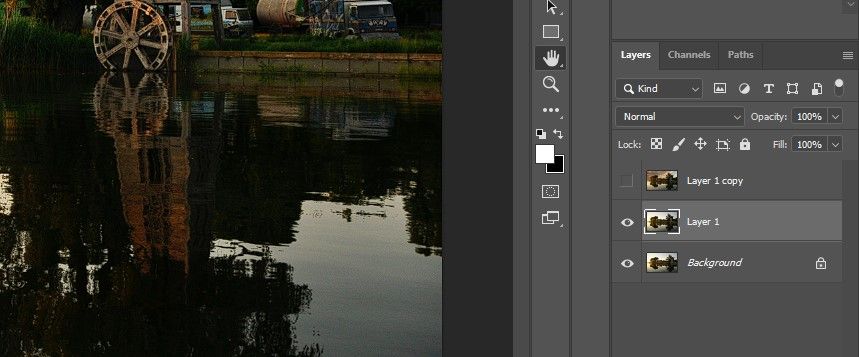
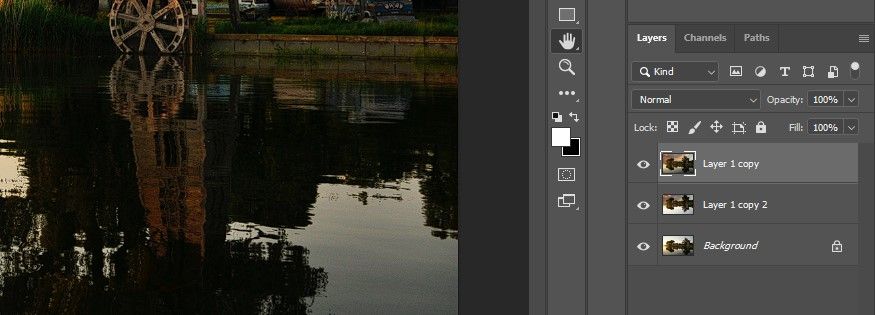
What we’re left with are 4 layers, of which we’ll work with the highest two so as to add an identical reflection within the water.
Would you want to do this in one other program? We additionally present you the way to exchange boring skies with Luminar AI.
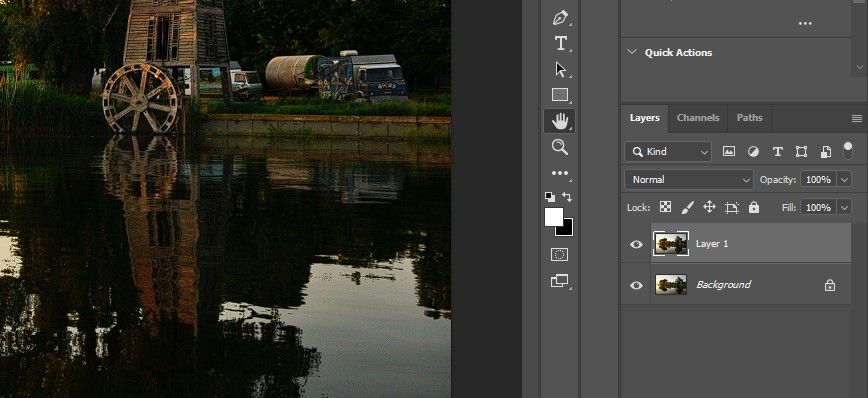
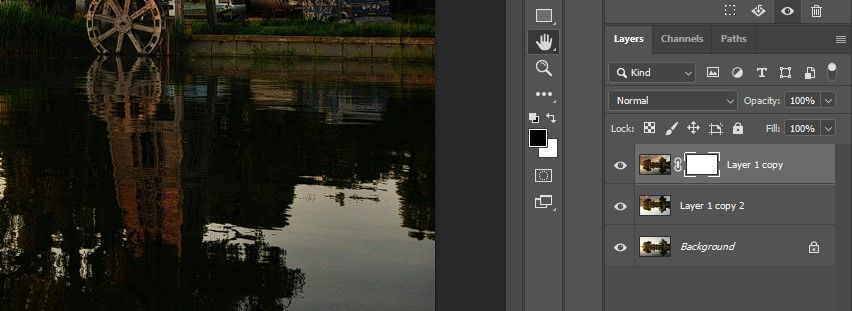
Step 2: Create a masks so as to add the suitable reflection to the water
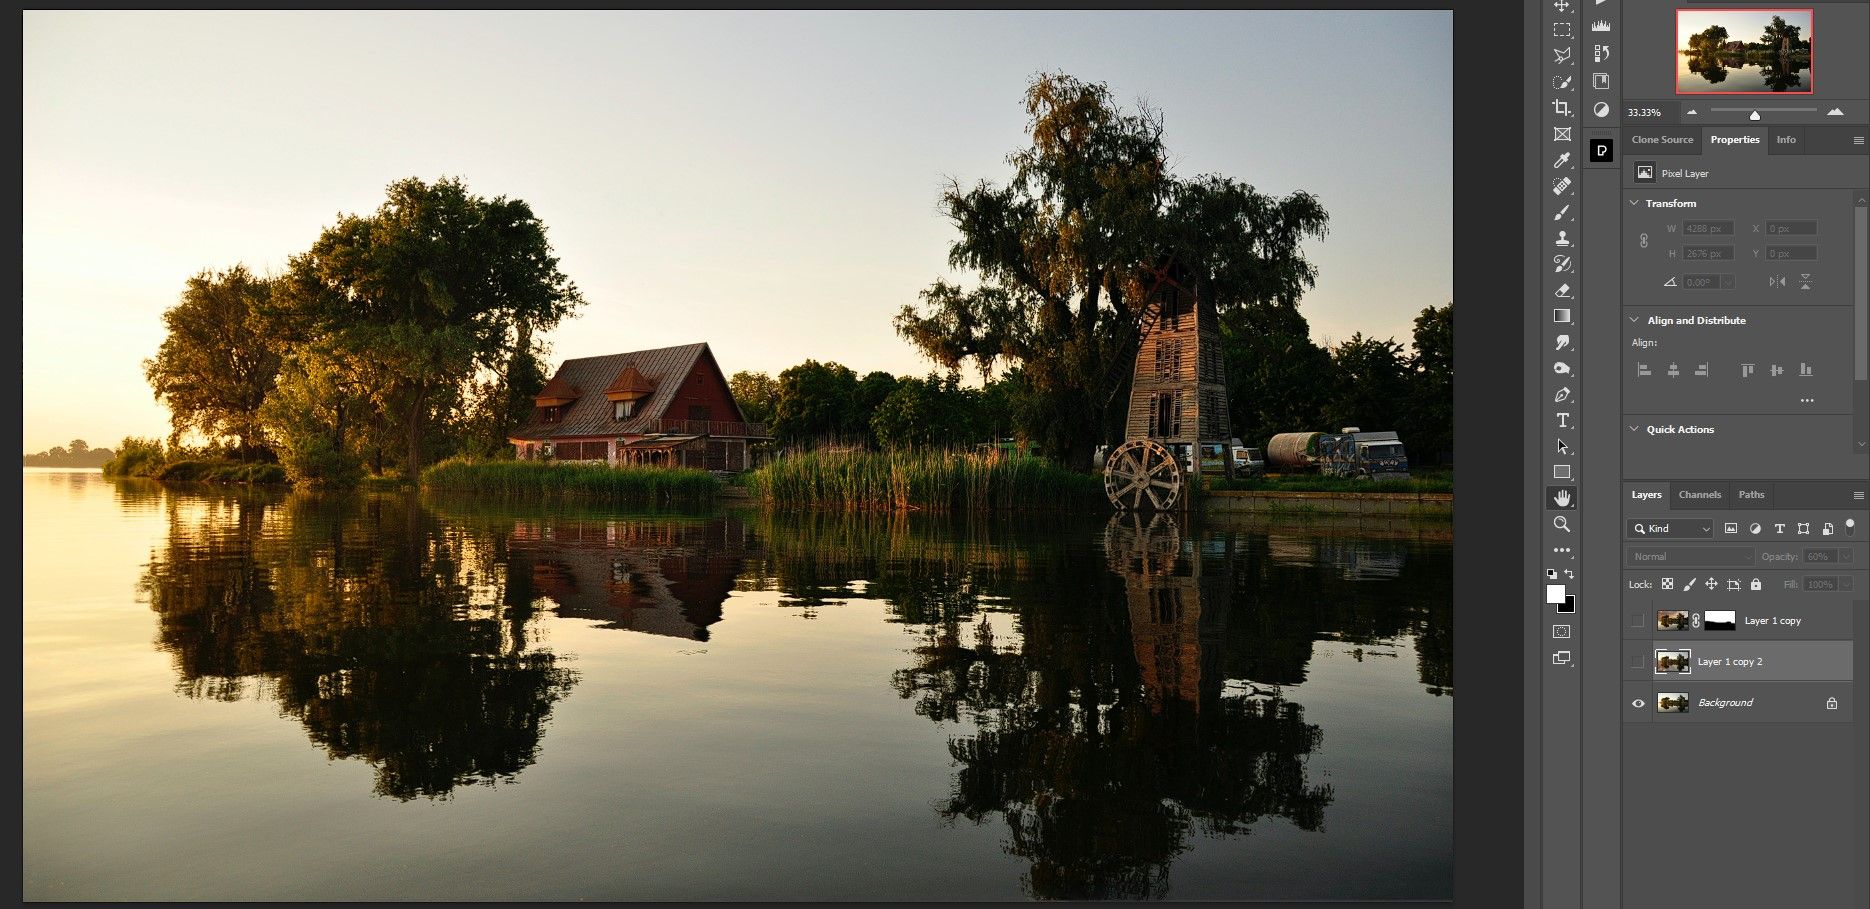
First, let’s clear up our layer stack by deleting layer 1. Then we create a layer masks on high of the layer stack and brush within the reflection on the water.
- drag and drop layer 1 to the trash to delete it.
- unhide Copy stage 1 and choose it.
- Add a layer masks by clicking on layer masks icon under.
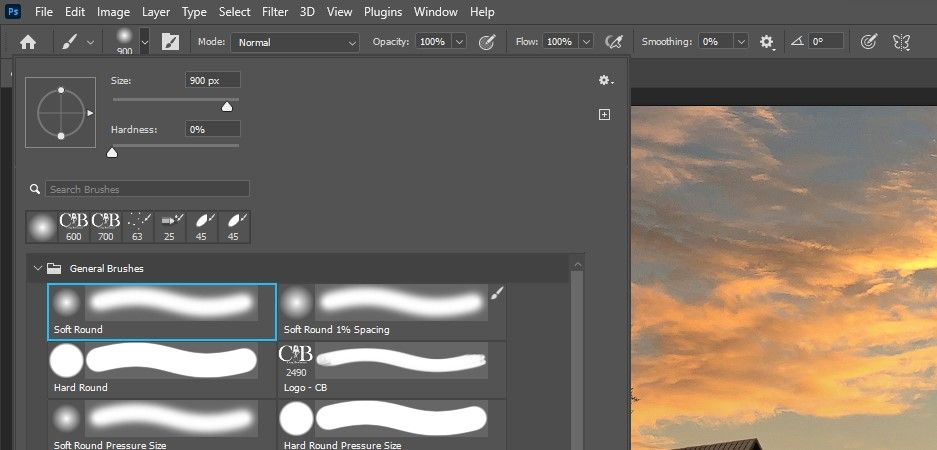
- Press B for the brush instrument and choose a gentle spherical Brush.
- With the masks chosen, swipe within the sky reflection on the backside of the picture. We’ll present you the way to use the Brush instrument in Photoshop if you happen to need assistance.
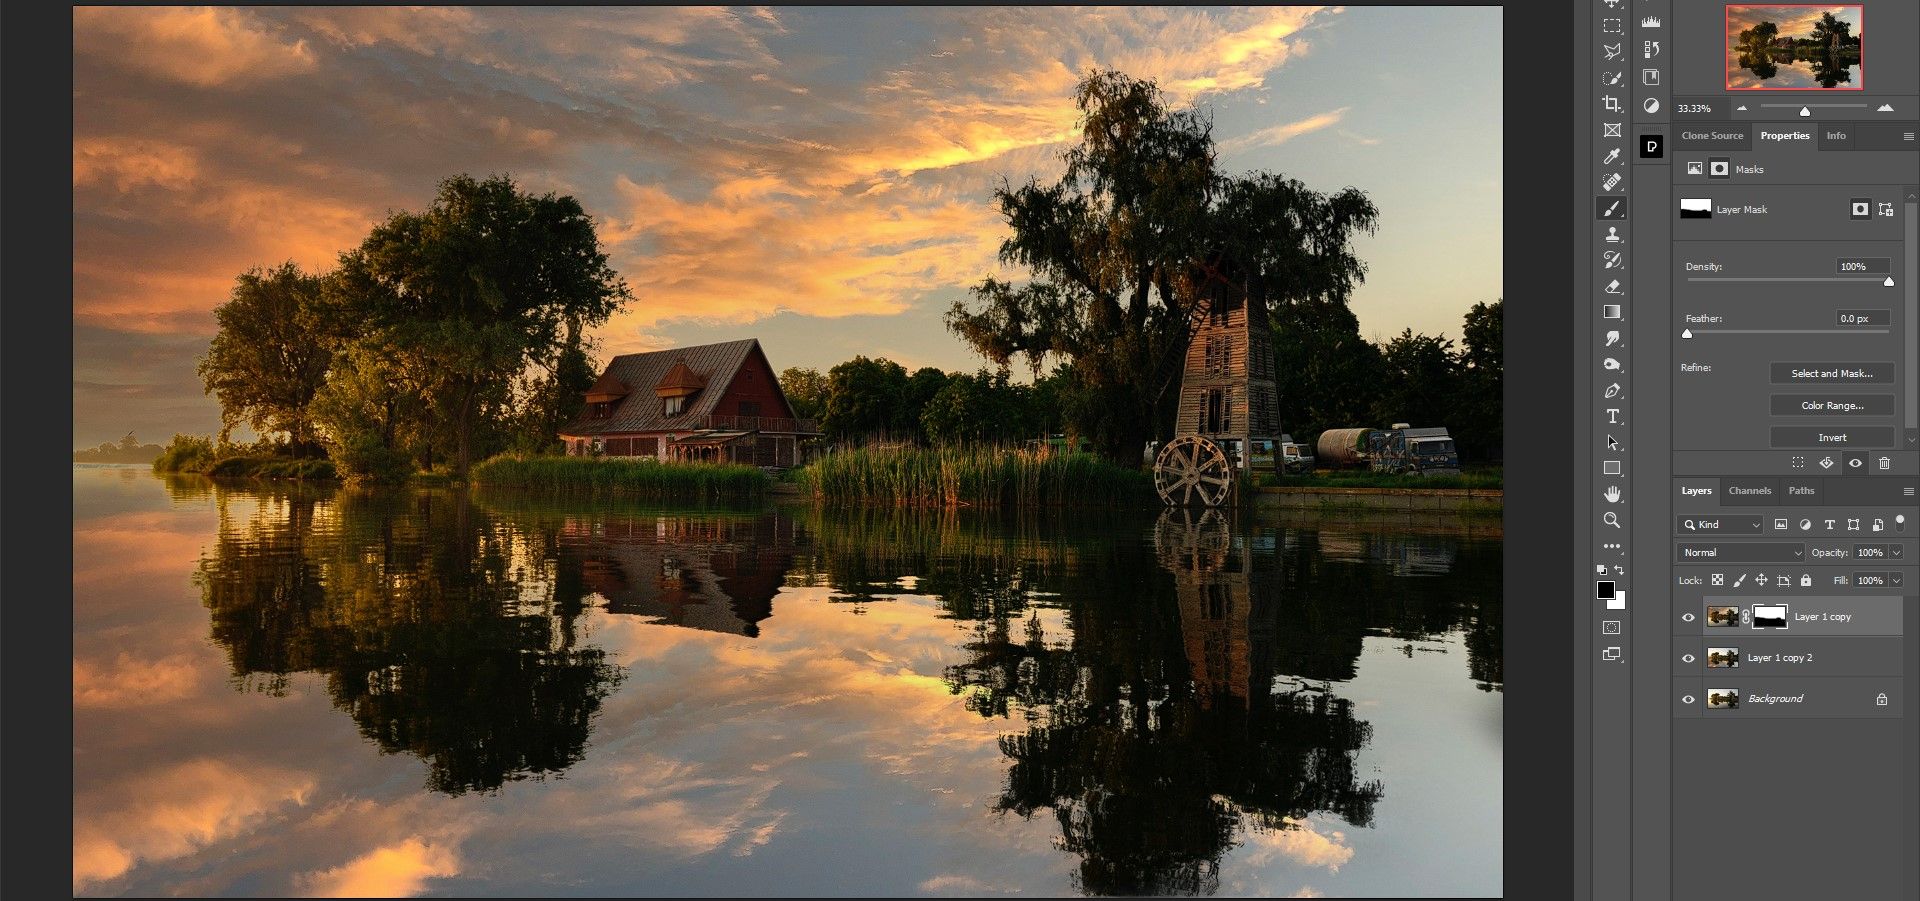
Now we’ve got an ideal copy of the sky’s reflection within the water. However to make it extra real looking, we’ll make a couple of extra changes.
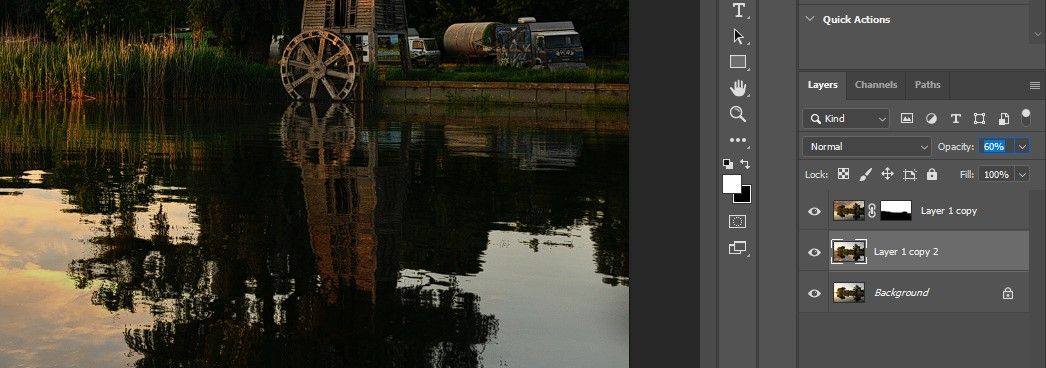
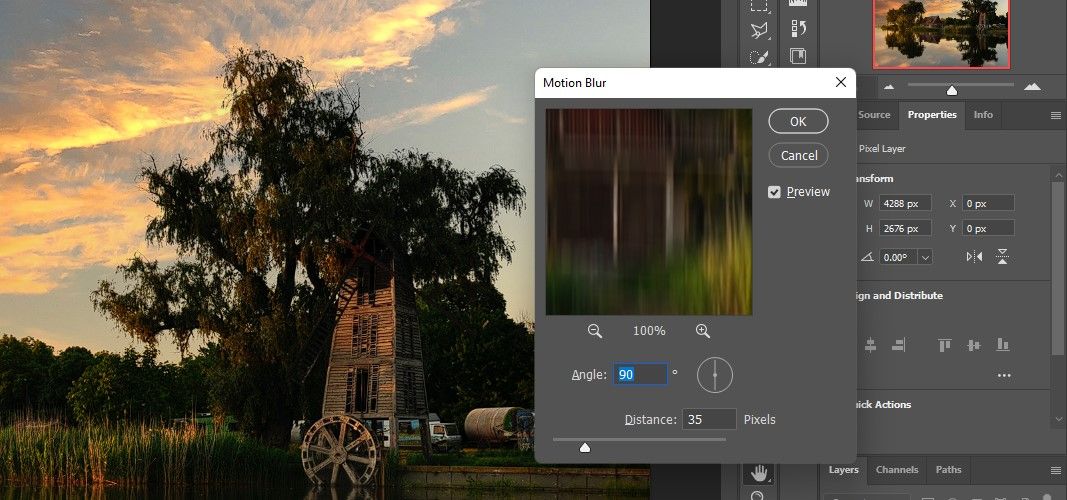
Step 3: Decrease the opacity and add movement blur
In actual life, the reflection of the sky within the water not often matches the depth of the sky itself. We decrease that opacity on the center tier to repair this. We’ll additionally add an elective blur impact to the identical layer.
- Choose the center stage.
- Cut back the opacity to 60%.
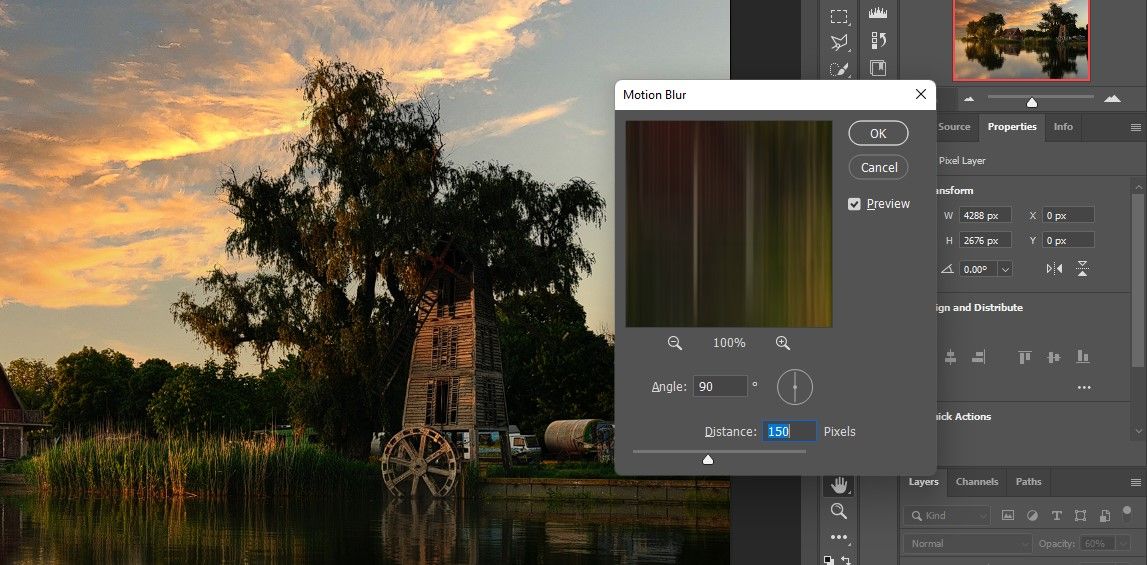
- Go to filter > Blur > movement blur.
- Through which movement blur menu, change the angle to 90.
- change that distance to 150 and press OK.

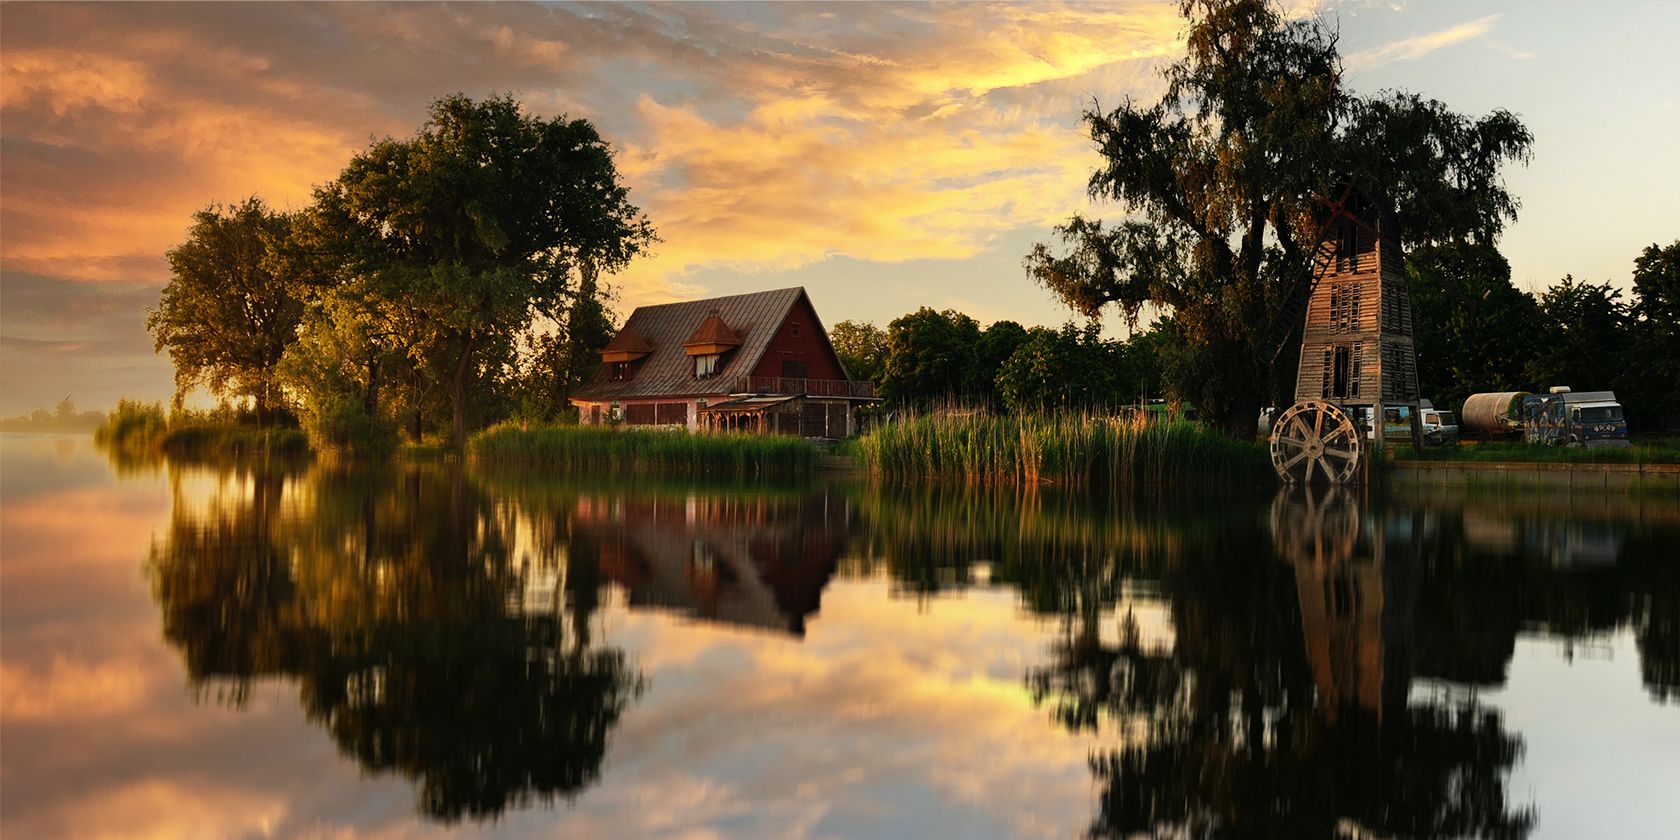
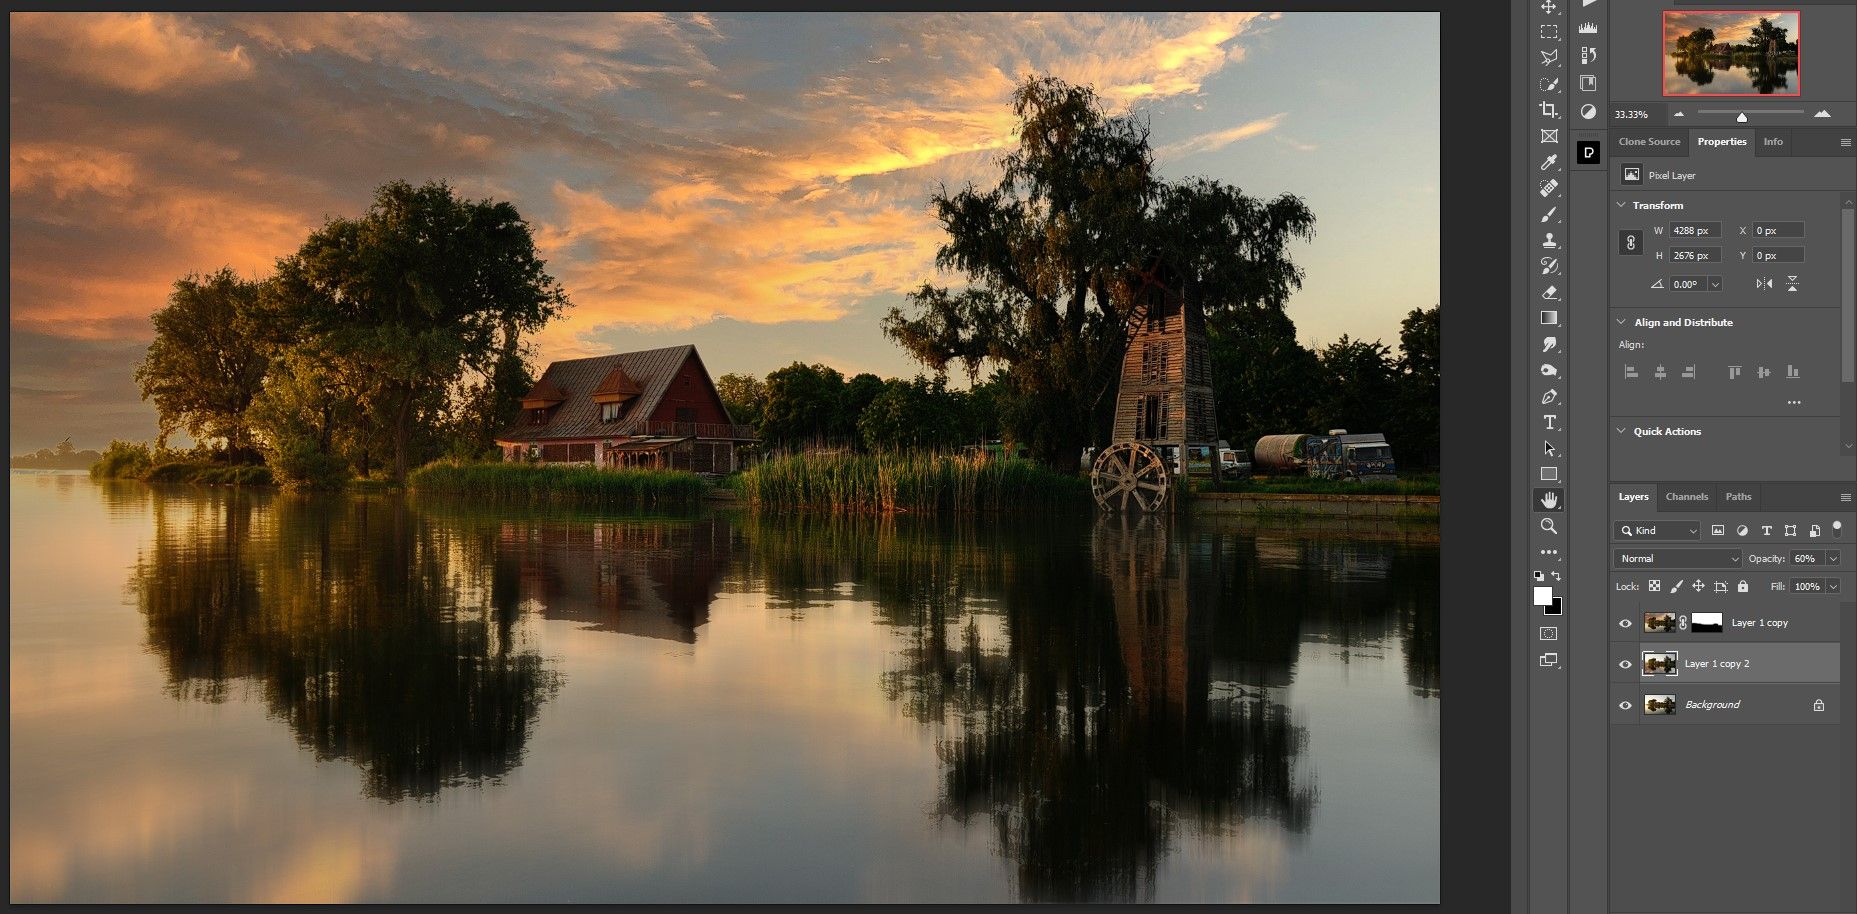
That is it! Listed below are the outcomes:
earlier than
To
Remember to create a water reflection of your sky substitute
Changing the sky in Photoshop is straightforward, nevertheless it would not at all times produce real looking outcomes when there is a physique of water within the picture. This tutorial confirmed you the way to repair that. It might appear to be loads of steps, however as soon as you’ve got practiced this trick, you may add an identical reflection within the water in beneath a minute.
