Create a Frosted Glass Impact in Photoshop

To avoid wasting your self from downloading frosted glass texture pictures or taking your individual photographs by frosted glass, you possibly can create a frosted glass impact in Photoshop.
With this easy-to-follow tutorial, you possibly can create frosted glass of all sizes and styles on your future designs. Whether or not you name it a blurred glass impact, obscure glass, or just frosted glass, the outcomes will probably be spectacular.
create a frosted glass impact in Photoshop
This tutorial works finest if you have already got a picture that you simply wish to cowl your glass form. As soon as you have chosen your picture, open it in Photoshop.
MAKEUSEOF VIDEO OF THE DAY
It doesn’t matter what picture or design you utilize, keep in mind that the feel of frosted glass obscures each wonderful element. Solely use frosted glass results in areas the place element might be misplaced. You may as well create a frosted glass impact in Figma.
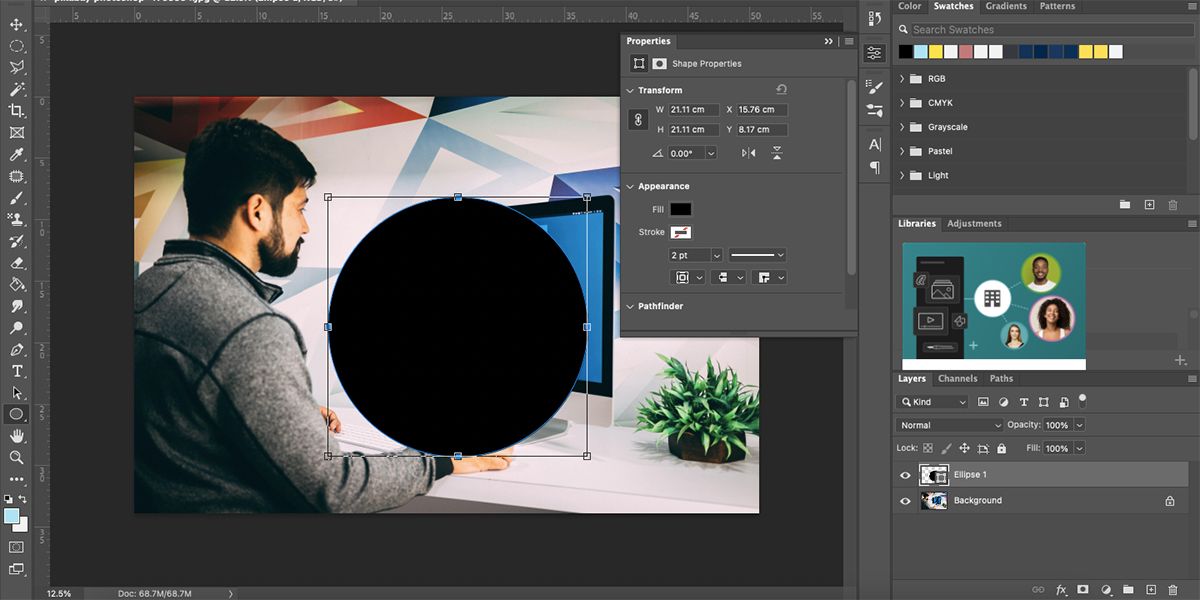
Open a brand new group by clicking the folder icon within the layers panel, however you are able to do this later as effectively. With one in all mildew instruments (u), draw a form wherever in your picture. Through which Traits subject, put the To fill to black (000000) and set the Stroke To none.
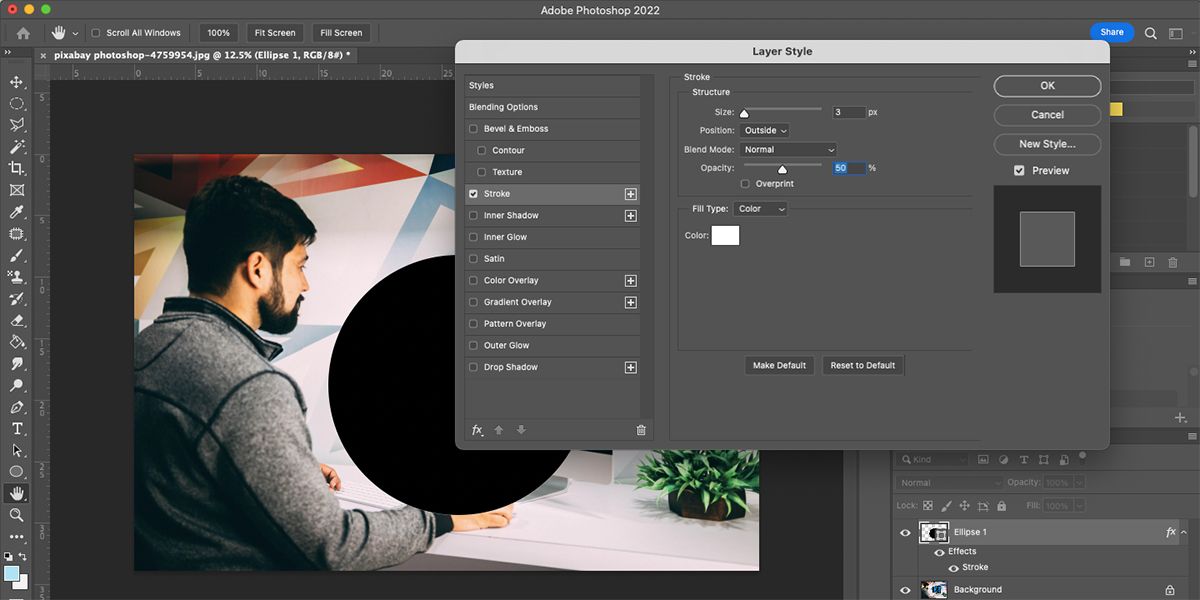
With the form chosen, click on fx on the Layers panel and choose Stroke. Within the Layer Model window, set the properties as follows: dimension as much as 4px, place outwards, mix mode on regular and opacity to 50%. Guarantee imprint is unchecked. Set these fill sort to paint and the colour as white (FFFFFF).
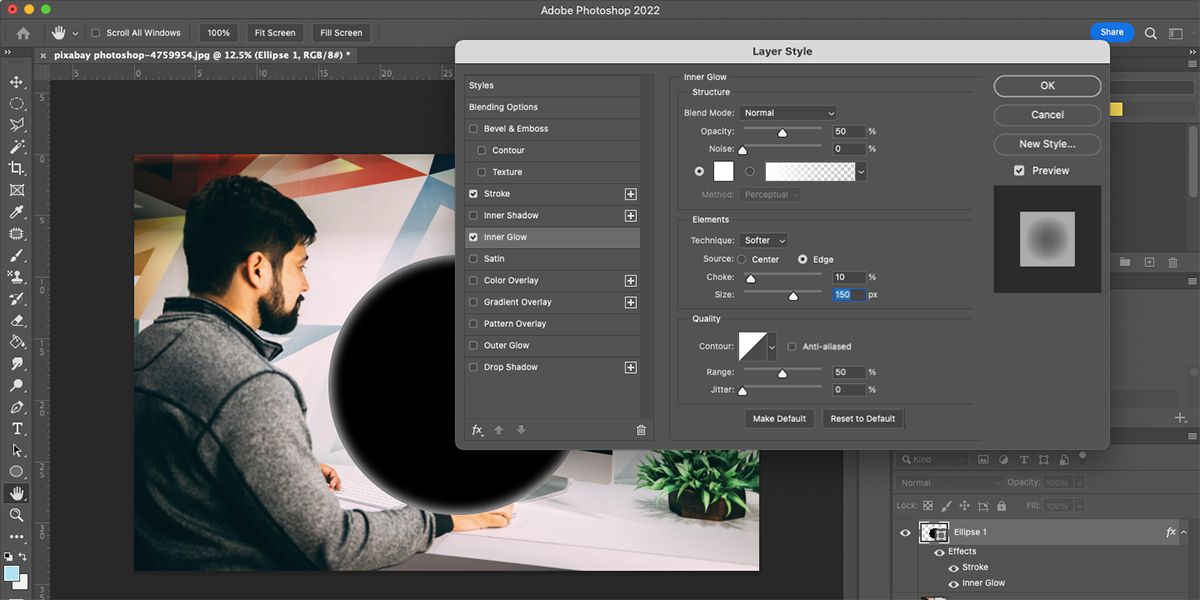
Choose “Layer type” on the left of the window Internal Glow. Modify the internal glow settings as follows: mix mode too regular, opacity to 50% and Noise at 0%.
The colour needs to be set to white and there needs to be a white to clear gradient by default. Sentence Expertise select softer edgeset to throttle till 10 %, dimension to 150%, space to 50% and Tremble to 0%.
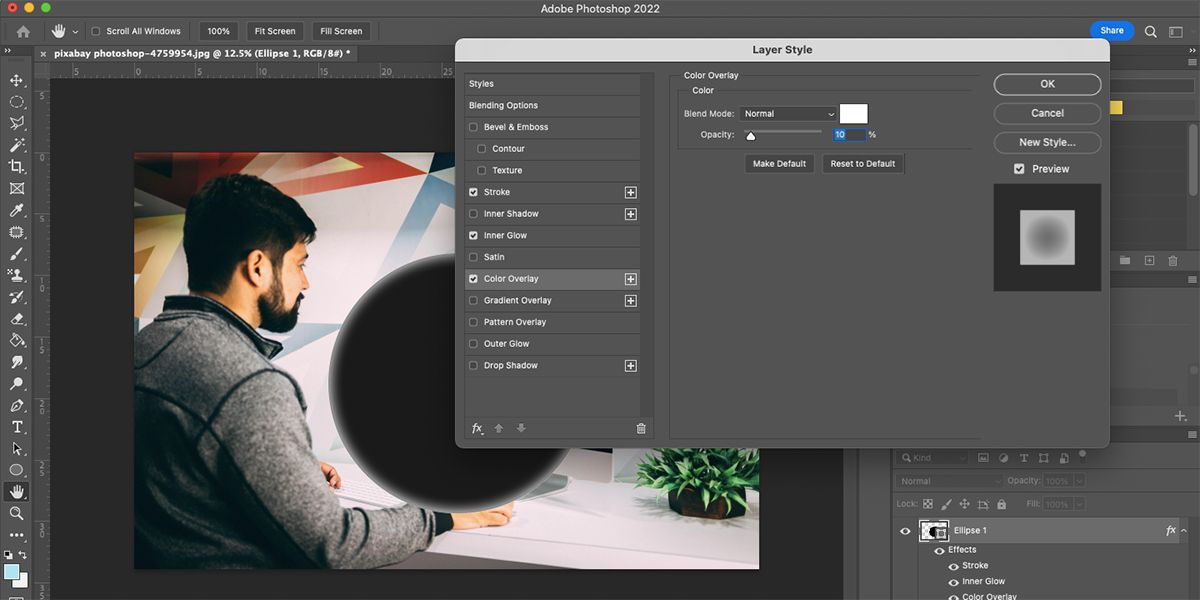
Choose “Layer Model” within the window coloration overlay and set the mixing mode to regular and the colour as white. put that opacity to 10%.
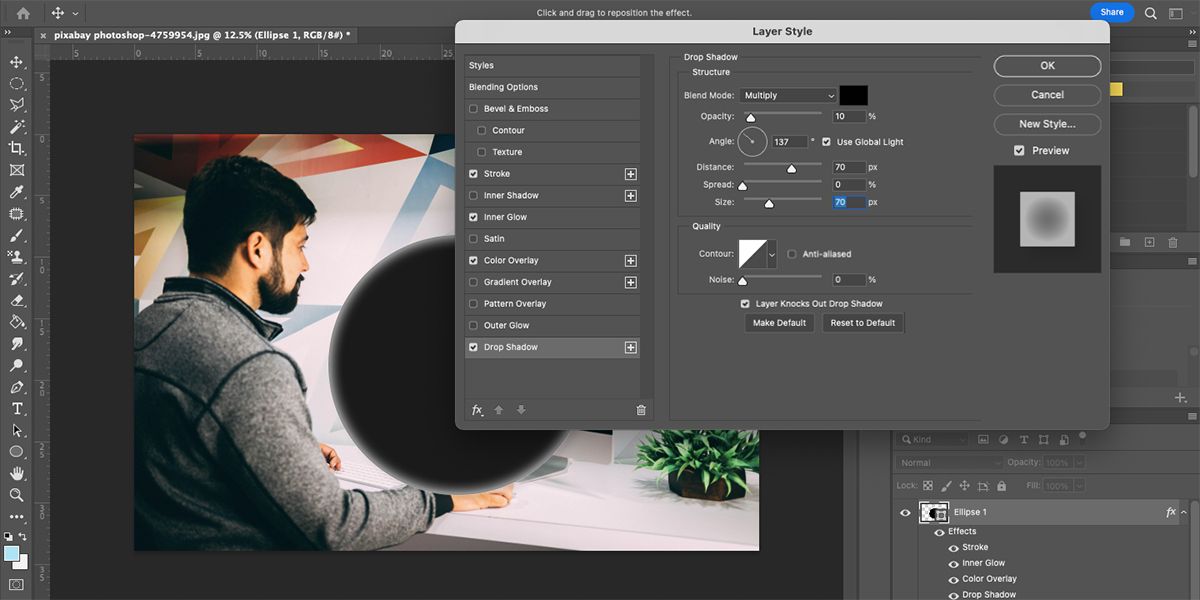
Select final drop shadow within the Layer Model menu on the left. Set the mixing mode to on Multiply with black as coloration. Sentence opacity to 10% and alter the angle to about 137 levels. Sentence distance as much as 70px, Unfold to 0%, dimension as much as 70px and Noise to 0%. click on OK.
This may give your form a white glow across the internal fringe of the form whereas the remainder is black. Duplicate your background layer or foremost picture by proper clicking on the layer and choosing duplicate layer.
Drag and drop the duplicated layer to the highest of the layer group. If you did not have a gaggle folder open while you began, you are able to do so now and drag the form layer and your new duplicate layer into the identical group. The duplicated picture ought to seem within the group above your form layer, primarily hiding the form layer beneath.
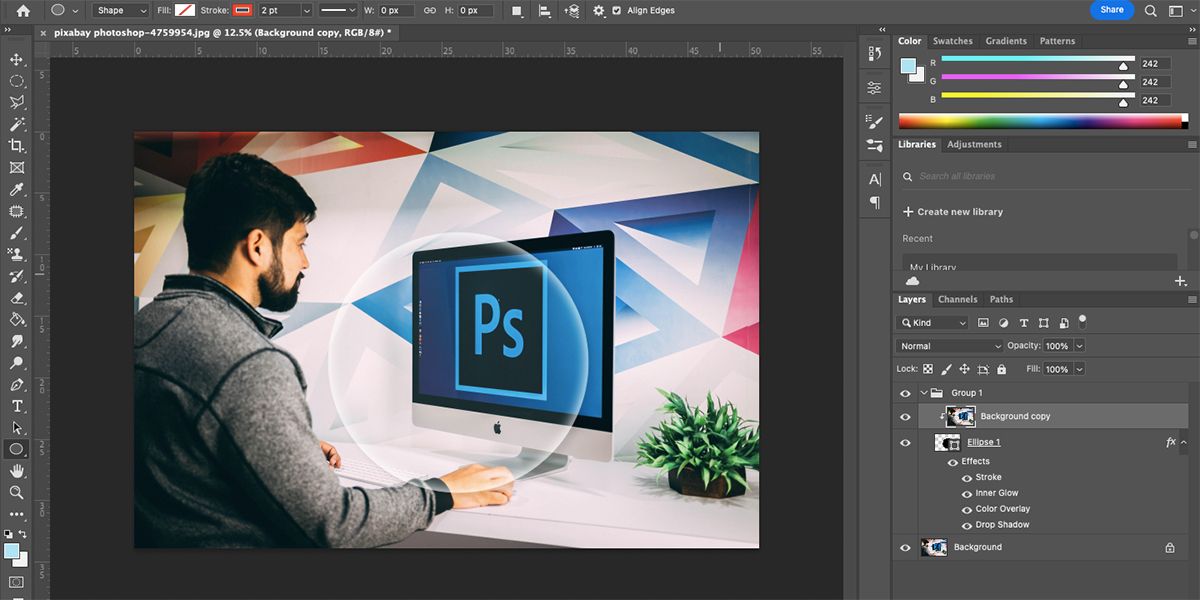
Proper click on on the duplicated layer and choose Create clipping masks. This brings your form again to the entrance and removes all black from it, giving it a glowing white impact.

With the clipping masks layer chosen, go to Filter > Blur > Gaussian Blur. Select between 35 and 50 pixels within the choices field. If you’re glad, click on OK.
So as to have the ability to freely transfer your frosted glass form in your picture, it’s essential choose the form layer. Deciding on the clipping masks layer solely strikes the picture. That will destroy the impact. You may transfer and rework your frosted glass type form wherever in your picture, together with resizing with transformation instrument (Cmd + T for Mac or Ctrl + T for Home windows).
You could want to add different results to your frosted glass, such because the nub impact discovered on privateness home windows in bogs, for instance. It is extremely simple so as to add the dimpled impact to your frosted glass impact.
With the clipping masks layer chosen, go to Filter > Filter Gallery > Distort > Glass.. If the background layer utilized in your clipping masks is vector-based, it should first be rasterized to make use of the filter gallery, however there needs to be a pop-up warning you about this and permitting you to rasterize it if wanted.
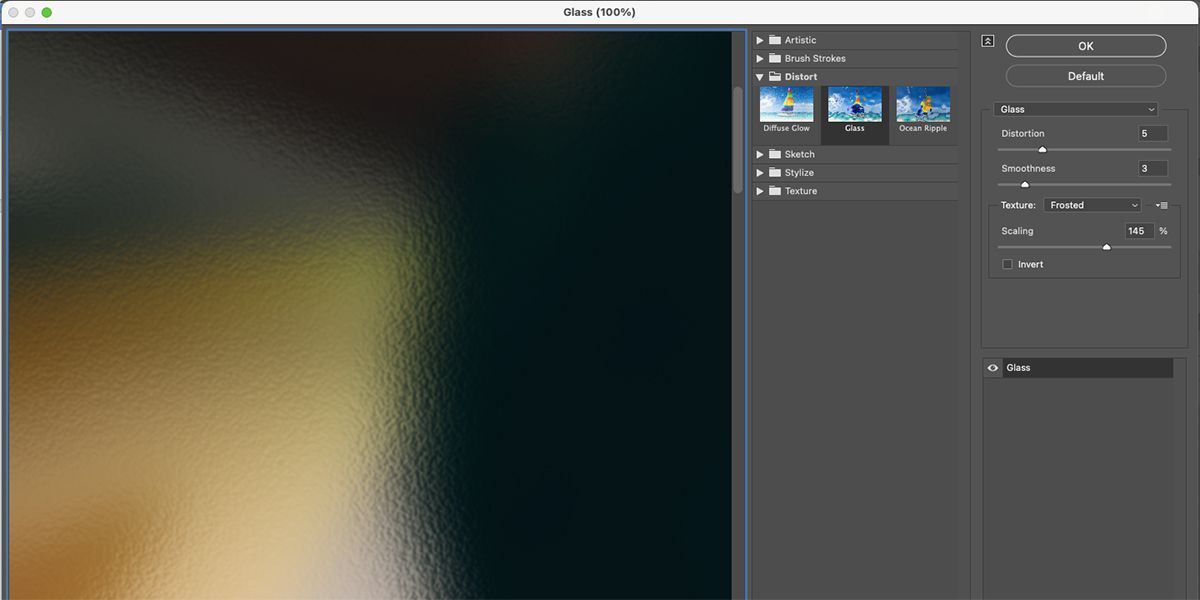
Through which Distort menu for GlassYou may mess around with totally different results, however these are the settings we advocate distortion set to five smoothness set to three texture set to Frosted, and scaling set to 145%. This will likely change relying on the picture and desired outcomes. If you’re glad with the preview window, click on OK.
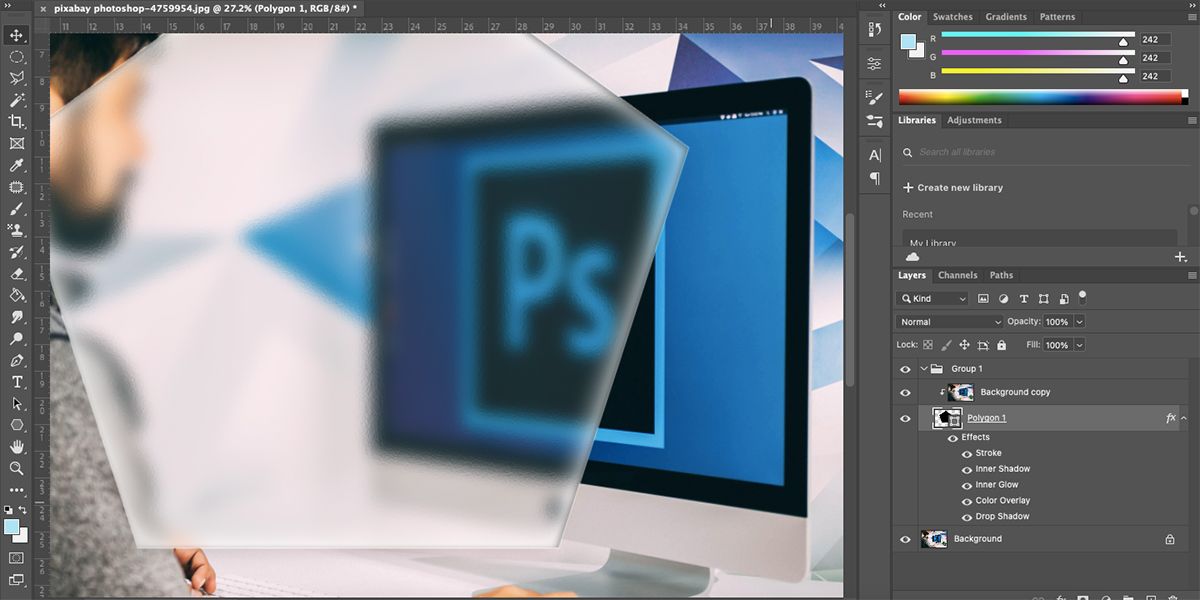
This provides a pleasant texture that provides you a distinct type of glass on your look. If you wish to experiment with extra textures, take a look at our information to creating textures in Photoshop.
Here is how you should use a frosted glass impact in designs
As with every sort of artwork, experimentation is vital to discovering extra makes use of on your designs. An effective way to experiment together with your opaque frosted glass is so as to add a stroke round it. A stroke with a refined gradient naturally enhances a design with out overwhelming the attention.
You should use the frosted glass impact in Photoshop so as to add texture to your digital work. When you’re drawing one thing with home windows or glasses, the frosted glass texture is a good way so as to add some realism to your digital paintings. You may add frosted glass to lifelike pictures together with many different results like glowing object.
When you use Photoshop for web site design, you should use this frosted glass impact for search bars or button backgrounds that mix seamlessly with the web site background picture. The impact blends effectively with a background with out dropping form.
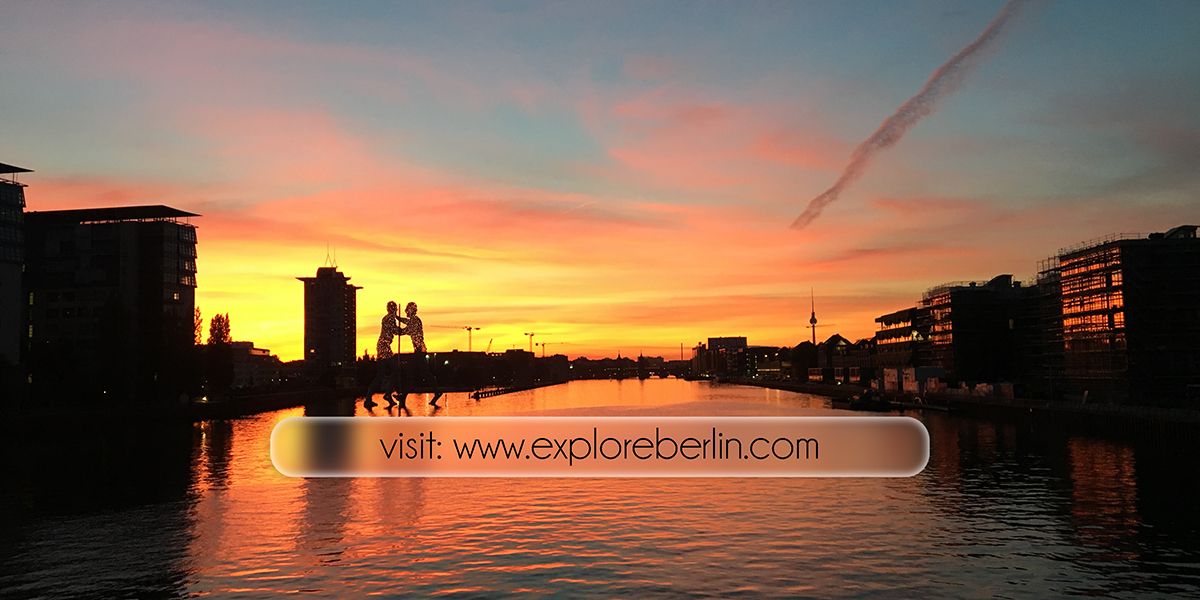
As within the tutorial, utilizing a big form with a blurred glass impact on prime serves as the right solution to have a posh background with a transparent part for textual content like a title or contact info. Who says a background must be plain and boring?
Add lifelike texture to your pictures with a frosted glass impact
With the brand new expertise you have discovered, you can rework pictures and pictures into extra helpful property. With so many makes use of for frosted glass results in your work, that is certain to be a way you will use repeatedly with out utilizing it twice for a similar factor.
You should use set shapes like circles or squares, and even draw a customized form to make your jar match. Experimenting with strokes, textures and totally different shapes opens up a world of design potentialities to enrich this fabulous approach.
