Easy methods to Add a Paint Drip Impact to a Portrait in Photoshop

If you wish to add slightly character to a portrait and make it look cool, strive making a paint drip impact in Photoshop. This impact makes the underside of a picture appear like it is dripping paint. It is a enjoyable strategy to make a photograph distinctive and straightforward to realize. Allow us to present you the way.
Step 1: Select an acceptable picture
For a profitable drop of paint impact, the perfect picture is one the place the underside of the topic is comparatively symmetrical in each form and colour.
If you wish to observe us, you may obtain the pattern picture we’ll use without cost from Nappy.co. After you have your picture, open it up in Photoshop.
Step 2: Select your subject
Go to Select > theme to decide on the topic in your image. If in case you have a extra complicated picture, you need to use to manually choose your topic Magnetic lasso device (L) or the lasso device (L) on the toolbar. With you may alter your choice Subtract Possibility on the Magnetic Lasso device.
Copy choice (command + C for Mac and ctrl + C for Home windows) and open a brand new layer within the Layers panel. Paste the choice on the brand new layer (command + v for Mac and ctrl + v for Home windows) and identify the brand new layer “Topic Cutout” by double-clicking on the layer’s identify.
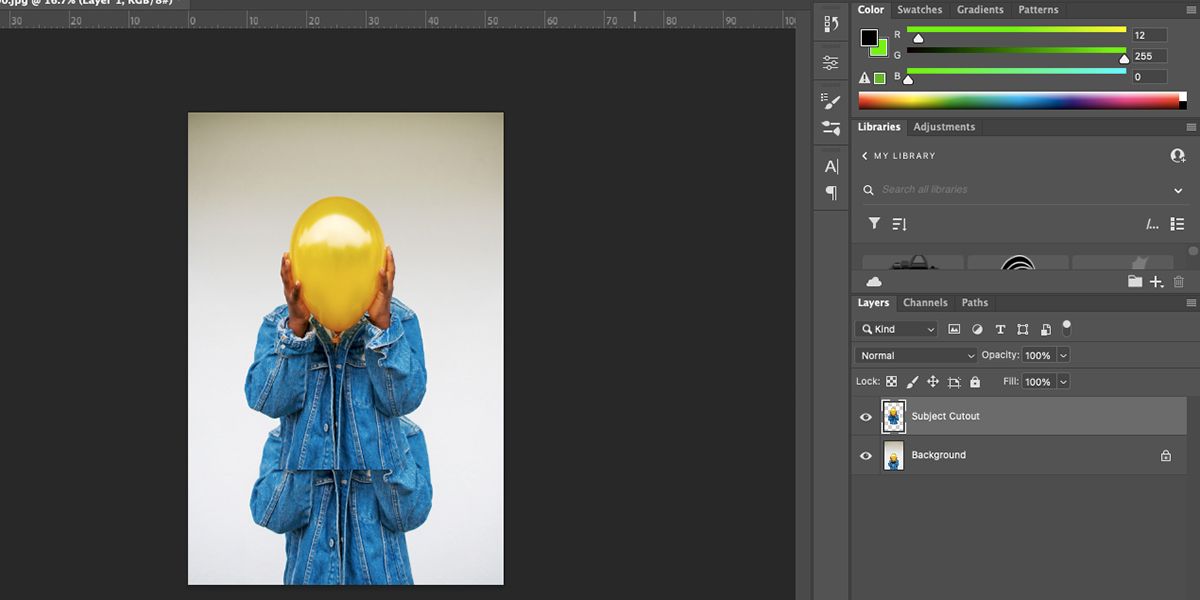
Transfer the pasted choice to the middle of your artboard.
For those who want a refresher on utilizing the Topic Choose device in Photoshop, try this information.
Step 3: Add a gradient
Choose the Motif Cutout layer. Proper-click on it and choose Convert to Sensible Object. The icon in your layer’s thumbnail will change to indicate that it is now a Sensible Object.
Choose the background layer with the unique photograph on it. Go to layer > New fill layer > gradient to open a historical past layer. Within the Gradient Background dialog field, identify this layer. Go away the opposite settings as default and choose OK.
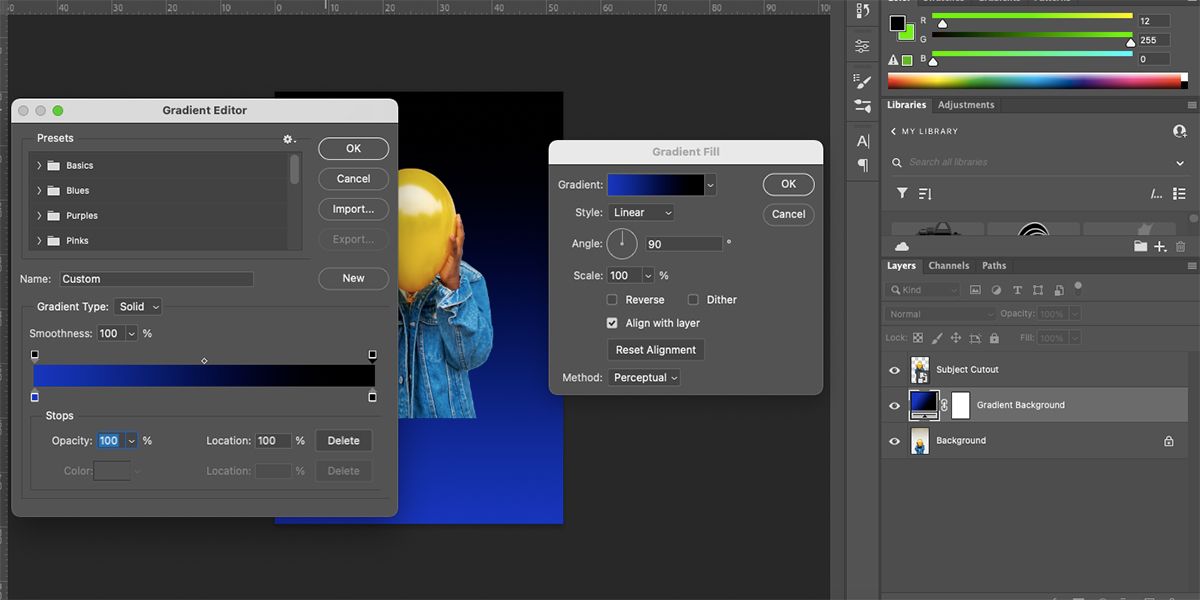
Within the Gradient Fill dialog field, click on the gradient colour rectangle to deliver up the gradient editor. Select a colour on your gradient for one facet and set the opposite facet to black (#000000). To alter a colour, double-click a backside slider tab to open the colour picker.
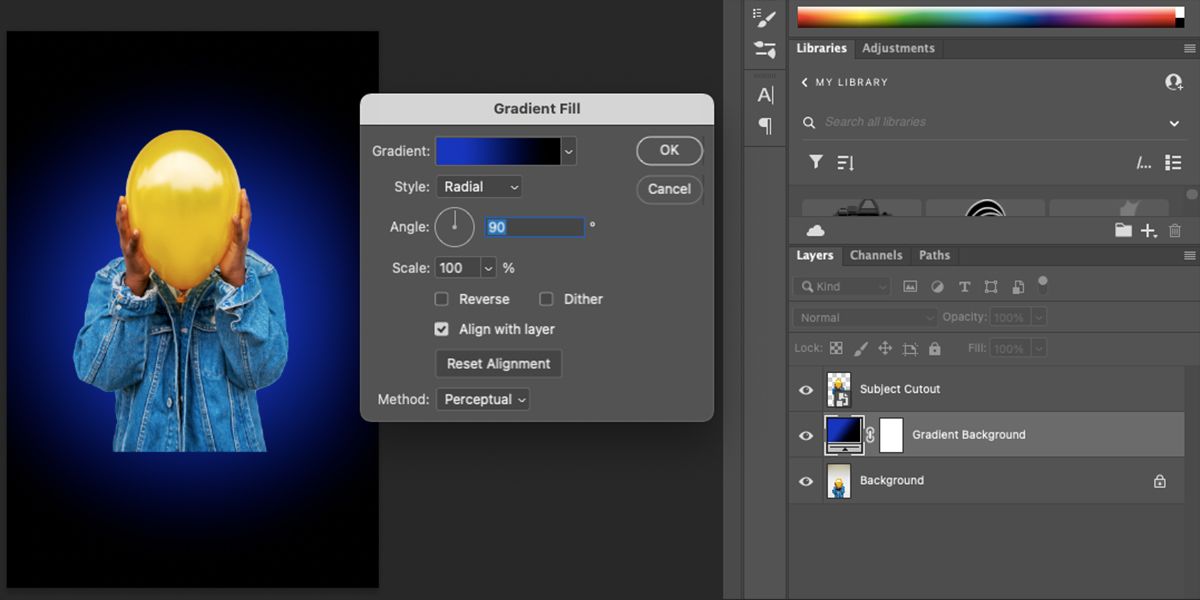
After selecting your gradient, choose it OK within the historical past editor. Then within the Gradient Fill dialog field, set the gradient kind drop all the way down to Radial and choose OK.
Choose the Motif Cutout layer. Go to filter > Liquefy.
Underneath Brush Software Choices, set the choice dimension till not less than 200, though you may change the comb dimension throughout the liquification course of to naturally obtain completely different droplet sizes. Set these density round 80 and the Print round 60, though you may change these to your individual preferences. And eventually examine the pin edges Crate.
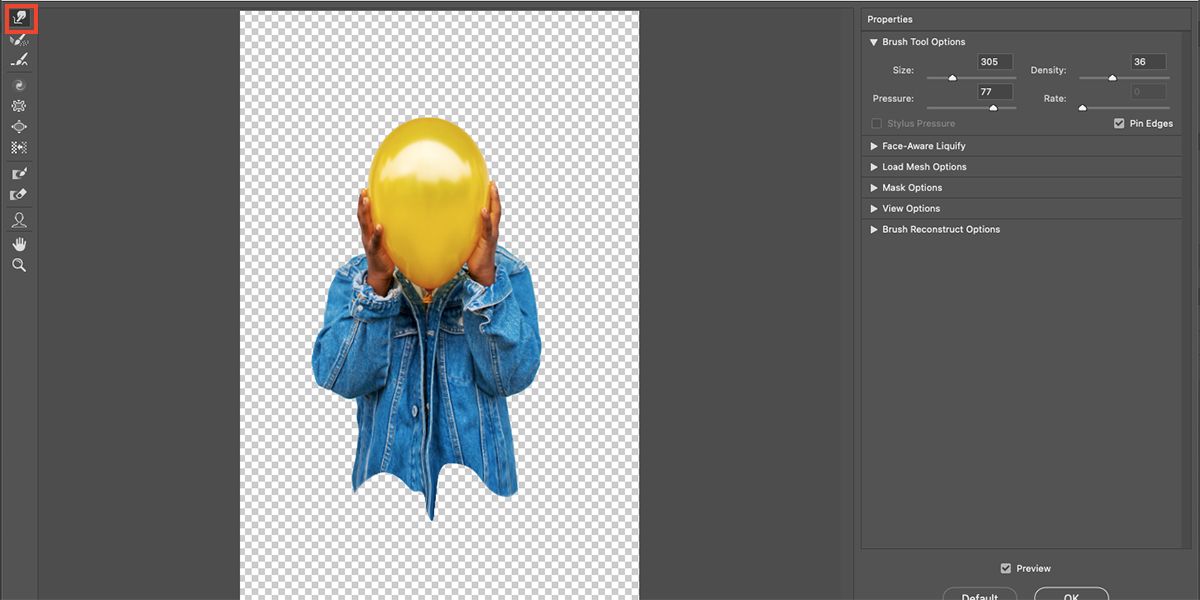
Now create the paint drops…
Use the Ahead warp device (W) to maneuver elements of the picture down. To make a drop seem longer, repeat the identical movement on a selected part till it reaches the specified size. When you find yourself completely satisfied along with your drops, select OK.
If you wish to discover the Liquify device a bit extra, you need to use it for lots of issues corresponding to: B. to create a cut up colour impact or add a smile to a portrait.
We may maintain the blobs on a single layer, however to provide your dripping paint portrait a extra rounded consequence, we will make the blobs seem to go all the best way across the topic.
Step 5: Create a rounded view
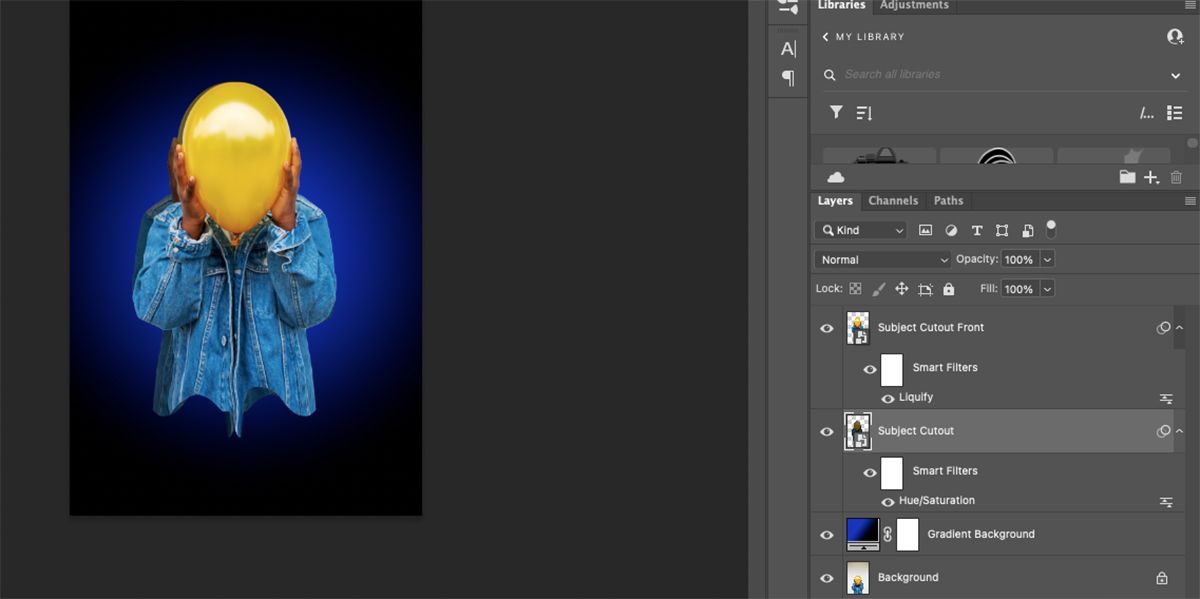
Within the Layers panel, duplicate your topic cutout layer by right-clicking on the layer and choosing duplicate layer. Double click on on the layer’s title to rename it “Topic Cutout Entrance”.
To ensure we do not lose the liquification results, we have to make the “Topic Snippet” layer a Sensible Object once more. Choose the Motif Cutout layer, right-click and choose Convert to Sensible Object.
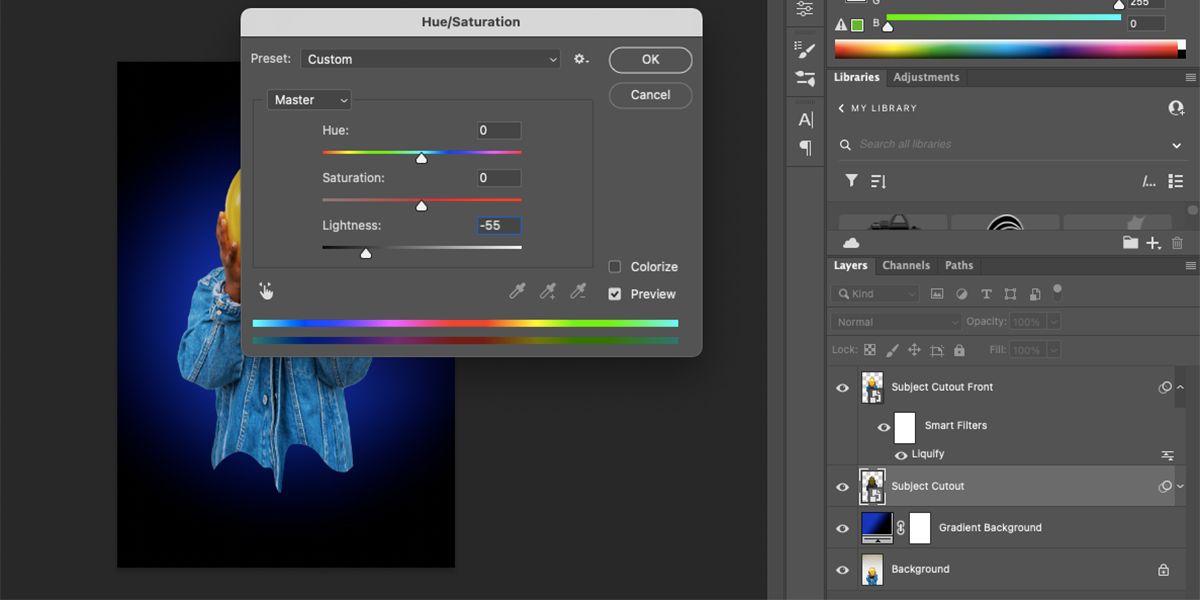
Choose the Motif Cutout layer and open it Hue/Saturation the settings (command + u for Mac and ctrl + u for Home windows). Set these ease slider too -55 however allow them to hue and saturation slider alone. click on OK.
With the layer nonetheless chosen, go to “Lower Out”. To edit > remodel > Flip horizontally. This serves because the again of the drop and creates a totally rounded impact.
Now you can see each cropped pictures. Use of transfer device (v), align the highest layer with the again layer to get the bottoms of the photographs as shut collectively as potential.

Whilst you need to see the drops in each pictures, contemplate eradicating duplicates of the individual’s head or further elements of their arms. To cover them, go to layer > layer masks > reveal the whole lot. Choose the masks thumbnail on the “Topic Cutout” layer and set its colour to black (#000000).
Use of brush device (B), swipe over any elements of the again that you do not need to see, e.g. B. an additional shoulder. For those who’re proud of the entire flipped and duplicated drops under, go away these alone, however you too can masks any you are not proud of.
Step 6: Add some depth
When you’re proud of the whole lot you are seeing and have hidden unpleasant particulars, it is time to add some depth to the drops to make them look extra sensible.
Staying on the “Topic Cutout” layer’s chosen masks, go to layer > layer fashion > interior glow, or click on within the Layers panel Add new layer fashion > Inside Glow.
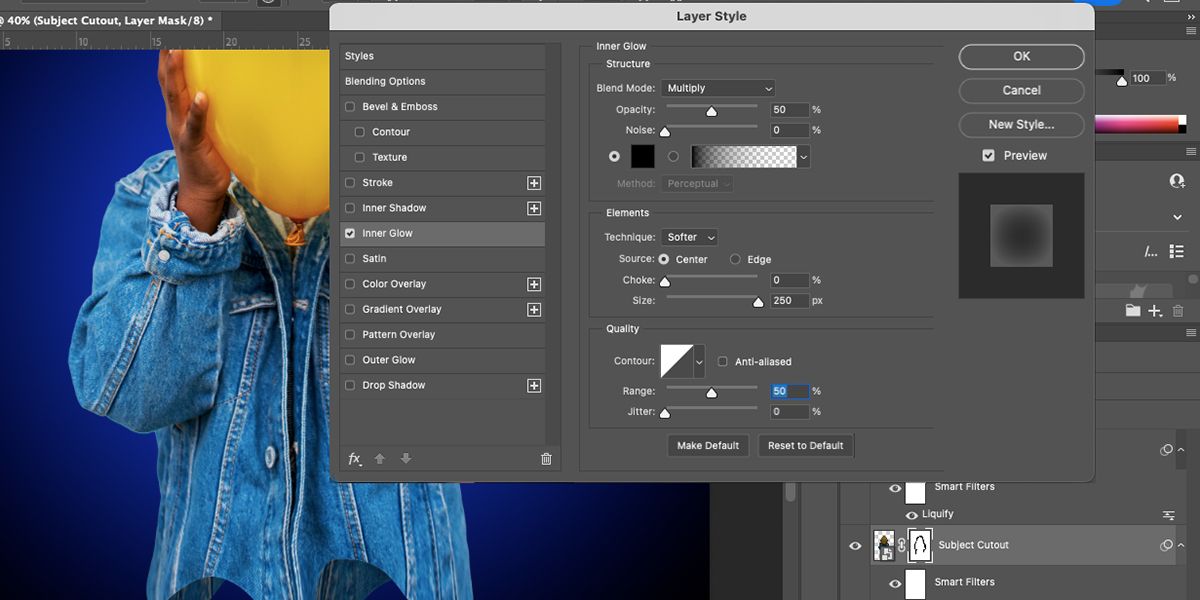
Within the Layer Fashion dialog field, set the mix mode to Multiply with a Opace from 50%. Set the colour to black (#000000) by double-clicking the colour field to open the colour picker.
Set beneath objects Expertise to softer and examine middle on the supply choices. transfer the throttle slider too 0the dimension slider too 250pxand set the space to 50%. Select OK to use the fashion. This provides a shadow impact on the again droplet layer.
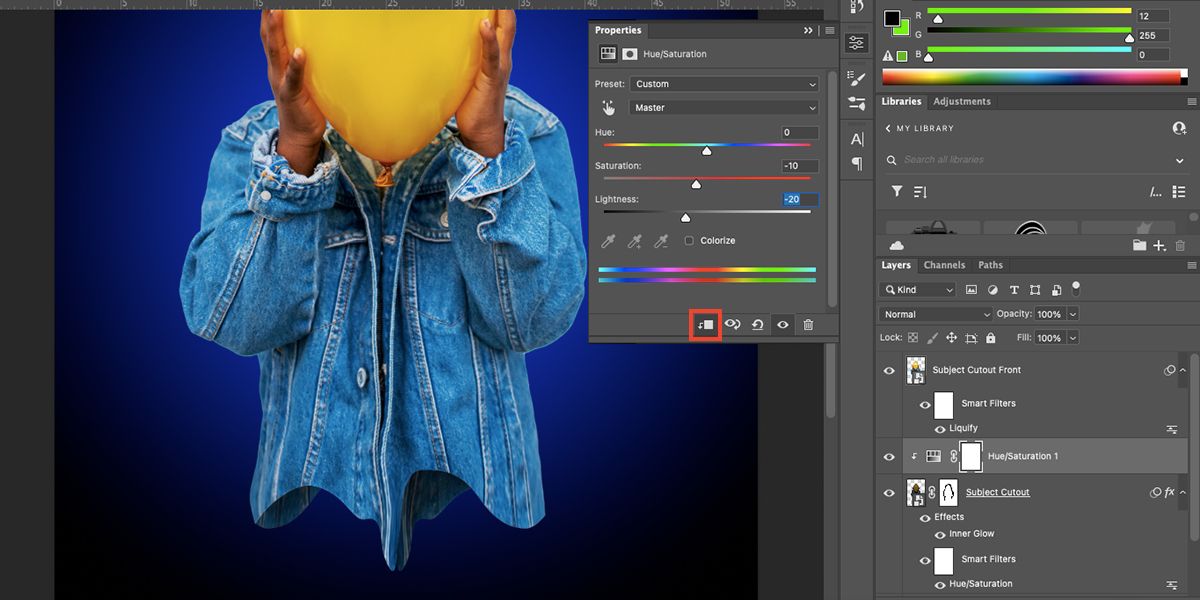
Then go layer > New adjustment layer > Hue/Saturation and click on OK when the layer panel seems. Set the Hue/Saturation properties within the settings hue to 0, saturation to -10and ease to -20. Then click on the Clipping Masks button on the backside of the window.
Choose the “Topic Cutout Entrance” layer within the Layers panel and choose Add a layer fashion > Bevel & Emboss.
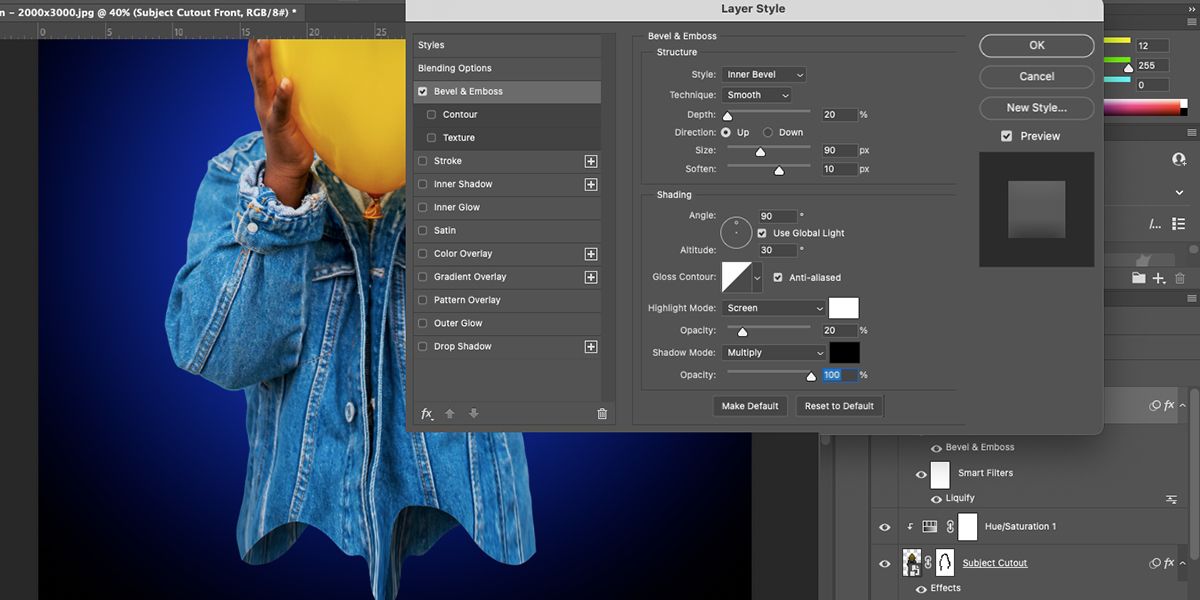
Set these fashion to Inside bevel, Expertise to Clean, depth to 20%and choose that Excessive directional button. Set these dimension to 90px and Soften to 10px.
Underneath Shading, set the angle to 90 levels and the Peak to 30 levels. Set these spotlight mode to Display screen with white colour (#FFFFFF) and put the opacity to 20px. Set these shadow mode to Multiply with black colour (#000000) and put the opacity to 100%. Select OK.
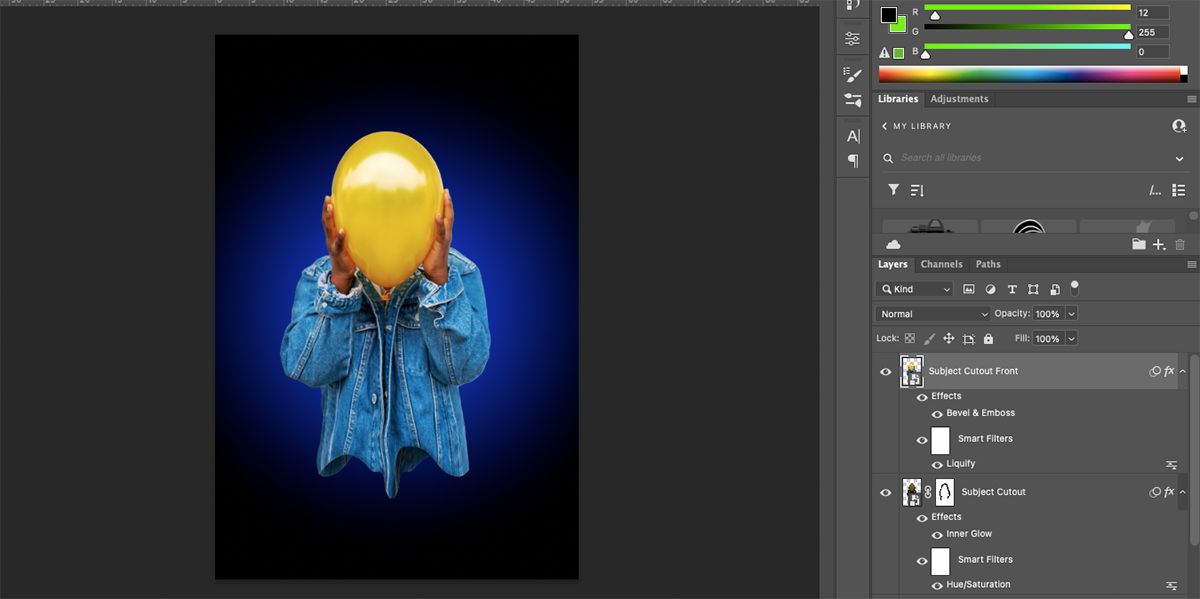
Now you may have a portrait with a paint drip impact. These settings have been only a information if you happen to adopted our instance picture, however you may alter them as wanted on your personal paint dripping portraits.
For those who’re on the lookout for one other approach so as to add a enjoyable aspect to your portraits, you may simply add a glow impact in Photoshop.
Add a cool paint drip impact to your portraits
By following this paint drip results tutorial, you may simply add an eye catching aspect to your portraits in Photoshop. Though there are numerous steps, they aren’t tough. Have enjoyable with the Liquify Software, Layer Types and Masking Instruments to finish this superior look.
