How you can Flip Photographs Taken on Your Smartphone Into Textures Utilizing Photoshop

If you happen to get pleasure from utilizing your personal photographs in your artistic initiatives, there’s nothing fairly like planning forward and photographing textures for future use.
On this tutorial we’ll present you how you can use Photoshop to transform photographs taken along with your smartphone into textures.
Why take photographs of textures along with your telephone?
Textures are extraordinarily helpful for including artistic touches to your photos. They’ll act as backgrounds when wanted to take away distractions or add curiosity to a scene. Textures, because the identify suggests, will also be used so as to add texture to totally different components of a picture to create photograph compositions or collages.
As well as, a group of various textures ensures that you simply by no means have to make use of different folks’s photographs in your personal work. You should use photographs of the ground, partitions, tree bark, paint chips, rust, metallic, or some other kind of floor.
The phrases “texture” and “background” are sometimes synonymous. So after we speak about photographing textures along with your telephone, it might additionally imply backgrounds if the intent is to interchange backgrounds. However not like conventional background alternative, textures will also be utilized to a complete picture—particularly when used with mixing modes in Photoshop.
We go into element about what textures are in pictures if you happen to’re nonetheless undecided what that exact saying means.
Suggestions for photographing textures along with your telephone
There are a number of useful ideas to remember when photographing textures along with your smartphone to be used in Photoshop. We are going to point out a few of them right here.
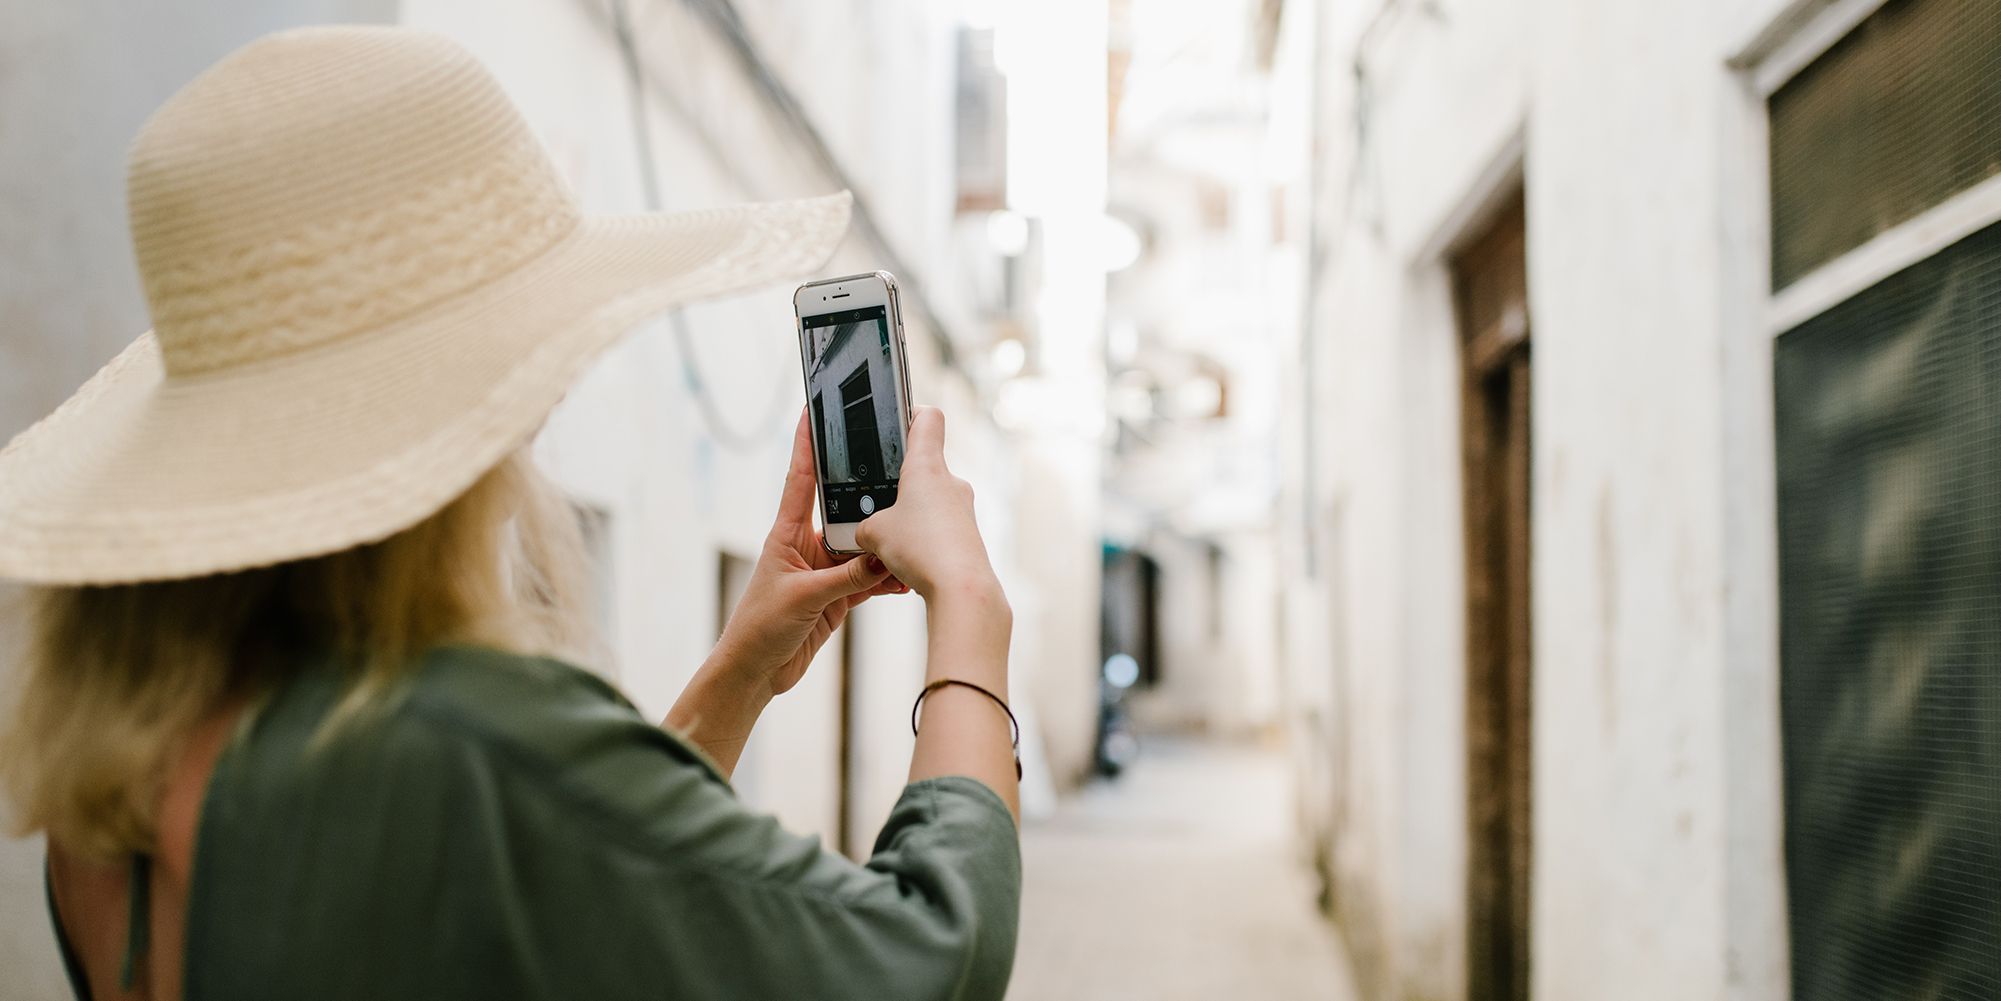
- Get within the behavior of photographing textures. Chances are you’ll not all the time have your “good” digicam with you, however you’ll virtually all the time have your telephone. Get within the behavior of photographing textures in all places. You’ll construct your assortment a lot quicker.
- Fill within the body. If attainable, keep away from parts that you do not need to put within the edges. You need a clear picture of simply the feel.
- Keep away from shadows. Typically the excessive solar can solid shadows in your textures. You must maintain shadows away so you do not waste time eradicating them in Photoshop.
- Expose your photos accurately. Be sure that your publicity is not too darkish or too mild when photographing textures. Goal for a impartial publicity throughout your complete picture.
- Take just one shot of a texture. If you happen to take too many pictures of a single texture, you danger losing time posting and filling up your onerous drive unnecessarily. Attempt to get an incredible shot of 1 texture and transfer on to the following.
- Retailer your textures on-line. Apart from storing textures in your laptop, do not forget that backing up your knowledge is necessary. There are storage websites like Flickr and 500px the place you’ll be able to retailer your textures. Additionally, you’ll be able to entry your textures if you find yourself on one other laptop.
There are different cloud providers that you should use to backup iPhone photographs and you can find many on Android as nicely.
Step 1 Switch footage out of your telephone to your laptop

As soon as you’ve got captured a number of textures in your smartphone, you may need to switch them to Photoshop. There are numerous methods to realize this, and it usually depends upon what digicam, apps, and working system you are utilizing to find out the most effective technique. If you’re simply beginning out and have few textures, think about sending the pictures to your e mail and downloading them out of your laptop.
If you happen to use photograph enhancing apps like Luminar AI and Luminar Neo, they’ve a sharing function that lets you switch photographs out of your smartphone to your laptop.
Step 2: Edit your textures in Photoshop
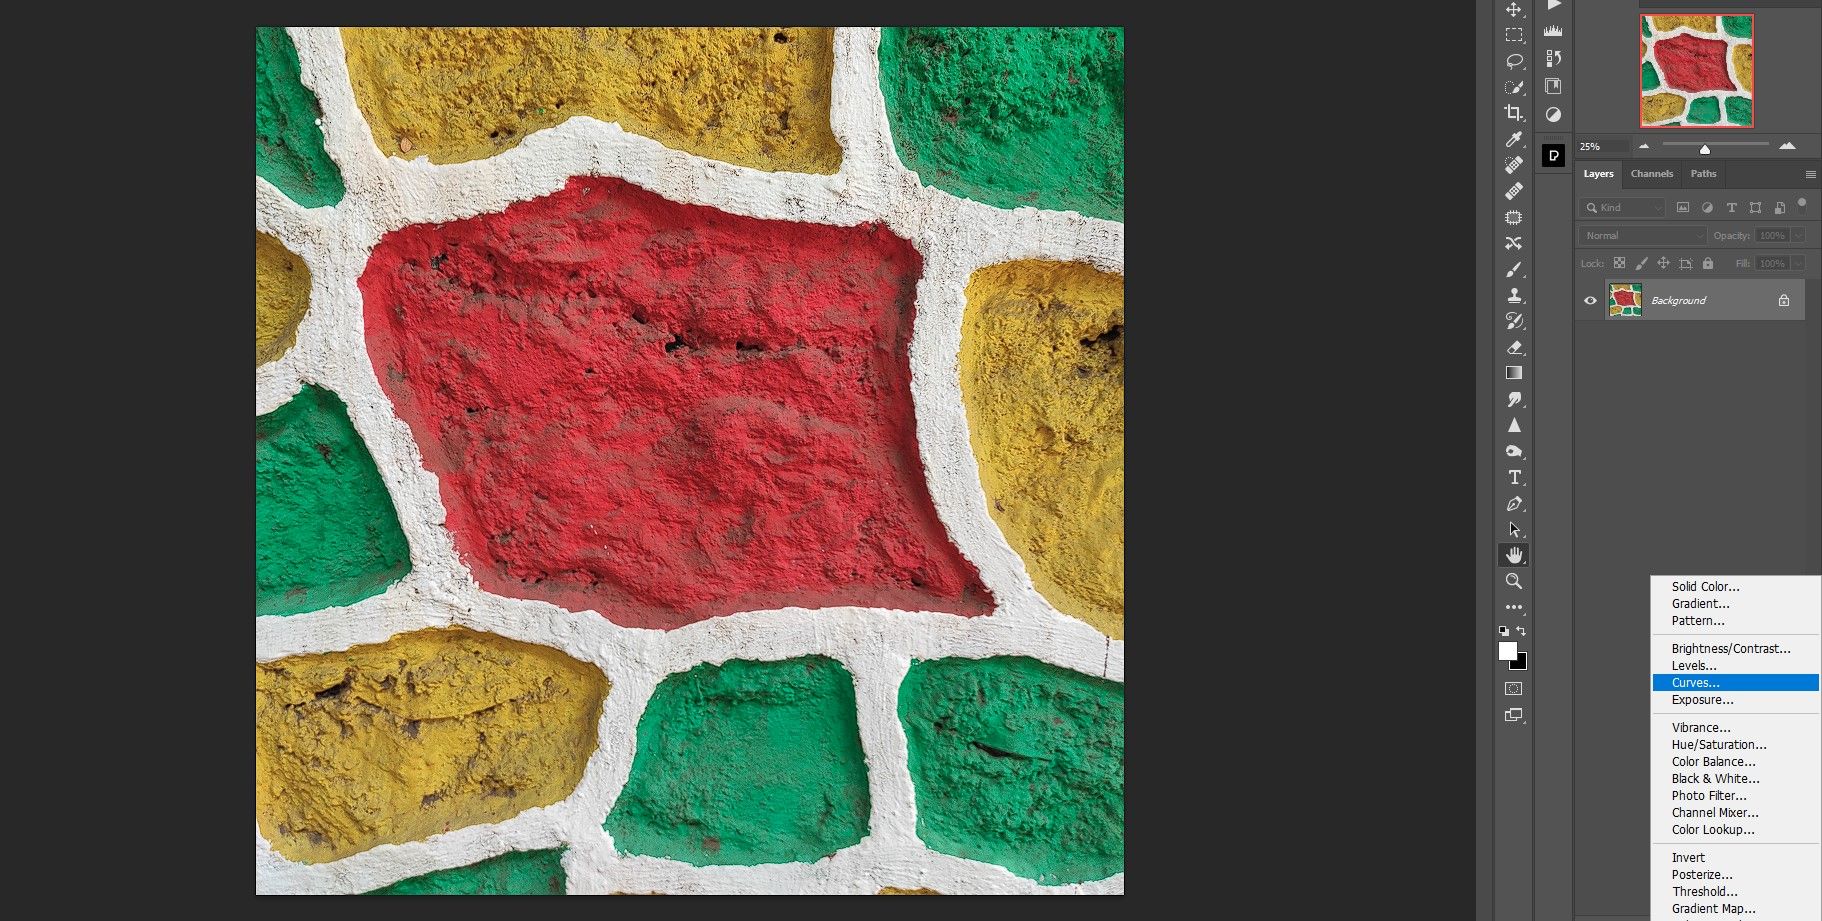
There are a number of issues you are able to do to reinforce your textures in Photoshop. The aim is to edit a texture so that you simply spend as little time as attainable when it comes time to make use of it with one other picture. Often you need to sharpen your texture (or improve its distinction) whereas enhancing the colour within the textures with standout colours.
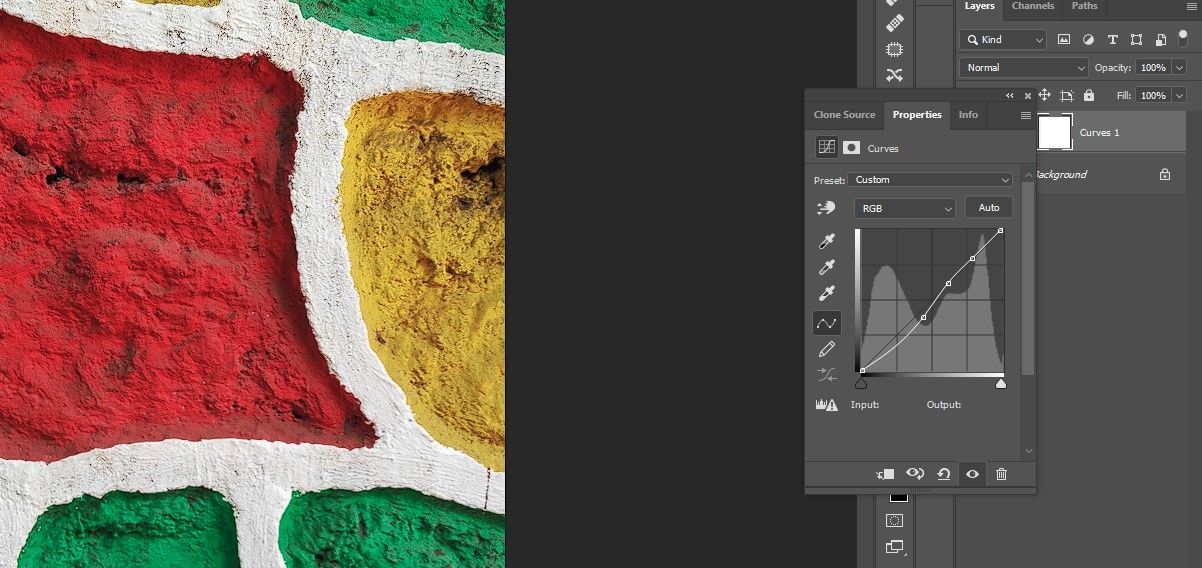
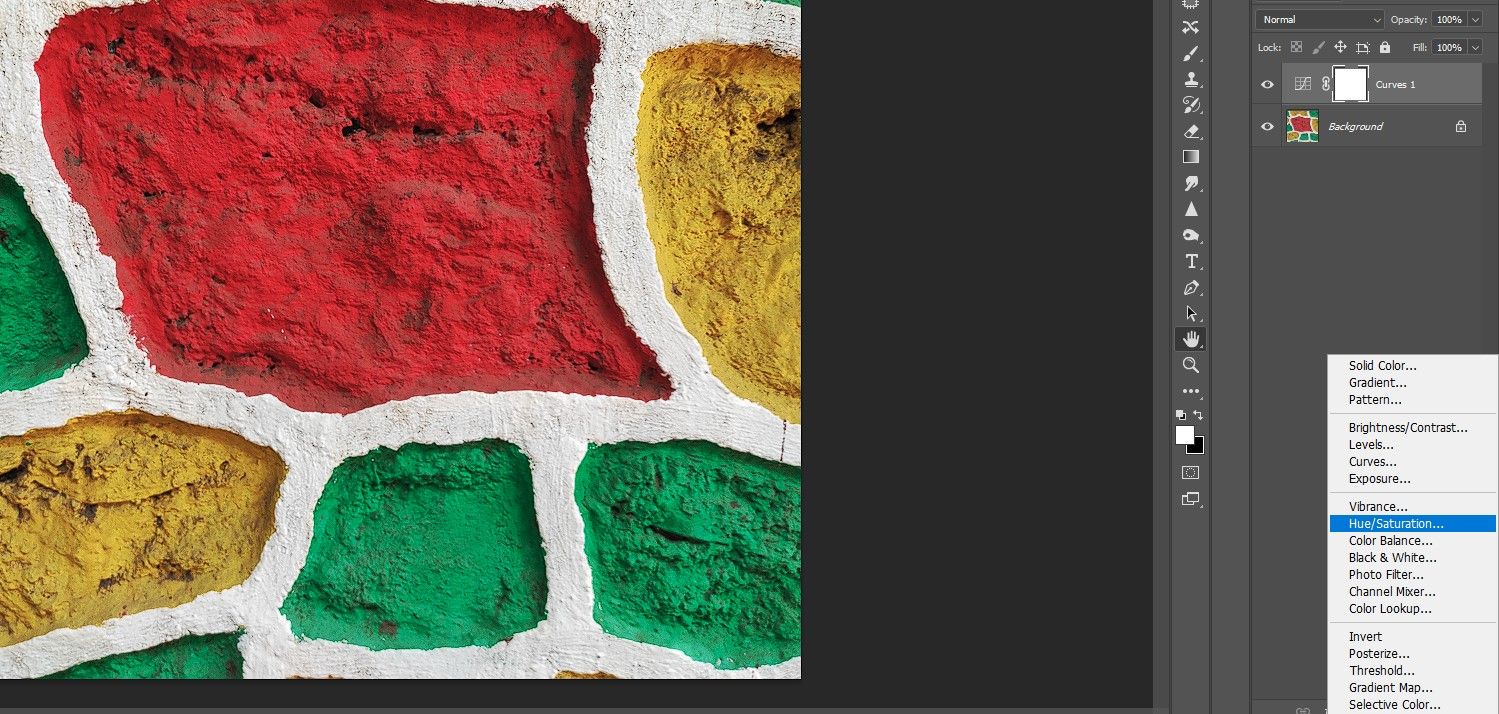
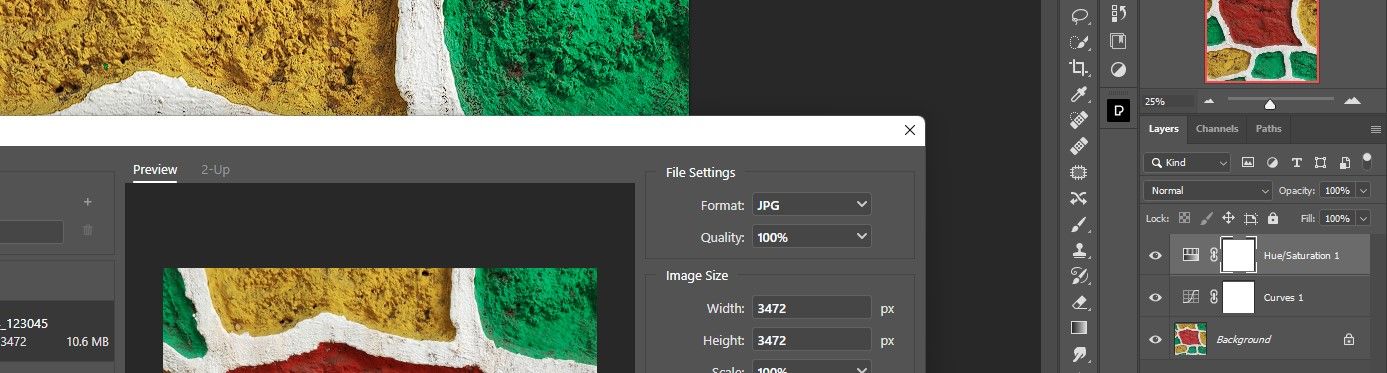
For our examples we use the curves and Hue/Saturation Adjustment layers to edit the feel.
- With the feel loaded in Photoshop, create one curves adjustment layer.
- When you’re snug with the Curves device, you can also make your personal changes by creating factors on the graph to extend distinction. For the needs of this tutorial, we’ll click on vehicle as a result of it does an incredible job of accelerating the distinction with out going too far.
- A… create Hue/Saturation adjustment layer.
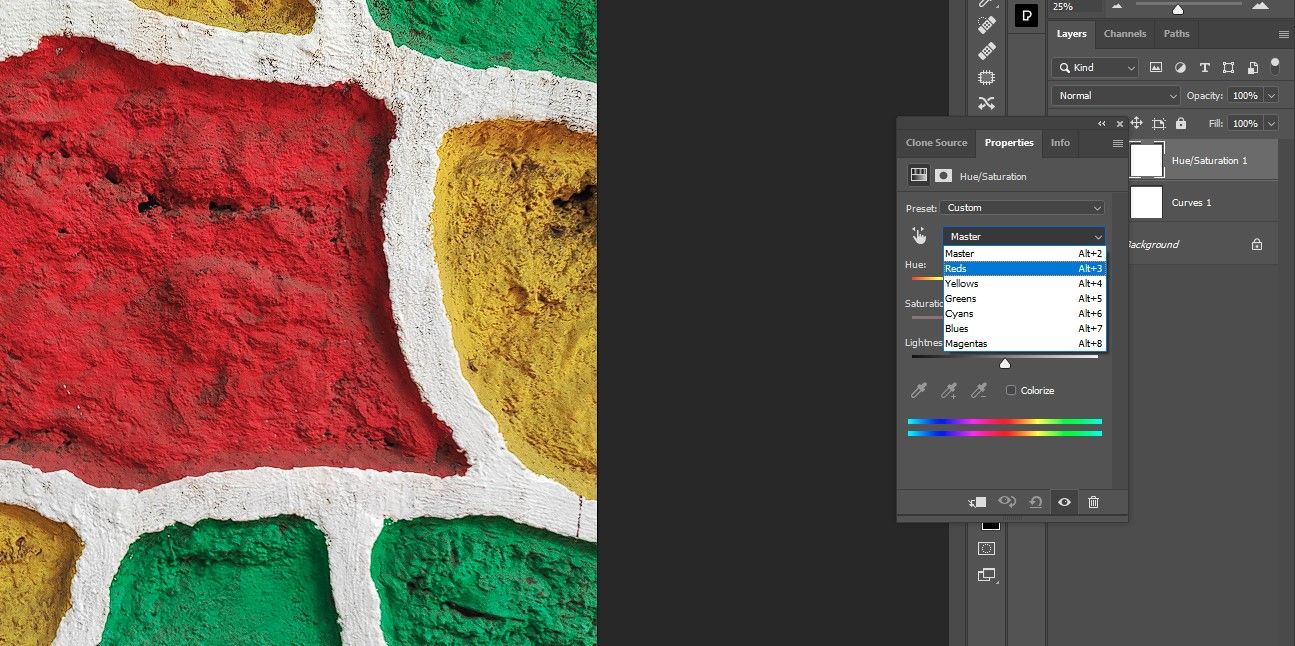
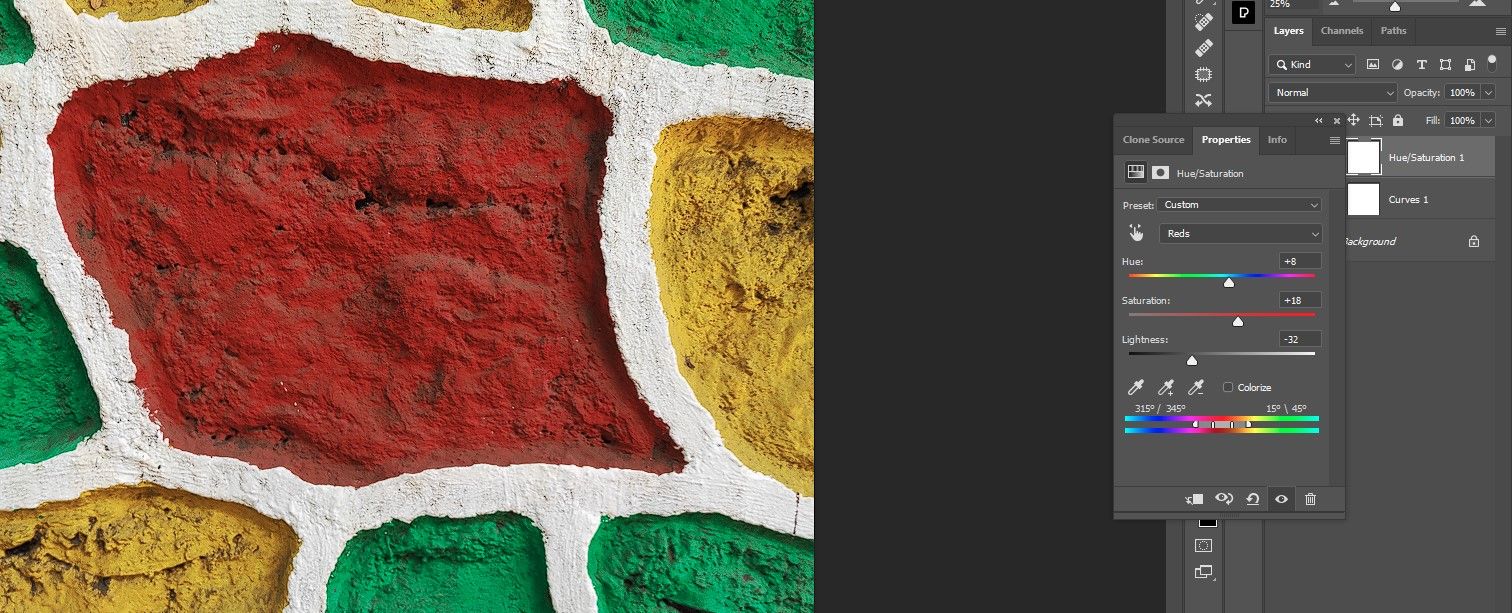
- In case you have plenty of photos, all you need to do is improve the saturation Slider to get good outcomes. However pushing the saturation slider too far for this picture will even improve the general brightness of the colours. It will create an undesirable impact. So let’s decide these as a substitute Purple Channel.
- We have adjusted them hue, saturationand ease Slider to edit the crimson tones within the texture. The identical might be carried out with any of the colour channels if required.
When the feel is totally edited, we are able to reserve it to our assortment for future use.
Step 3: Save the feel to your assortment
After taking photographs of textures along with your smartphone and enhancing them in Photoshop, it is best to save them in a particular folder in your laptop. There are a number of choices to contemplate when saving your textures.
file format
Do you need to save your textures as PSD or TIFF information for later enhancing, or do you simply need to save them as JPEGs?
By default, think about exporting your textures as JPEGs for future use and save disk house. Solely save the textures for additional enhancing if you happen to really feel that several types of photos would require additional post-processing.
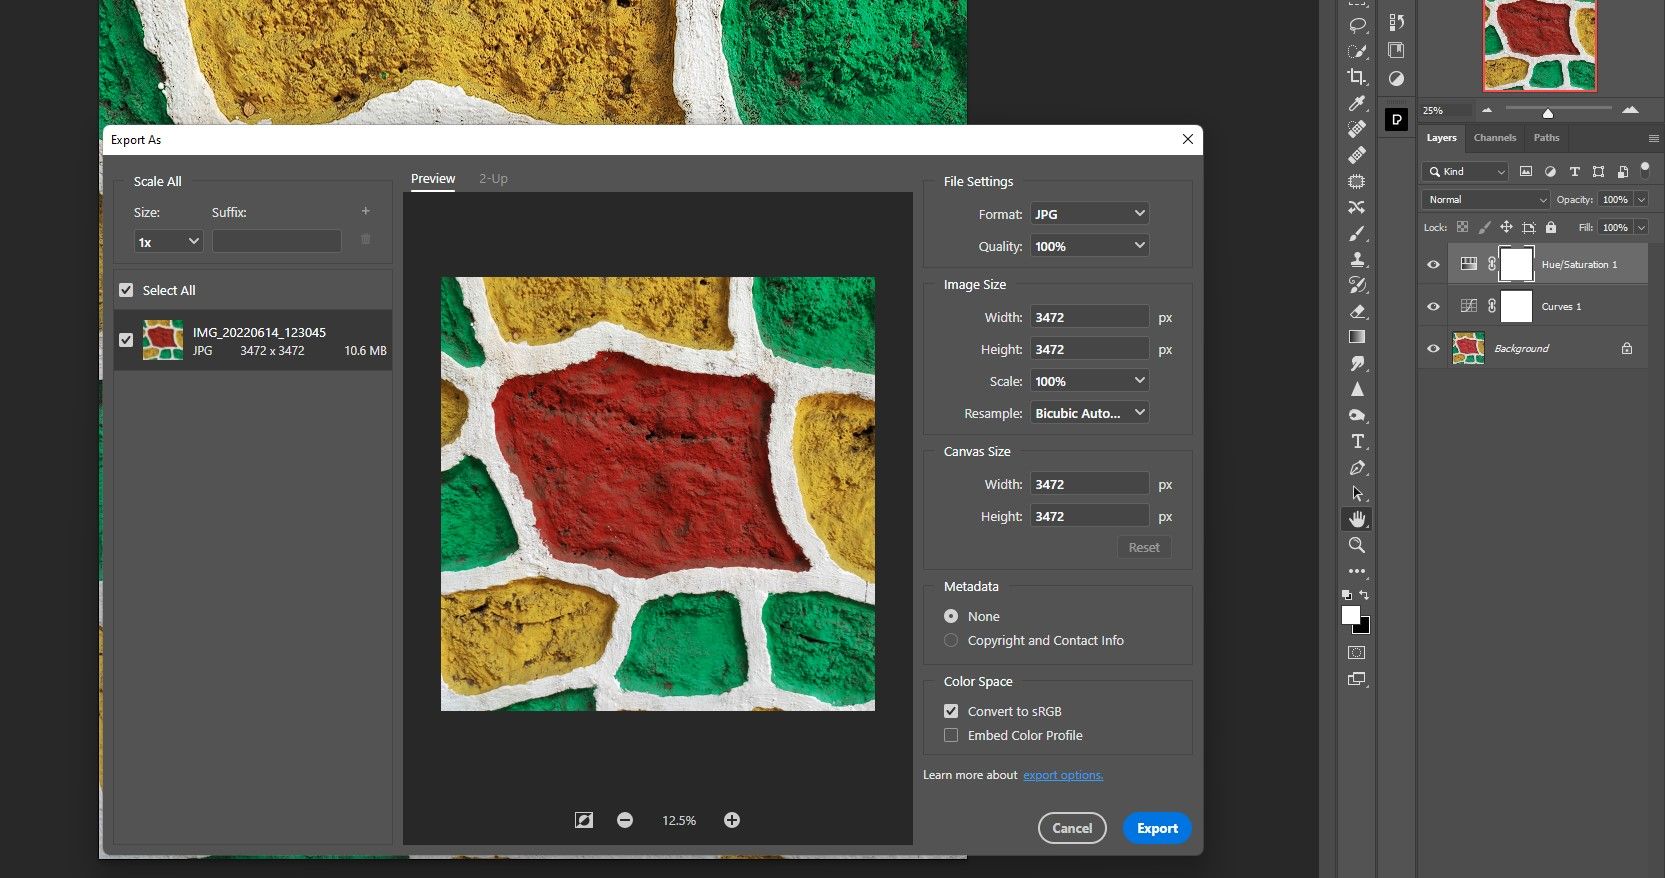
In our instance, we’ll save the feel as a JPEG and shut Photoshop.
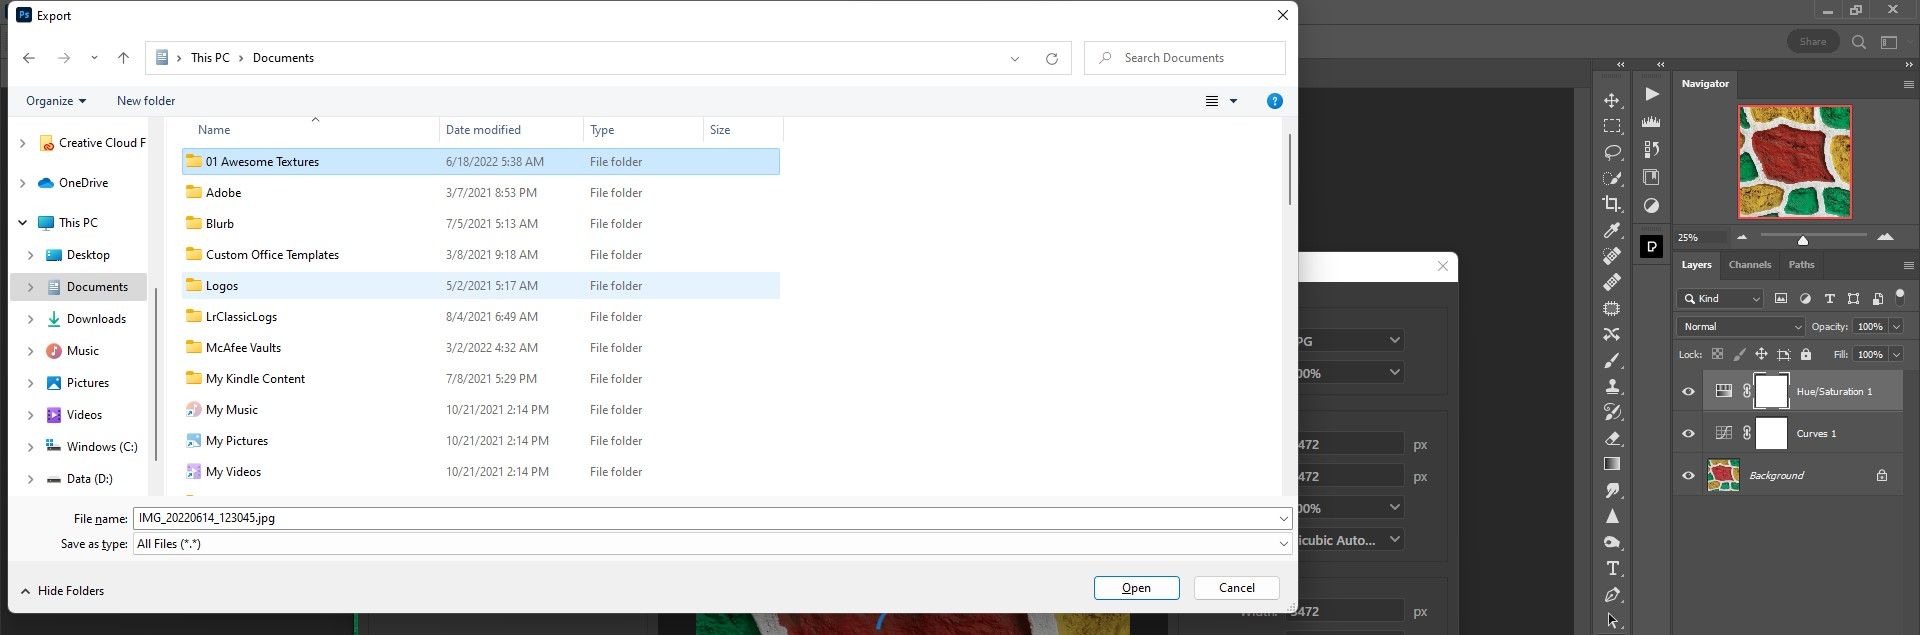
- Use the keyboard shortcut change + ctrl + Outdated + W to entry the Export as Menu.
- Alter the settings as you see match. It is necessary to ensure you have them format set to JPG and the high quality set to 100%.
- Click on on export.
- Click on on the vacation spot folder the place you need to save. In our instance we select Nice textures. Then click on Open.
- Rename your texture file. Then click on Save on laptop.

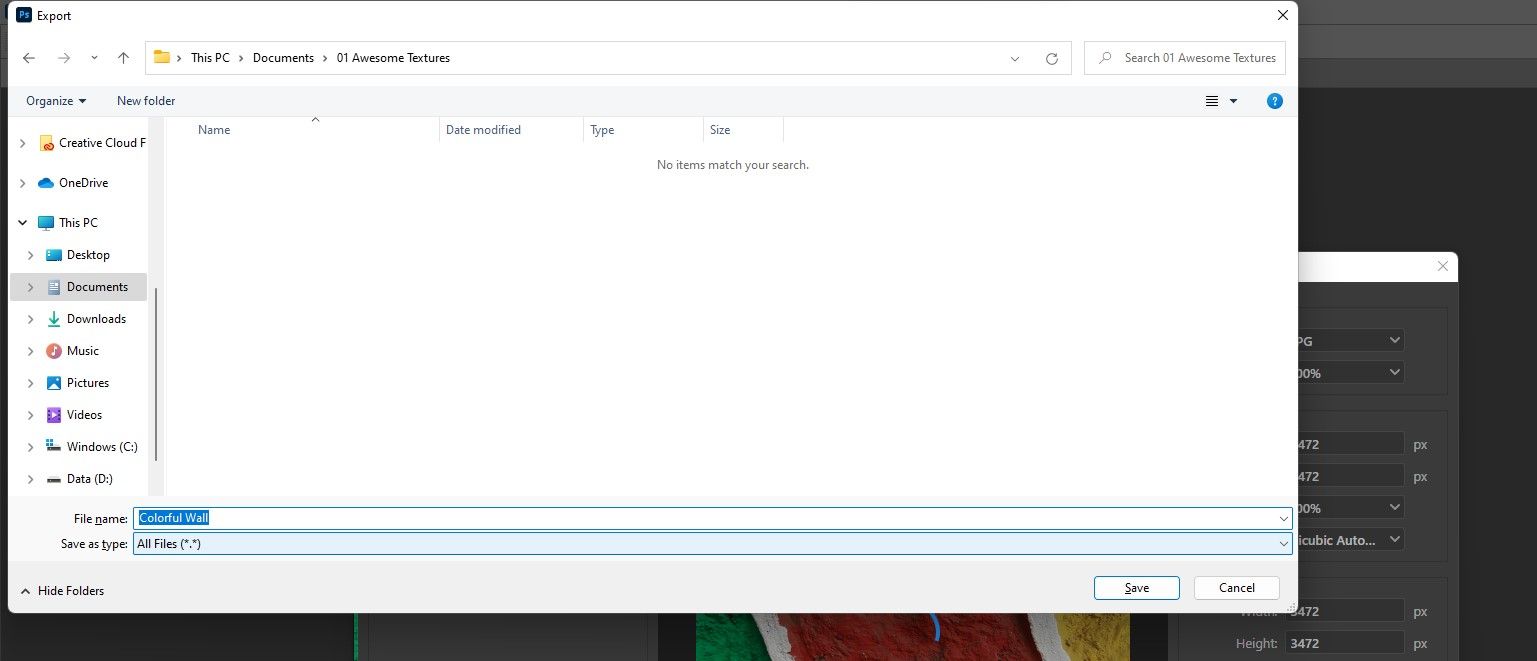
We now have a saved texture in JPEG format for later use.
If you wish to export a number of textures, Adobe Bridge makes it simple to export JPEG information from Photoshop.
Step 4: Add the feel to a Photoshop file
Now let’s paste the feel file we simply created into one other picture file. There are a number of methods to do that, however we’ll use the quickest one for demonstration functions, which is the Place embedded particular function.
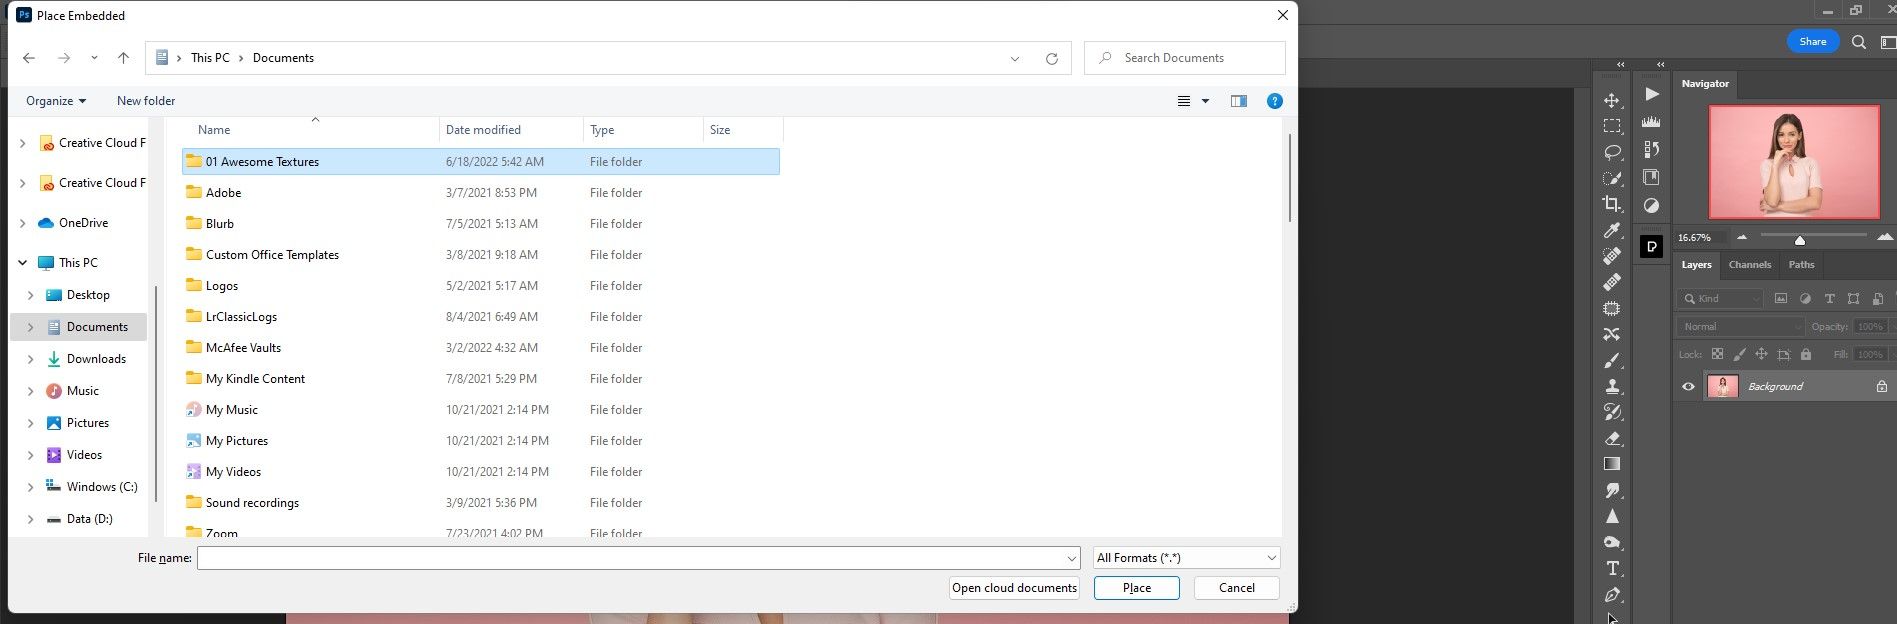
- If the file picture you need to use the feel with is already loaded in Photoshop, go to file > Place embedded.
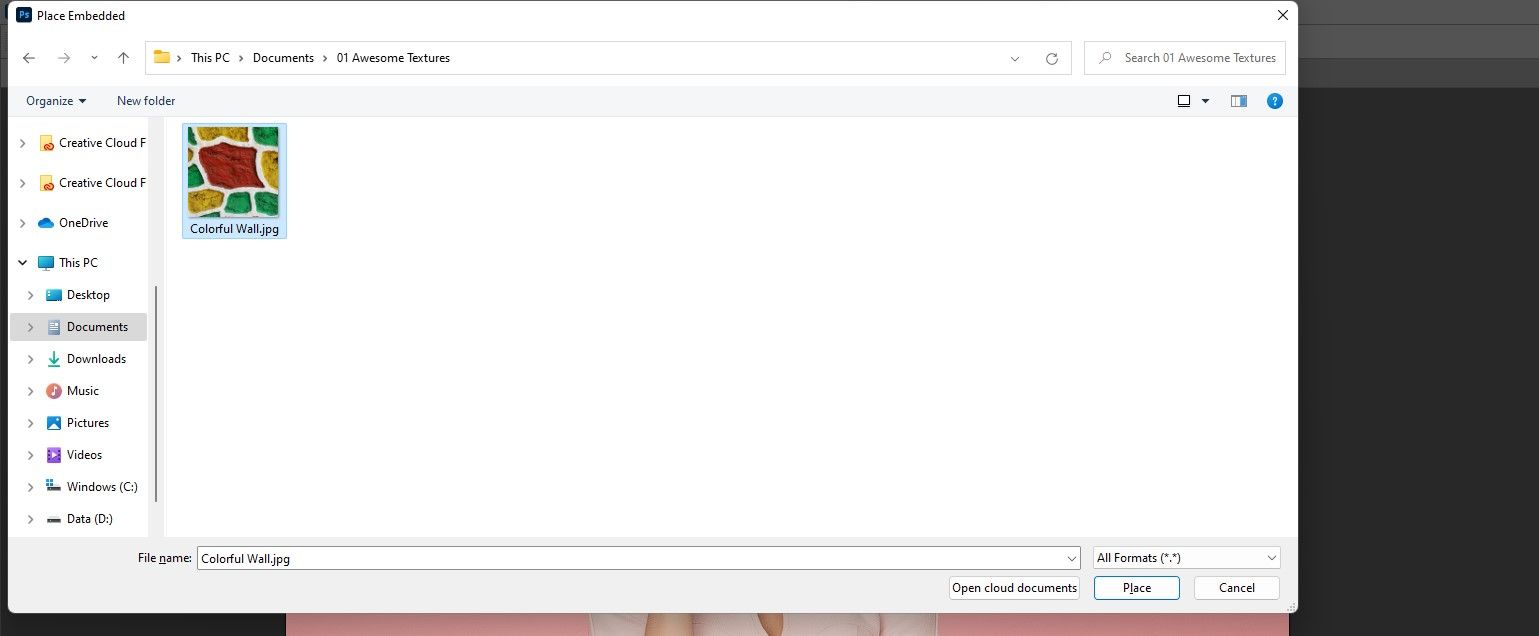
- Discover them Nice textures folder we simply created.
- Double-click and choose the folder colourful wall. Click on on location.
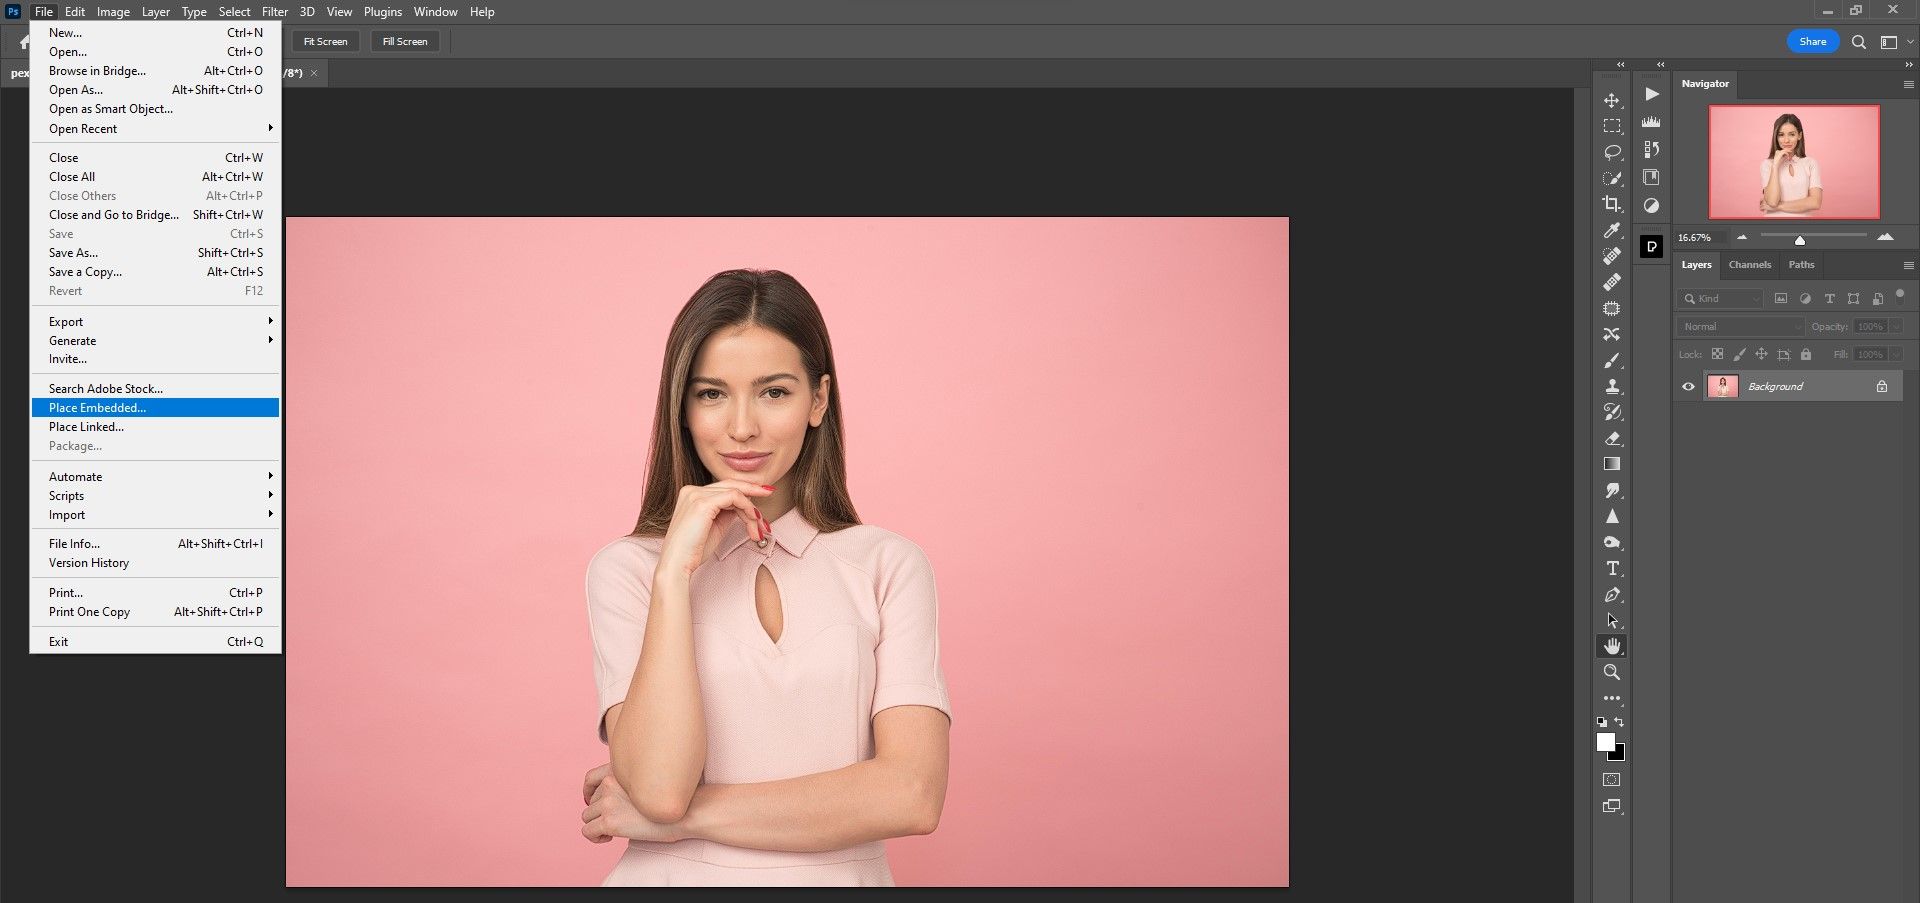
What we’re left with is a place to begin to use the feel to the girl’s portrait.
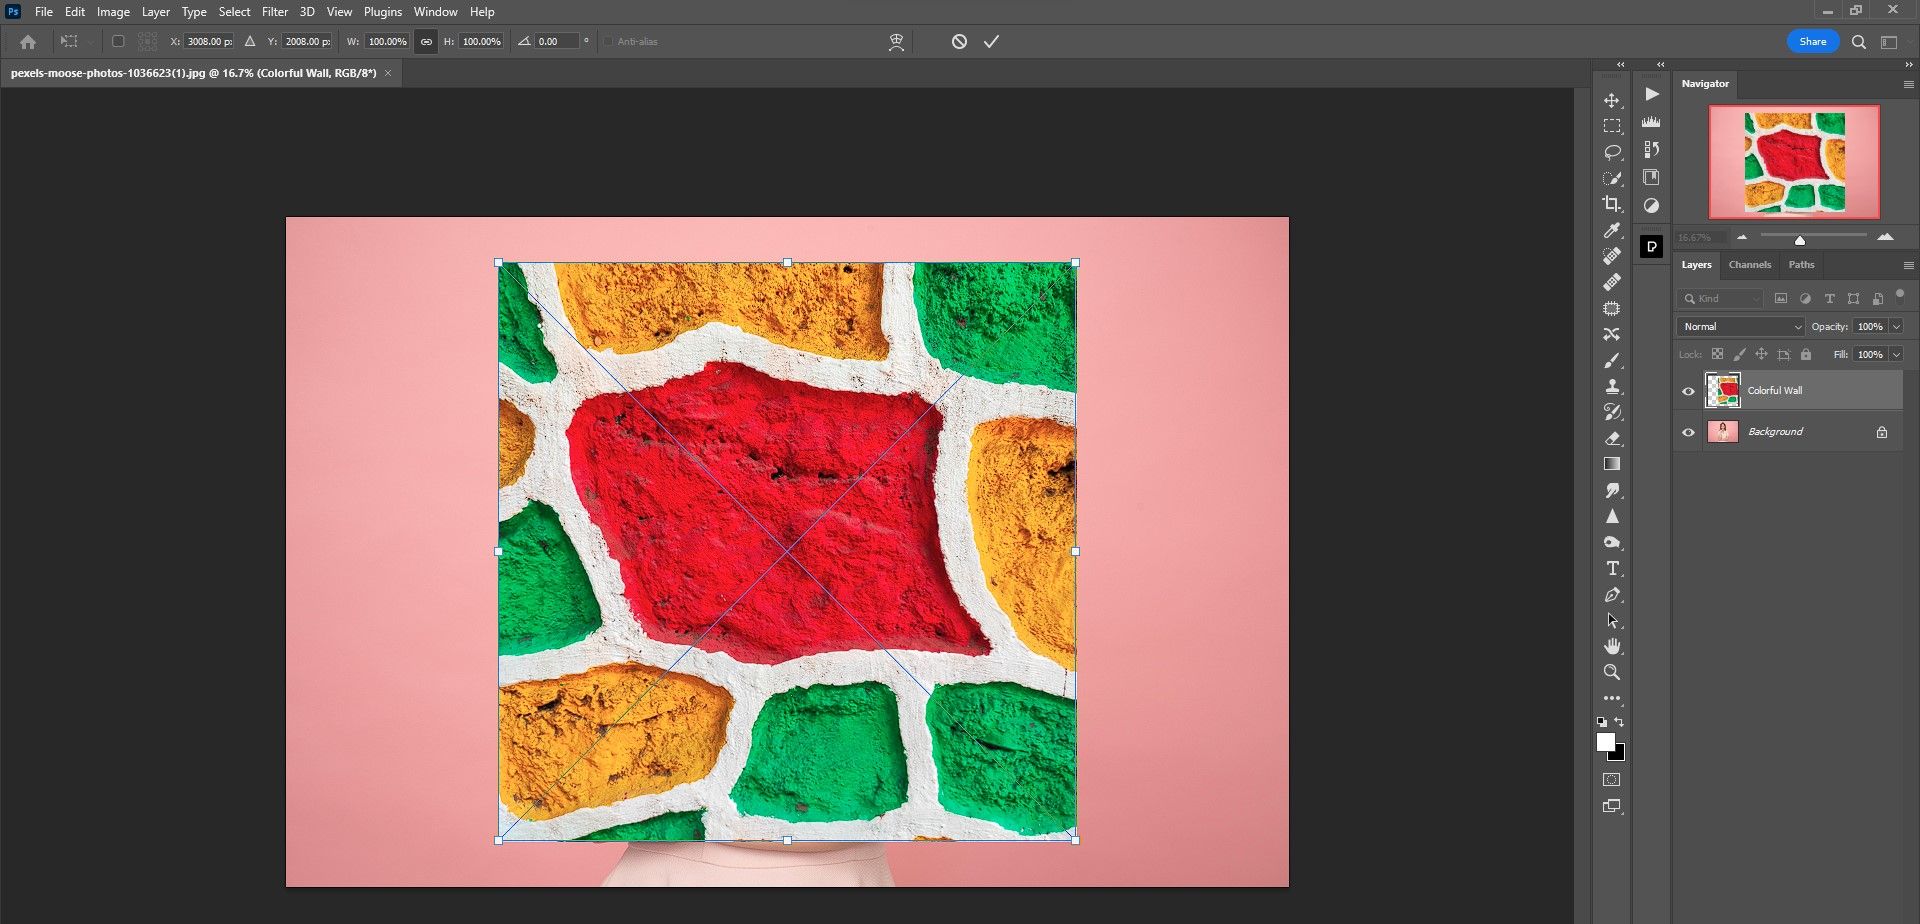
From right here we are able to modify the handles to stretch the wall throughout your complete picture or simply a part of it. The way you in the end resolve to make use of the feel is as much as you.
You can too save your texture information as patterns to interchange boring partitions in Photoshop, like we did with our cowl picture for this text.
Textures captured in your telephone enhance your creativity in Photoshop
There are numerous makes use of for textures. Now that you’ve got discovered how you can take photographs of textures to be used in Photoshop, you’ll be able to unleash your creativity and create masterful photos by combining textures with different picture information.
