Making ready Images for Laser Engraving in Photoshop: A Full Information

Are you interested by laser engraving your pictures however do not know the right way to put together them for the method? Photoshop may also help!
This information will present you the right way to shortly and simply put together your pictures for laser engraving. We’ll additionally offer you tips about the right way to get the very best outcomes out of your engravings. However earlier than we try this, let’s shortly focus on laser engraving first.
What’s laser engraving?
Laser engraving is a way that makes use of a laser beam to etch a picture onto a floor. The laser beam vaporizes the fabric it is available in contact with, leaving a clean, exact picture. Laser engraving is often used to create nameplates, awards, and different objects that require detailed lettering or pictures.
The excessive precision makes laser engraving excellent for delicate or intricate designs. As well as, laser engraving can be utilized on varied supplies together with metallic, glass, wooden and plastic. Consequently, this versatile know-how can be utilized for a lot of functions.
Methods to put together your photograph for laser engraving in Photoshop
To simply put together any photograph for laser engraving, observe these steps:
1. Obtain and set up Photoshop
Photoshop is comparatively simple to put in and use when you get the cling of it. The very first thing you might want to do is obtain this system from Adobe’s web site. As soon as downloaded, double click on on the installer file and observe the directions. After set up, you might want to activate it along with your Adobe ID. You are able to do this by opening this system and clicking Assist > Signal In. Enter your Adobe ID and password and click on log in. When you’re signed in, you can begin utilizing Photoshop.
2. Open the picture you wish to put together for engraving
To open the picture in Photoshop, right-click the file and choose Open withafter which choose Photoshop. Alternatively, you possibly can open Photoshop and go file then Open.
3. Make a reproduction of the picture
You possibly can duplicate the picture layer by urgent Command-J on a Mac or Ctrl-J on a PC. Alternatively, you are able to do this by right-clicking and choosing the picture within the layers panel duplicate. A dialog field seems in which you’ll be able to enter a brand new title for the duplicate file. You too can select the place to avoid wasting the file and format.
When you could have entered all the data, click on OK, and Photoshop creates a duplicate of your picture. A replica file is a lifesaver when one thing occurs to the unique picture, e.g. B. Unintentional deletion or file corruption. It is also a good suggestion to maintain a number of backups in numerous places for safety causes.
2. Enhance the brightness of the picture
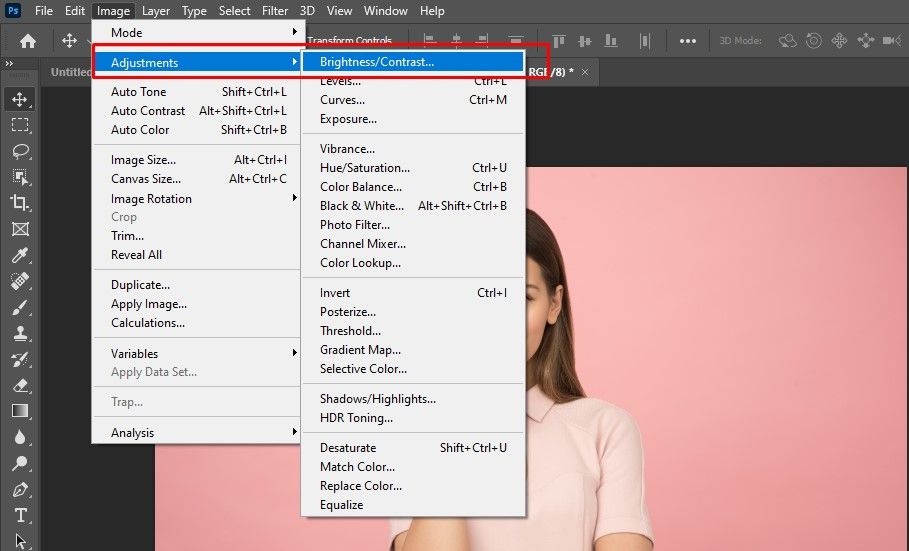
Go to image menu and choose changes. Subsequent, choose brightness distinction. Now you will notice a dialog field in your display screen. Alter the brightness and distinction within the dialog field till you are proud of how your photograph seems to be.
3. Crop and resize picture

As soon as you have adjusted the brightness and distinction of your photograph, it is time to crop it. Go to imageMenu once more and choose harvest. A brand new dialog field will seem in your display screen. Use this dialog field to crop your photograph leaving solely the portion you wish to engrave. Alternatively, you should use the harvest Icon discovered within the toolbar. If the instruments do not seem in your Photoshop, you possibly can go to window and click on Instrument or just reset Photoshop to its default look.
Now that your photograph is cropped, you might want to resize it. Go to image menu and choose picture measurement. A dialog field will seem in your display screen. On this dialog you possibly can enter the brand new width and top you need your photograph to be.
If you wish to take away the background of your picture, there are a number of strategies you should use. If the image is sharper, you possibly can simply go Select and then select theme. Photoshop can choose your total picture. Then click on within the layers part Add layer masks, and it will likely be capable of take away your background. You too can use the Fast Choice Instrument to pick out your picture and use the masks choice to take away the background.
5. Convert the picture to grayscale
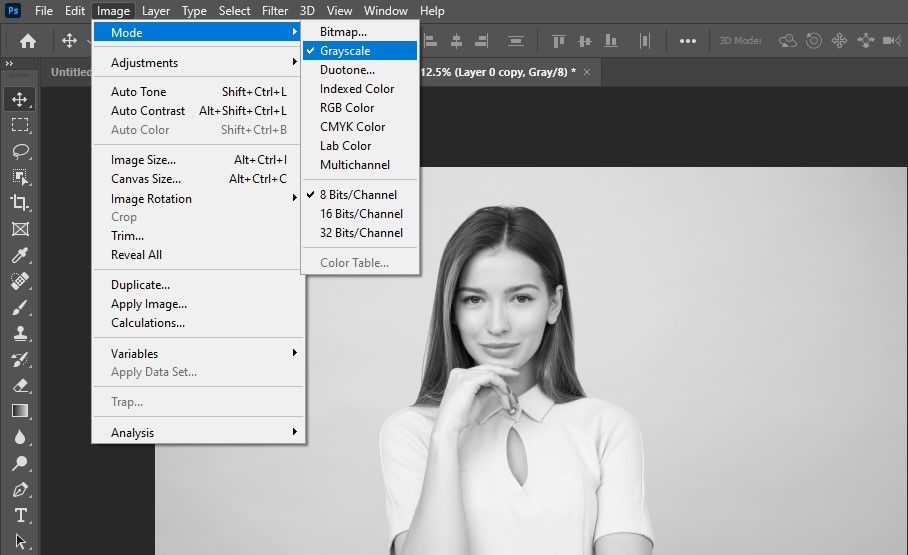
There are a number of methods to do that, however the easiest is to make use of Grayscale Instrument. Go to Picture > Mode > Grayscale. You too can experiment with different strategies, e.g. B. change the layer mode to grayscale or use the channels Mixer adjustment layer.
6. Enhance the brightness and reduce the distinction
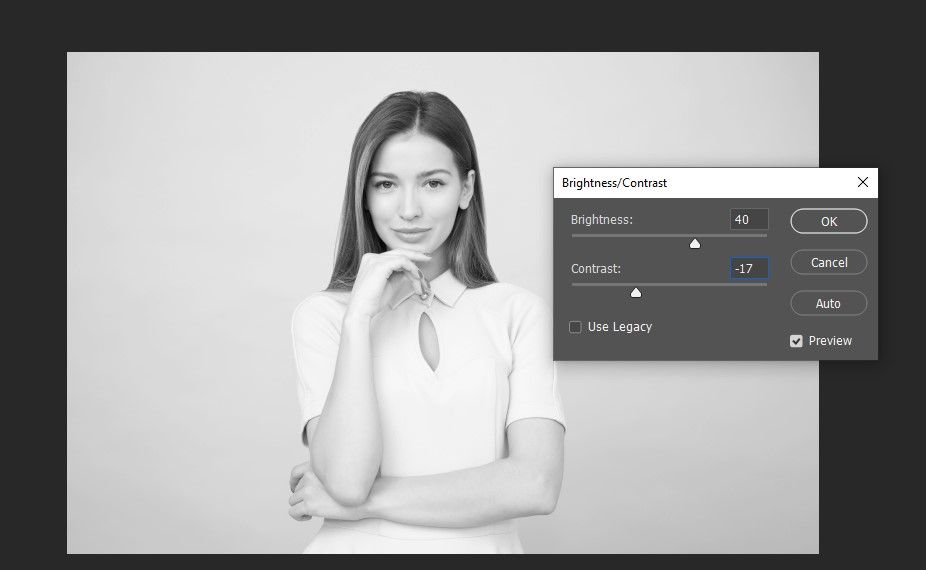
To regulate the brightness and distinction, go to Picture > Changes after which choose Brightness/Distinction. For our case we’ll decide brightness to 40 and distinction to -17 in order that the image could be displayed nicely as proven under:
7. Change the colour mode of the picture
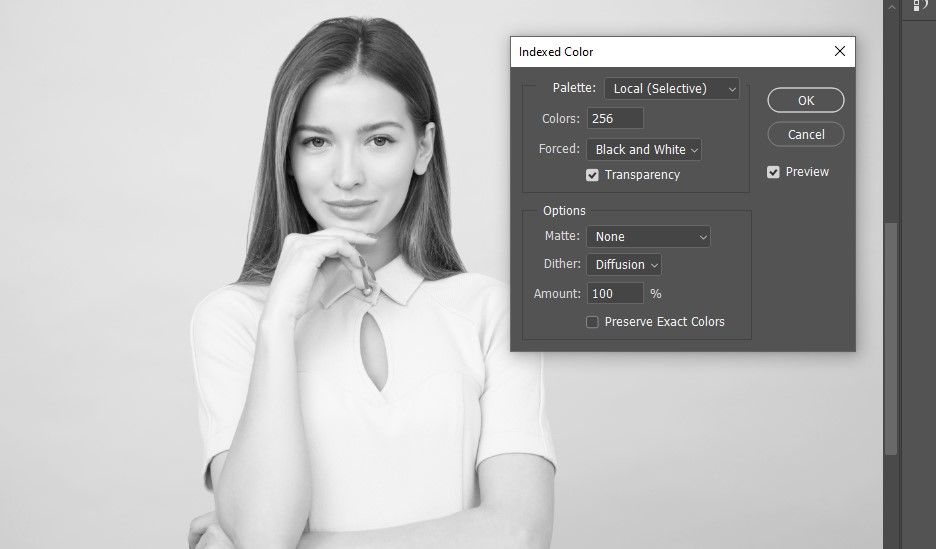
After altering the picture to grayscale and adjusting the brightness and distinction, you might want to change the colour mode to listed colour. Go to Picture > Modethen change it to RGB colour. Go once more Picture > ModeChoose Listed colourand set the Crowd to 100%.
8. Sharpen the picture
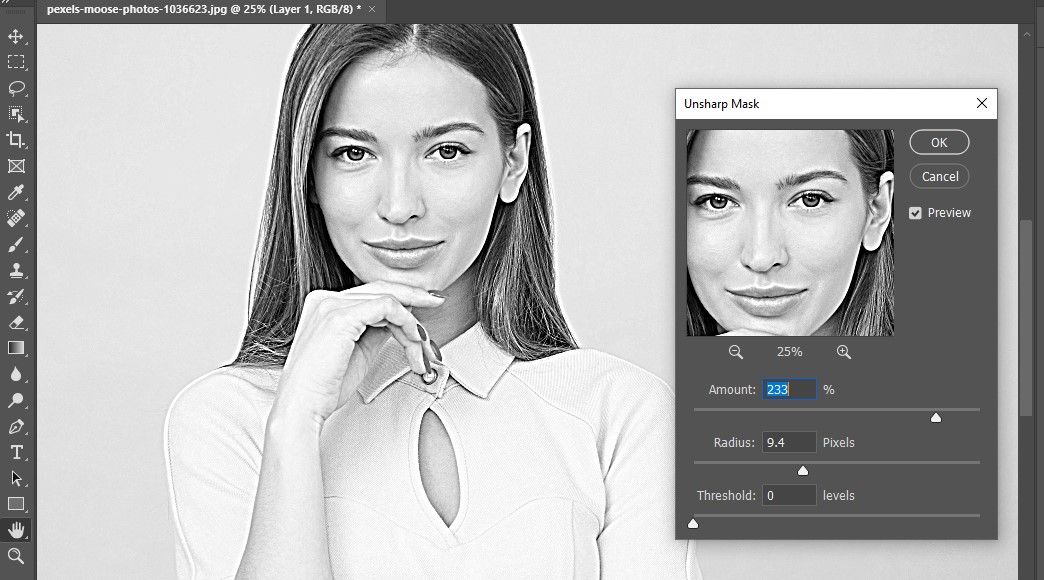
Sharpening the picture will increase the distinction between neighboring pixels by making mild pixels lighter and darkish pixels darker. Consequently, object edges seem higher outlined and the general picture seems sharper. Though sharpening your picture improves its look, it could actually additionally carry out noise and different distractions within the picture. So it is vital to watch out when doing this. (Learn our information to eradicating distractions in Photoshop)
To begin sharpening the picture, go to Filter menu > Sharpenthen choose Unsharp Masks. Then you possibly can pull that Crowd Slider till the picture is nicely outlined. For our case, a Crowd from 233 and a radius from 9.4 regarded nice as proven under.
9. Export the picture
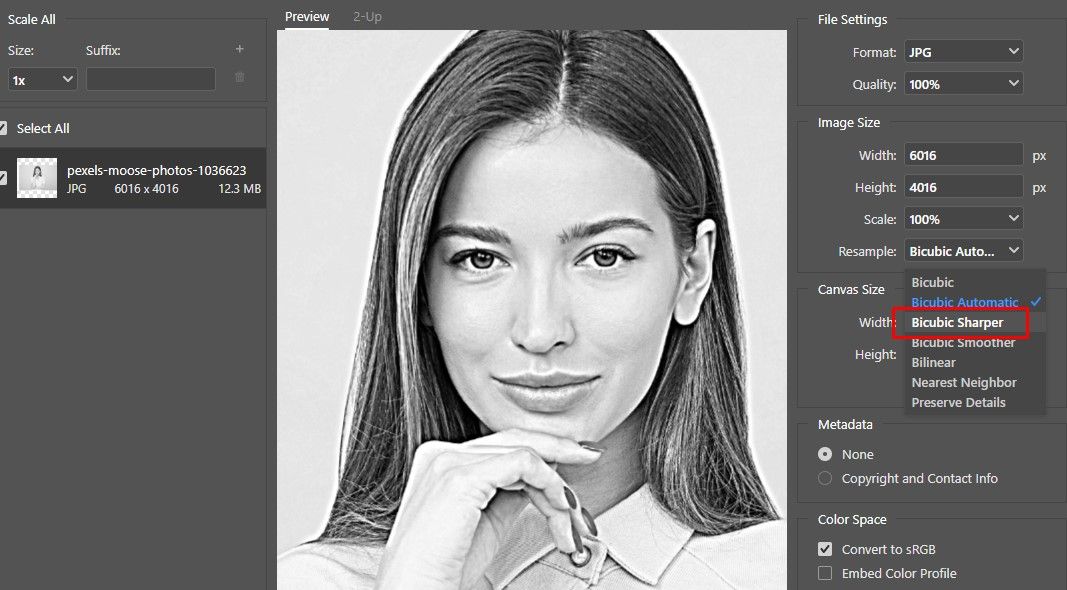
After getting ready your picture in Photoshop, you possibly can export it for laser engraving Export as operate within the file Part. This lets you save your file as a local JPG file you can import into your laser engraving software program.
When exporting your file, you will need to additionally specify resampling Risk. We advocate utilizing it Bicubic sharper for greatest outcomes, as proven under. You too can customise Photoshop’s fast export settings, so you possibly can simply export your pictures with out going by means of the above course of each time.
Flip your pictures into customized objects with laser engraving
We confirmed you the right way to shortly put together your pictures for laser engraving in Photoshop. By following these steps it is best to be capable to correctly put together your pictures and make sure that your ultimate product precisely displays your unique idea.
As soon as every part is prepared you possibly can import it into your laser engraving software program and begin the engraving course of. Laser engraving is a flexible and highly effective software for bringing your concepts to life. It is also a wonderful option to personalize presents and add a particular contact to any undertaking. Completely satisfied laser engraving!
