The way to Make a Picture Mosaic in Photoshop

Photomosaics are intelligent artistic endeavors the place the picture seems to be made up of smaller pictures resembling mosaics. These small mosaics are pictures which have their very own story, however taken collectively they inform a bigger story.
Opposite to what it feels like, most photograph mosaics aren’t created by individually assembling small items of the mosaic. Actually, you may simply create your personal inventive photograph mosaic with none superior Photoshop abilities. As? Learn on to learn to create a photograph mosaic with Photoshop.
The way to create a photograph mosaic in Photoshop
There is no higher method to study a Photoshop talent than to attempt it. On this article, we’ll take a picture from Pexels and switch it into a photograph mosaic in Photoshop. That is carried out by way of a number of easy steps.
First we are going to put together our mosaic pictures and make all of them the identical measurement. Then we create a contact sheet of those mosaics and outline this sheet as a sample. As soon as we’ve the mosaic sample, we will fill the large picture with it. Lastly we are going to make some changes and that is how straightforward you’ve got your photograph mosaic!
1. Put together the mosaics
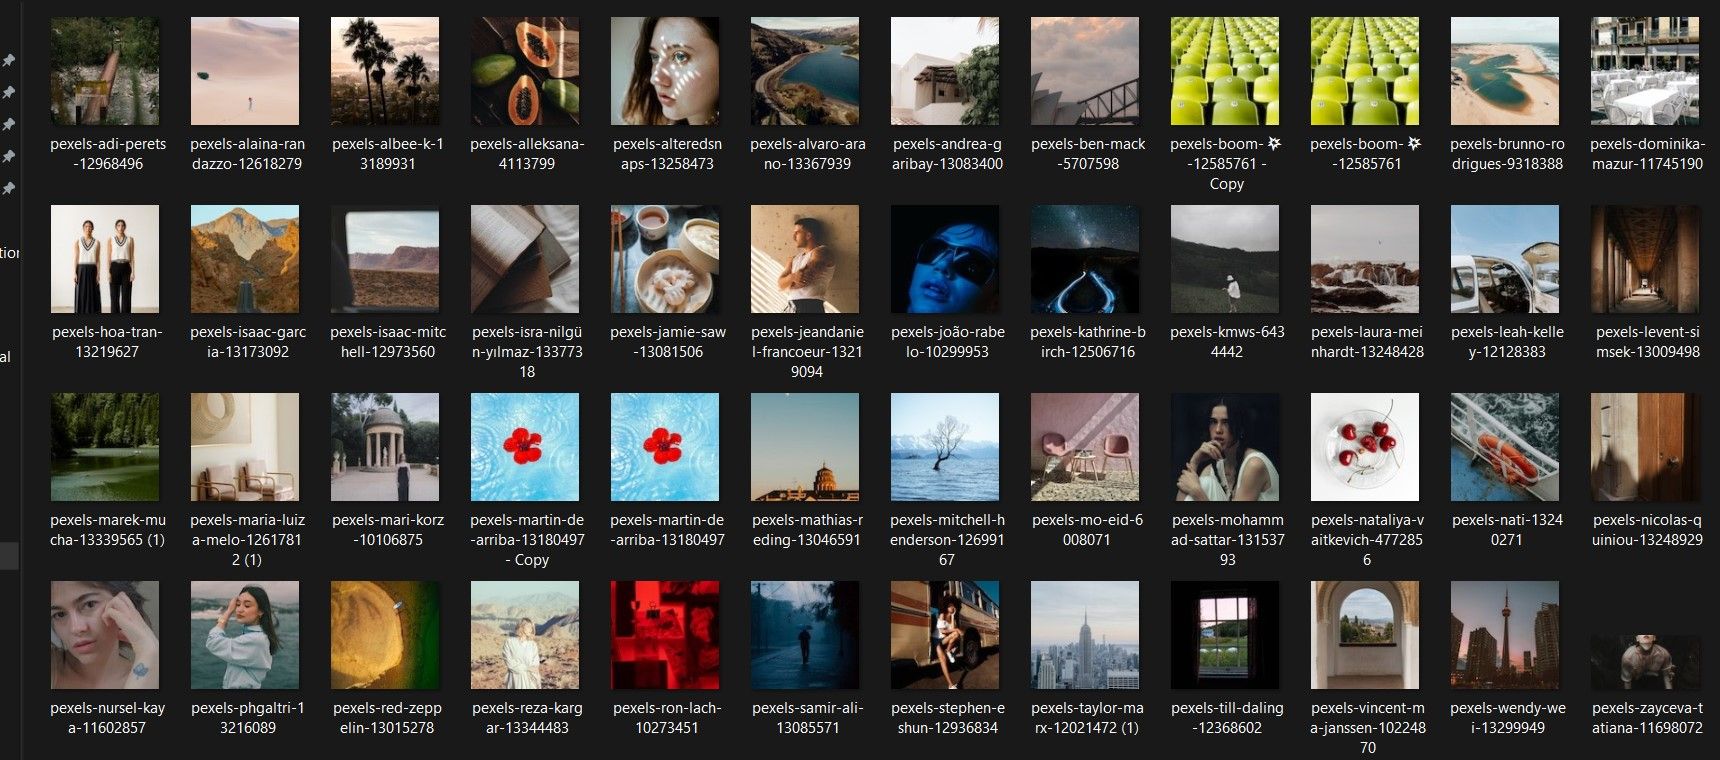
The very first step to creating a photograph mosaic in Photoshop is to organize your mosaics. The mosaics are every a person photograph. You should use as many pictures as you want, but it surely’s finest if the variety of pictures is an ideal sq., e.g. B. 49 or 100. This fashion you possibly can create a sq. contact sheet.
It’s also possible to use duplicate pictures. Actually, it is higher if you happen to use duplicate pictures right here and there to make the sample much less apparent in your photograph mosaic.
The final criterion is that your mosaics ought to be of the identical measurement. Once more, it is higher in case your mosaics are sq., identical to actual mosaics. You’ll be able to crop and resize your pictures in Photoshop, however because you’re coping with a variety of pictures, it is simpler to batch resize your pictures with free on-line instruments. On this tutorial we used inventory pictures from Pexels as mosaics.
After you have your mosaics prepared, put them in a binder and prepare to get your palms soiled with Photoshop. If you wish to make changes to the pictures earlier than you begin, e.g. B. eradicating undesirable coloration casts from a topic, now’s the suitable time.
Now that you’ve your mosaics at hand, it is time to create a contact sheet. Contact sheets have been initially utilized by photographers to show the entire pictures on a roll of movie as small thumbnails. In Photoshop, a contact sheet suits your particular pictures onto a single canvas.
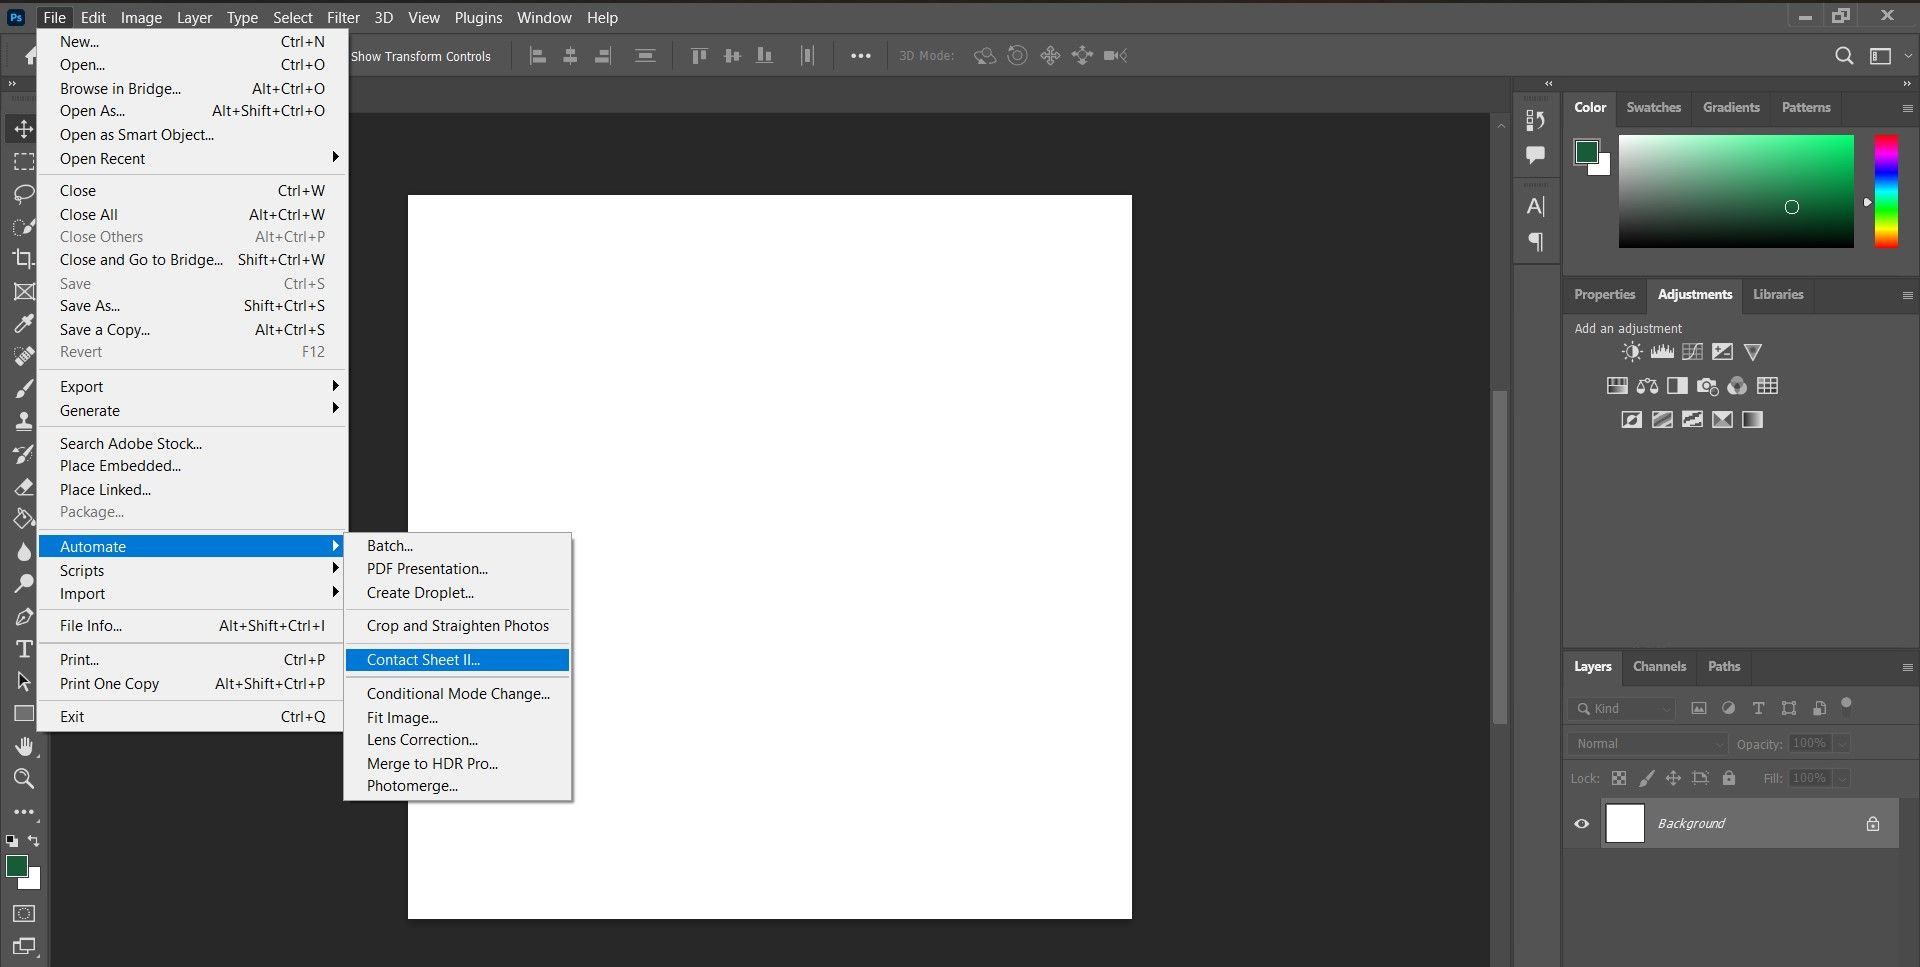
- Open Photoshop.
- Go to file Menu.
- Click on on Automate after which choose contact sheet II.
This can open the Contact Sheet II window. Right here you could choose the folder the place your mosaics are situated and supply the main points of the contact sheet.
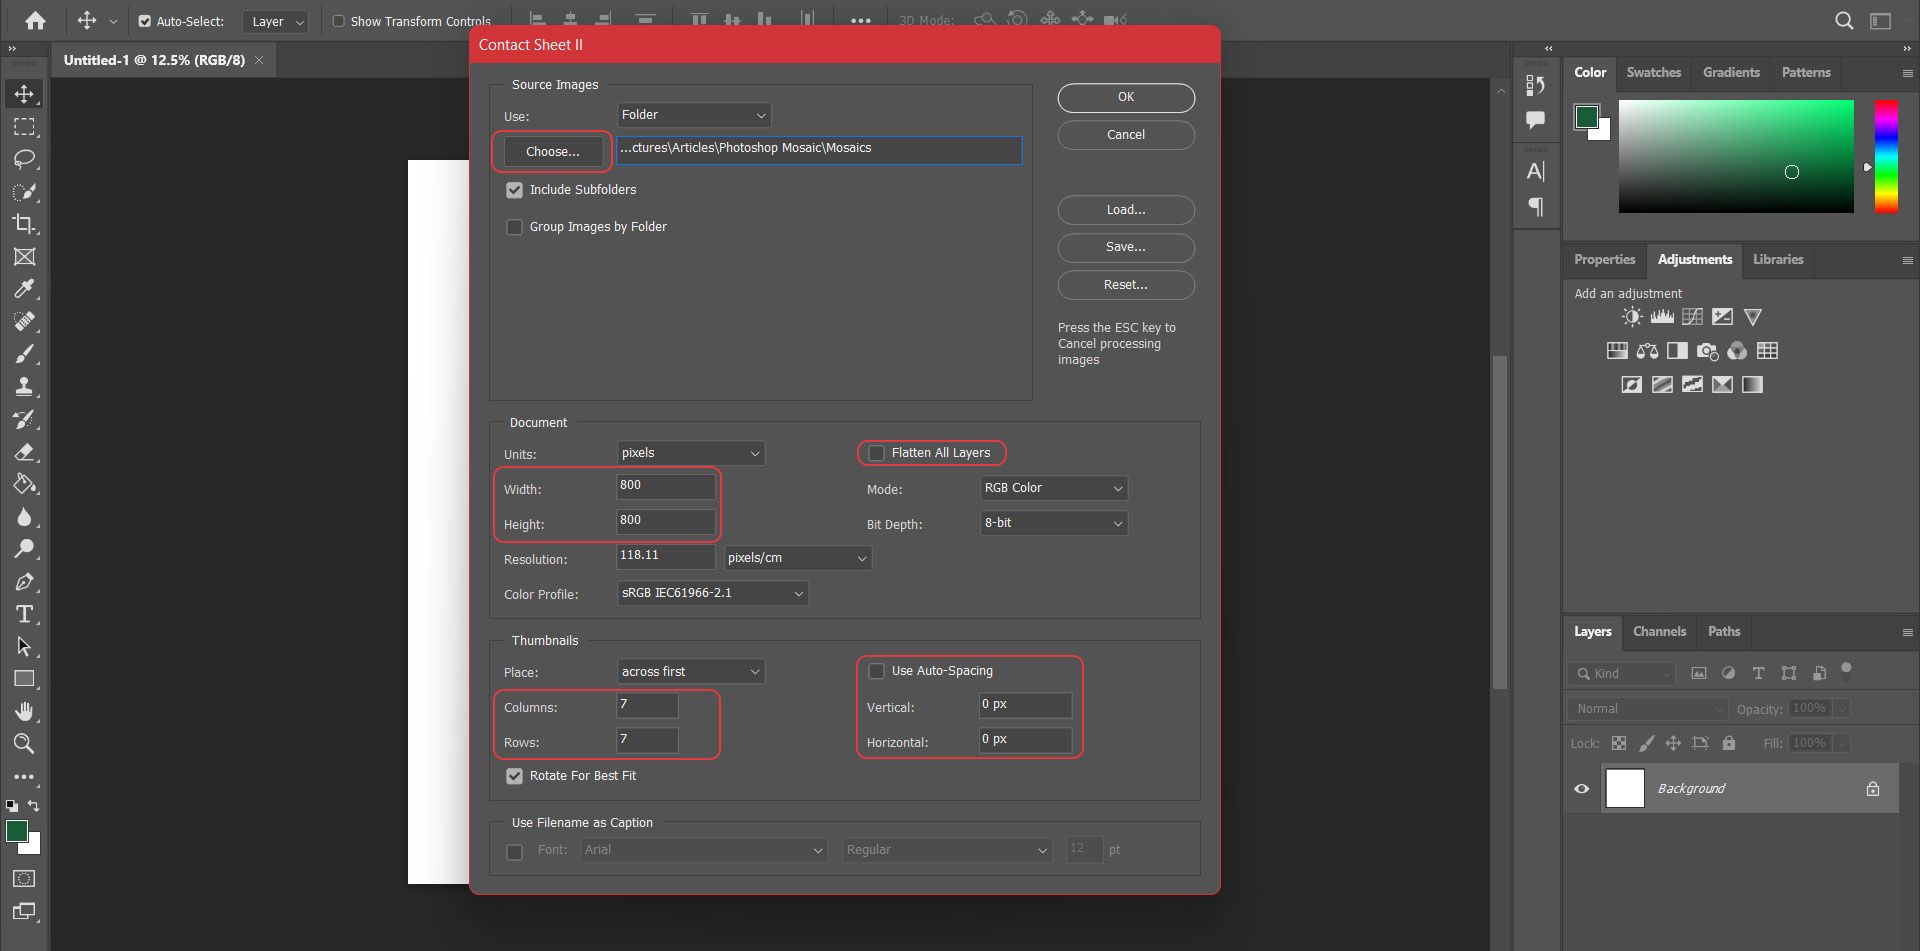
- Beneath supply pictures click on on Select after which choose the folder the place your mosaics are situated.
- Beneath Doc, enter your canvas measurement. The canvas measurement ought to be proportional to the mosaic measurement. So in case your mosaics are sq. enter a sq. measurement and if they’re rectangles enter an oblong measurement.
- Deactivate Flatten all layers. In the event you disable this, every mosaic within the contact sheet turns into a separate layer so you possibly can resize or transfer it earlier than finalizing.
- Beneath thumbnails, enter the variety of columns and rows based on the variety of pictures you’ve got. These two multiplied collectively ought to equal the full variety of mosaic pictures you’ve got within the folder. In any other case you’re going to get areas in your contact type. You probably have 100 mosaics, you need to enter 10 for each.
- Deactivate Use auto spacing and alter each Vertical and Horizontal values to zero. This ensures that there’s minimal spacing between the mosaics.
- click on OK prime proper when you’re carried out.
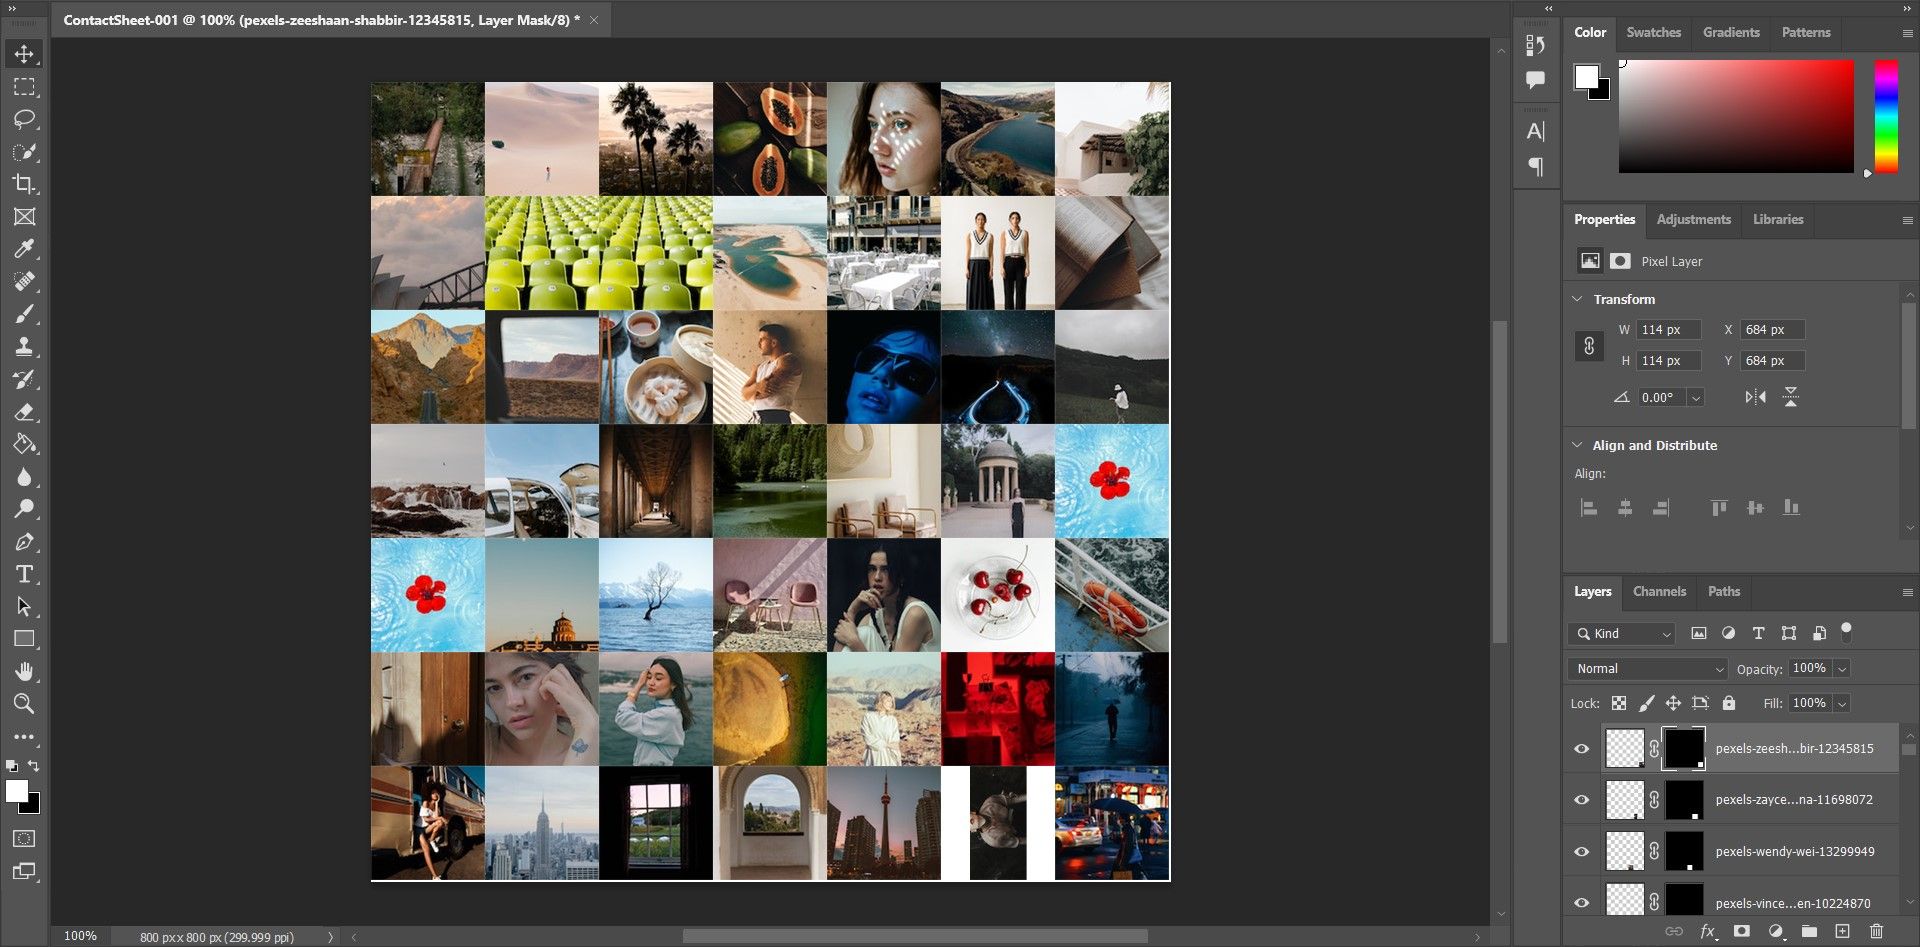
Relying on the variety of pictures and canvas measurement, Photoshop might take some time to create the contact sheet. As soon as it is carried out you need to have the ability to see how your entire mosaics will match on a single canvas.
3. Prepare the mosaics
Because you did not flatten the layers within the earlier step, the mosaics at the moment are every in a separate layer, so you possibly can organize your mosaics nonetheless you want. You probably have a selected gradient in thoughts, now’s the time to play it.
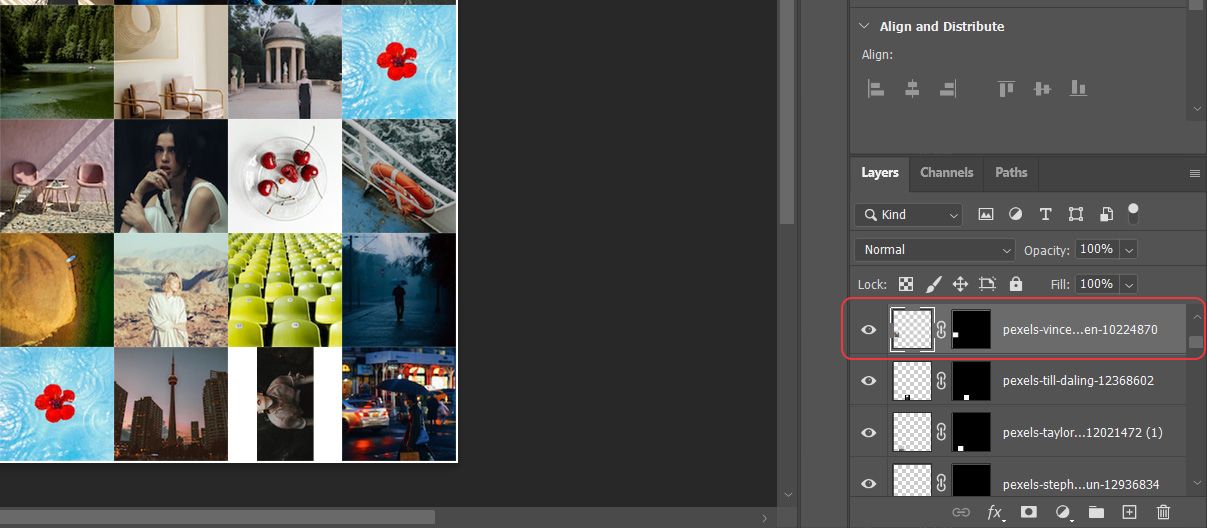
However, in case you have duplicate pictures facet by facet within the contact sheet, it is best to create some house between them by repositioning them. Duplicates could make the general sample much less clear, which is what we would like, however two duplicates facet by facet can draw consideration and destroy the photograph mosaic.
- Choose the picture you need to reposition.
- Seize the layer of the image within the layers window and produce it upstairs.
- Select Transfer software from the toolbar and reposition it. It’s also possible to press v in your keyboard to pick the transfer software.
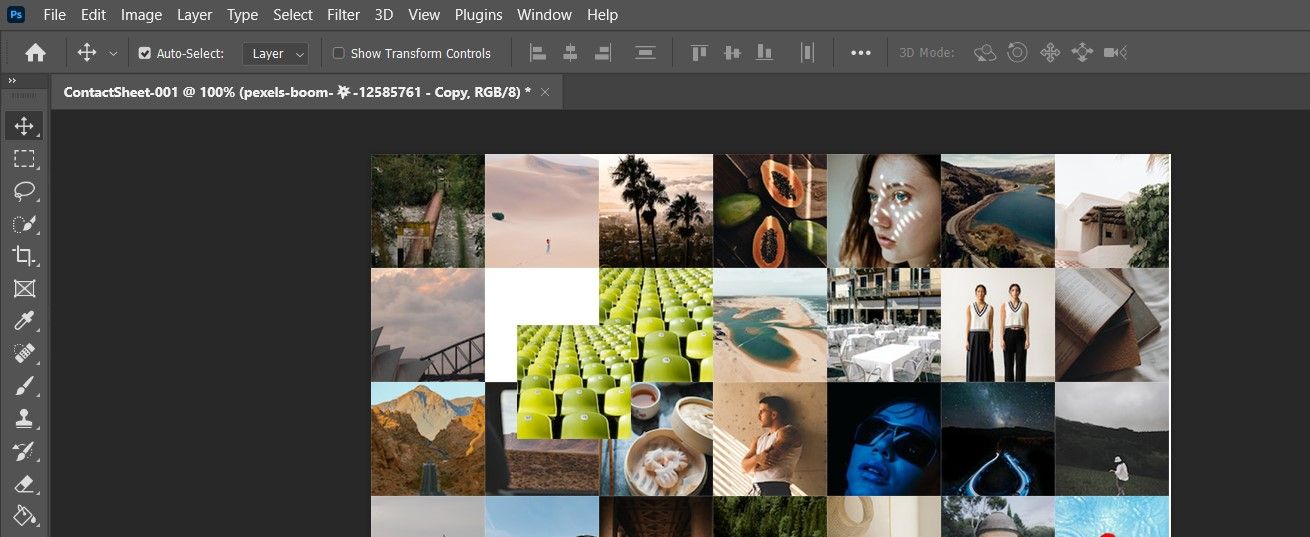
If there may be white house round a mosaic, you possibly can resize the picture to fill the complete space round it.
- Choose the picture you need to resize.
- Detach it from the layer masks by clicking Chain icon within the layers Window.
- Press ctrl/command + T activate in your keyboard Free transformation and zoom out the picture.
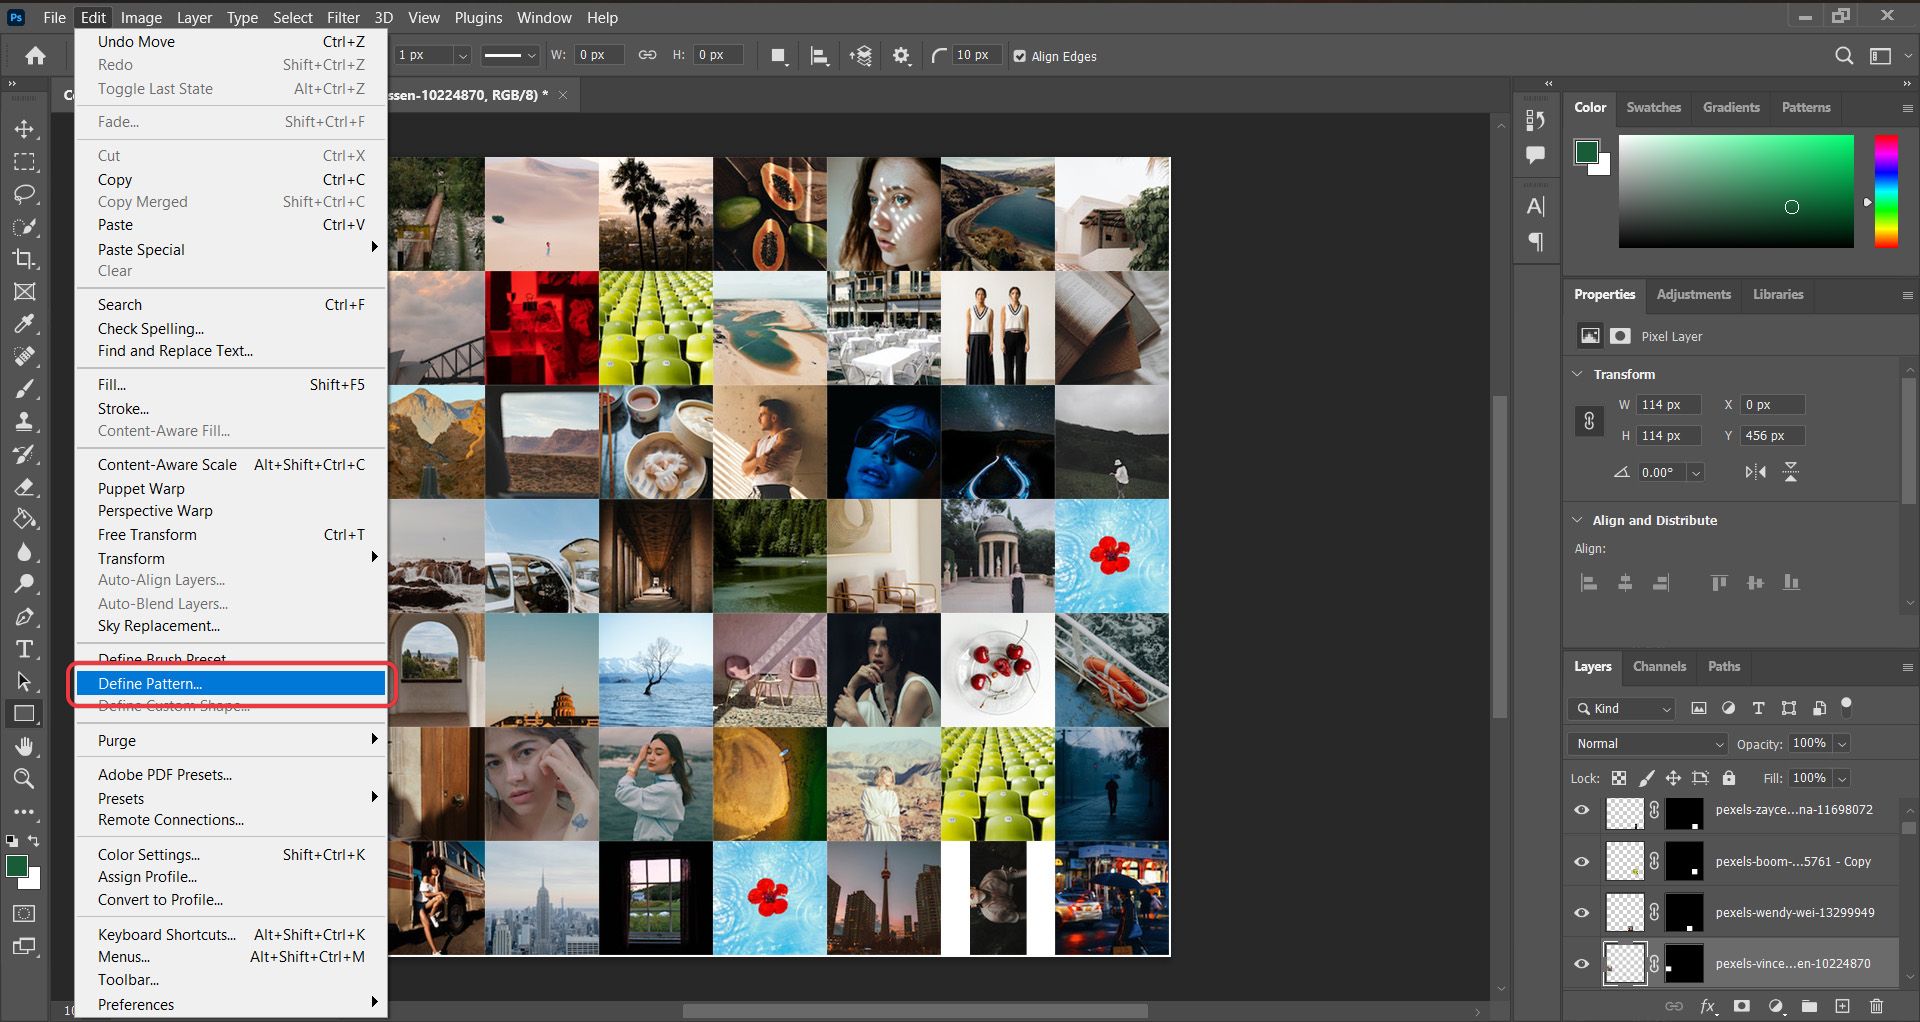
4. Outline a sample
Now that your little mosaics are carried out and organized, it is time to outline them as a sample. We’ll use this sample later to fill within the general picture.
- Go to To edit Menu.
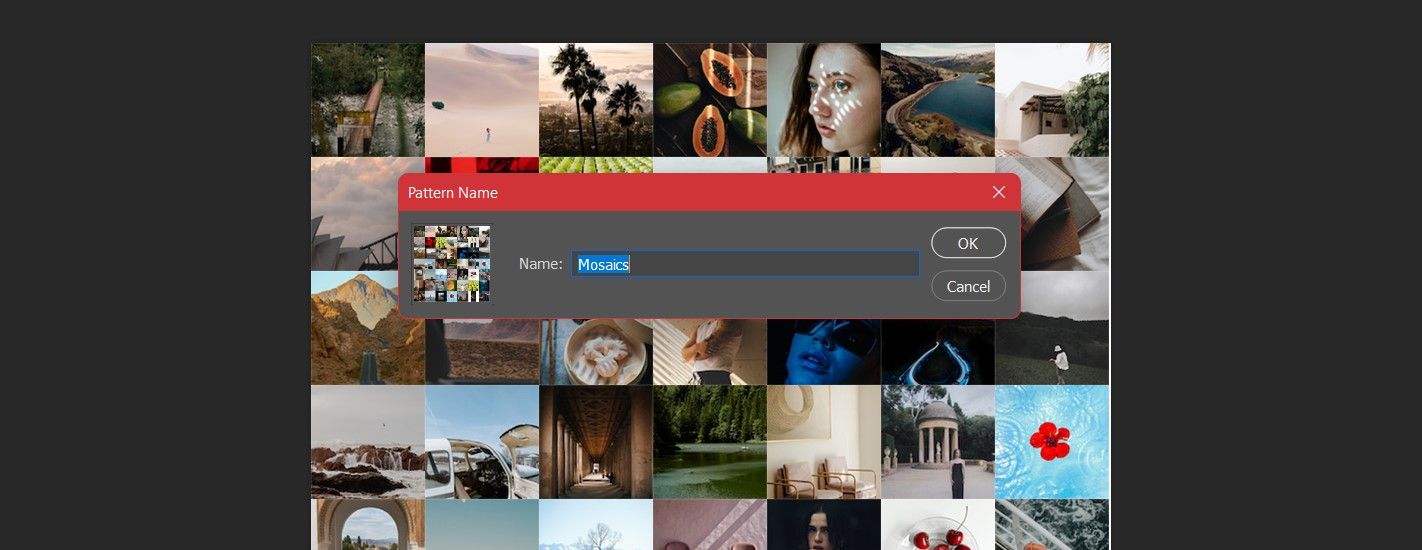
- Select Outline a sample. This can deliver up a immediate the place you could enter the identify on your sample.
- Enter a reputation for the sample.
- click on OK.
5. Create a sample fill layer
With the mosaic sample completed, we will now work on the general look. We create a brand new layer and fill it with the brand new mosaic sample.
- Open the primary picture in Photoshop.
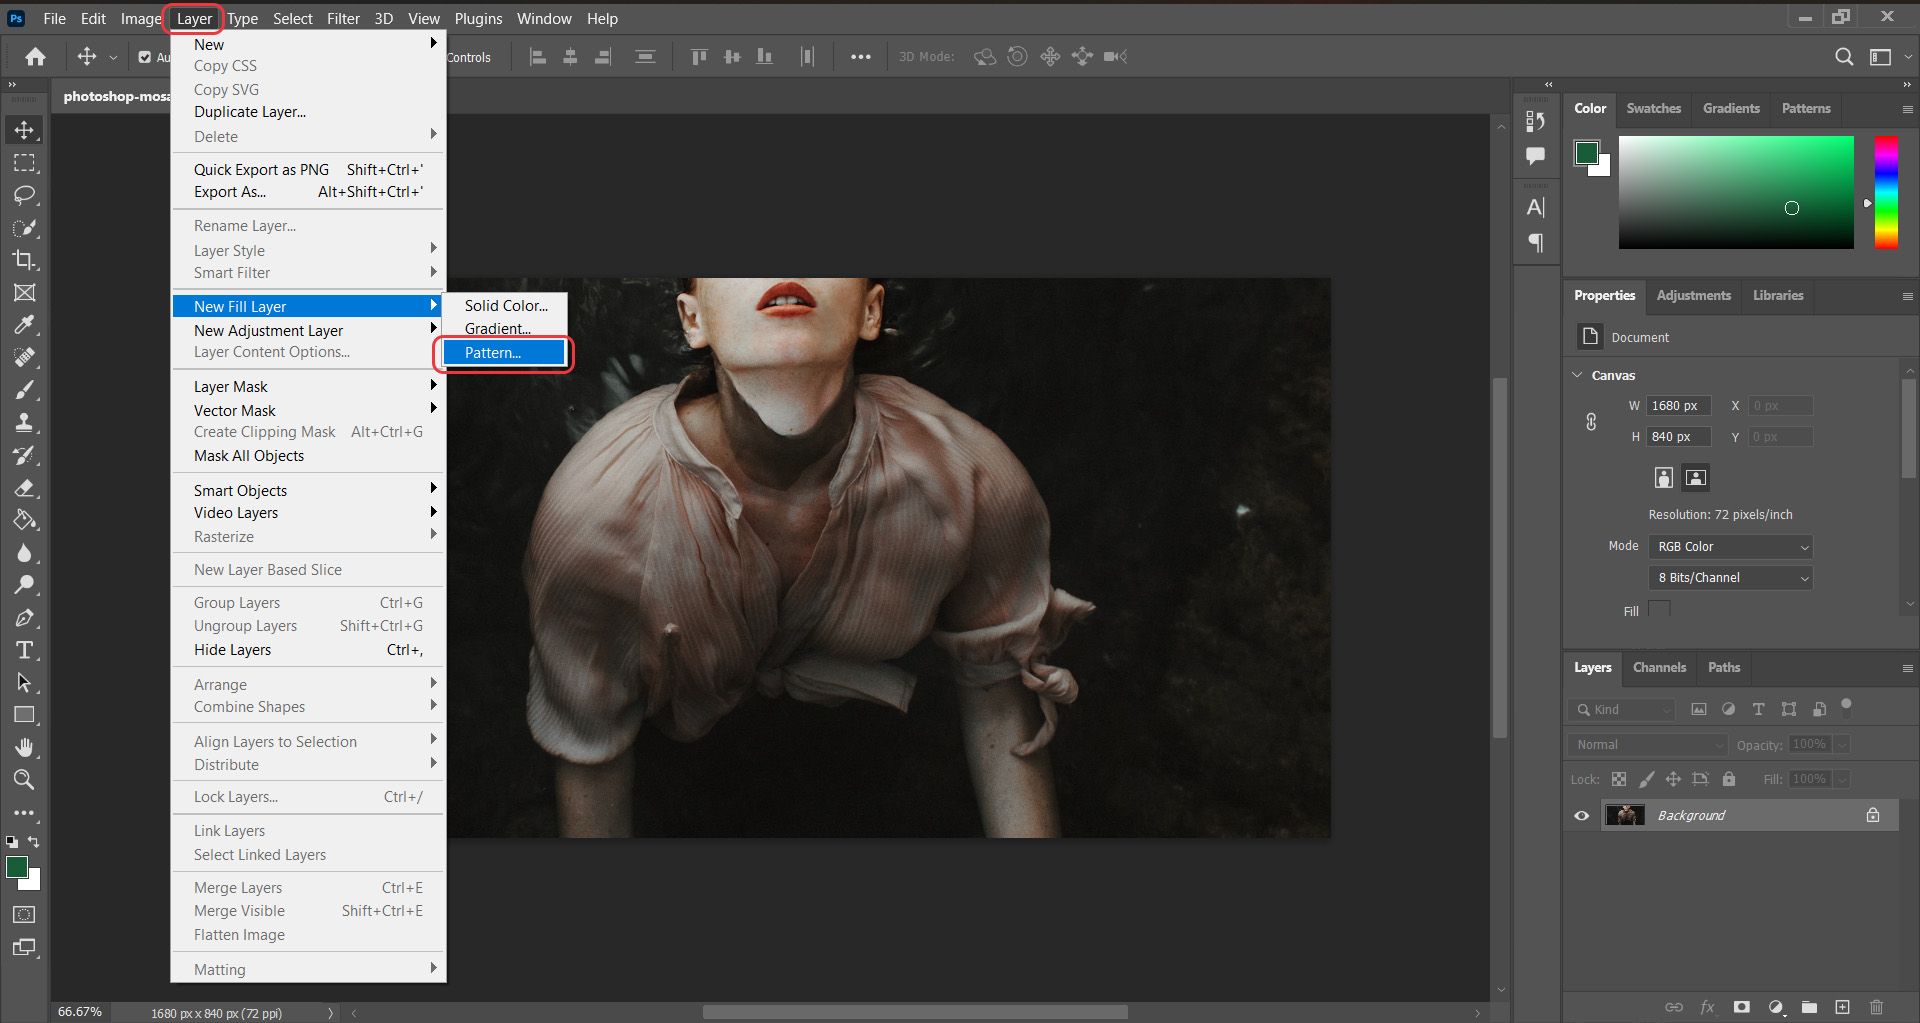
- Go to layer Menu.
- Click on on fill stage after which choose pattern. A command immediate will open.
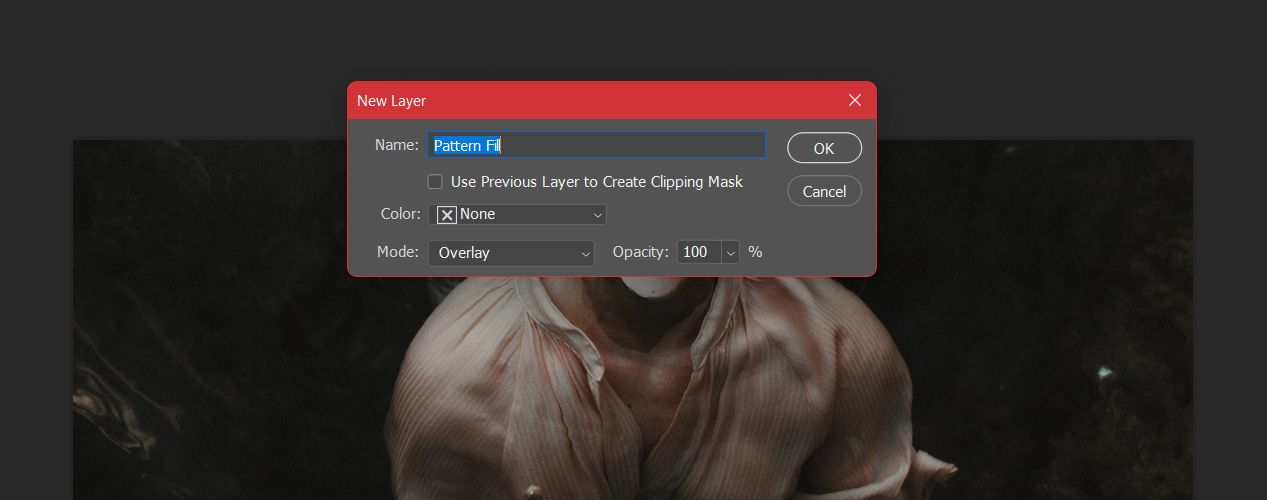
- Enter a reputation for the extent.
- change mode out regular to overlay.
- click on OK. One other immediate will seem.
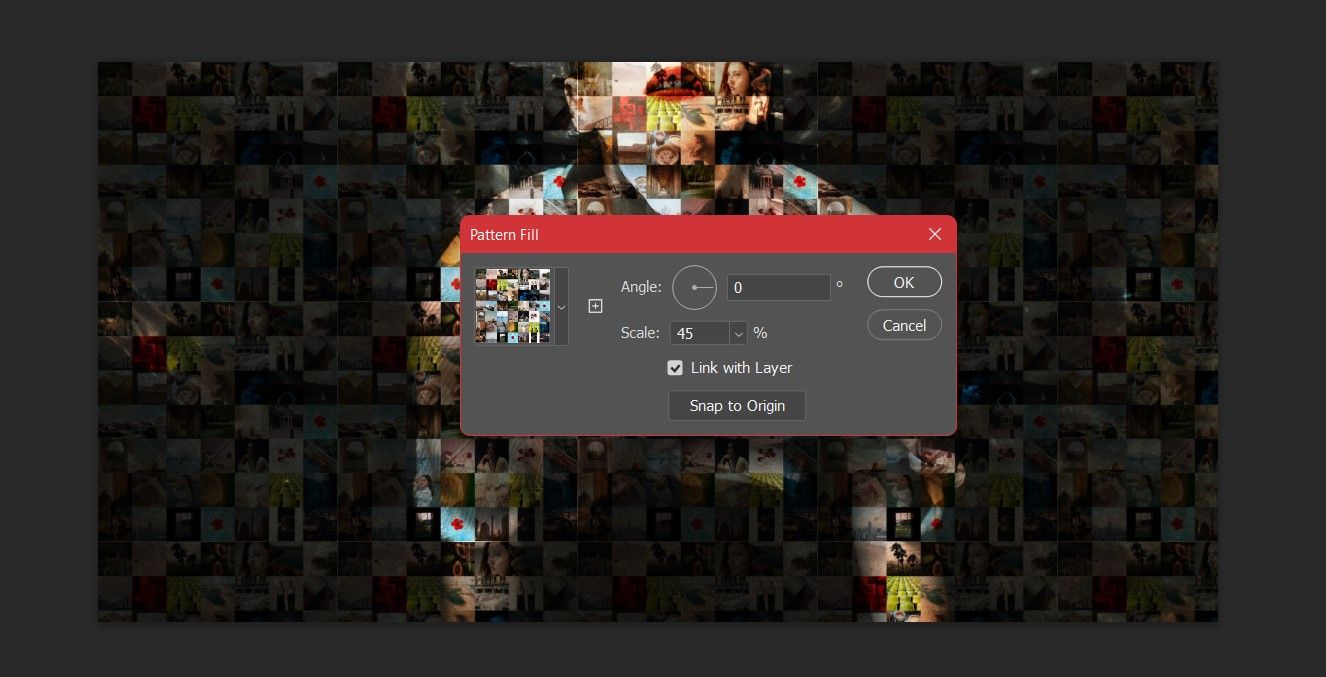
- press the Arrow subsequent to the sample thumbnail and choose the mosaic sample you simply created.
- To regulate scale and angle to your liking. Ideally, the dimensions shouldn’t be too massive in order that focus stays on the bigger picture, and never too small in order that the mosaics are distinguishable.
- click on OK.

Your photograph mosaic is now showing! In the event you’re pleased with the outcomes, then that is it for you. In any other case, you may make some changes to enhance the look of your photograph mosaic. It’s also possible to transfer the sample layer to higher place the tessellations.
6. Make the ultimate changes
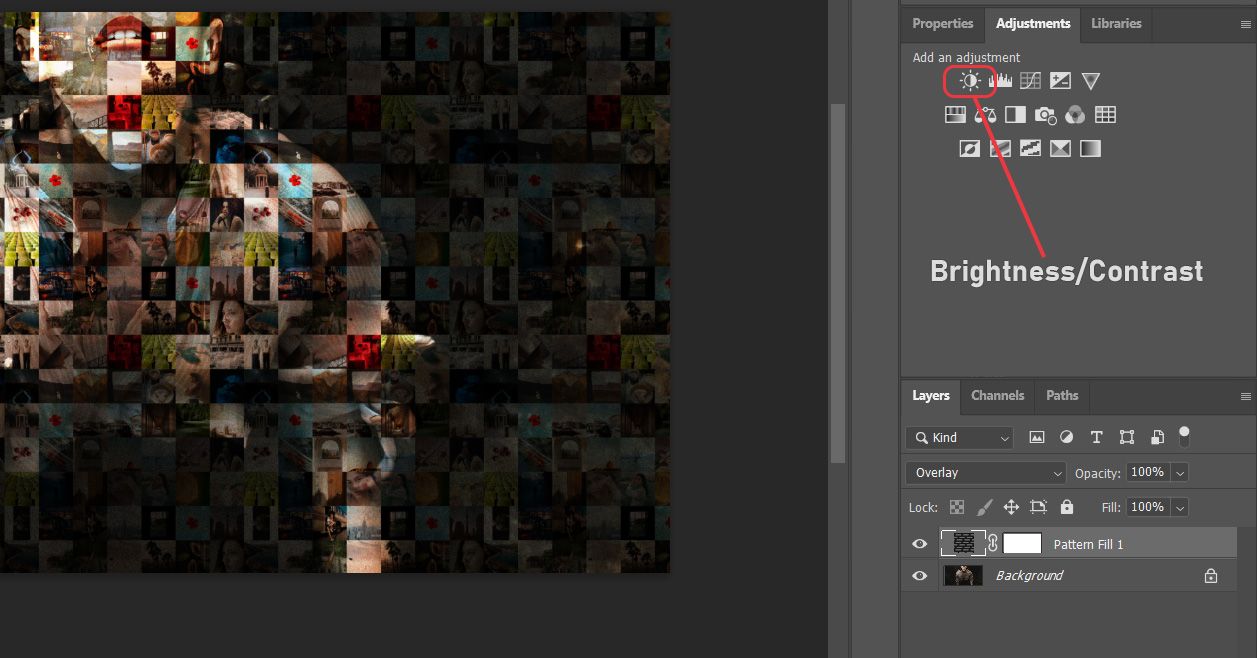
At this level, making the ultimate changes is only a matter of private desire. Nevertheless, you possibly can swap the main focus from the mosaics to the primary topic with the brightness/distinction adjustment.
- Go to changes Window. If you do not have the adjustment panel in your Photoshop workspace, go to window menu and test changes.
- Select brightness distinction.
- Place the “Lightness/Distinction” layer between the mosaic sample and the primary topic layers.
- Modify the brightness and distinction till you get an excellent stability between the primary topic and the mosaics.
Brightness and distinction have been only a few examples of what you are able to do to enhance the ultimate picture. For instance, one other adjustment you may make is the Hue/Saturation adjustment in Photoshop.
Puzzle comes up
Picture mosaics are an exquisite twist on photograph collages that mean you can place a number of pictures facet by facet to create what seems to be a bigger one.
With this text, you now know easy methods to create a contact sheet of your pictures, outline them as a sample, and fill in that sample on a bigger picture to create a photograph mosaic. It is time to use this newfound information and unleash your creativity in Photoshop!
