Find out how to Flip a Portrait Into Pop Artwork Utilizing Photoshop
Pop Artwork is an iconic artwork model that takes us again in time. Cheers to pop artwork hero Andy Warhol and salute to Roy Lichtenstein. In the present day, you may make your self seem like the muses of your work with halftones, summary colours, and daring strains and shadows. Beautify your portraits with this enjoyable pop artwork model in simply 10 steps in Photoshop.
Step 1: Open your picture
You need to use a shade picture or an already black and white picture. Since a part of this course of is coloring the picture itself, don’t fret about current colours. Typical pop artwork model focuses on particular person portraits, however use no matter picture you want in Photoshop.

If you wish to comply with our instance, obtain this picture of Eye for Ebony free of charge on Unsplash.
Step 2: Convert to good object, crop and resize
To work non-destructively, let’s convert our picture into a sensible object. This implies all the things is definitely reversible with out degrading the standard of the unique picture.
Choose the picture layer within the layers panel, proper click on on it and choose Convert to Sensible Object.
Earlier than we begin making a pop artwork masterpiece, it is best to verify the scale of your picture. Since we will be utilizing filters, a bigger picture is not as efficient. If you wish to crop your picture, do it first with the harvest Device (C).
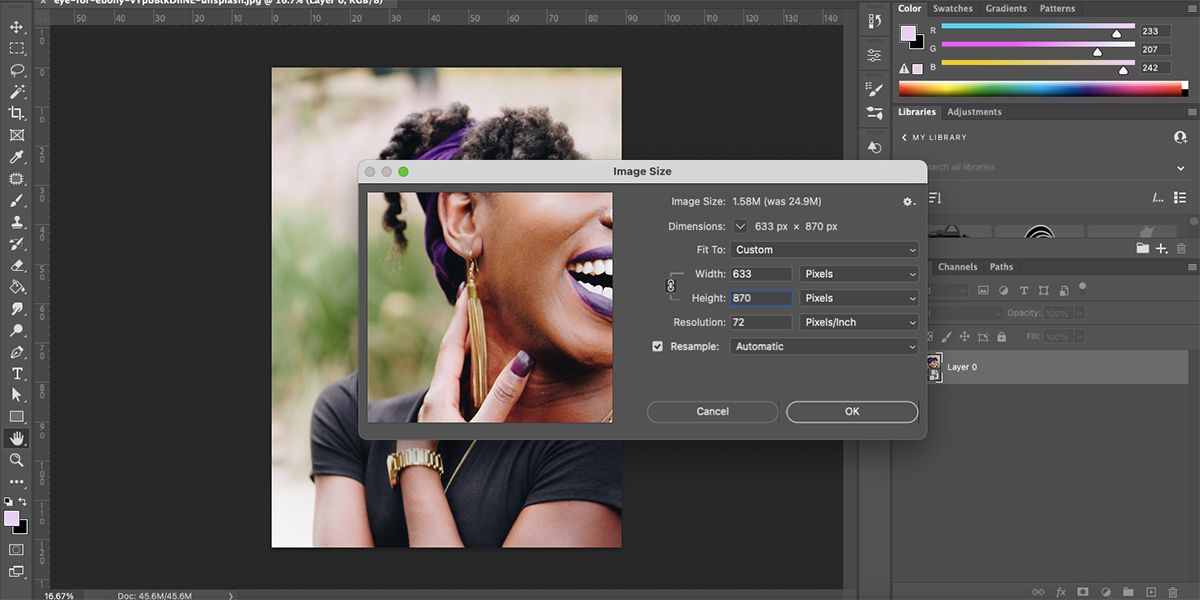
To alter the scale, go to image > picture measurement and set the decision to 72. In case your picture is in panorama format, set that Broad to 1200. In case your picture is portrait, set that Peak someplace inbetween 870 – 1200. Choose after resizing OK. Press ctrl + 0 (Home windows) or command + 0 (Mac) to suit your picture to the canvas.
Step 3: Select your subject
There are alternative ways to decide on your topic and it largely is determined by what your topic is. For portraits we will use the topic choice device.
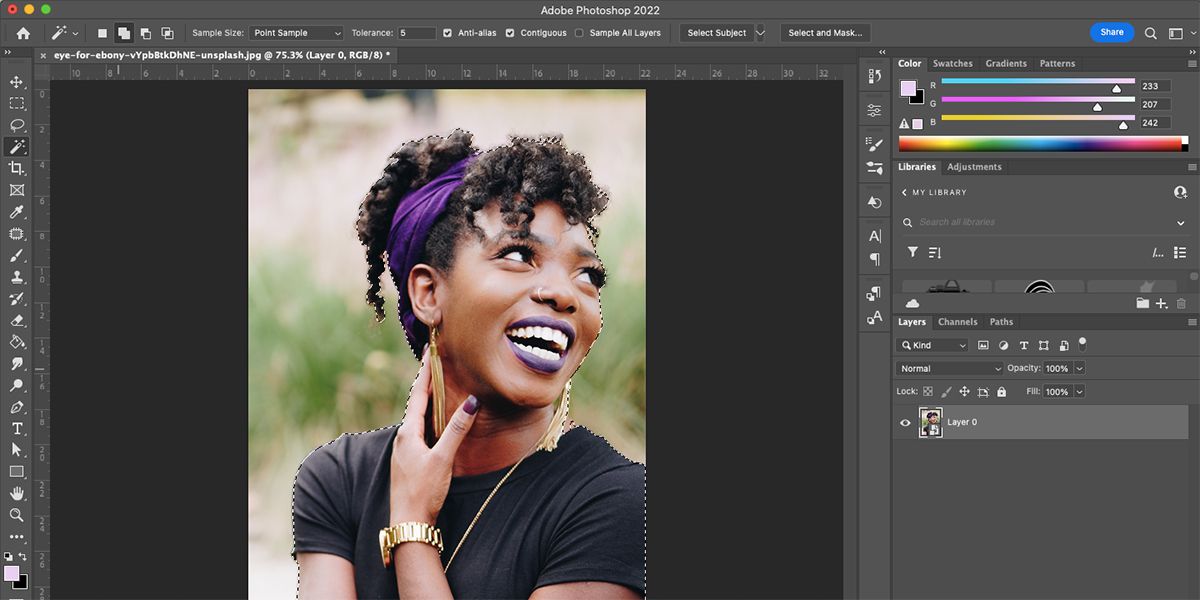
Select any choice device from the toolbar, e.g Magic wand Device (W). Then select choose topic within the high settings bar. When you do not see this selection, go to Select > theme. The choice reveals ants marching round your topic, however might have refinement. Click on the arrow subsequent to Choose Topic to decide on between choosing Adobe Cloud or System.
In case your picture has stray hairs or low-contrast shade variations between the topic and the background, you could must refine the choice. Photoshop has made it simpler to keep up hair picks.

Select lasso Device (L). Choose within the high settings bar Add to choice or Subtract from choiceafter which drag over the areas you could add or take away till you might be happy.

Within the Layers panel, with the topic layer chosen, choose Add layer masks on the backside of the panel. This may masks your topic so you’ll be able to work non-destructively. Proper click on on the picture layer and choose duplicate layer. Do that twice for a complete of three.
Rename the layers by double-clicking the titles after which clicking eHer Icon on the highest and backside duplicates to cover them so you’ll be able to solely see the center layer.
Step 4: Add a white background layer
Choose the underside layer and maintain it down ctrl (Home windows) or command (Mac) throughout choice Create a brand new stage within the layers panel. A brand new clear layer will open underneath the chosen layer. Choose the clear layer.
Double-click on the toolbar foreground Colour field to open the colour picker. Sort FFFFFF within the hex code area and click on OK. Then use the To fill Device (G) to fill the brand new layer with white. Now it appears like your topic has a plain white background.
Step 5: Make the image black and white
When you used a full shade picture, now could be the time to transform it to black and white. When you have already used a black and white picture, go to step 6.
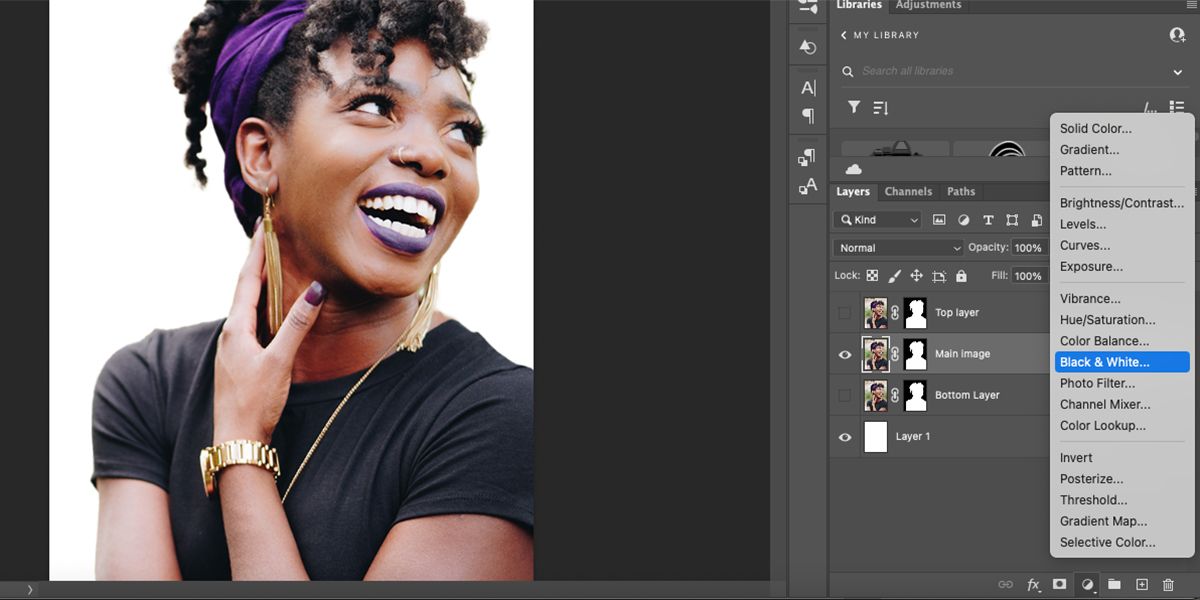
Choose the thumbnail of your picture within the layers panel, then choose Create a brand new fill or adjustment layer > Black-and-white.
Step 6: Mix the layers as a sensible object
To make sure all results are utilized accurately, some layers should be mixed into one good object. We have already made the only topic picture into a sensible object, however now that we have added an adjustment layer we have to do it once more.
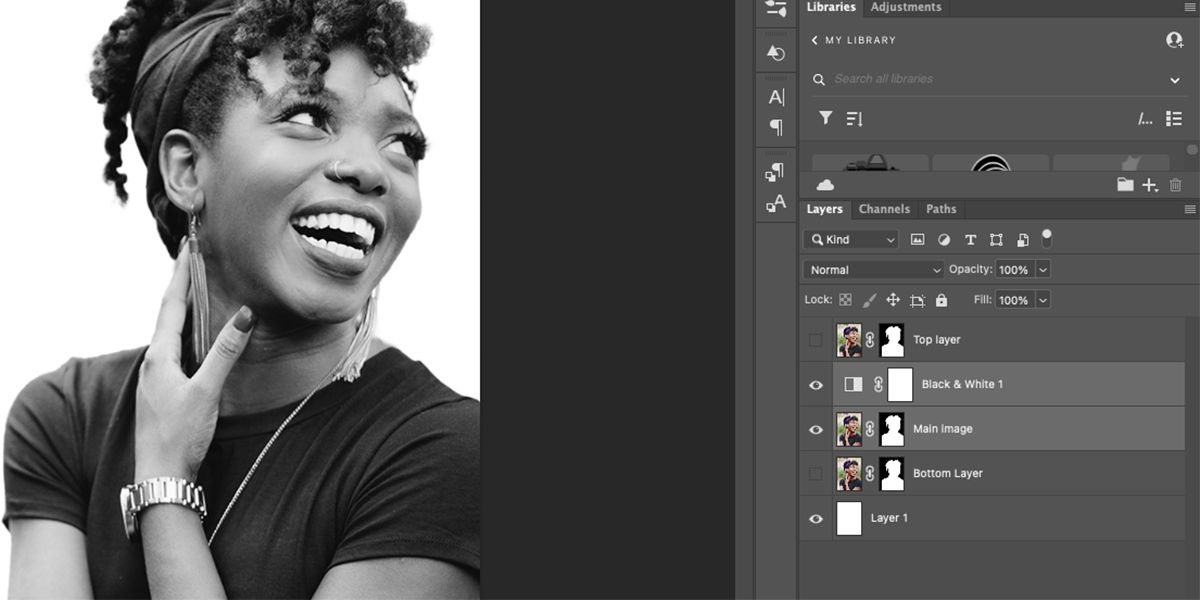
Choose your foremost picture layer and black and white adjustment layer by holding down change as you choose every. Proper click on on one of many layers and choose it Convert to Sensible Object. Now these layers are merged into one good object layer.
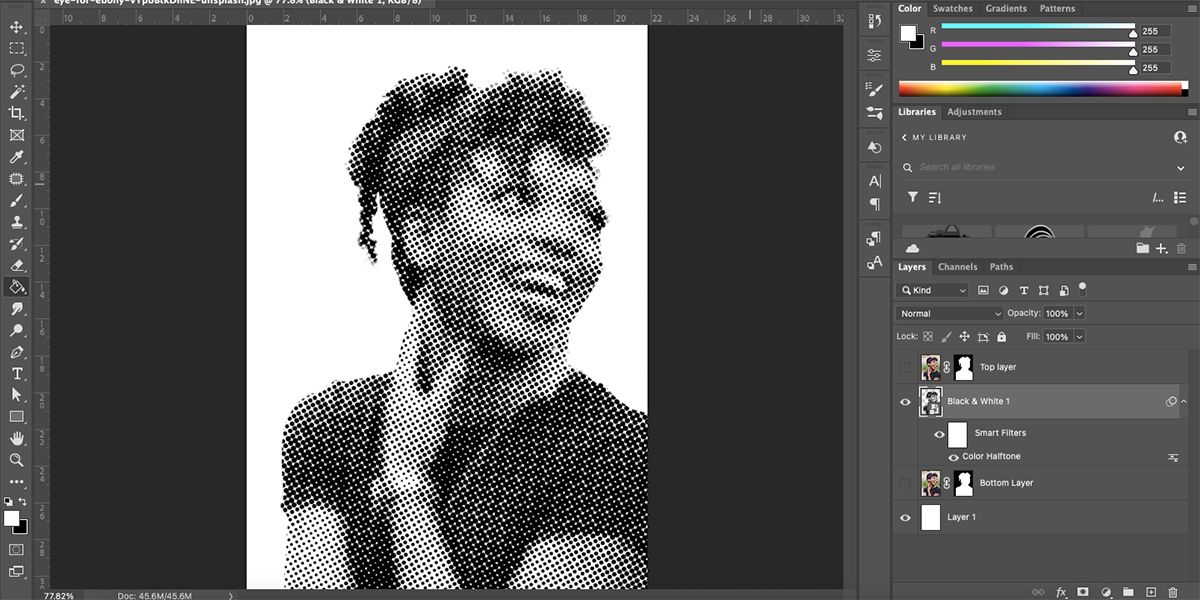
Step 7: Add a shade halftone filter
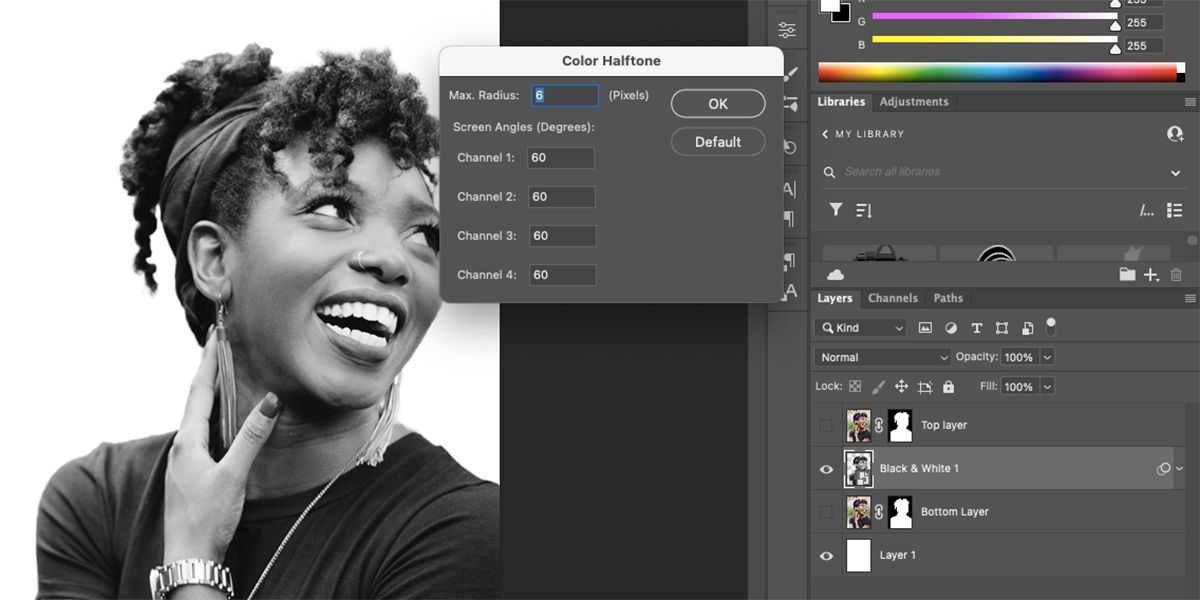
That is the step that turns your portrait right into a pop artwork piece: including halftones. Go to filter > pixelate > shade halftone. Set these Most Radius to 6 and set each channels to 60. click on OK.
There isn’t a preview possibility for this filter. So for those who’re not proud of that, you may should undo it and return to the filter to toggle the settings.
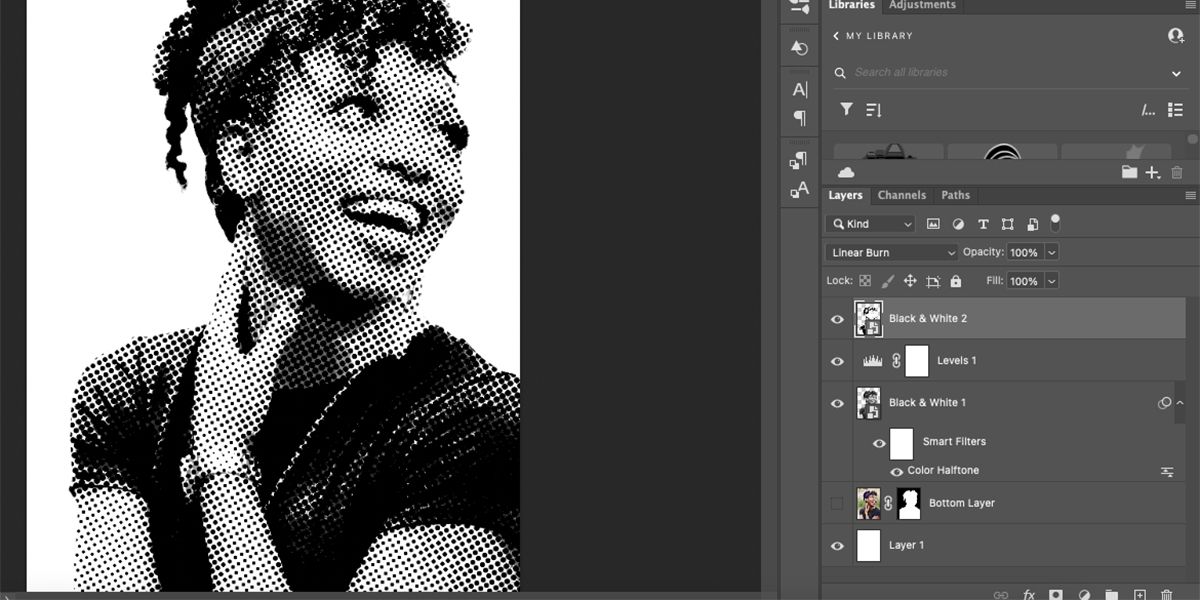
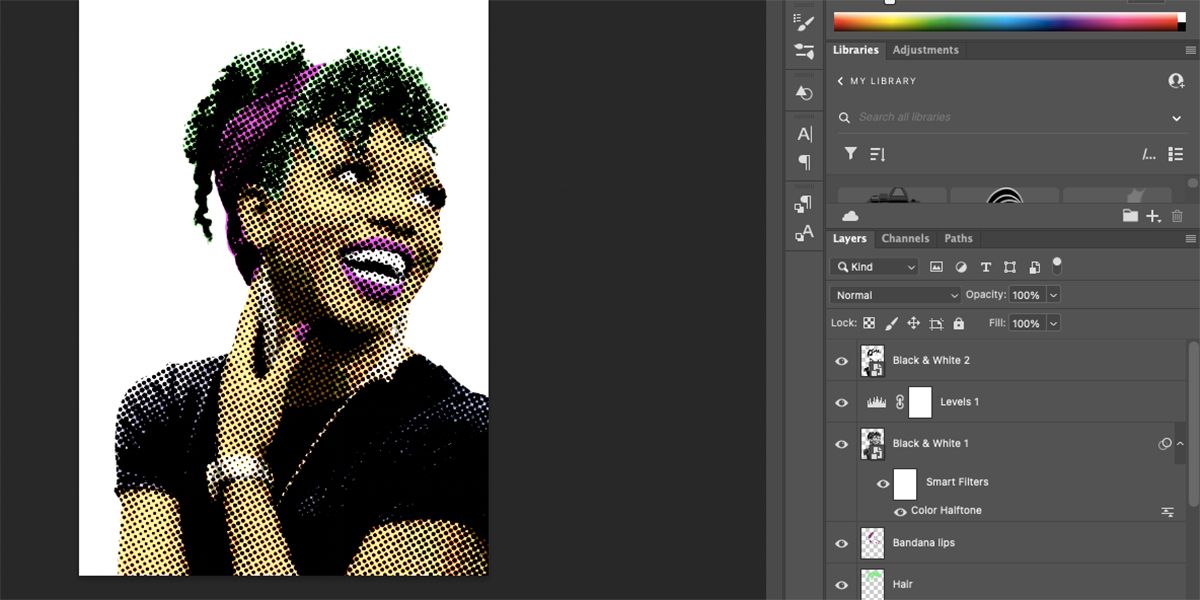
Step 8: Brighten your picture with layers
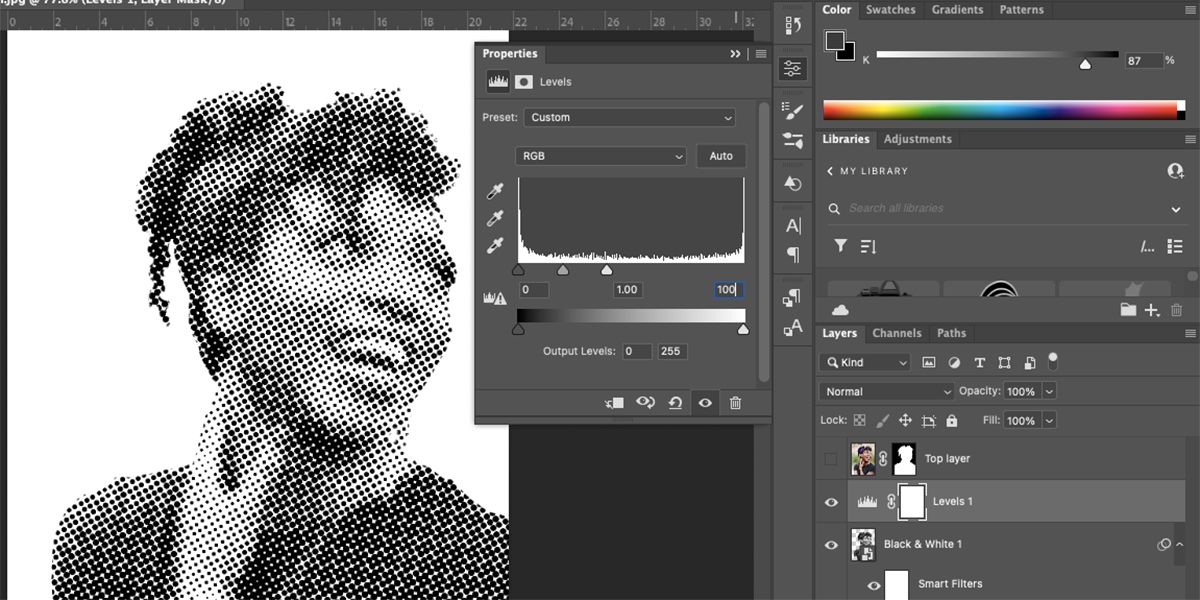
Within the Layers panel, click on Create a brand new fill or adjustment layer > ranges. Set the intense finish of the Ranges spectrum to 100. This may brighten your picture, however you’ll be able to change the degrees to your individual choice.
Choose the primary picture layer within the layers panel and choose Linear Burn within the Mixing Modes drop-down checklist.
Step 9: Change the publicity
Do you keep in mind these hidden layers? press the eHer icon on the high stage, after which choose the extent. Select Create a brand new fill or adjustment layer > Black-and-white. Then reselect the airplane and click on Create a brand new fill or adjustment layer > publicity.
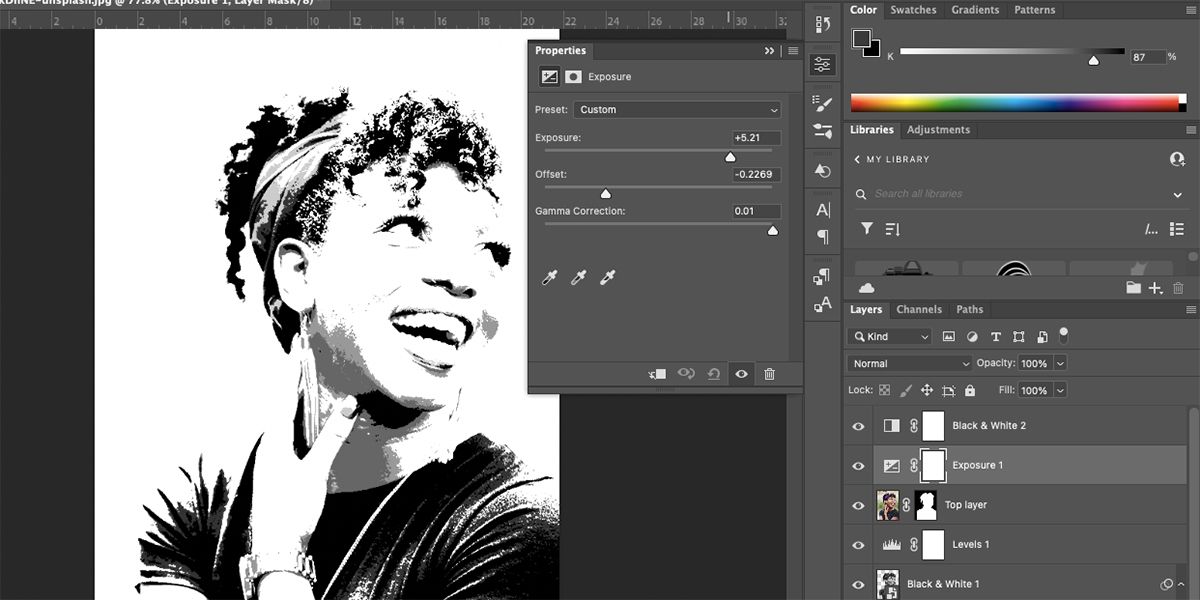
Publicity settings are totally different for every picture and your private model, however for our picture, set them publicity to +5.21the offset to -0.2269and the Gamma Correction to 0.01. Toggle the sliders to see what most closely fits your chosen picture.
Within the Layers panel, choose each Sensible Filter layers and your high duplicate layer – maintain them down change whereas choosing the highest and backside of the group to pick them abruptly – then right-click and choose Convert to Sensible Object.
Set your new layer’s Mixing Mode to Linear Burn.
Step 10: Add a pop of shade
Now you’ll be able to add shade to your portrait to finish the pop artwork impact. There are two alternative ways so as to add shade to your portrait, each are quite simple.
Possibility 1: Use the unique picture
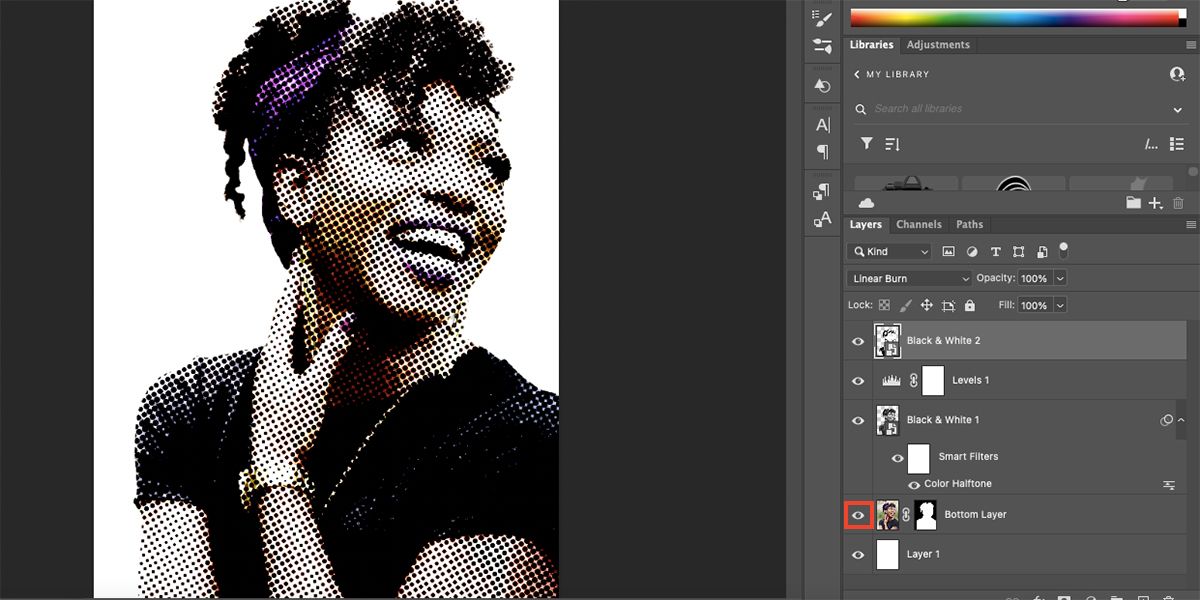
In case your authentic picture was full shade, you should use this method. Do you keep in mind the final hidden layer beneath? Simply choose them eHer icon on that layer to point out it once more. The mixing modes and adjustment layers on the opposite layers create a cool shade impact that works efficiently for a pop artwork portrait.
Apart from this nice halftone impact, you may as well make your pictures seem like work in Photoshop and even create an attention-grabbing picture mosaic in Photoshop.
Possibility 2: Paint with the comb device
If you wish to add extra summary shade to your portrait, you should use the Paintbrush device to color areas of shade. Create a brand new layer and transfer it beneath your halftone portrait however above your backside authentic picture. Conceal the layers above by clicking eHer image on these ranges.
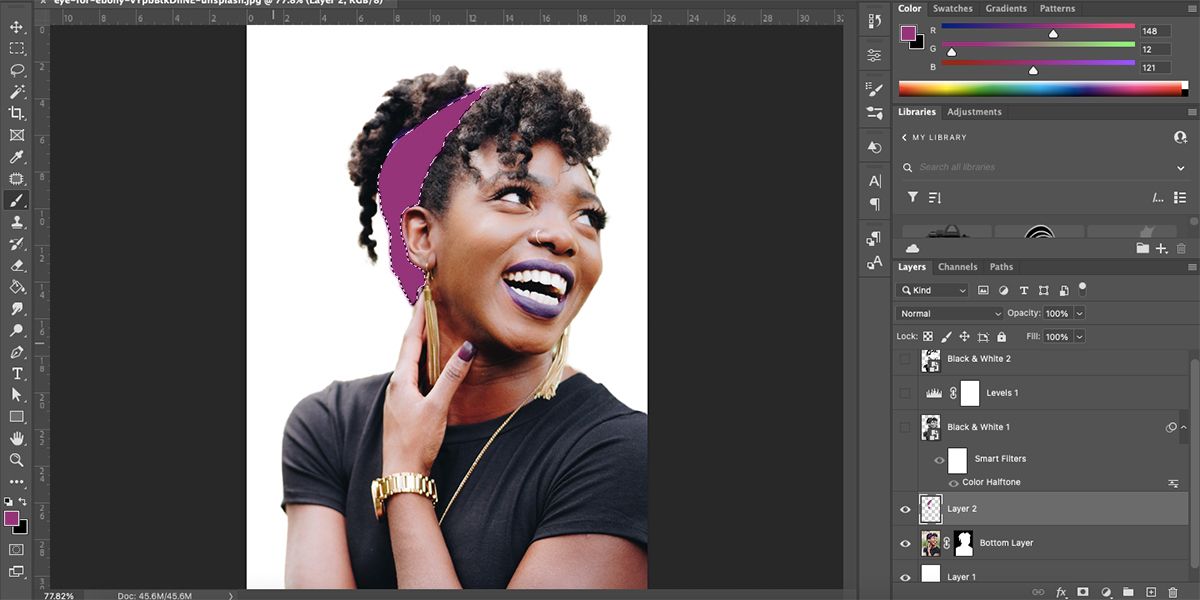
Along with your clear layer over the unique, you should use the unique picture as a reference and paint the colours immediately onto your clean layer. Use the brush Device (B) to color immediately the place you need, or use the lasso Device (L) to attract and choose exact areas earlier than portray or utilizing the Brush device To fill Device (G).
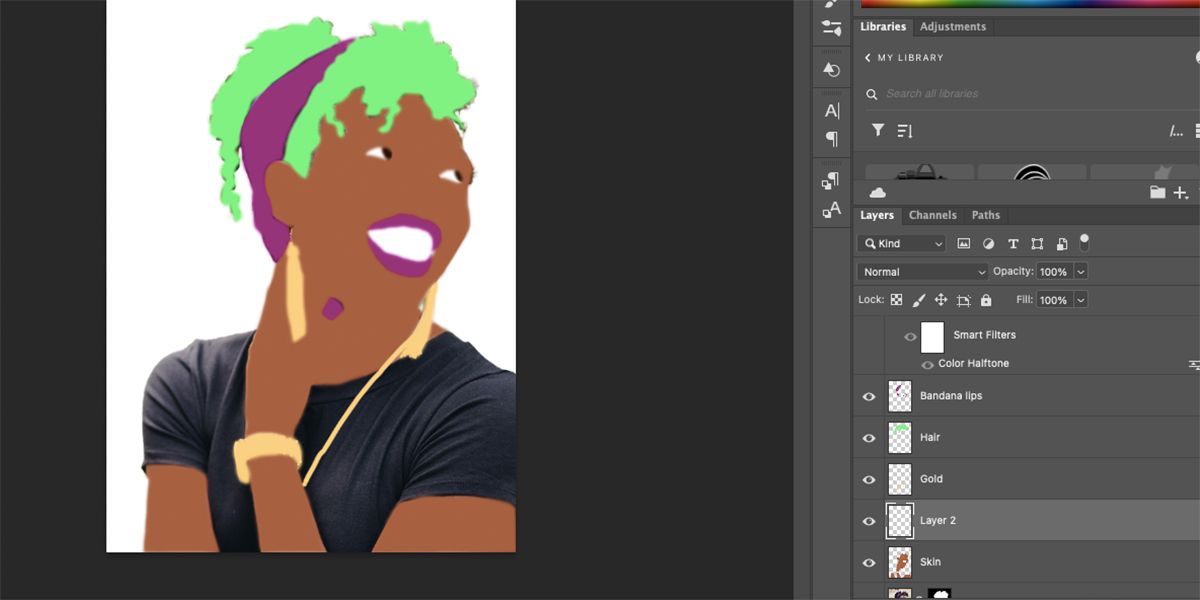
Be at liberty to create a number of layers for every shade space you add, or you’ll be able to paint all of them on one layer.
Whenever you’re completely happy, uncover the opposite layers once more to see your pop artwork creation. You possibly can conceal or delete the unique picture layer on the backside of the panel.
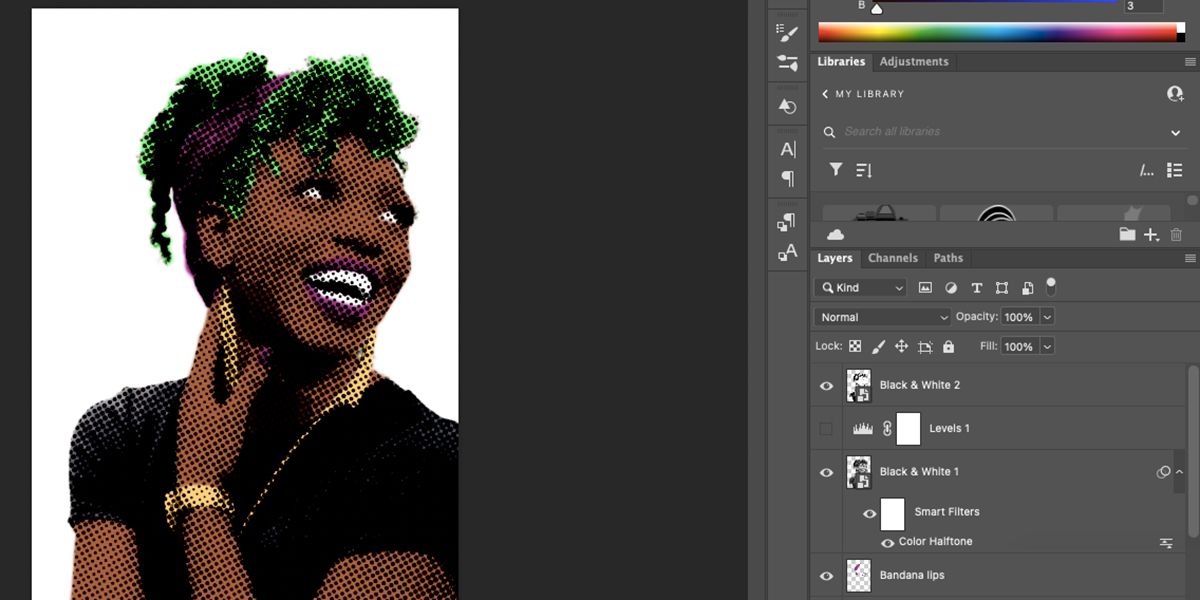
Now that you’ve got your summary colours, you could need to tweak or delete one of many adjustment layers to your liking. We predict ours appears higher with out the degrees adjustment layer.
Flip your portraits into pop artwork
Following this easy tutorial, you can take your portraits again in time with the long-lasting pop artwork model. Whether or not you need to hold the colour real looking or go summary, a pop artwork portrait is a enjoyable technique to showcase your pictures and exhibit your inventive facet. You possibly can experiment with colours, halftone results, or daring strains and see what involves thoughts.
