Change the Background in an Picture Utilizing Photoshop

In the event you’ve taken an incredible photograph of your topic, however the background simply would not match, don’t fret – you may simply change the background to your liking in just a few faucets utilizing picture modifying applications like Adobe Lightroom or Photoshop.
On this Photoshop tutorial, we’ll present you the best way to exchange the background picture, together with selecting your topic and matching the colour to the unique photos.
change background photos with Photoshop
There are a number of steps to interchange a background picture in Adobe Photoshop CC. First you must import each the unique picture and your new background picture. Then you must choose and masks your topic, subtract the background and overlay the topic on the brand new background. Lastly, you may add ending touches like paint to match the 2 photos.

In fact, that is simpler with a picture that has a well-defined topic and background, corresponding to a picture. B. the picture we selected for instance the method. With a number of topics, a foreground, or a blurred background, it turns into harder to create a convincing picture.
With that out of the way in which, this is the best way to change the background of a picture.
Step 1 Import the brand new background picture
Step one is to open your picture and import the brand new background. The trick right here is to make use of a background picture that matches the attitude of your topic as carefully as potential.
In our instance, a girl is wanting into the gap and her torso is seen. Selecting a picture with an excessive amount of foreground would not match, so we selected a distant panorama with an identical perspective as the brand new background.
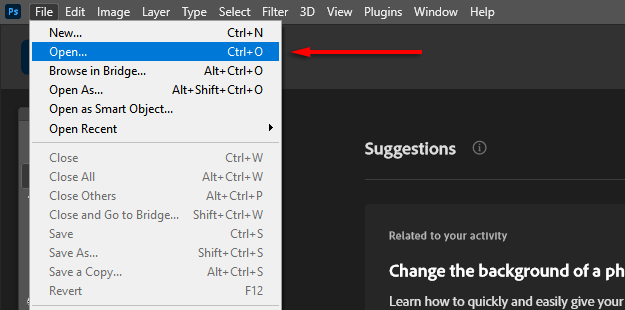
- Open the picture in Photoshop by both clicking and dragging or deciding on the file file > Open and collection of the picture file.
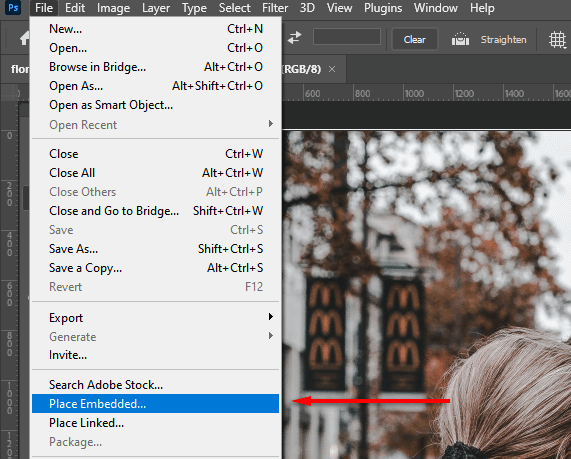
- With the picture open in Photoshop, choose file > Place embedded.
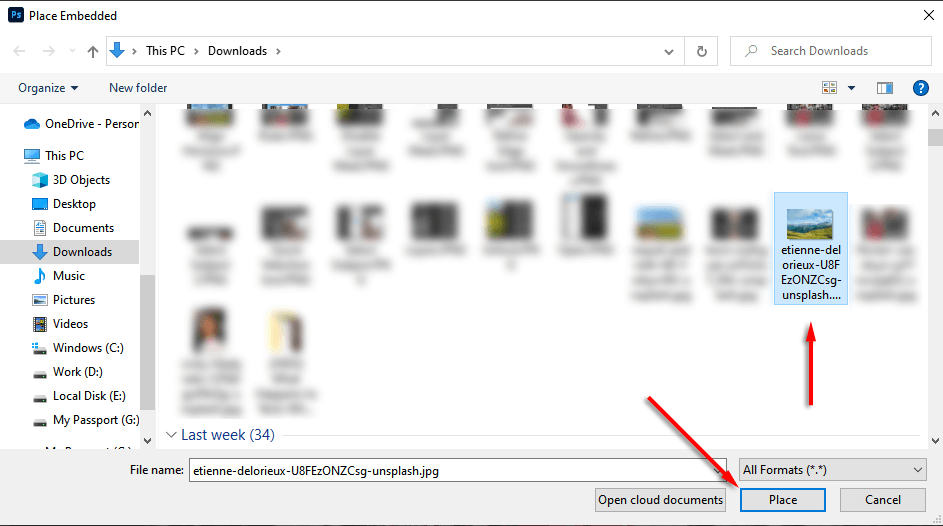
- Navigate to your new wallpaper and choose it location.
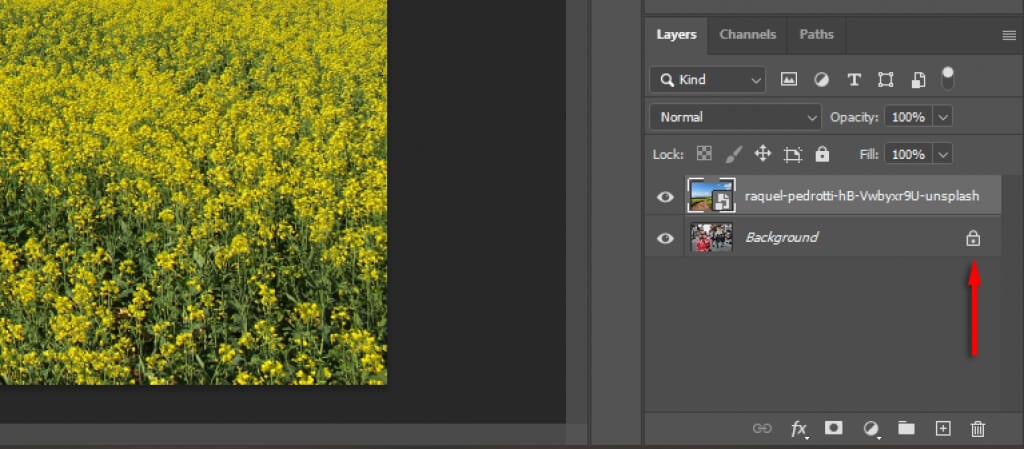
- Place the brand new layer under the unique layer by clicking and dragging it into the layers Blackboard. You could have to unlock the unique layer by clicking lock out icon first.
Step 2: Choose the topic and masks it
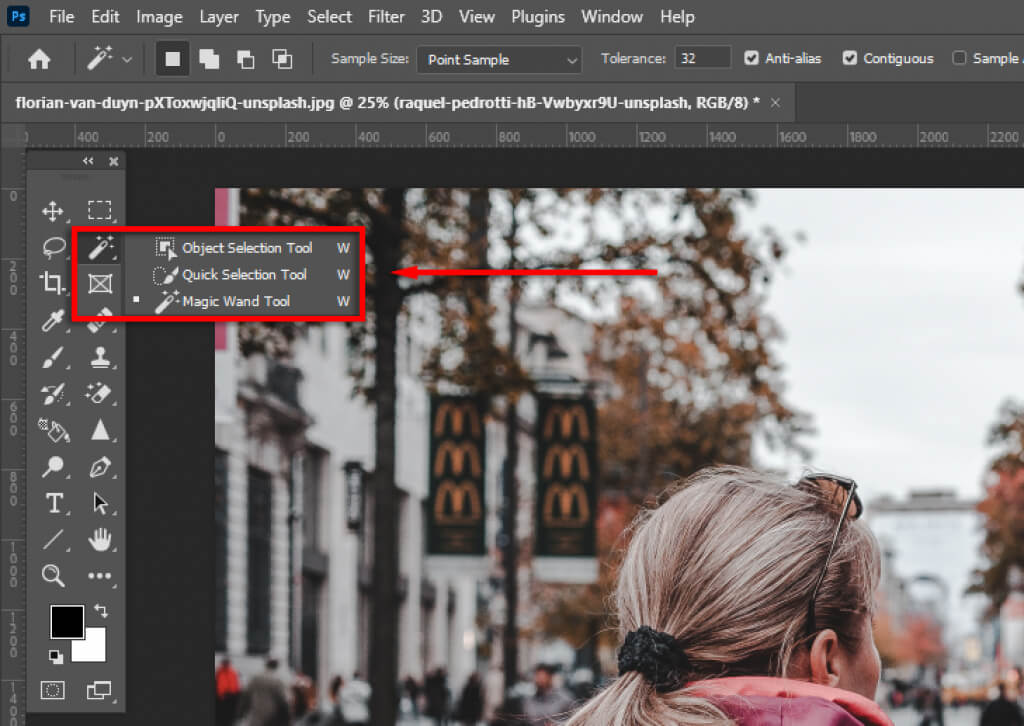
There are a number of methods to create a range. You probably have a transparent topic, Adobe Photoshop’s automated topic choice device is the best to make use of. Nevertheless, it’s also possible to use a mix of the Fast Choice Instrument, Magic Wand Instrument, and Lasso Instrument to pick your topic.
Select your matter
- click on Select.
- click on choose topic and let Photoshop do its magic.
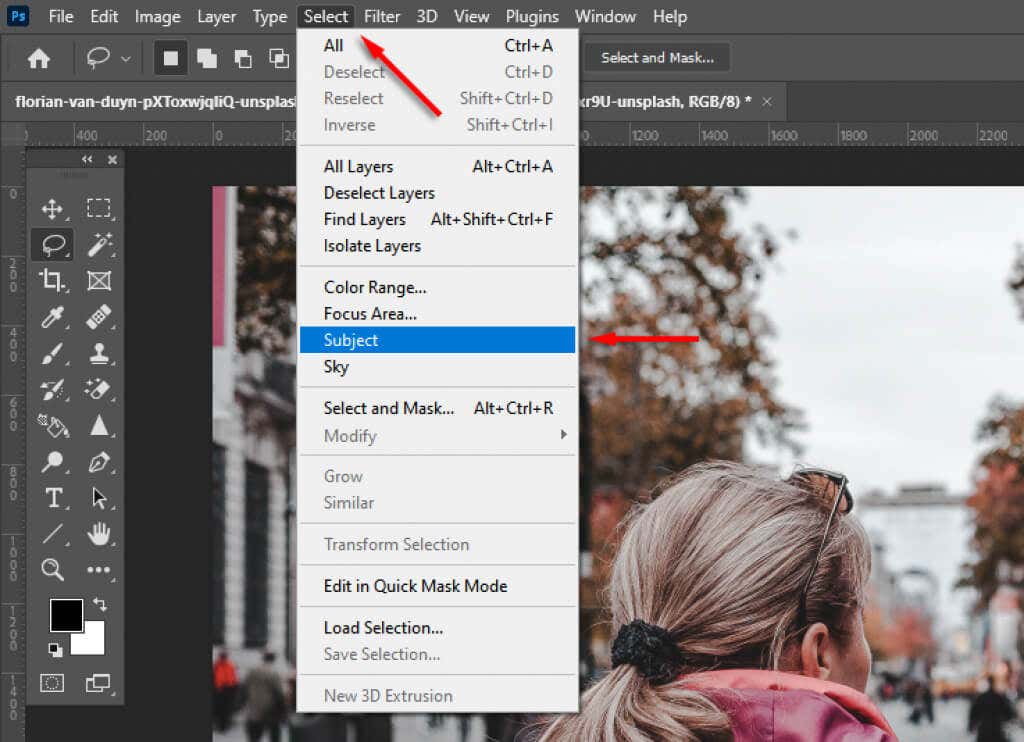
- Alternatively use the fast choice or Magic wand Instrument to pick as a lot of your topic as potential.
- Use the lasso Instrument to refine your choice. This will probably be required for tougher to establish topics. In our instance, you may see that Adobe captured some areas incorrectly.
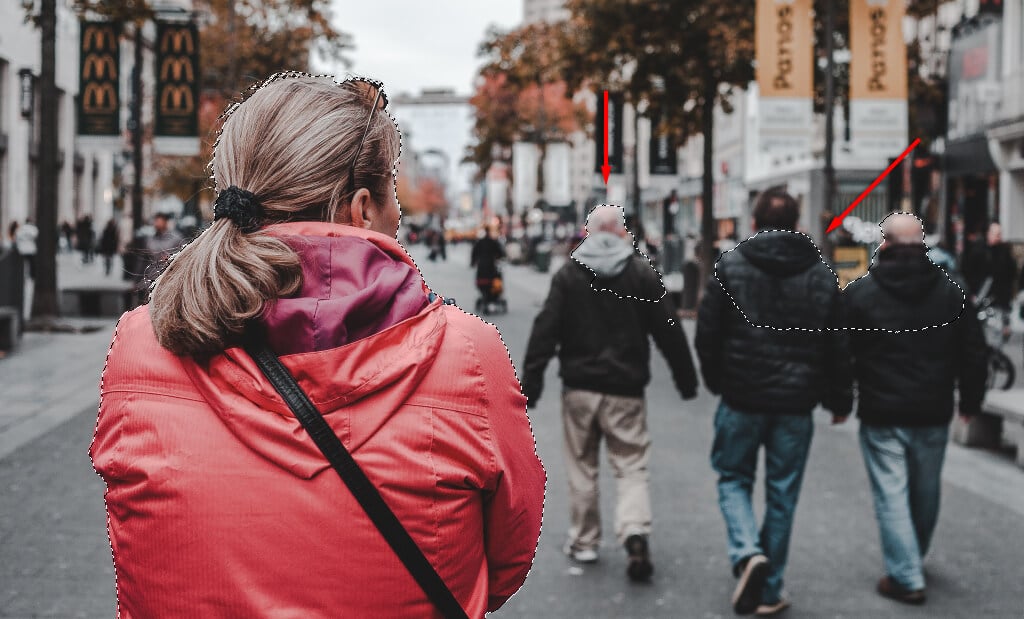
- Maintain with the Lasso device change Orbiting an space expands the choice when you maintain it previous will deduct.
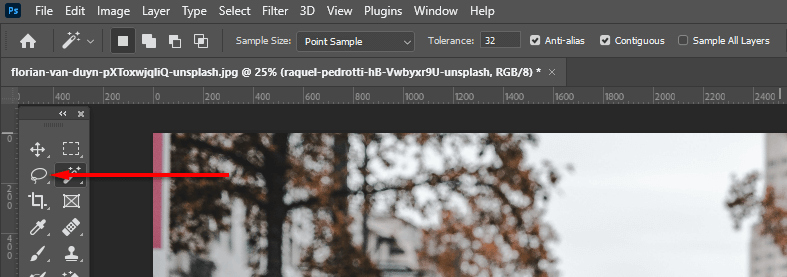
- click on Choose and masks… to chop out your design.
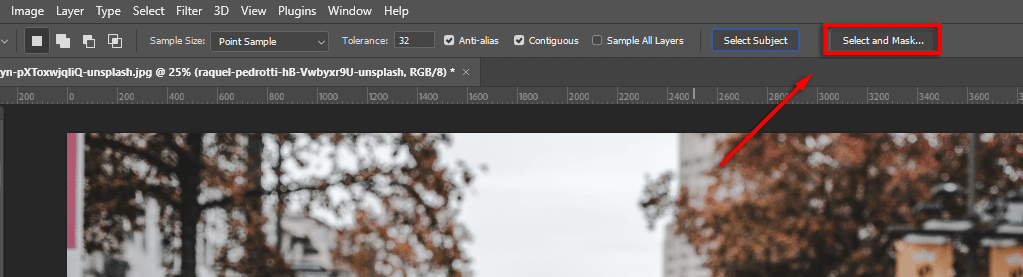
Refine the choice
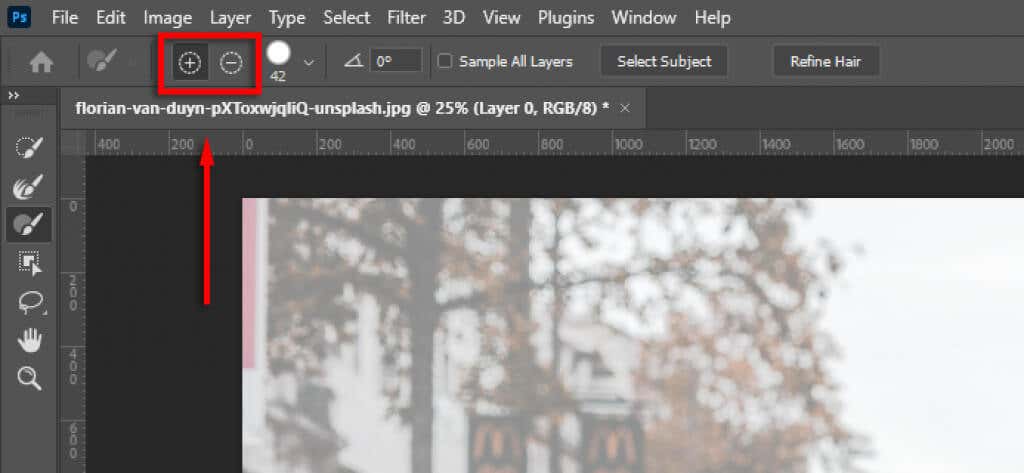
- If essential, refine the choice additional by utilizing the lasso and brush Instruments from the toolbar. To enrich your choice, be sure that the add to choice button is chosen. To take away areas, click on deduct from the choice Button.
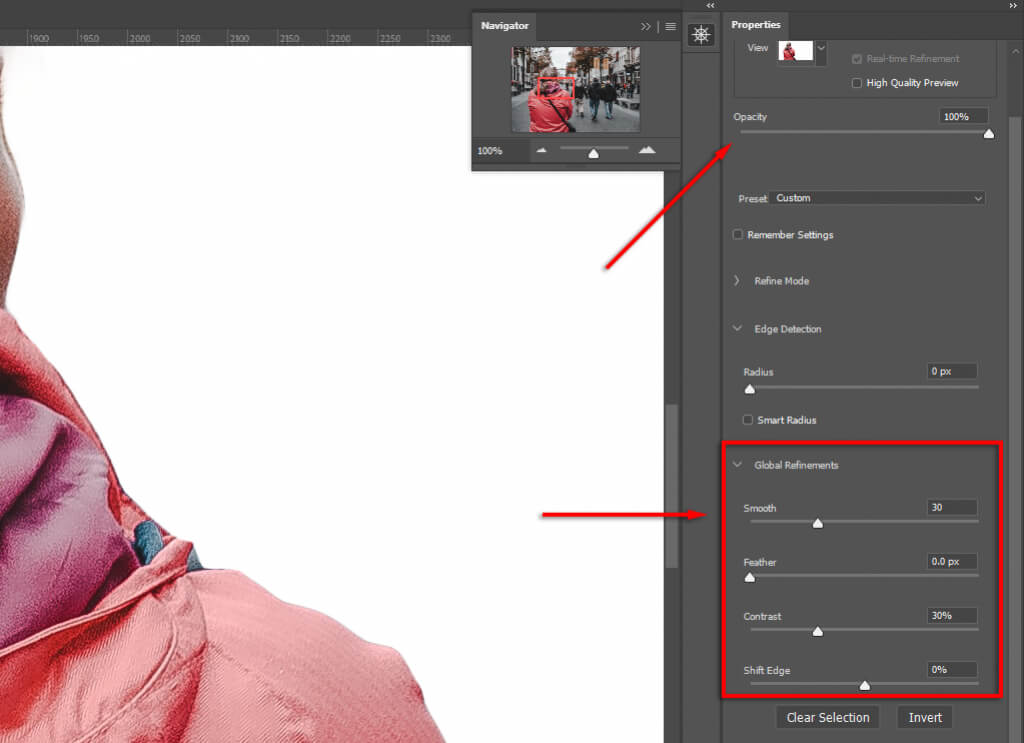
- Lastly, enhance the margin of your choice. If the perimeters look unnatural, below World refinementschange that smoothness and distinction Slider till the choice appears extra pure. It could be useful to set these opacity Slider to 100% to see the perimeters higher.
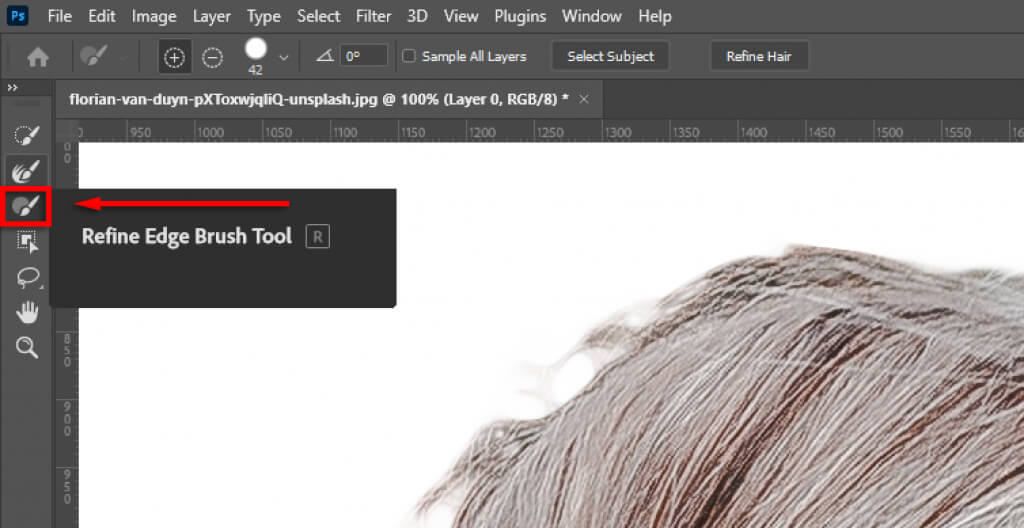
- Click on on refine edges to nice tune tough areas like hair. Then choose refine hair (if it is hair) to have Photoshop refine the sting routinely, or use the comb so as to add areas to your choice.
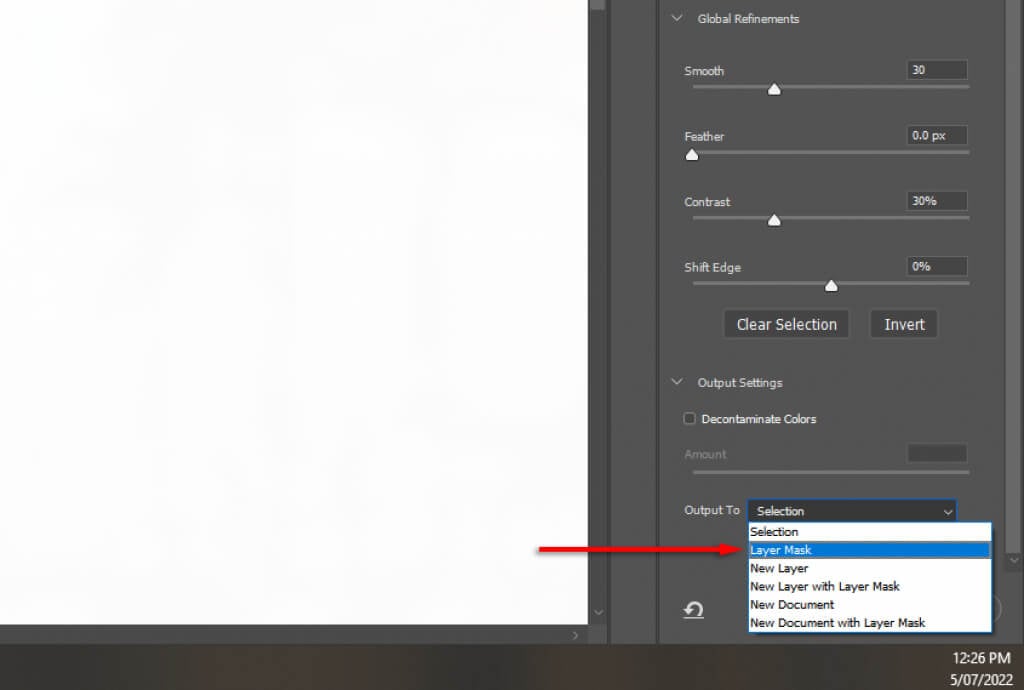
- Through which output settingschoose the drop down menu and click on layer masks then choose OK.
Notice: The extra time you spend refining your decisions, the higher your outcomes will probably be. Zoom in and pay shut consideration to any areas that Photoshop by accident added or eliminated. You’ll be able to at all times regulate your choice later by double-clicking the masks layer.
Place your topic within the composition
Now merely click on in your topic and drag it to the place you need it to seem within the remaining picture. This completely depends upon your preferences.
Step 3: Regulate the attitude
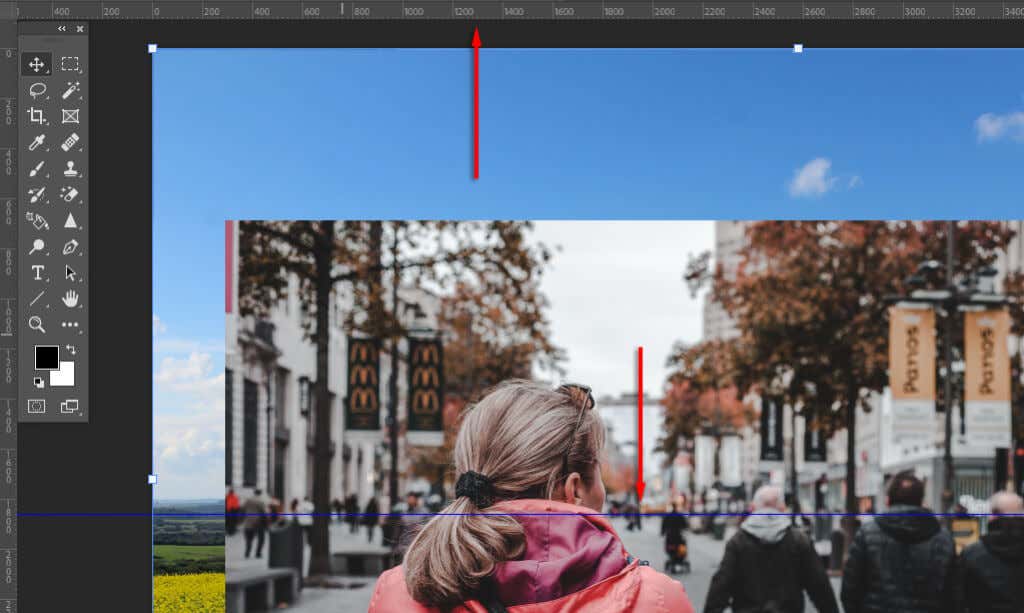
Matching the attitude of the unique photograph to your new background will make the picture seem extra lifelike. To do that you should utilize the ruler device to mark the place the horizon is within the authentic picture and align the brand new background in order that it has kind of the identical place.
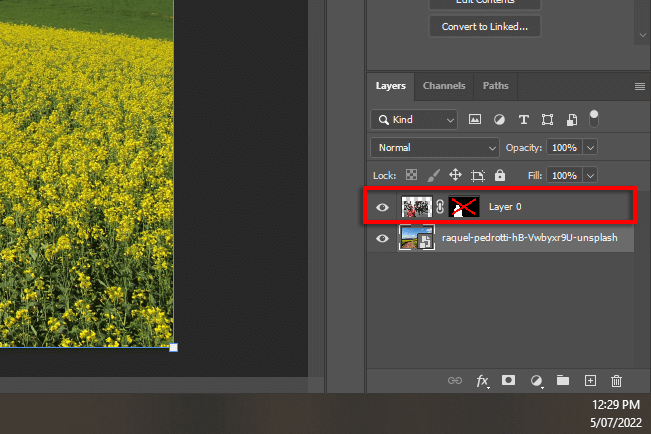
- Flip off the layer masks by holding down change and click on the layer masks in order that the unique background is clearly seen. If profitable, the layer masks ought to be coated with a purple cross.
- Click on and drag from the horizontal ruler to create a line the place the horizon would doubtless be.
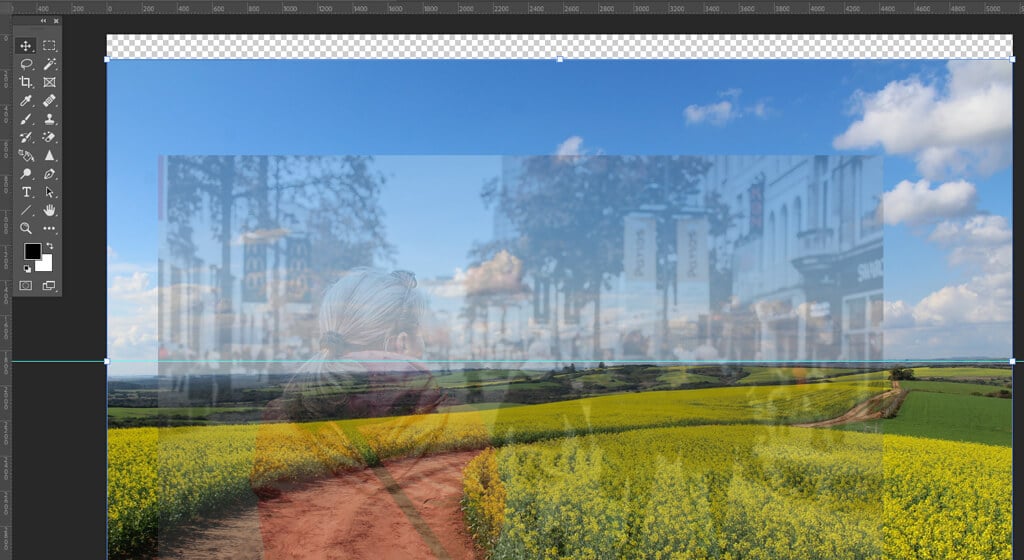
- Use of Transfer Place or resize the brand new background in order that the horizon strains up with the unique perspective. To make this simpler, slide the down opacity on the highest layer.
Step 4: Content material Conscious Fill
As soon as you have reached the sting of your picture and added a clear background, you should utilize the Content material-aware filling Instrument to create a background on this space. In case your background would not have clear pixels, you may skip this step.
To fill the clear space:
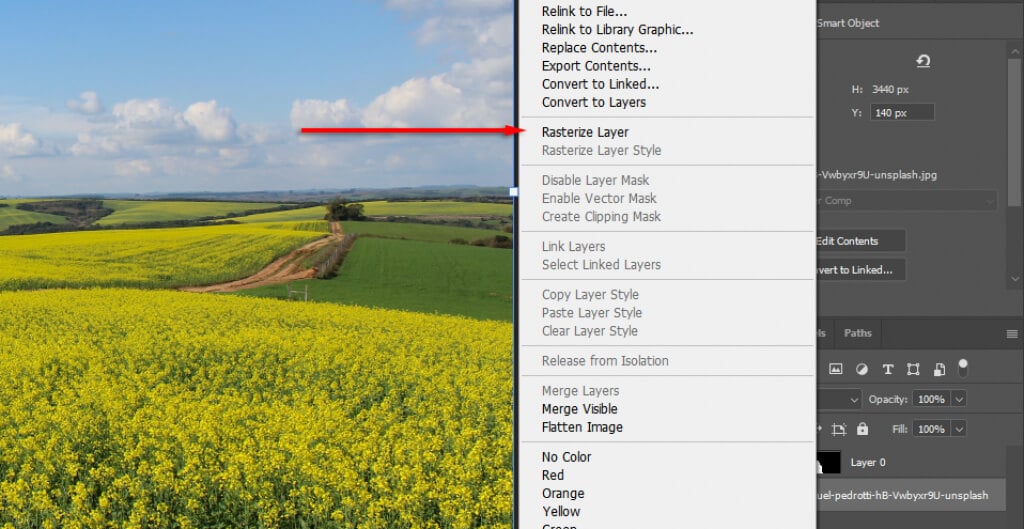
- Proper click on in your background layer and choose it rasterize degree.
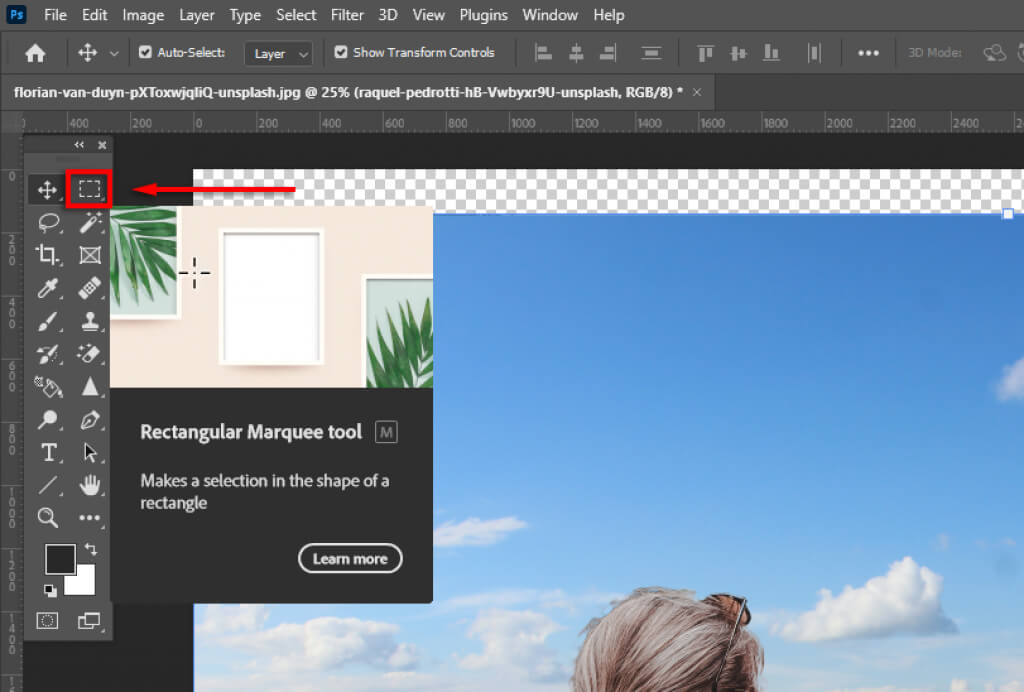
- Select Rectangular choice device and make a choice that features the clear space plus a small portion of your background.
- click on To edit > Content material-based fill.
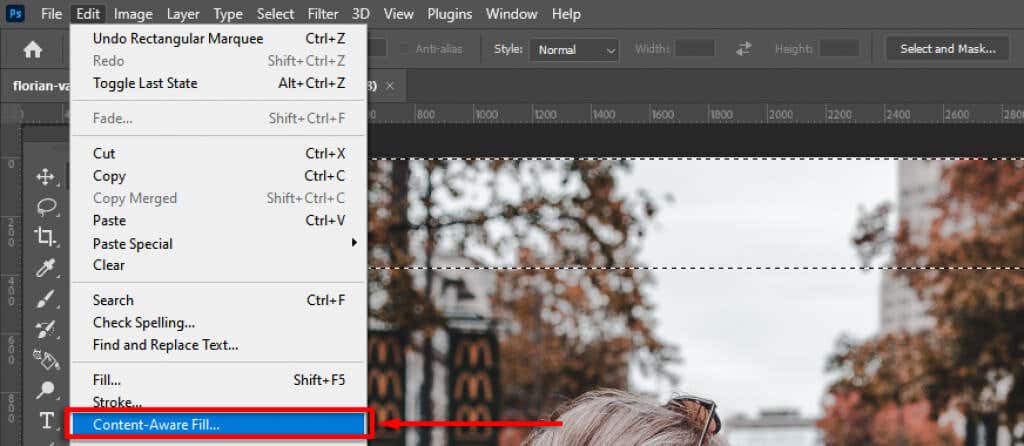
- click on OK.
Step 4: Regulate the depth of subject
The following step is to regulate the depth of subject of your authentic picture. To do that, you must visualize how cameras work and what components of the picture you need in focus. In our instance, the lady within the foreground is in focus, which means all the pieces within the distance is out of focus. The farther away, the blurrier it will likely be.
So as to add this impact, let’s add blur to the background picture:
- Select background layer.
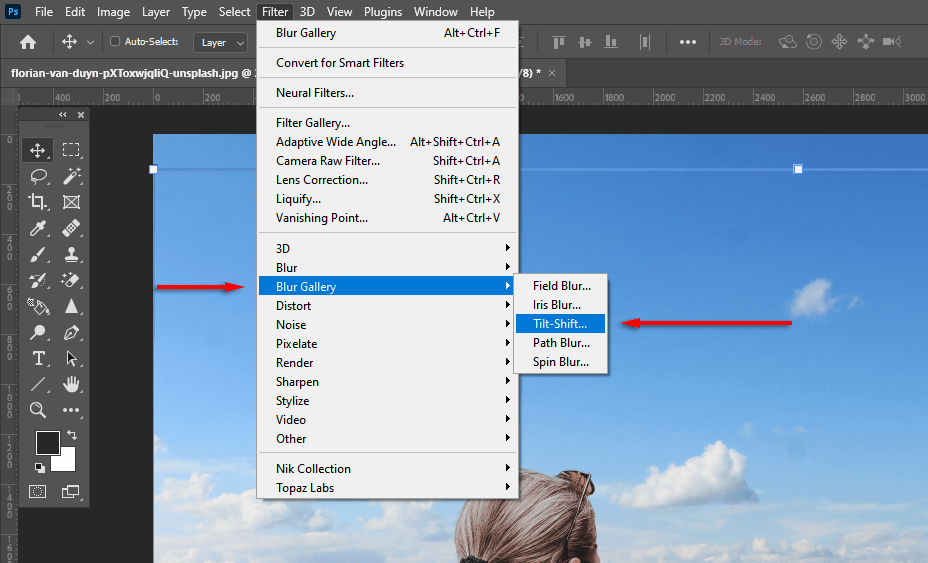
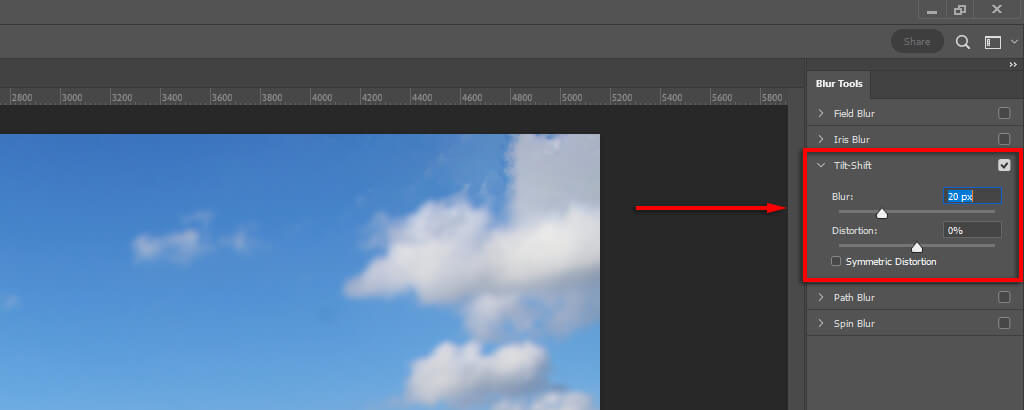
- Select filter > Blur gallery > tilt shift. Different blur results work as effectively (e.g. Gaussian blur), however the tilt shift creates the impact of regularly rising blur into the gap.
- pull that center circle down till that’s the place the focal aircraft of your topic is (in our case, the lady’s ft). The whole lot above the highest dotted line is blurred.

- Use to vary how a lot blur is launched Blur slider. Transfer this till it appears lifelike after which choose OK.
Step 5: Regulate the lighting
You could discover that your topic and the brand new background have totally different gentle sources. This may be tough to regulate, so it is higher to decide on a background with an identical gentle supply. In our instance, you may see within the background that the sunshine supply is on the left (the shadows fall to the precise). Within the case of the topic, nevertheless, the sunshine supply is extra from high to backside.
This may be adjusted by introducing lighting and shadows. As well as:
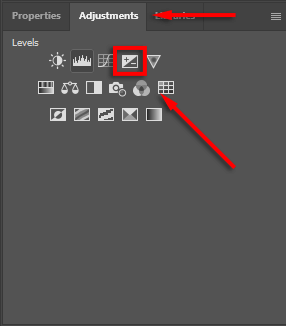
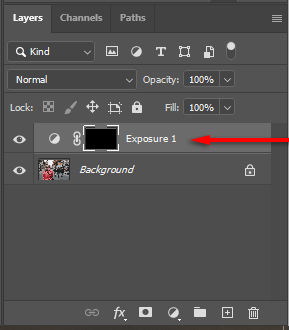
- Select changes then publicity.
- Press ctrl + I to reverse the masks.
- Decrease the publicity after which paint with white to get shadows on the precise aspect of your topic.
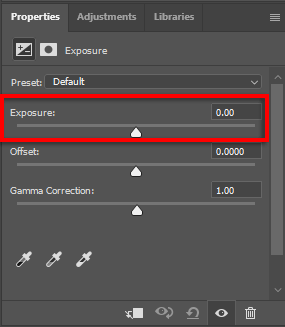
- Repeat steps 1-3 however enhance the publicity so as to add highlights.
Step 5: Coloration match your photos
At this level, your topic ought to line up properly with the brand new background. Nevertheless, you’ll discover that the 2 photos have totally different hues. To repair this you’ll have to do the next:
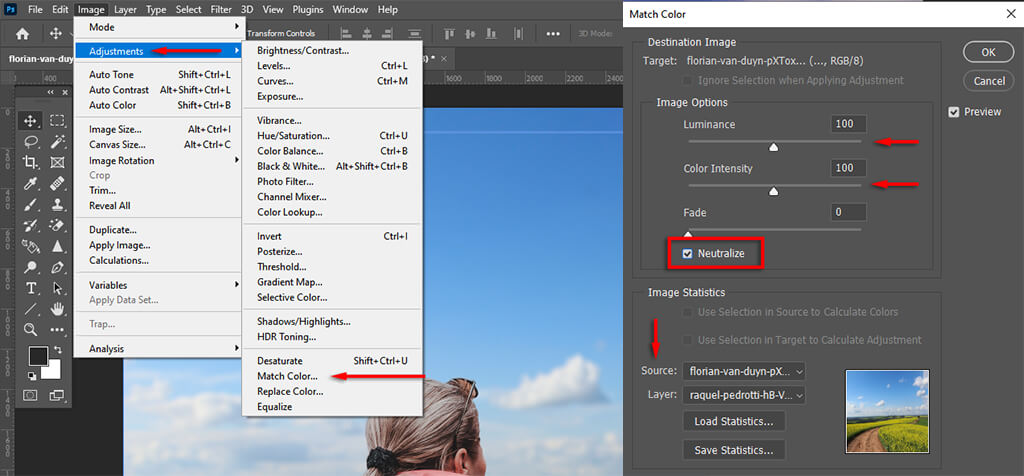
- Regulate the colours routinely by deciding on the background layer after which clicking image > changes > Regulate colours. To the supply select your matter. Then click on Neutralize to regulate the colours. Mess around with that luminance and coloration depth Slider if essential, after which choose OK.
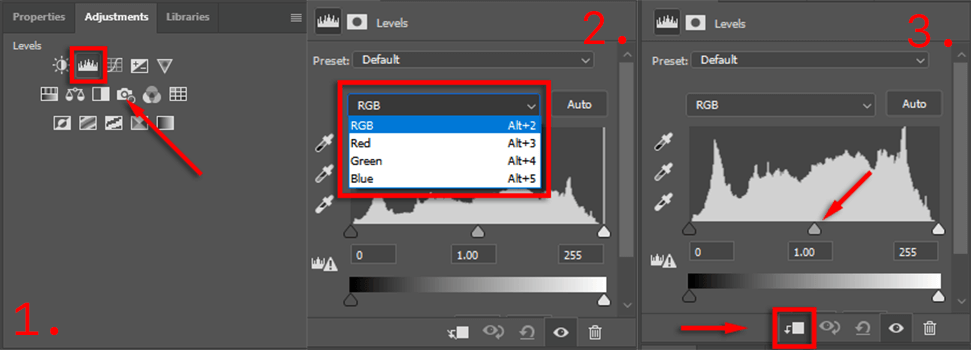
- Alternatively, regulate the colours manually by adjusting the RGB ranges. To do that, choose changes then ranges. Ensure that the changes solely have an effect on your topic by deciding on clipping masks Image. Now regulate the purple, blue, and inexperienced channels individually till the topic colours align higher with the background coloration.
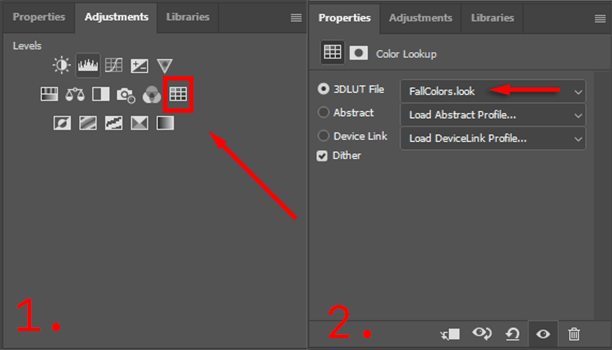
- Lastly, add a worldwide adjustment layer to match the topic and background. This may occasionally contain including grain, coloration filters, or vignettes to enhance cohesion. So as to add world coloration changes, it’s best to pick changes > coloration search. Then, within the Properties panel, choose a 3DLUT file that goes effectively together with your picture and regulate the file opacity Slider to vary the depth.
This may take some fiddling to get it excellent, however the extra consideration you pay to element, the higher your picture will find yourself wanting.
Export your remaining picture
That is it. Simply click on file then Save as to avoid wasting your remaining picture as a JPEG. As you may see, eradicating the background is comparatively straightforward, nevertheless it requires a eager eye for element to get it excellent – so do not quit!
