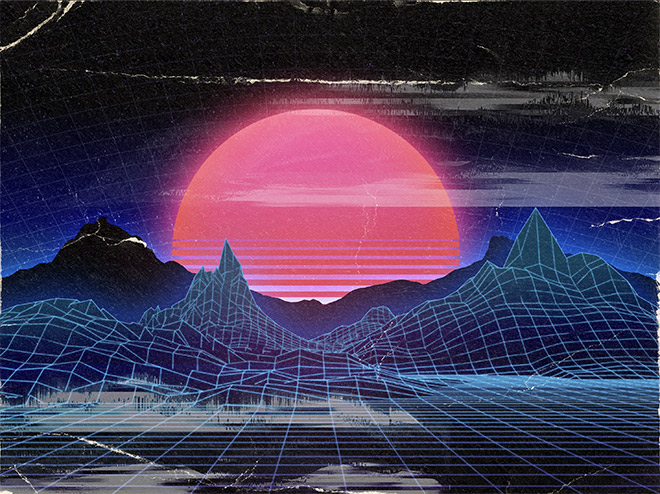
Easy methods to Simply Create Retro Landscapes with an 80s Aesthetic
Sci-fi landscape scenes with Tron-style grids, mountain scenes, and a vibrant sunrise are a popular aesthetic associated with art and design from the 80s. This retro-futuristic style has stayed on trend thanks to the Retrowave / Synthwave music movement that helped bring back the visual elements from the '80s arcades, action movies, fashion and pop culture. In today's tutorial, I'm going to show you an easy way to create your own retro landscape scenes using a huge '80s-inspired toolbox called NeonWave. Download a free sample that has all of the elements you need to easily create this surreal science fiction scene with vivid colors.
The artwork I'll be creating in this tutorial was created using just a handful of elements from NeonWave. You can download all of the assets you need along with this free sample package. It includes all of the pre-made mountain graphics, grid layouts, glitch graphics, and abstract textures that I used to create this scene. I'll show you how to put the elements together, create complementary elements from scratch, and apply the important lighting effects right in Photoshop.
Download the free NeonWave sample package
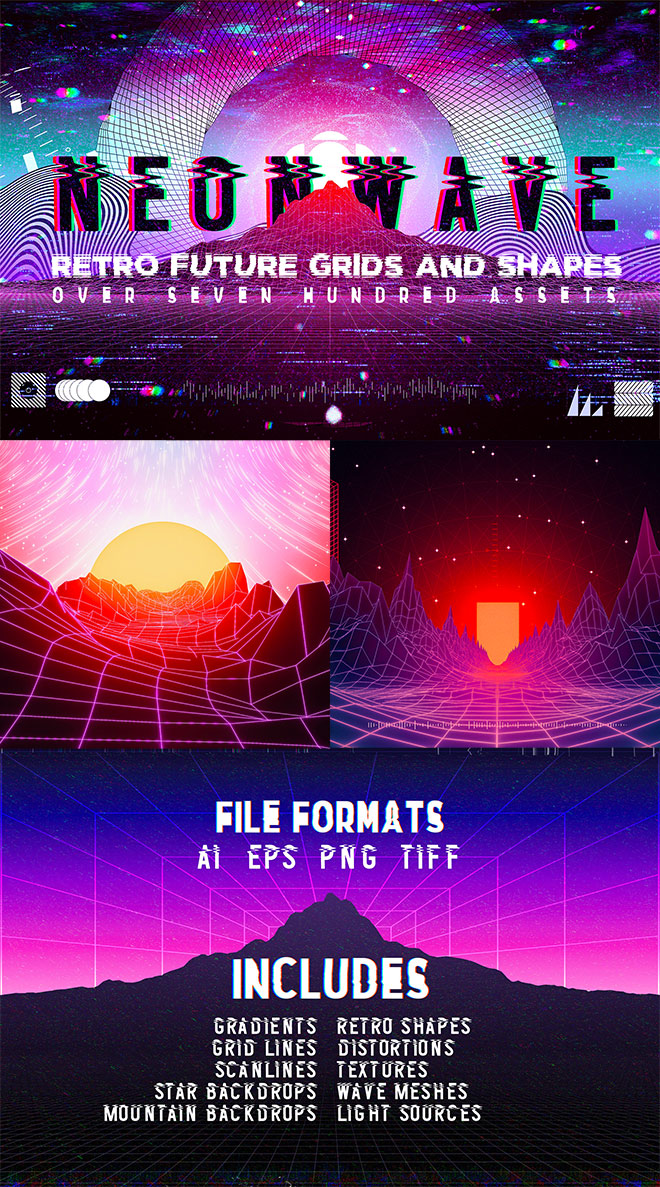
NeonWave is a huge collection of over 700 assets that make it easy to construct retro-futuristic 80s-style landscapes. It contains a variety of useful graphics including raster shapes, polygonal landscape renders, mountain silhouettes, spectrograph distortions, abstract shapes, and much more! With this kit, you can simply drag and drop a selection of assets to create a radical looking scene in minutes. If you put in some colorful layer style effects, you have the perfect piece of art for an album cover, a flyer, or just a fun visual piece of art. Spoon Graphics readers can save 10% of the price with the code SPOONGRAPHICS.
Purchase the full NeonWave kit
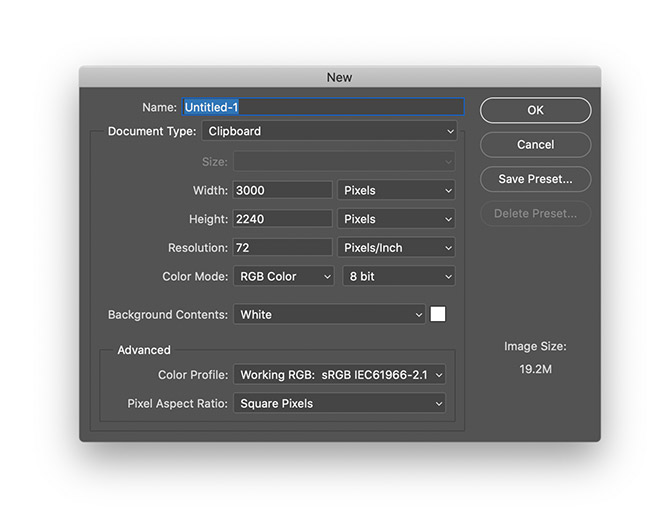
First, open Adobe Photoshop and create a new document. I am using a document size of 3000 x 2240 pixels, but your dimensions may vary based on the final use of your artwork. While the brightest RGB colors cannot be reproduced in print, you can also start with an RGB document for the most vivid colors possible before converting to CMYK later when working on a design for print.
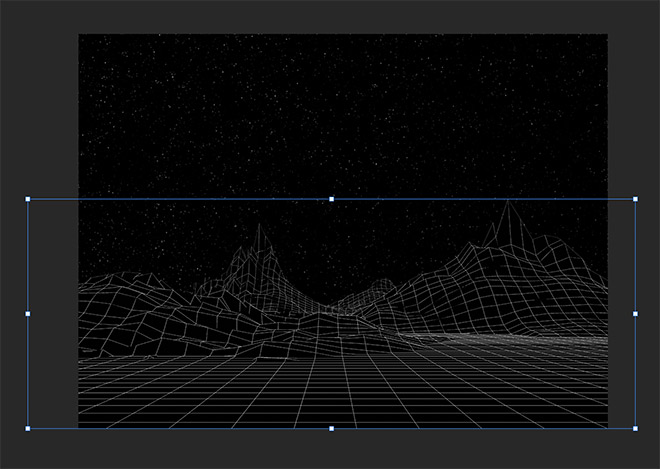
Open the star background file and paste it into the document to generate an interesting background. Drag the NeonWave Render graphic into it and use the keyboard shortcut CMD + T (Ctrl + T on Windows) for Transform to scale it to size. Within seconds we have already created what, thanks to the prefabricated elements in the NeonWave kit, would have taken hours to model and render a 3D landscape scene.
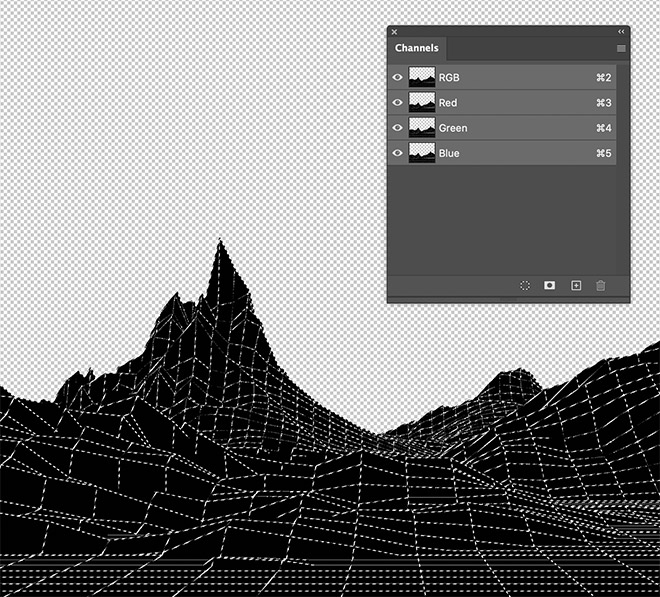
To just select the white grid lines so we can apply some lighting effects, turn off the visibility of the other layers and open the Channels panel. Hold down the CMD key (or the CTRL key on Windows) and click on the thumbnail of a channel to load its selection. Create a new layer in the Layers panel and use the CMD + Backspace shortcut to fill this selection with white.
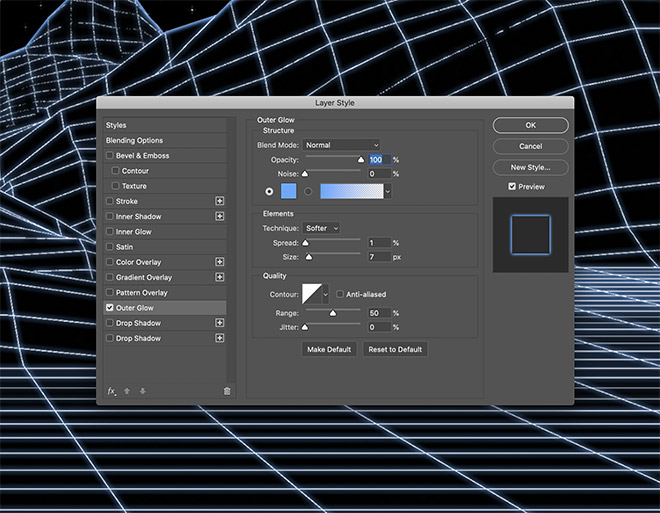
Double-click the layer with the white grid lines to apply an exterior glow layer style. Choose a light blue (# 5ba8ff) and configure the size to around 7 pixels, just enough to create a soft glow effect from all the fine lines.

Apply some layer styles to the mountain plane. Start with a gradient overlay between a purple and a light blue shade. I use # 472468 and # 009dab. Set the mode to Hard Light to allow the colors to interact with the landscape graphics.
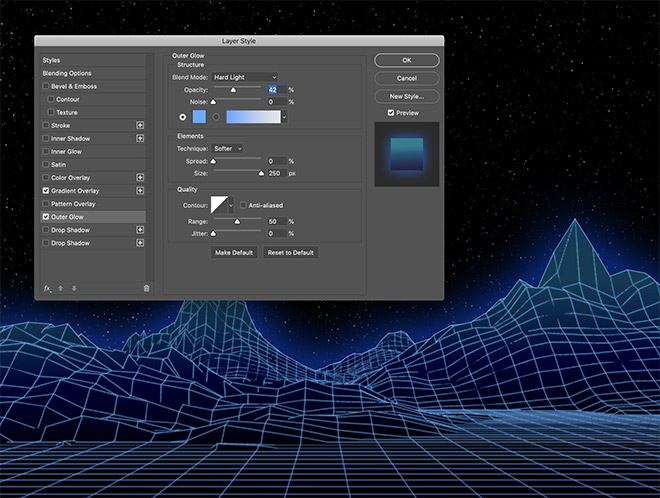
Next, add an outer glow effect. Configure the settings to their maximum size, but change the Blend Mode to Hard Light and lower the Opacity to lessen the impact so the glow doesn't get too intense.
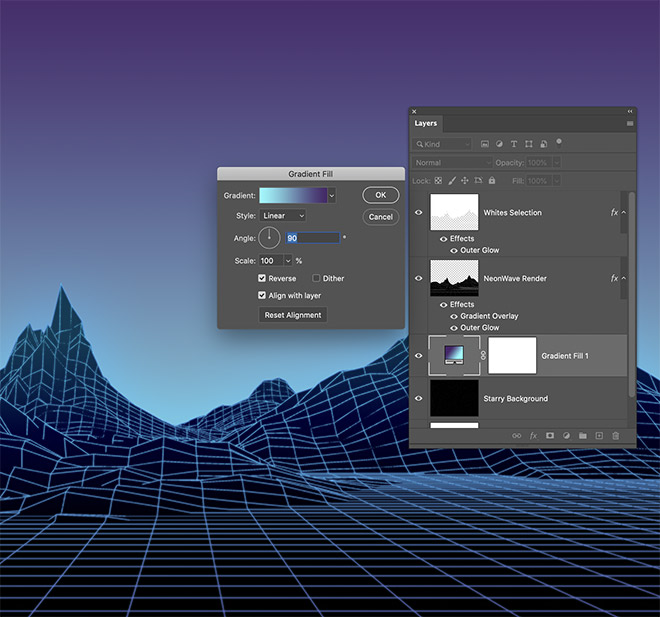
Add a gradient fill adjustment layer and drag it over the star background but under the mountains in the layer stack. Use the same purple for light blue colors but vice versa so that the bright glow comes out from behind the mountains.
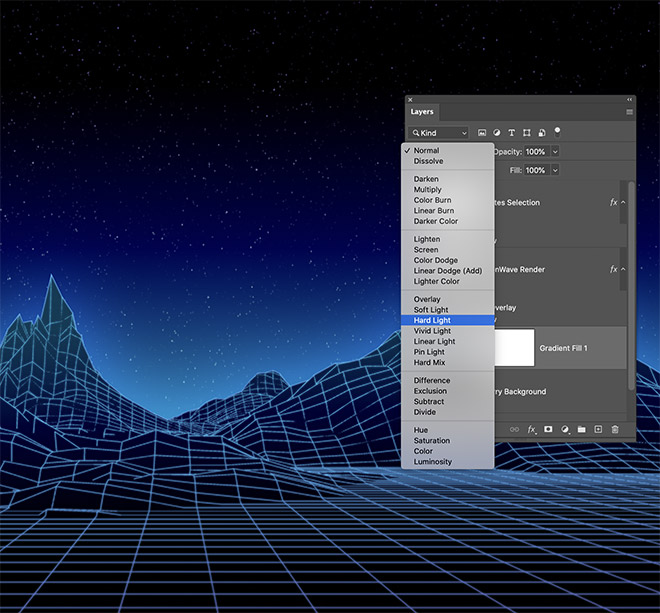
Change the Blend Mode of the Gradient Fill layer to Hard Light so that the starry background shows through and the colors interact to create a vibrant glow.
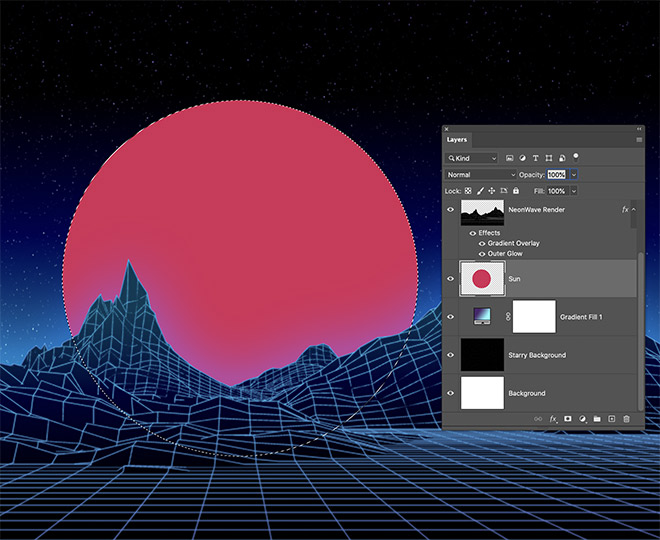
While the full NeonWave kit has some useful light source graphics, we'll use some simple Photoshop tools to draw our own. Create a new layer above the gradient fill but below the mountains, then use the elliptical marquee to draw a circle. Fill it in with a reddish pink from # d72a57.
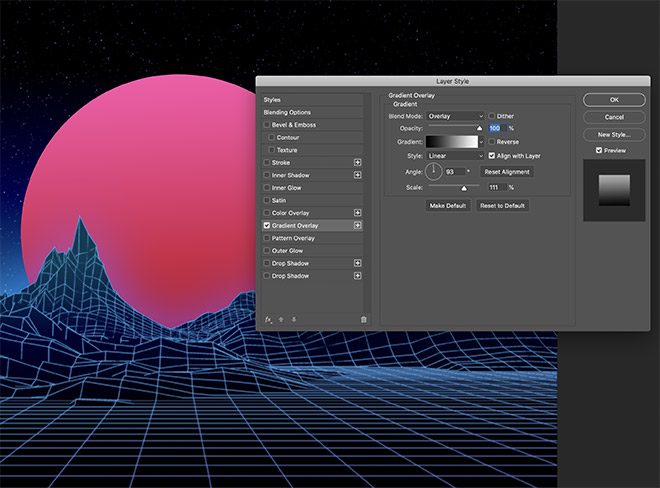
Apply some layer style effects to enhance the appearance of the sunrise. Start with a gradient overlay, using the default black to white gradient, but with the blend mode set to Overlay.
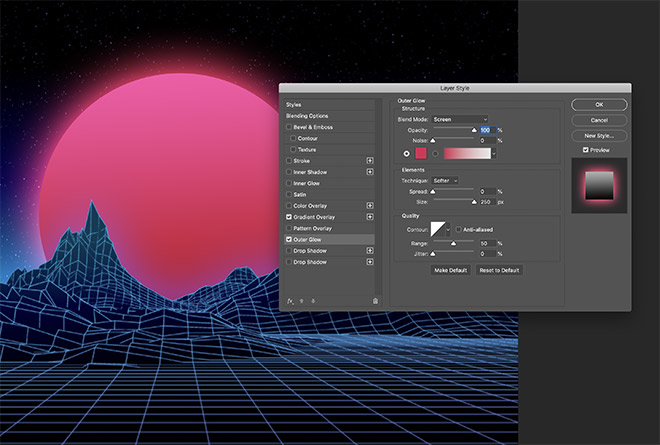
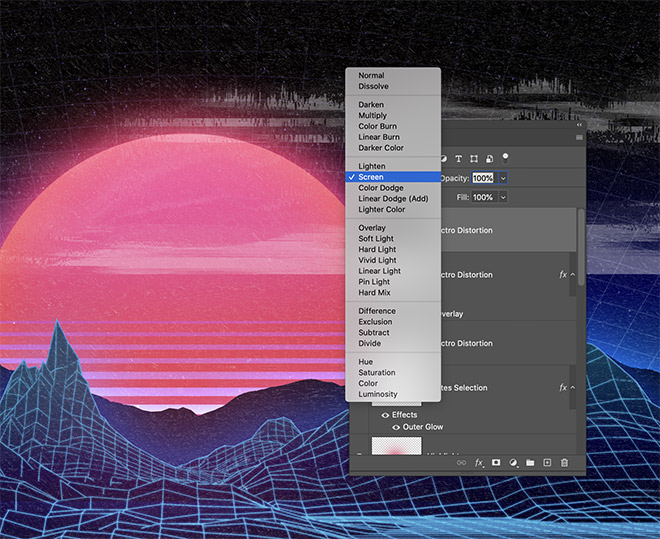
Next, add an outer glow effect. Configure the settings for screen with the same color # d72a57 as the main sunrise fill, then set the size to maximum to create a soft, glowing glow.
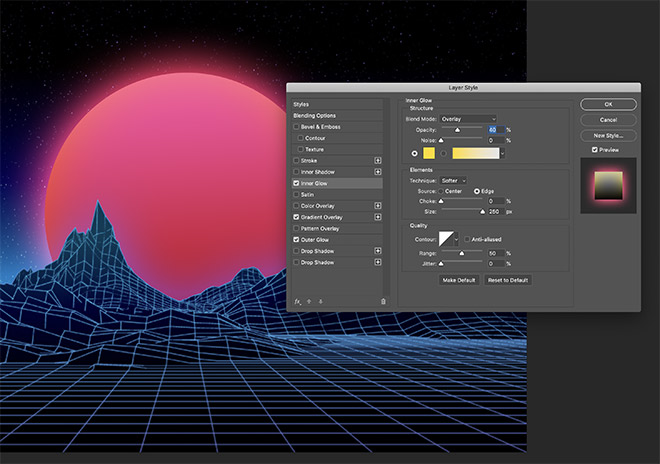
Set up an inner glow effect with a bright yellow color (# ffdc18). When you use the Overlay Blend mode, the yellow can interact with the red and pink tones to add a warm cast of color. Lower the opacity to adjust the colors.
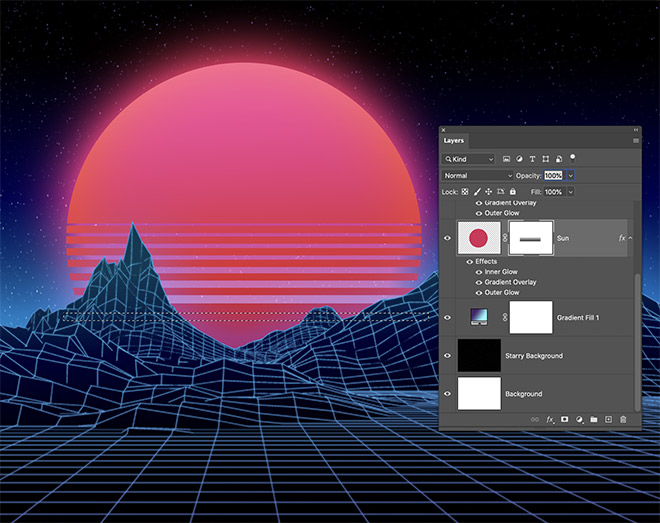
Add a layer mask to the sunrise layer, then use the Rectangular Selection Tool to draw a thin selection over the circle shape. Fill this area with black to clear the selection. Carefully draw and fill in several more selections, each one increasing in size.
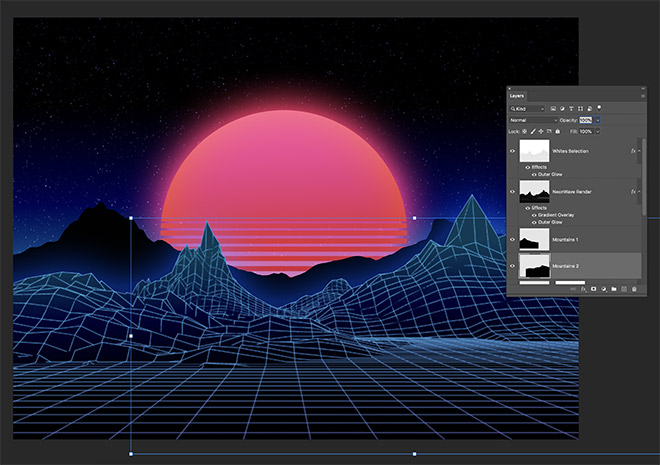
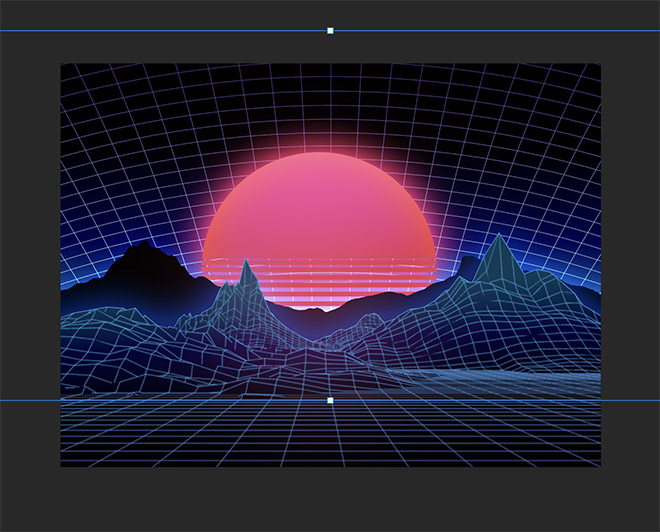
Open the two mountain silhouette images and copy them into the main document. Use the CMD + T shortcut to resize and position the mountains in front of the sun but behind the grid landscape.
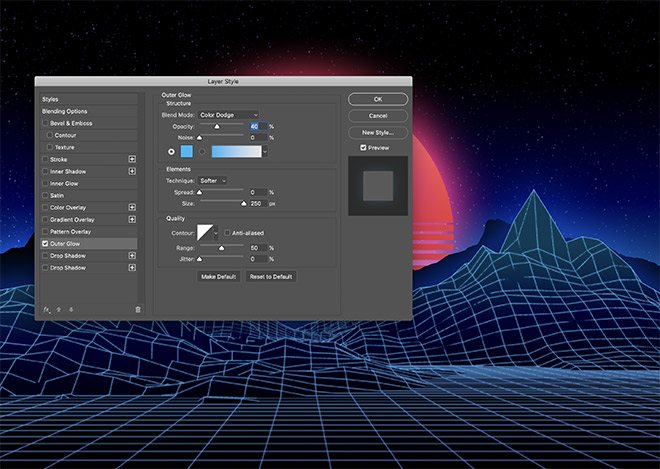
The outer glow effect from the grid landscape gives the silhouette mountains a beautiful blue shimmer. However, give each mountain level its own outer glow effect to add more ambience to the scene. I use a bright blue (# 1fb7f6) with the color evade blending mode to create a vivid glow. Lower the opacity to fine-tune the intensity.
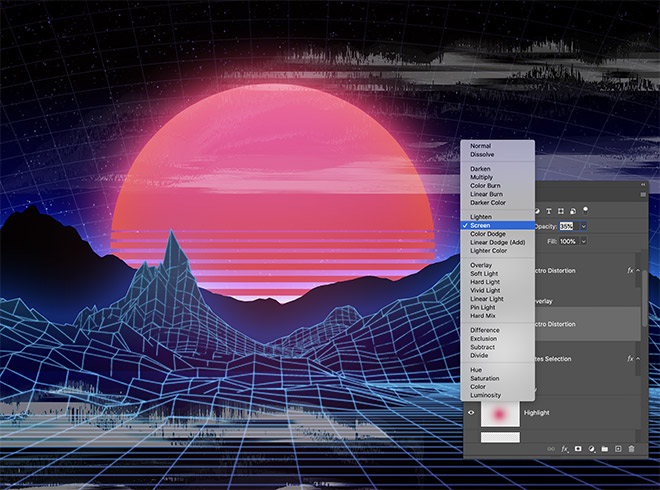
Create a new layer above the mountains and sunrise plains, then try a reddish-pink shade from the sunrise shape. Use a larger, soft brush tip to blot a single patch of paint in the center of the scene.
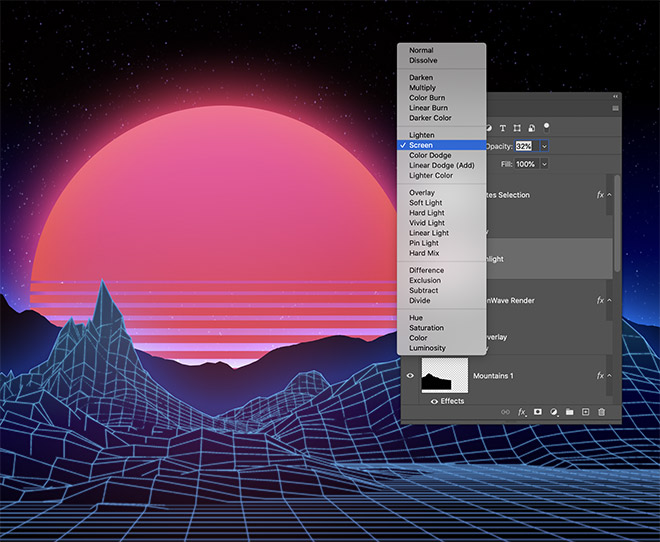
Set this layer's blend mode to screen with reduced transparency to add a subtle ambient glow effect.
Open the graphic of the grid form in Photoshop and place the image at the bottom of the layer stack, just above the starry background. Scale and position this graphic so that the grid lines extend from the horizon.
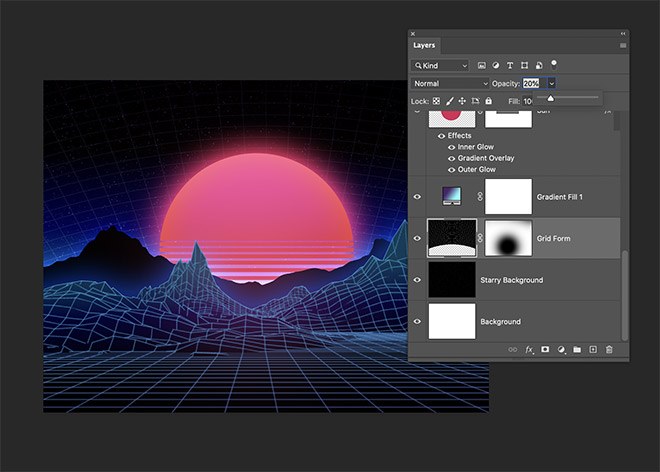
Reduce the opacity of the Raster Shape layer to about 20%, then apply a layer mask and hide the top and bottom to remove harsh lines.
The Spectro Distortion graphics can be further distorted by squeezing and stretching the proportions using the Transform link.
Set the Blend Mode to Screen to make the black background transparent, leaving only the white glitch graphics, then use the Opacity slider to make them less familiar.

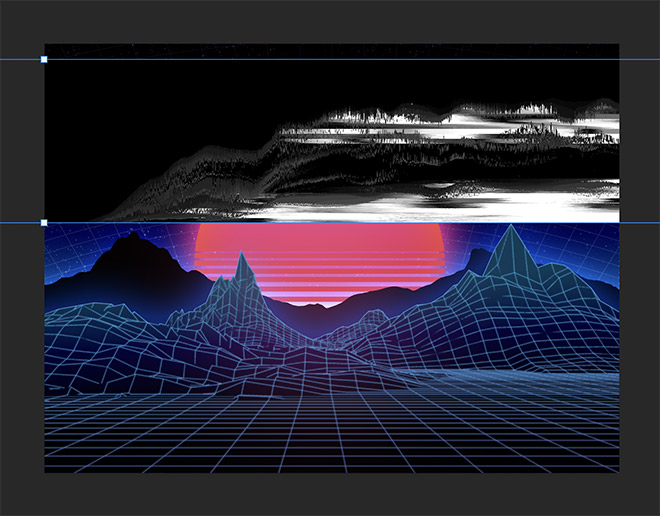
The NeonWave kit also includes a variety of noisy Spectro Distortion graphics. These images can be used to add texture to your artwork. Place the image on top of the layer stack and adjust the hue / saturation with the keyboard shortcut CMD + U.
Desaturate the image completely, then change the blending mode on screen to apply the noisy grain effect to your artwork for an aged retro look.
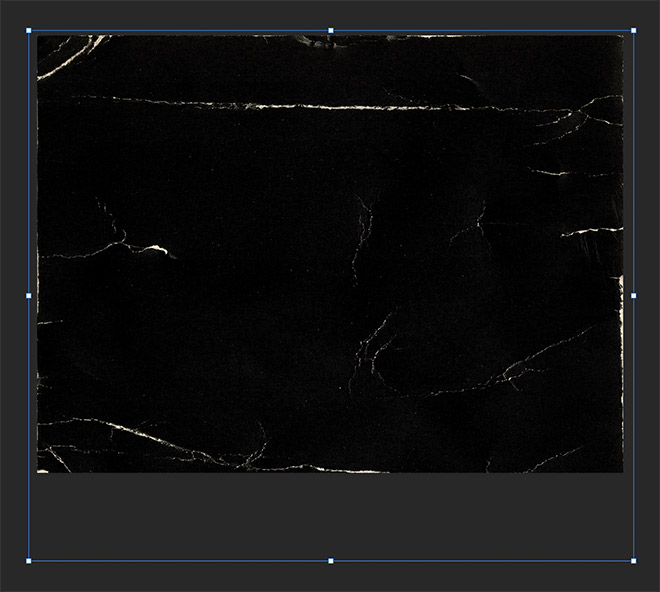
These types of artwork also go perfectly with my 80s retro cover art textures! Download the texture included in the free sample I offer to add a final retro texture effect to your artwork. Here I scaled the texture to crop the main border, slightly damaging the edges of the design. Set the Mix mode to Screen so your footage looks like an old, damaged VHS tape or a computer game box.
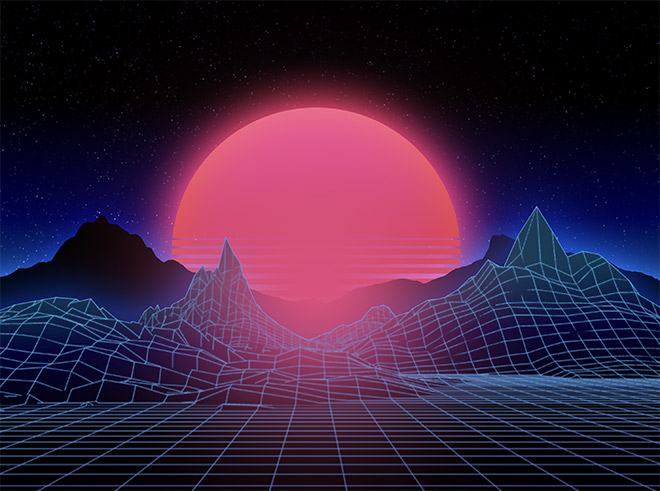
The end result is a radical, 80s-inspired retro landscape scene with vibrant neon colors. The NeonWave kit makes it easy to create graphics in this style with a wide variety of elements that you can quickly drag and drop around. A little bit of tweaking in Photoshop like layer style effects and texture overlays really go a long way in enhancing the artwork and complimenting the retro wave style.

