The right way to Create an Infrared Impact in Photoshop

Photographers usually relate to creating infrared pictures in one among 3 ways. You should utilize a movie digital camera with infrared movie, or a digital digital camera modified to take solely infrared pictures. Alternatively, you need to use an infrared filter on the digital camera lens, just like the traditional Hoya R72.
On this article, we are going to present you the fourth method, which is how you can create an infrared impact in Photoshop. For individuals who have no of the above gadgets and have already got Adobe Photoshop, it is a nice introduction to replicating the false colour infrared look.
What’s infrared?

The infrared spectrum is a comparatively massive vary of sunshine that isn’t seen to people. Its frequency vary is so large that solely particular gear can filter it out of seen mild. We go into element about this in our newbie’s information to infrared pictures.
Which photos work greatest?
As a result of what we’re replicating at greatest is a false-color infrared impact in Photoshop, we won’t reproduce photos that look precisely as in the event that they had been photographed on infrared movie, with a digital camera, or via a lens filter. As an alternative, we’re aiming for an strategy that emphasizes the reds that always consequence from the false-color infrared impact.
What can we imply by false colours? It’s the technical time period for introducing colour into an infrared picture the place no colour is current. This isn’t to be confused with making a black and white infrared impact, which is one other sort of infrared pictures.
So which photos work greatest? Normally, it’s best to use photos that comprise plenty of inexperienced. Landscapes and nature photos often work greatest. However that does not imply that these photos all the time completely match what we’re about to indicate you.
Further experimentation and inventive enhancing past the scope of this tutorial could also be required, and even inspired, to create the picture you take note of.
And typically you’ll be able to obtain artistic leads to portrait pictures with the next steps that we’ll present you on the finish. You possibly can even create pictures in black and white apart from one colour.
Step 1: Create the Essential Infrared Impact
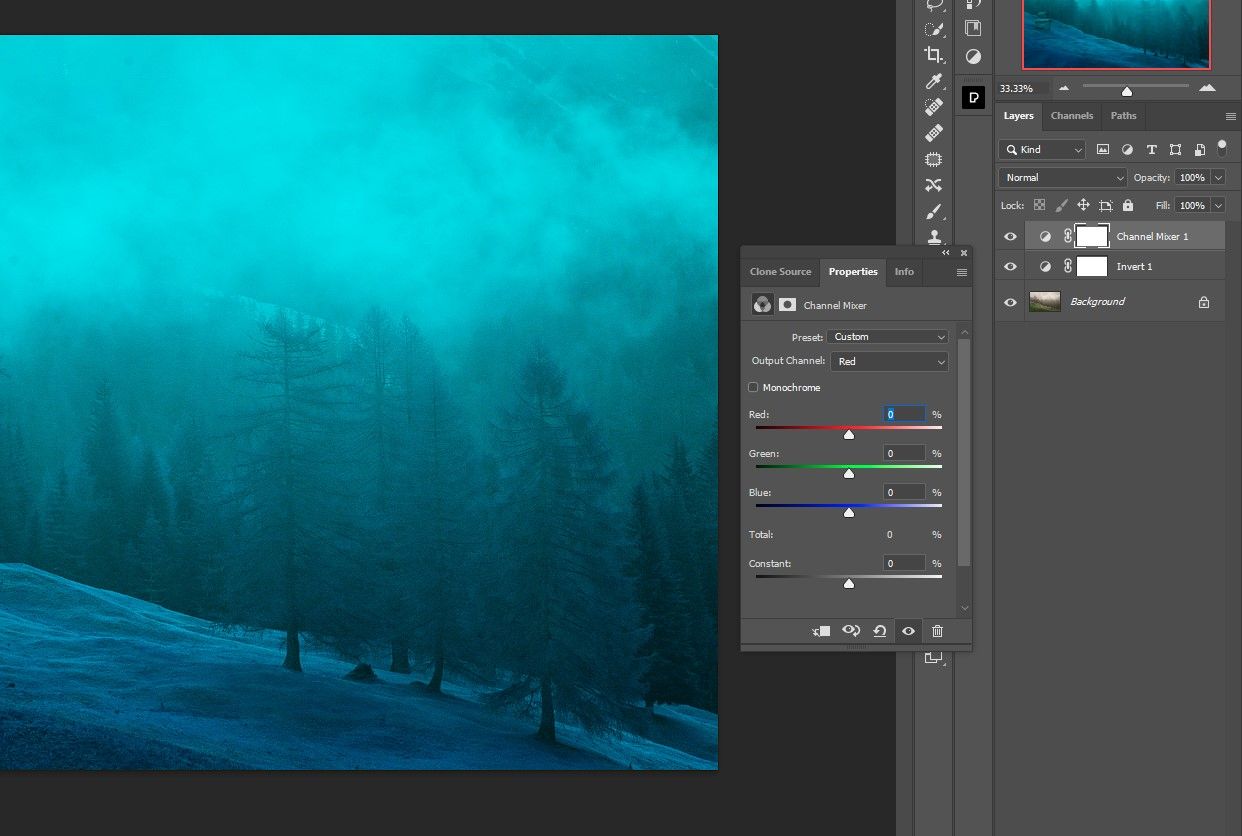
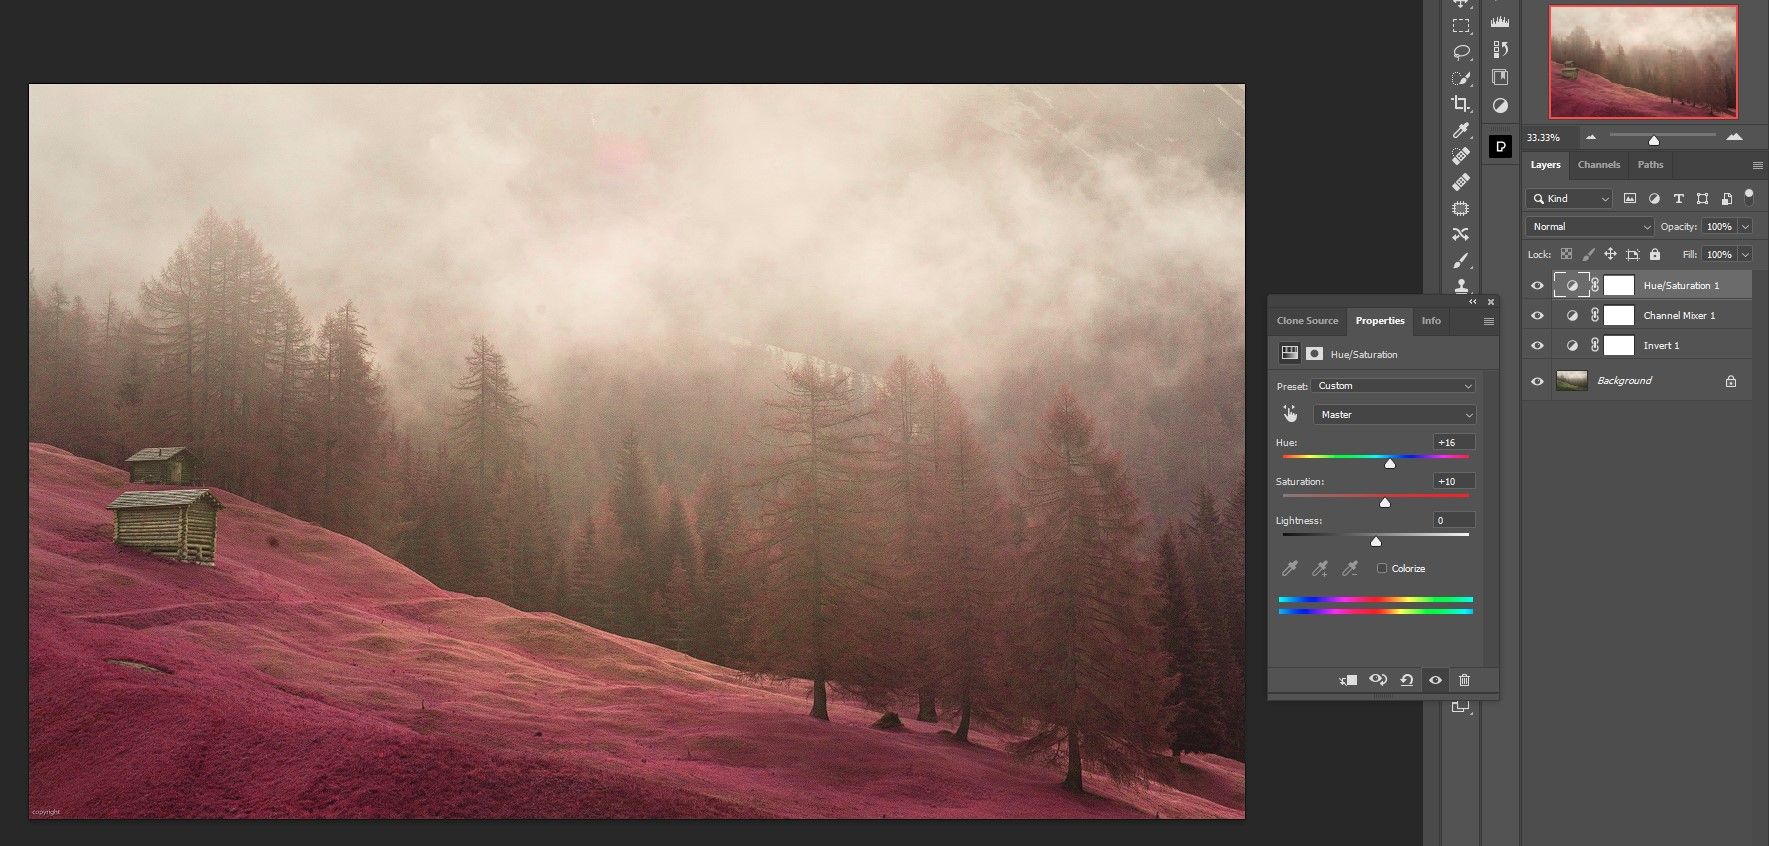
As talked about earlier, we are going to recreate the purple tones typically produced in false colour infrared pictures. To realize this, we’ll create a non-destructive workflow utilizing adjustment layers. We’re additionally going to swap the purple and blue channels, which is the magic recipe that makes the infrared impact potential.
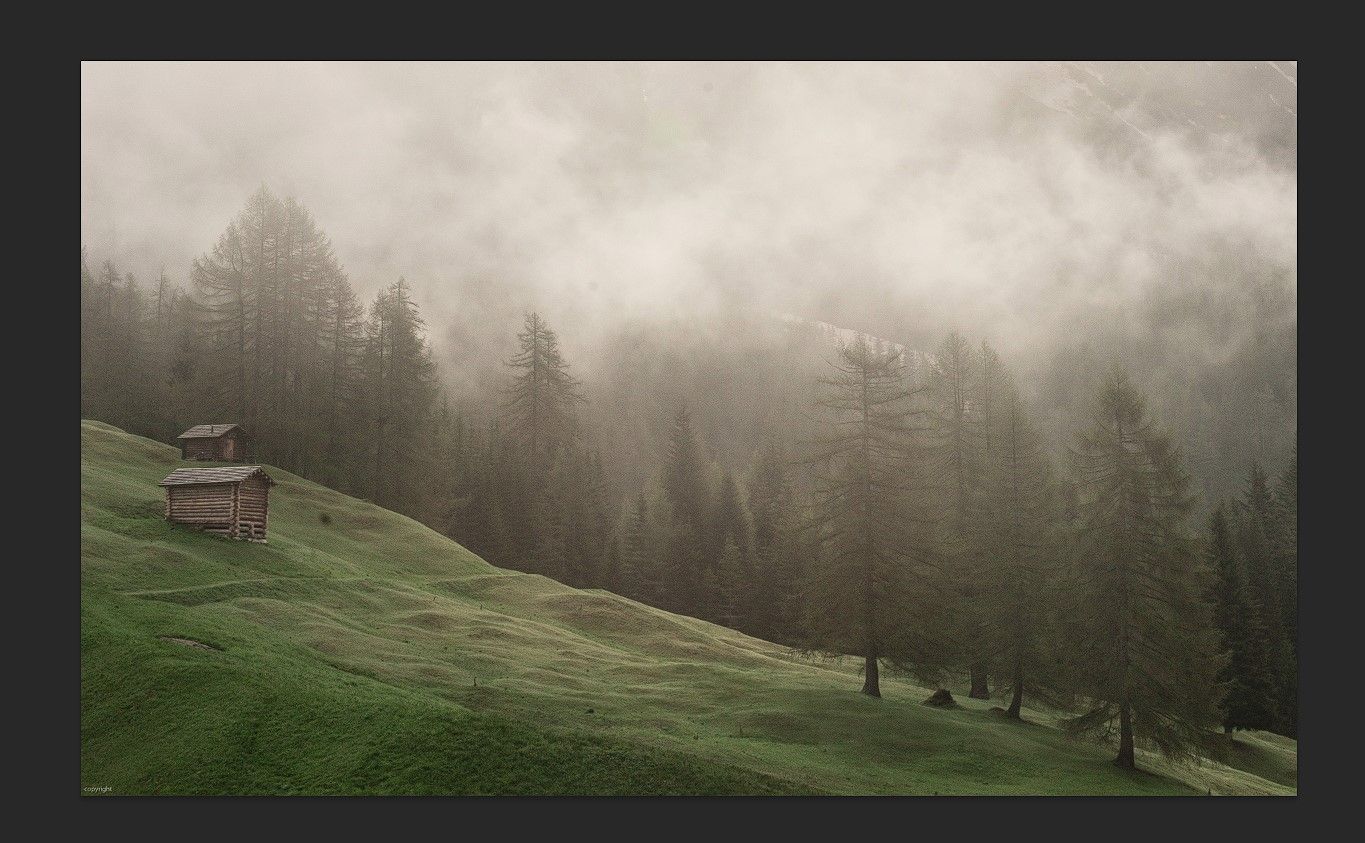
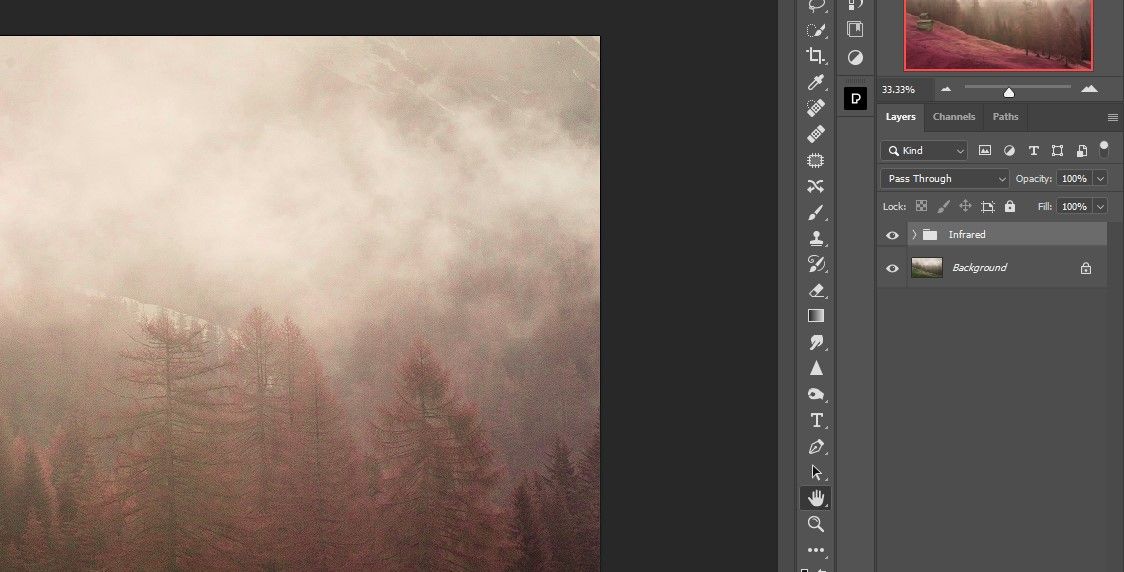
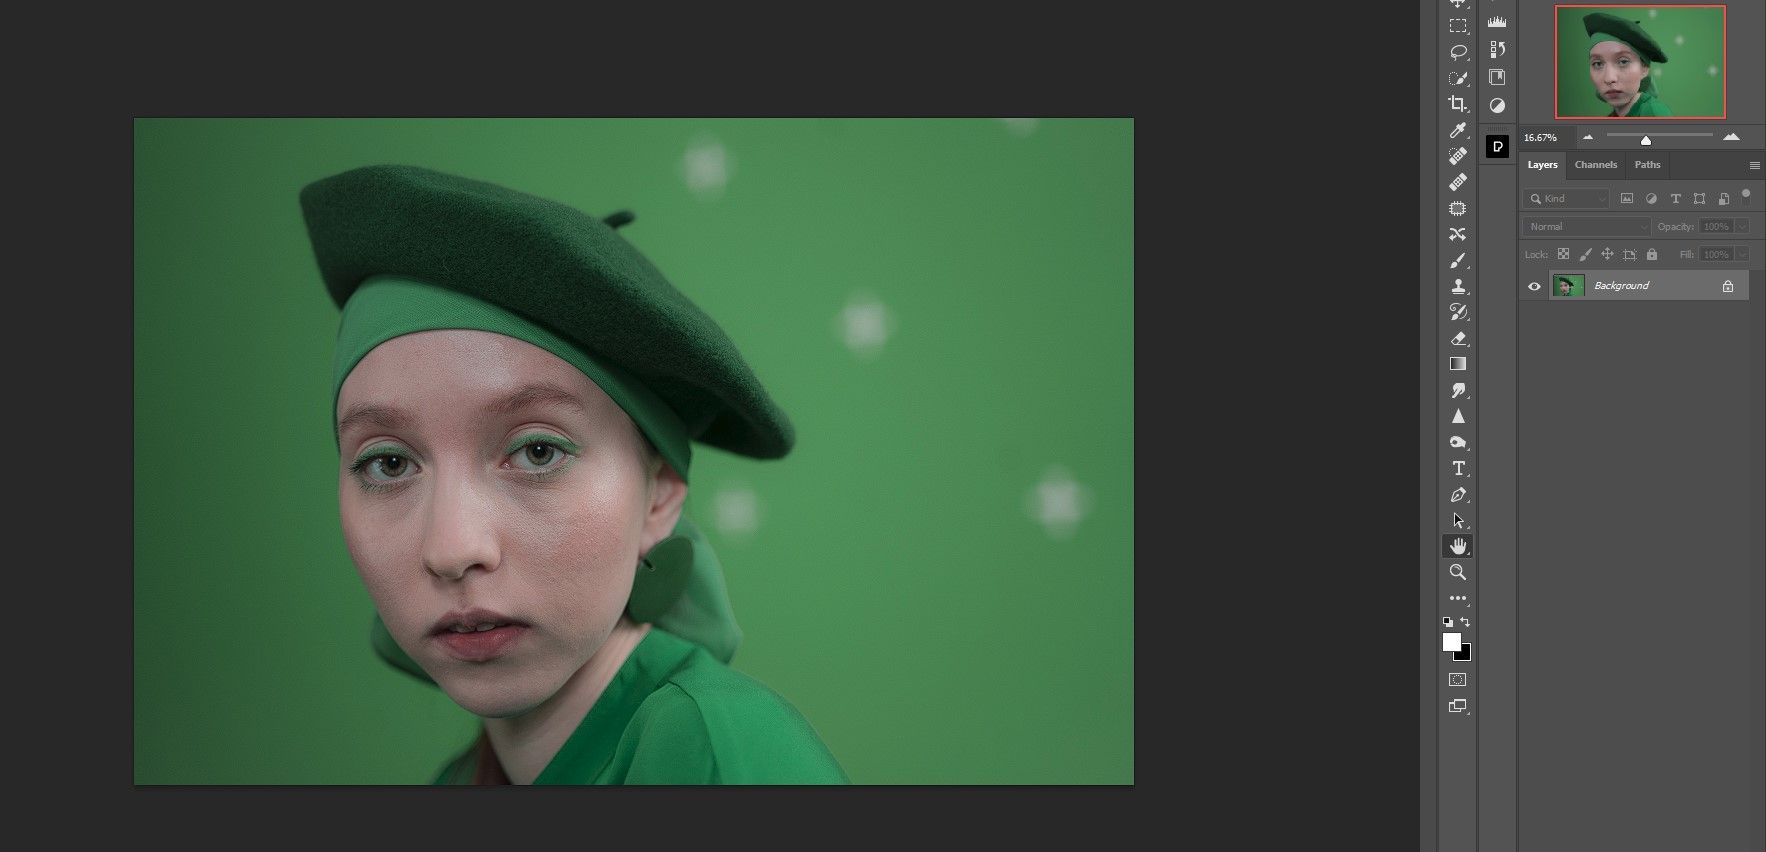
The above is the unique picture that we’ll use. You possibly can obtain it from Pexels if you wish to take part.
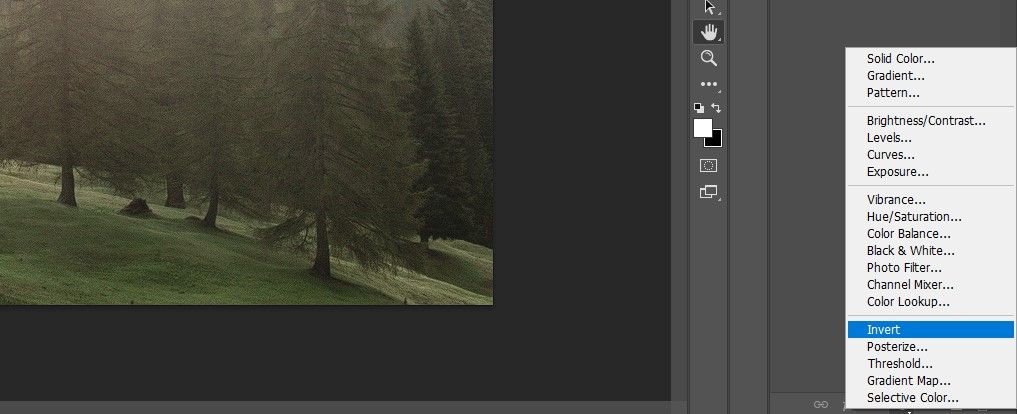
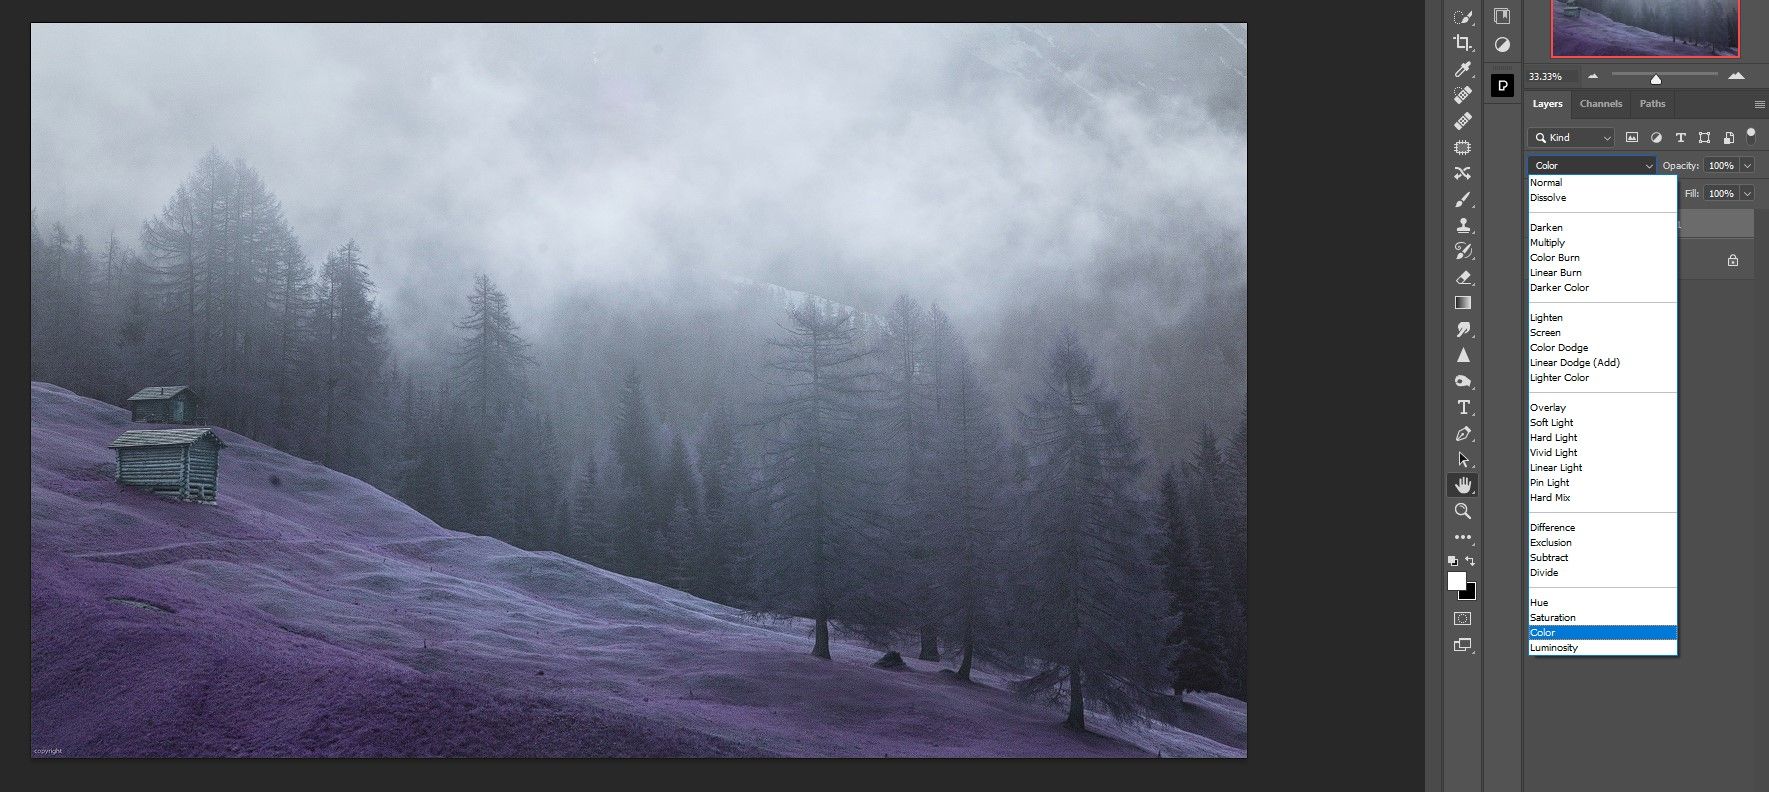
- Utilizing the picture loaded into Photoshop, create one Turning again adjustment layer.
- Change the Mixing Mode to color.
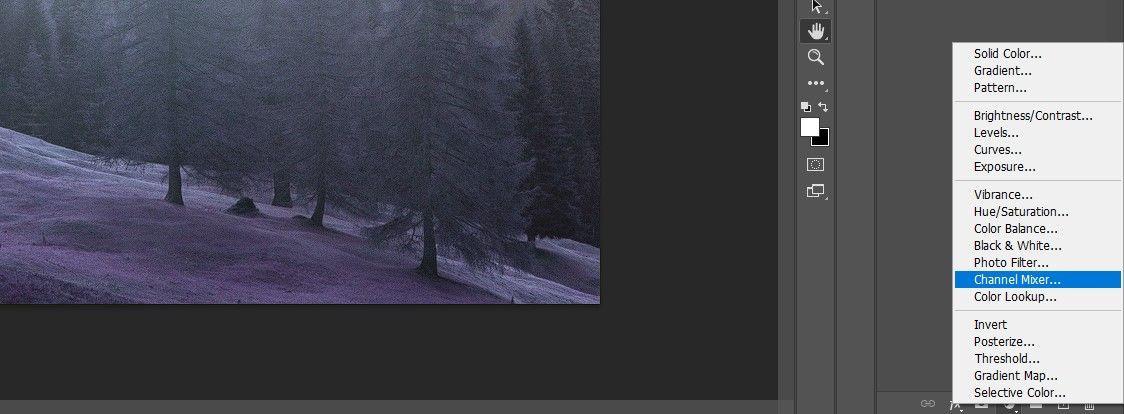
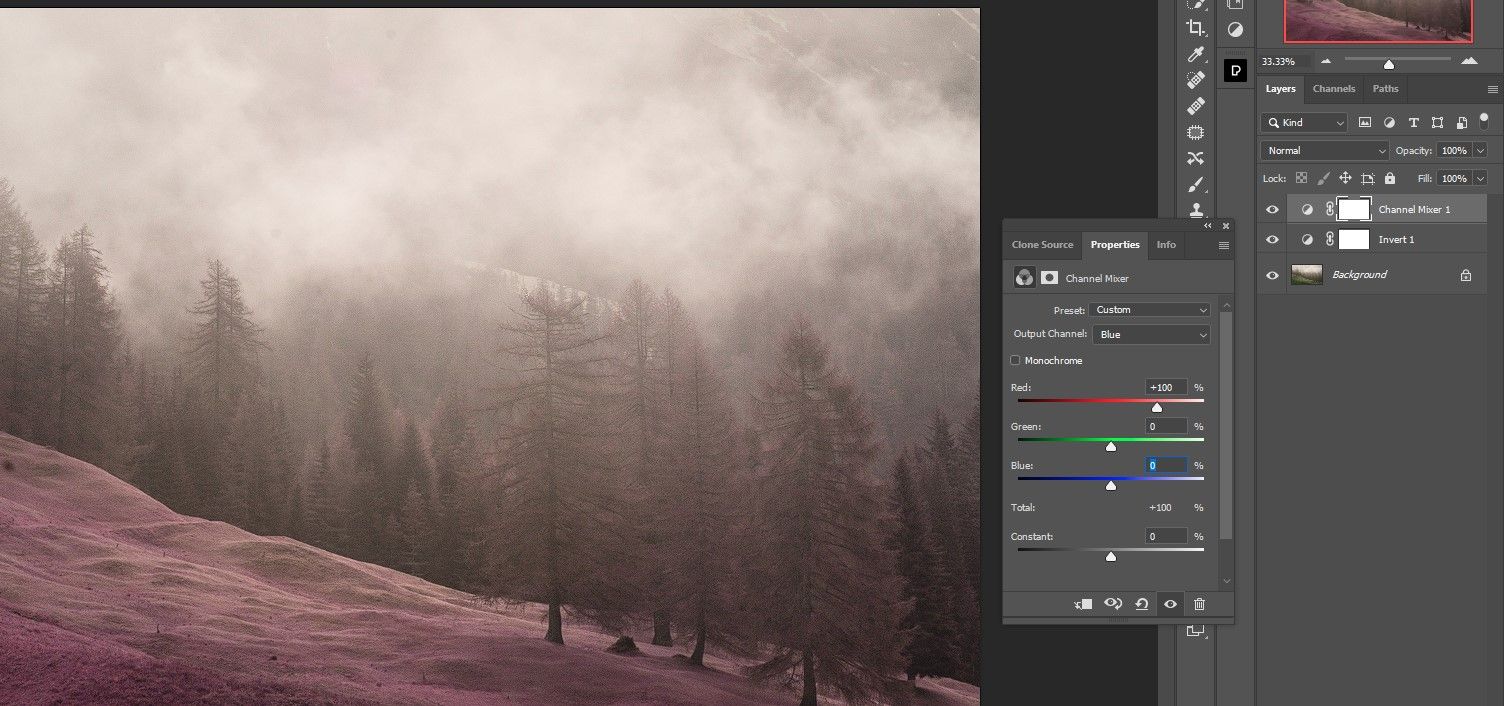
- A… create channel mixer adjustment layer.
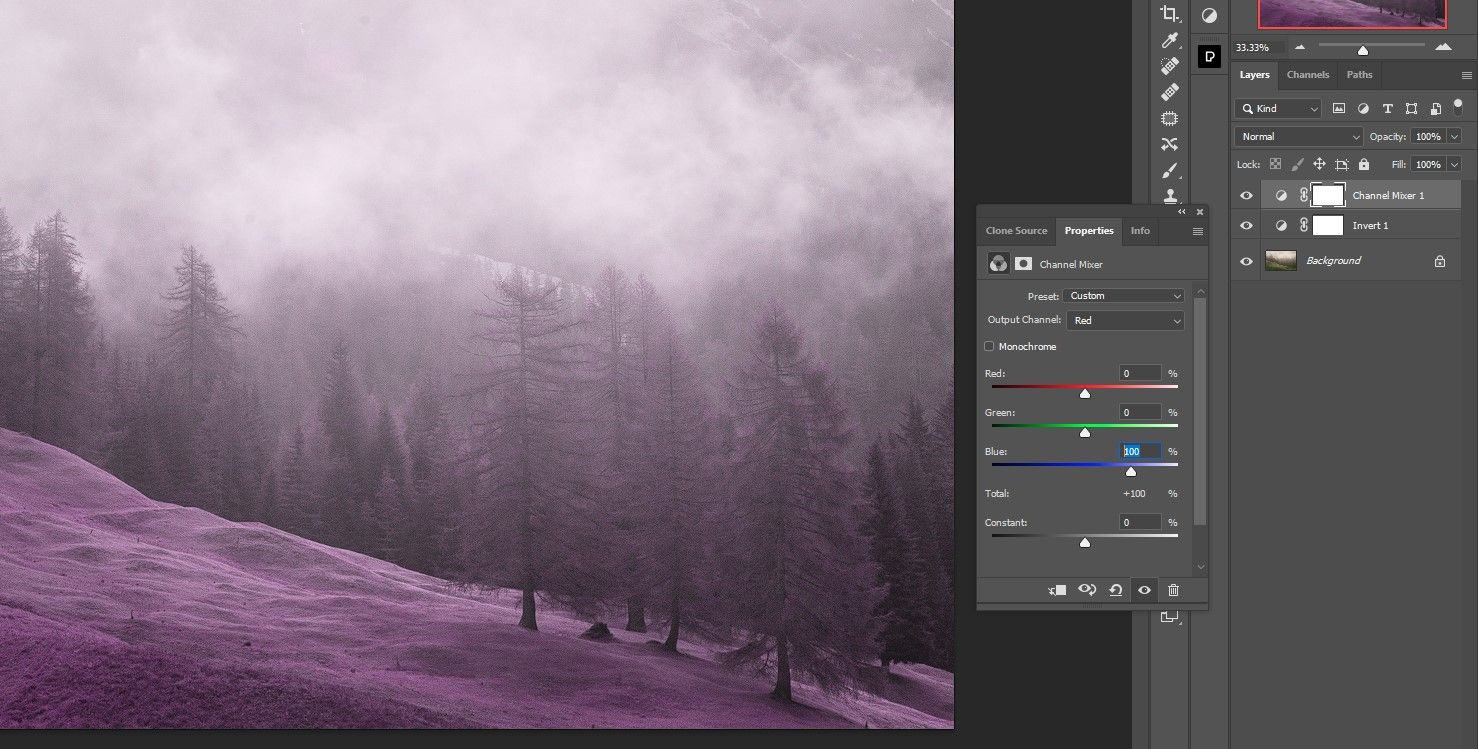
- Through which Purple channel, change the Purple out +100 % to zero.
- whereas in Purple channel, change the Blue to 100 P.c.
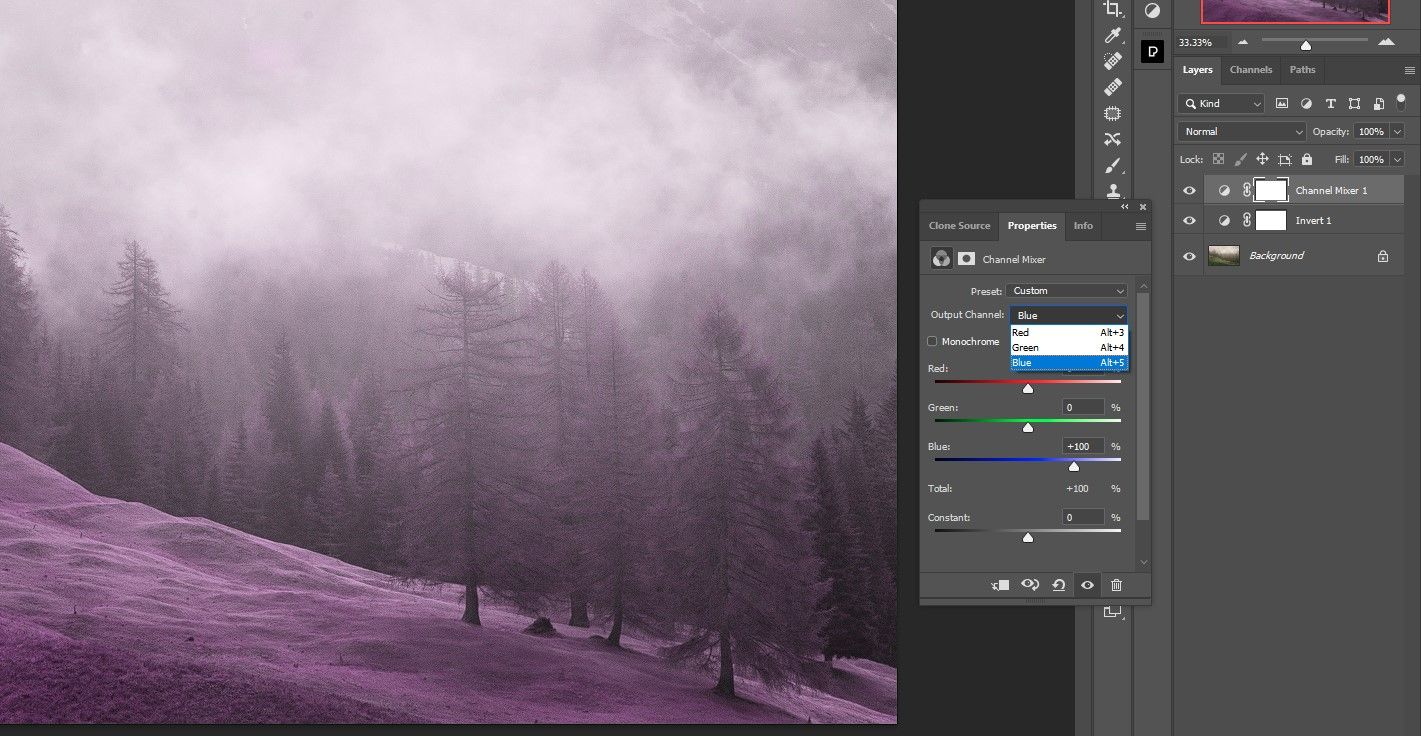
- change that output channel to Blue.
- change that Purple channel to 100 P.c.
- whereas in Blue channel, change the Blue to zero.
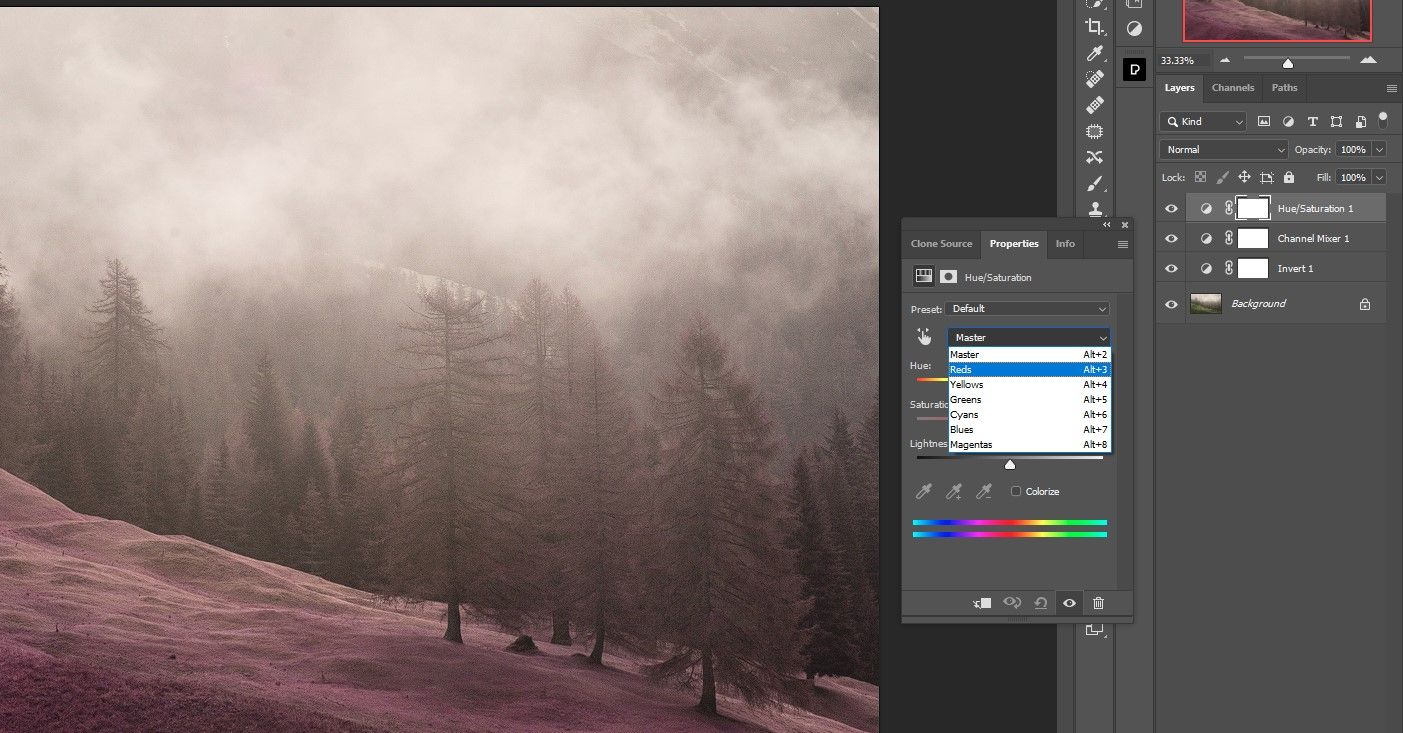
- A… create Hue/Saturation adjustment layer.
- Choose from the drop down menu Purple.
- Regulate the hue Slider to fine-tune the colour. We’ve got chosen -25 for this image.
- Regulate the saturation Slider so as to add extra colour. We’ve got chosen +43 for this image. We have reassigned them too hue slider too -13 to set a redder hue.


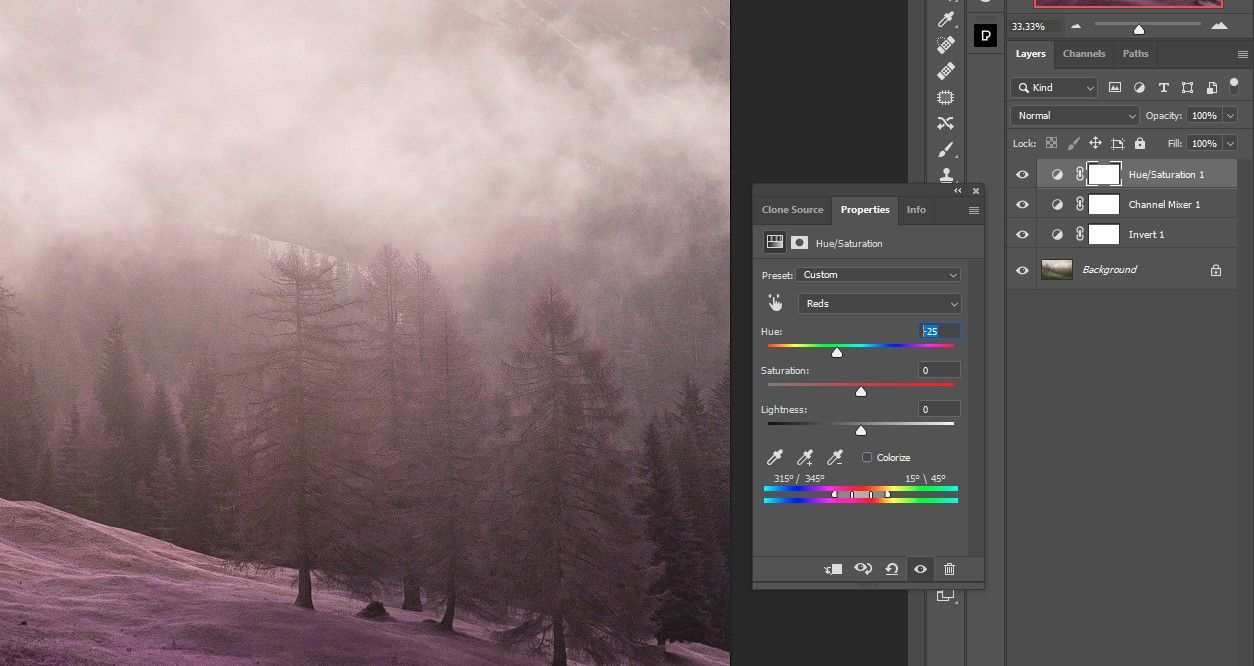
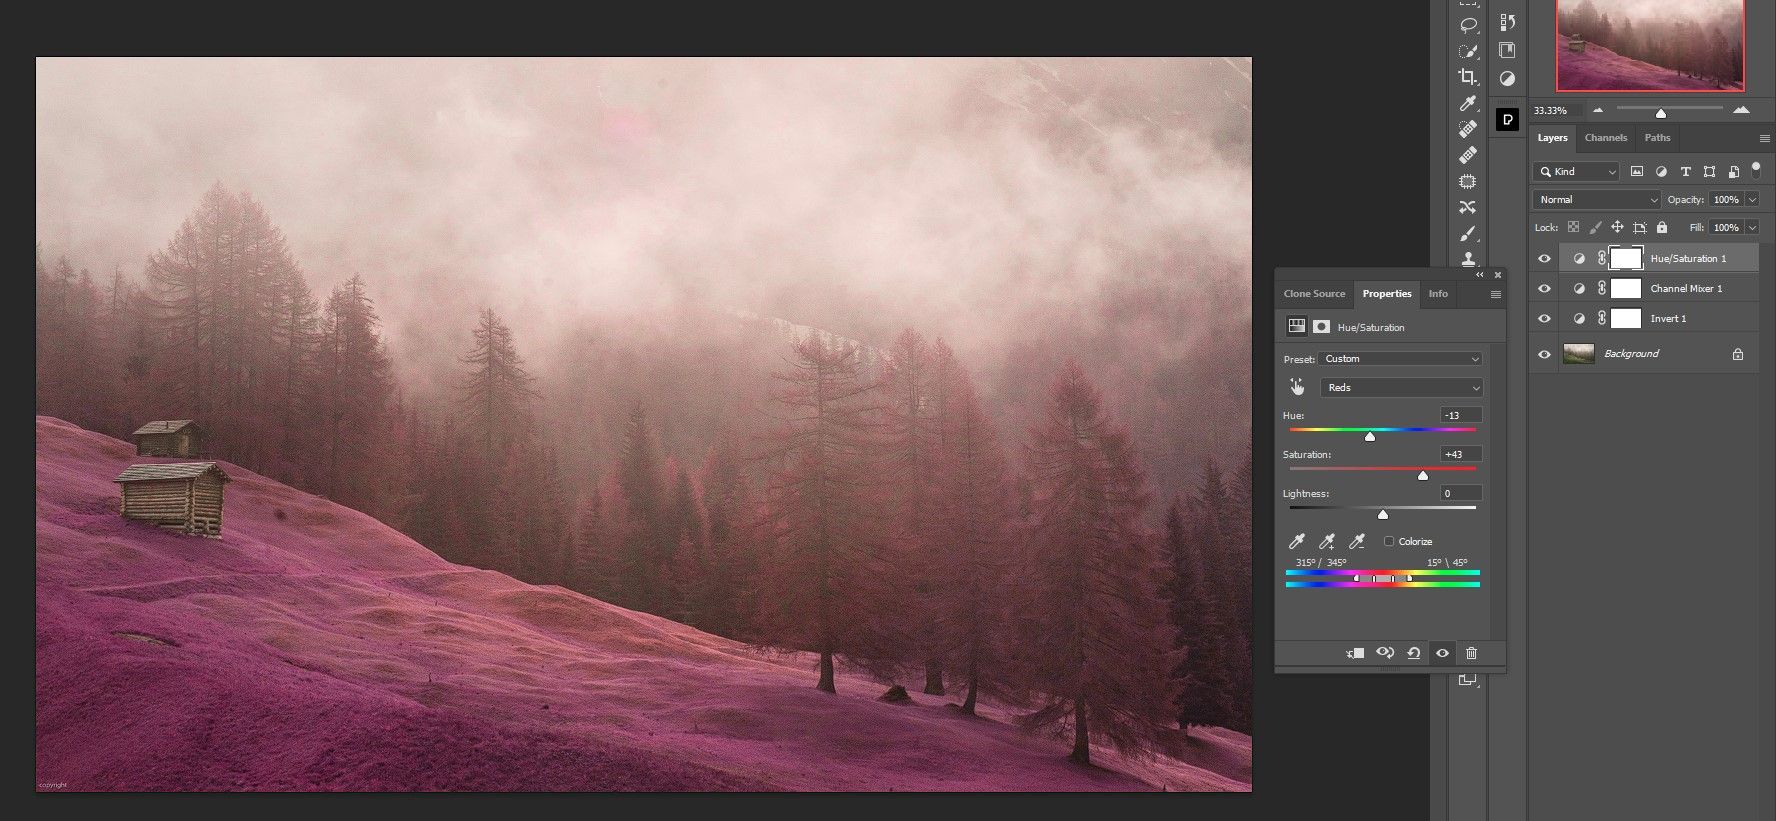
Each picture is completely different and requires completely different changes to the Hue and Saturation sliders. All of it relies on your private desire for the picture.
An alternative choice on the finish of step 12 is to return to grasp Channel and alter the Hue and Saturation sliders.
This additionally impacts every other colours which may be current, however for this picture it is a good adjustment.
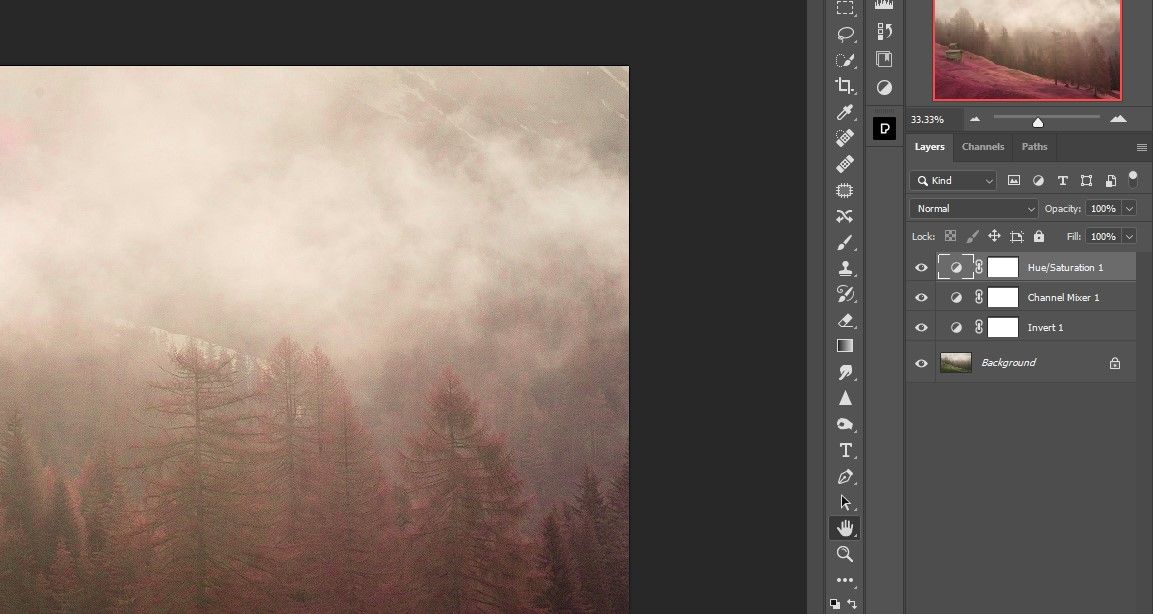
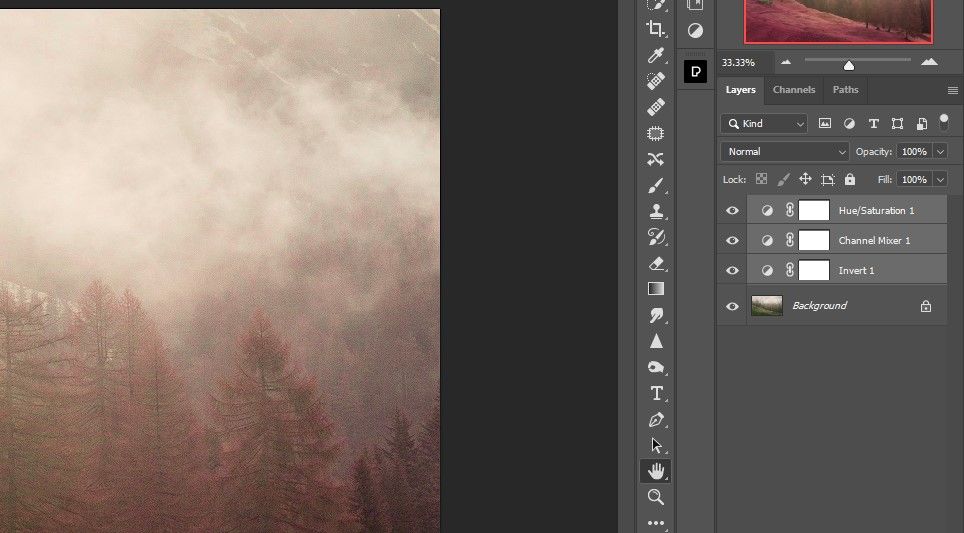
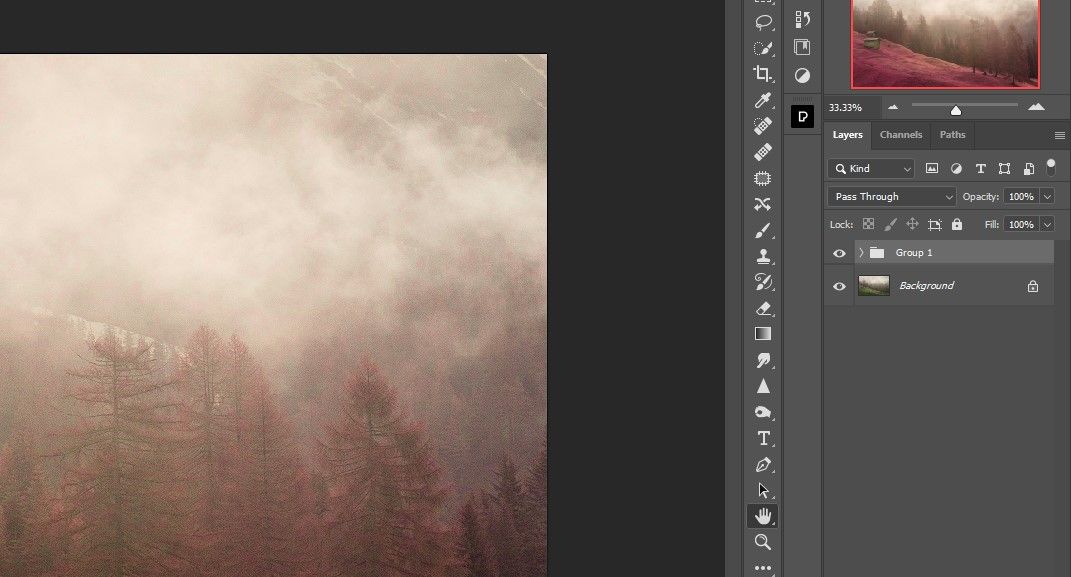
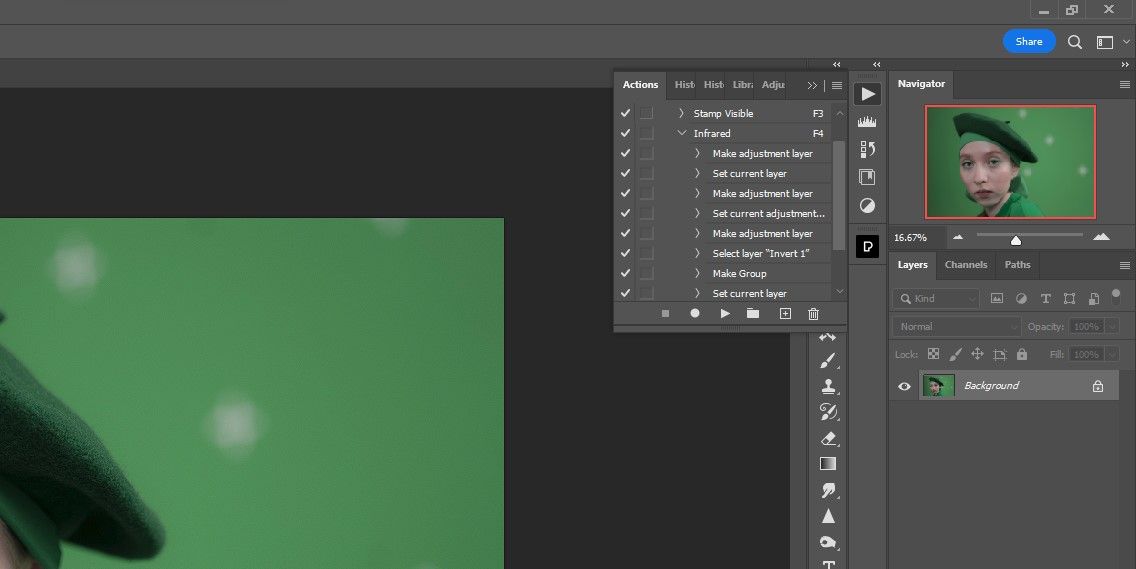
Step 2: Group the layers collectively
That is an optionally available step, but it surely actually helps manage your layer stack, particularly when you intend to make use of different Photoshop methods to boost your infrared photos.
- Click on on that Hue/Saturation degree to make them energetic.
- Press change + click on on the Turning again Layer.
- Press ctrl + G to group the layers.
- Double-click the brand new title subject folder. title it Infrared. Press Enter to simply accept modifications.
We’ll find yourself exhibiting you how you can create a Photoshop motion for what we have finished up to now, so you’ll be able to experiment with completely different photos with out having to redo all of the work for each. We’ll present you how you can save time with Photoshop actions.
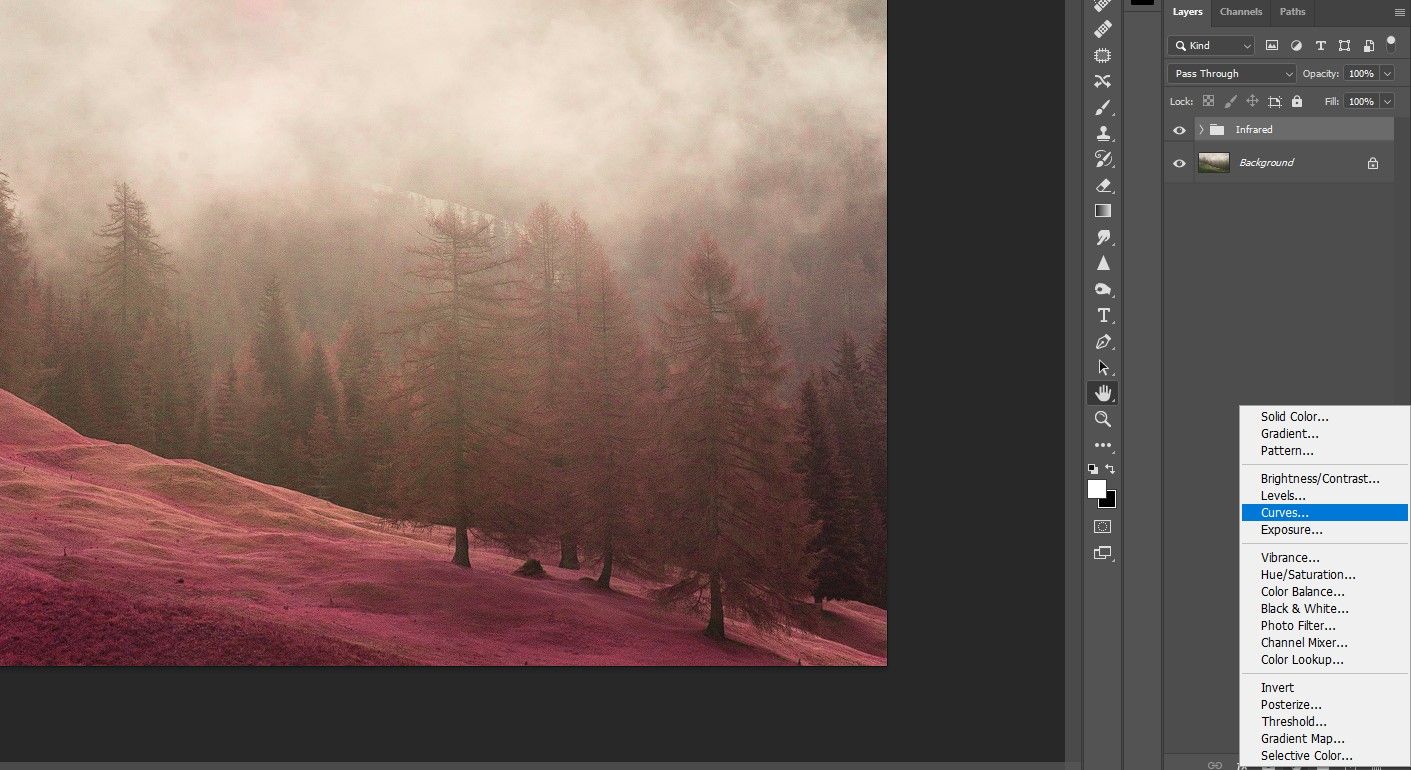
Step 3: Add the shine for the of completion
One other widespread characteristic of many infrared photos is a considerably dreamy or glowing impact that makes the picture seem otherworldly. This of completion will enormously enhance the general infrared search for lots of your photos, no matter style.
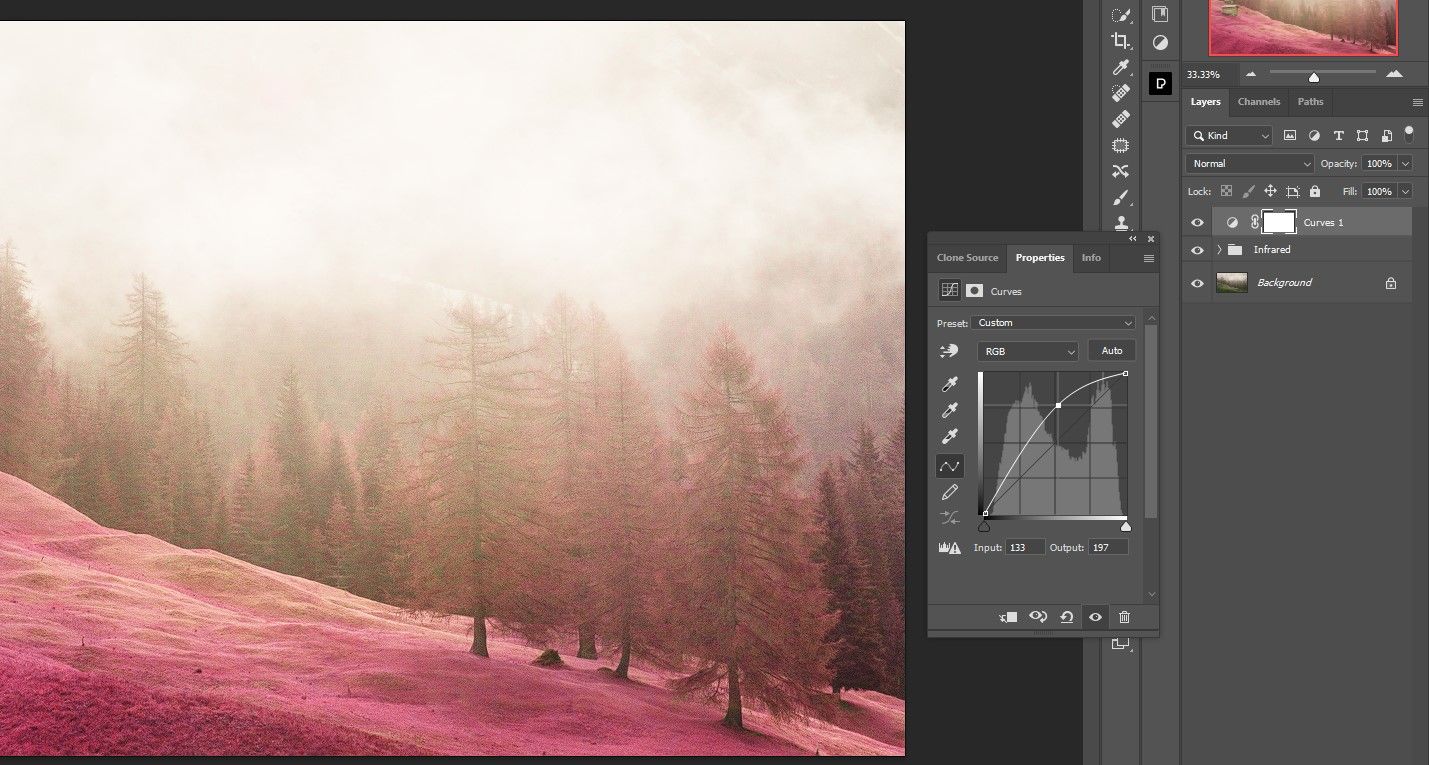
- A… create curves adjustment layer.
- A… create Level wherein midtones and carry all of it the way in which up as proven.
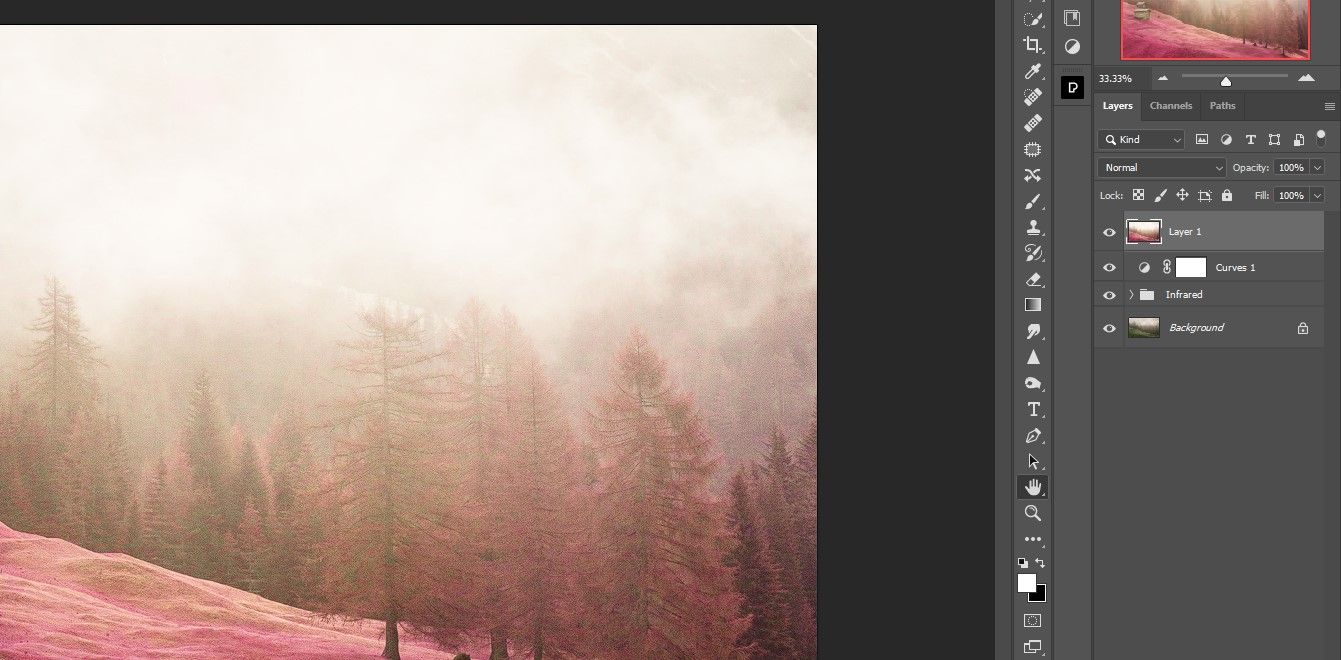
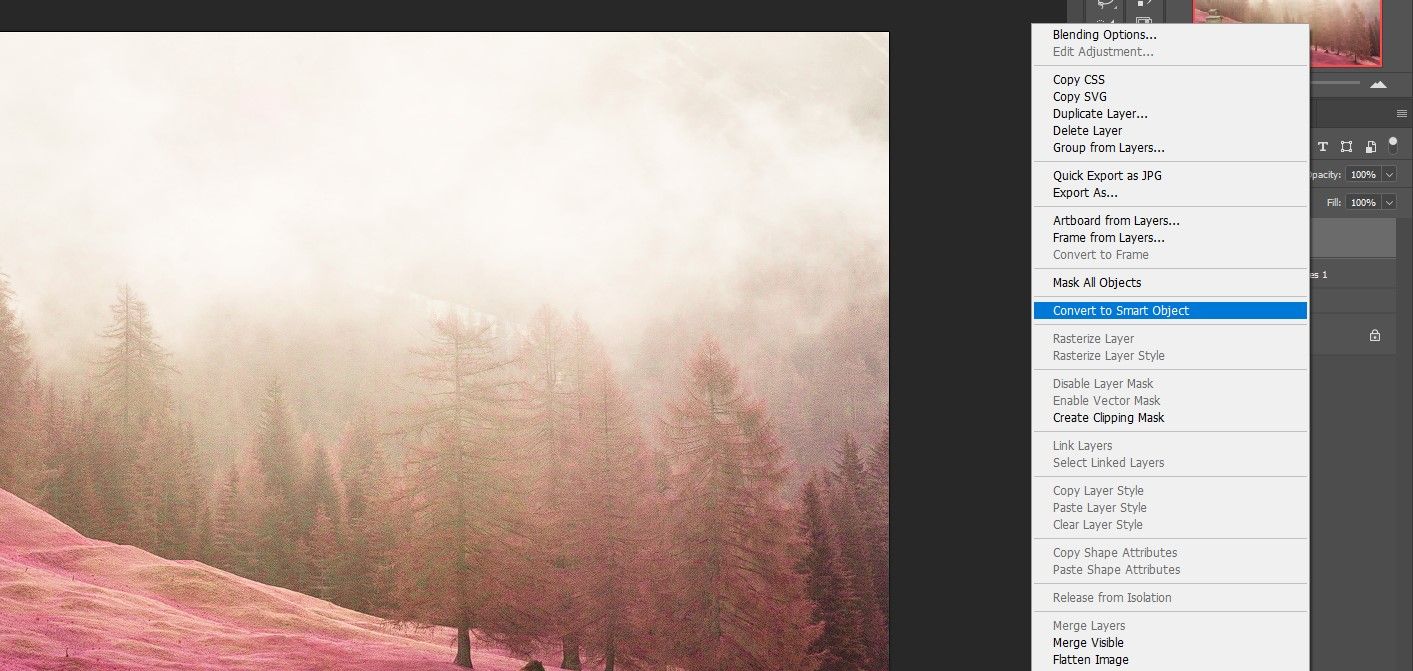
- Press change + ctrl + Previous + E to create a “Stamp Seen” layer.
- Proper click on on the Stamp seen layer and select Create good object.
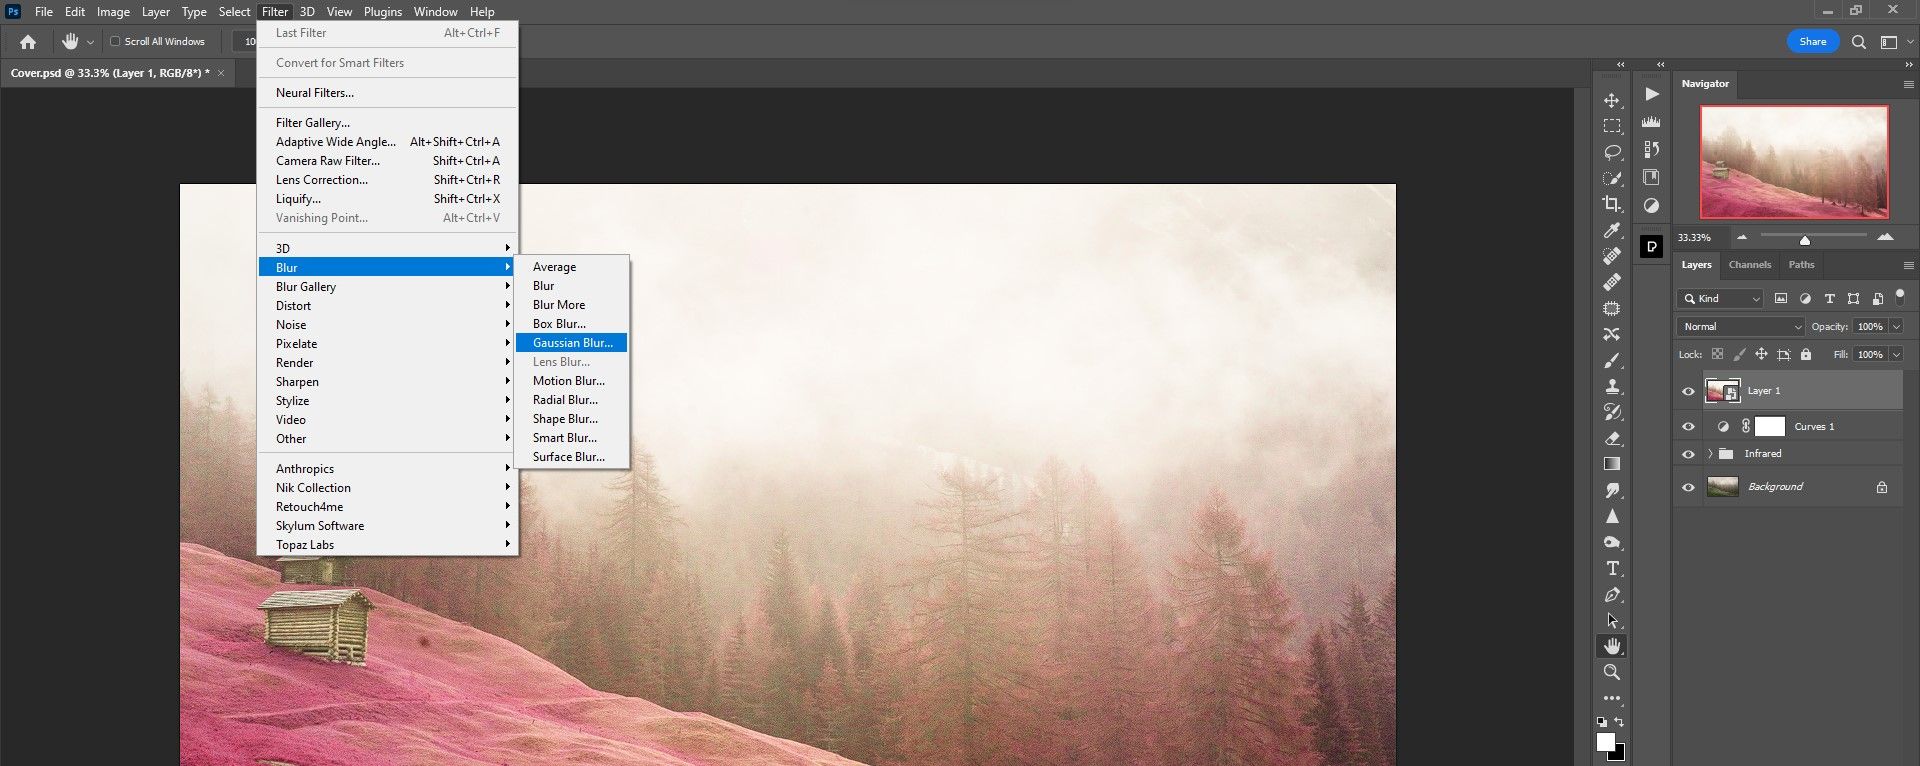
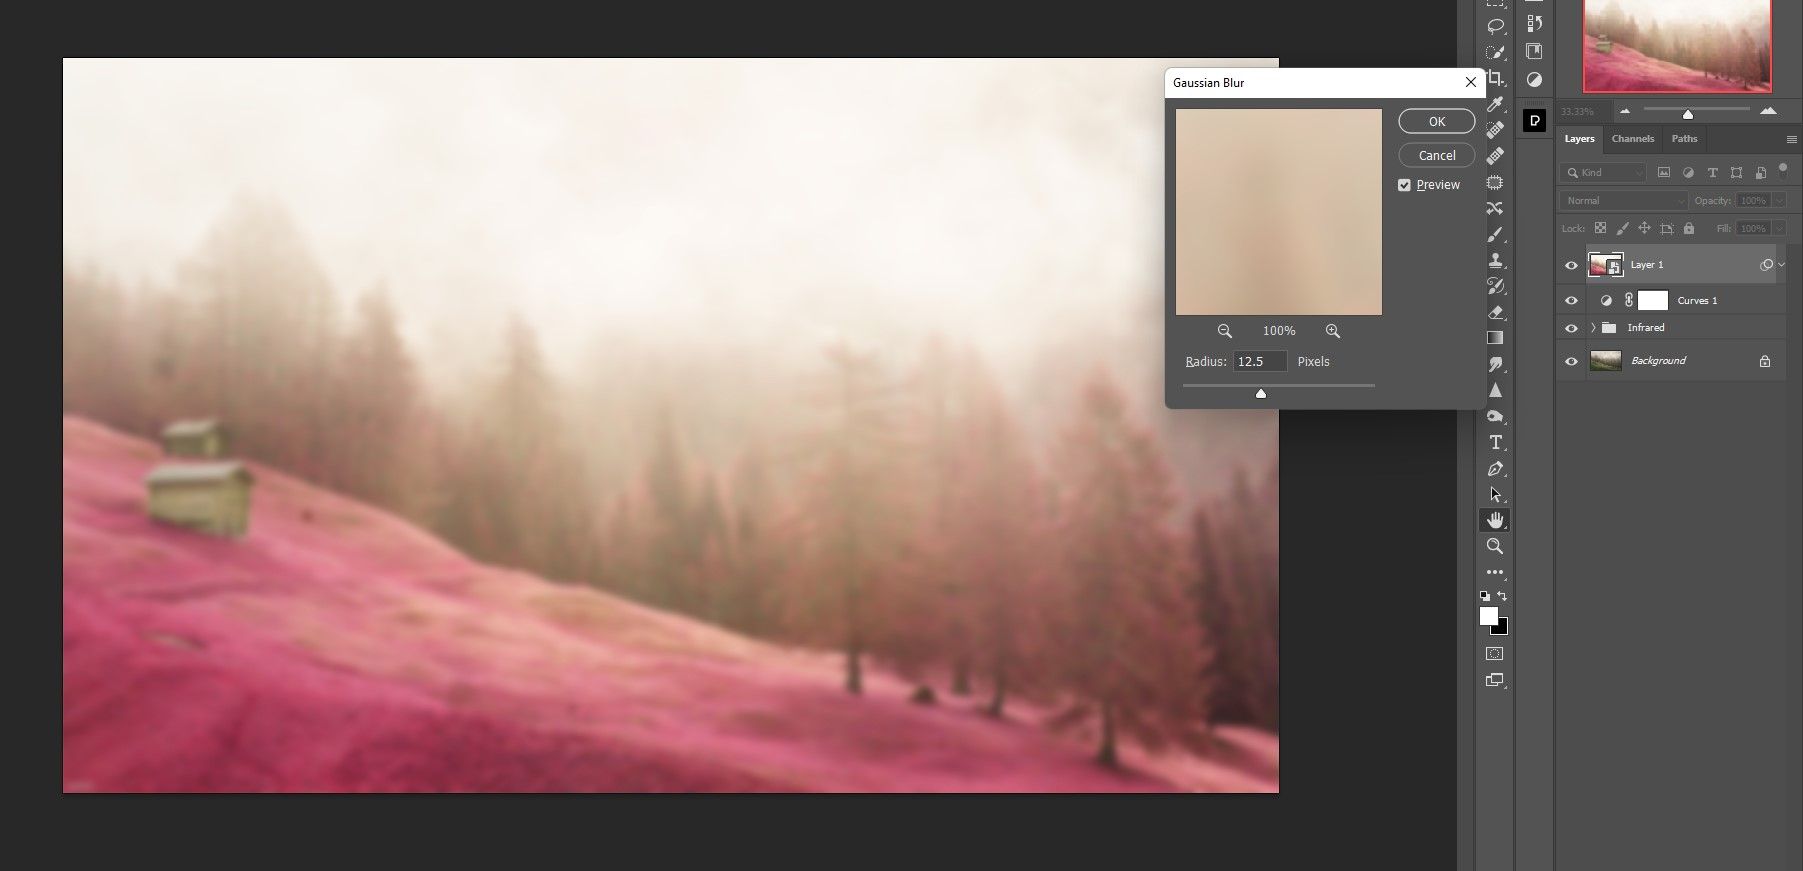
- Go to filter > Blur > Gaussian blur.
- change that radius Slider so as to add a average blur. We selected this image 12.5. Press OK.
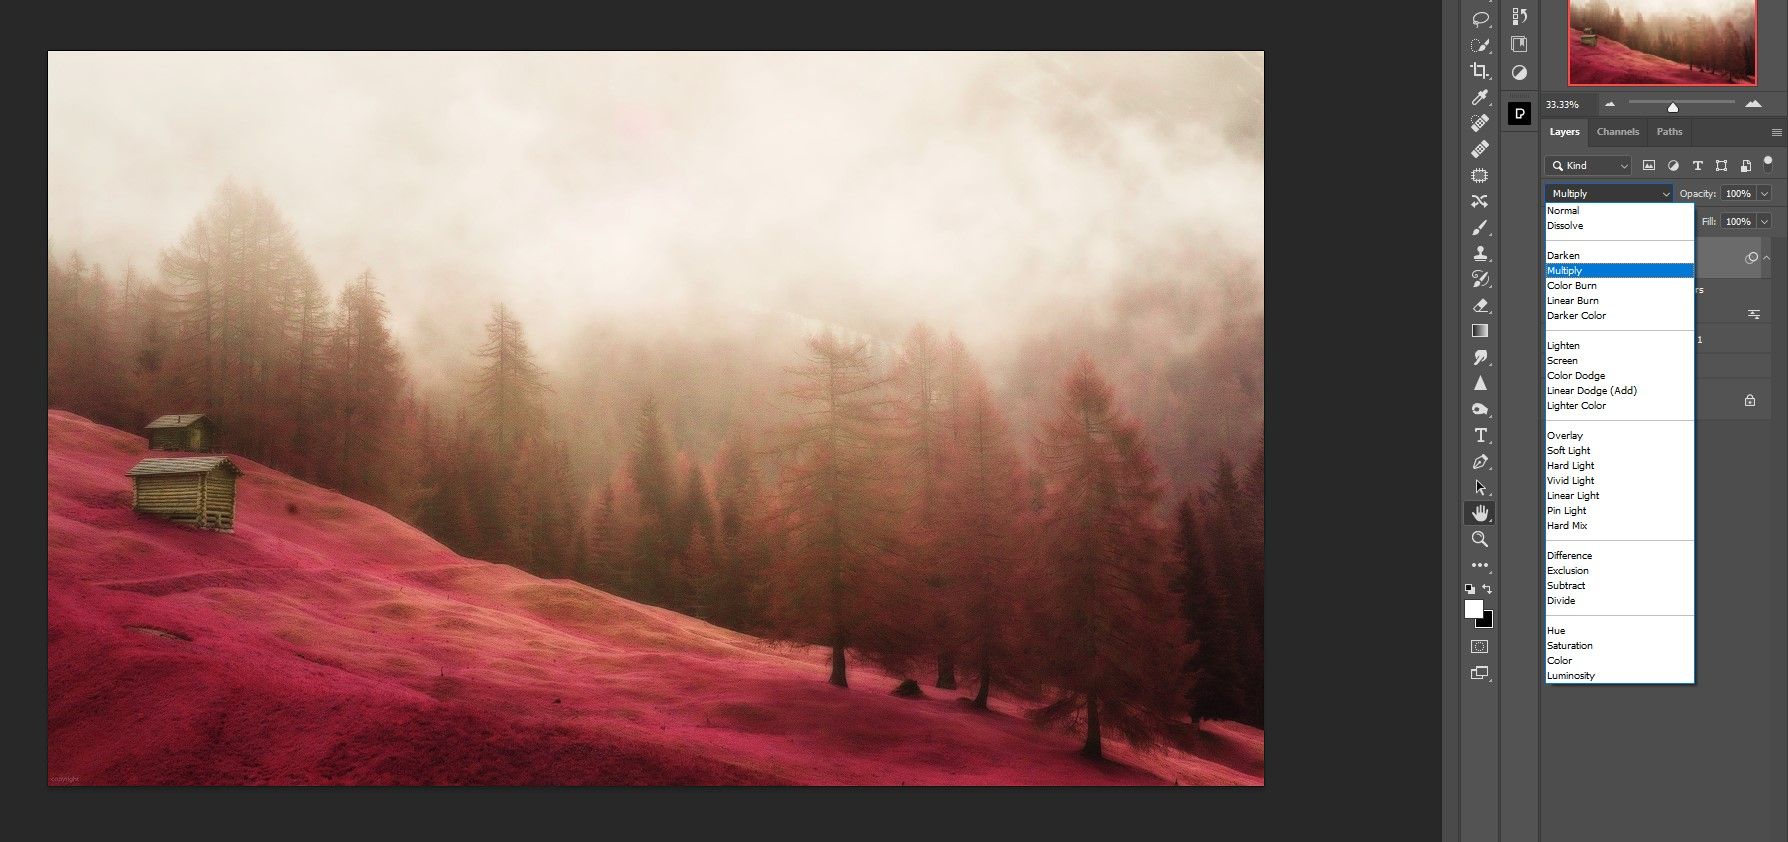
- Change the mixing mode of the Stamp seen shift to Multiply.
This final step is absolutely simply the tip of the iceberg relating to Photoshop enhancing. How far you are taking your artistic infrared conversions is fully as much as you. You possibly can even use third-party plugins just like the NIK Assortment so as to add colour and analog results.
An instance of the IR impact on a portrait
Who says infrared results can solely be utilized to panorama and nature pictures? Should you select the fitting photos, the strategies we’ve got proven you’ll be able to doubtlessly add a artistic dimension to your portraiture that you could be not have thought-about.
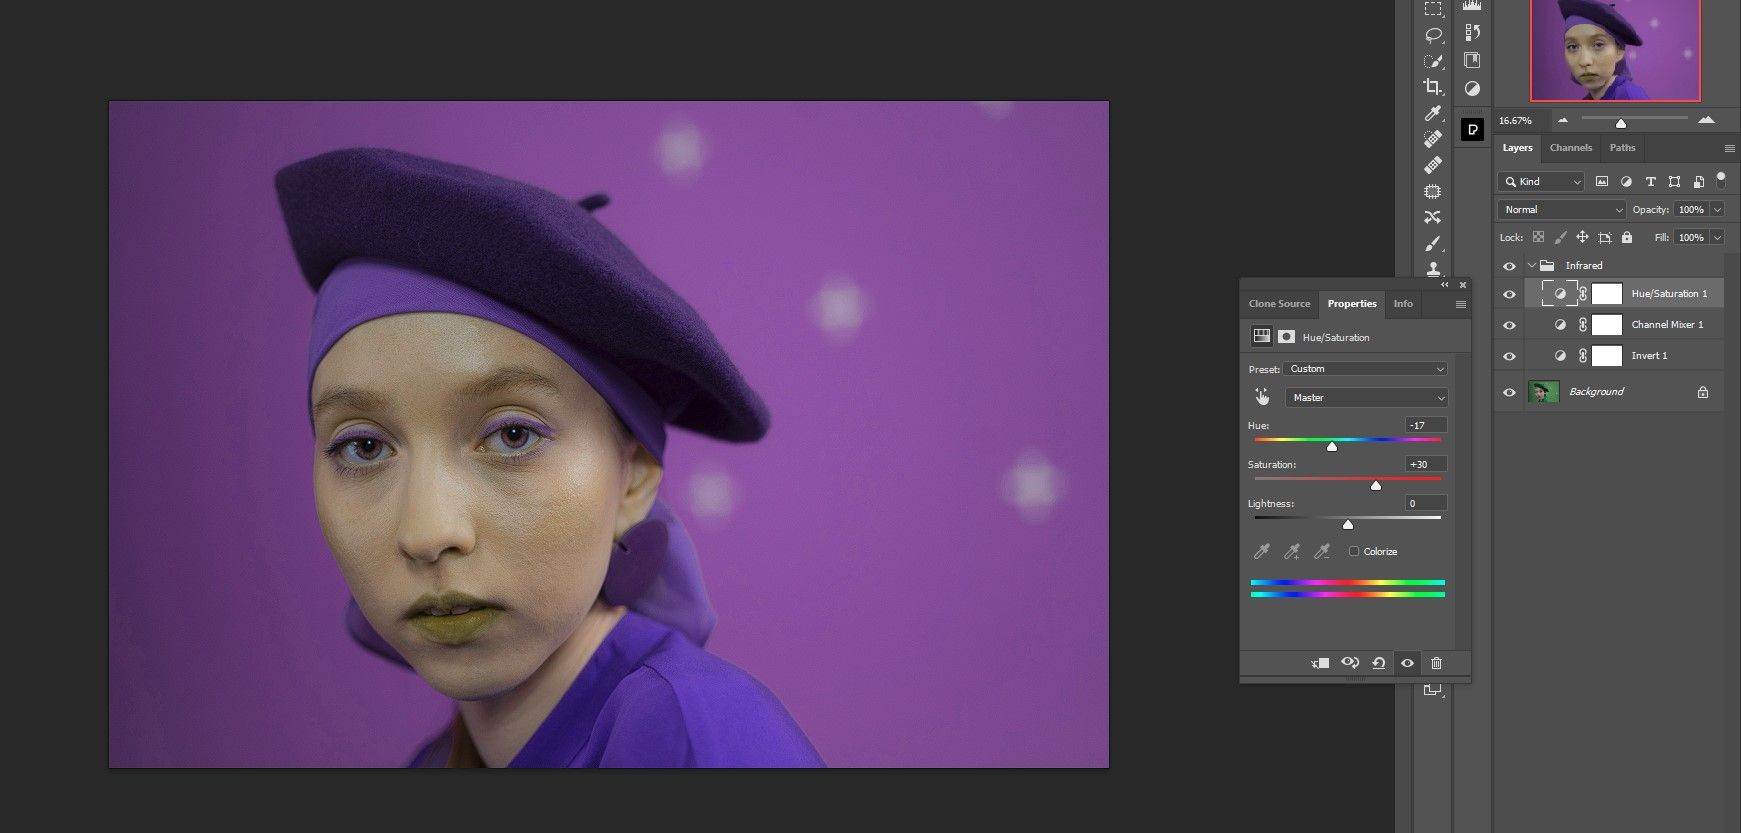
Should you examine the 2 photos you’ll be able to see how we manipulated the inexperienced within the unique to show it into one thing fully completely different. All we did was go away grasp Channel within the Hue/Saturation adjustment layer and play with the hue and saturation controller on the finish of step 1.
Create a Photoshop infrared motion to save lots of time
The primary two steps on this article may be programmed right into a Photoshop motion that may prevent plenty of time creating infrared photos in Photoshop. Let’s have a look at how that may be finished.
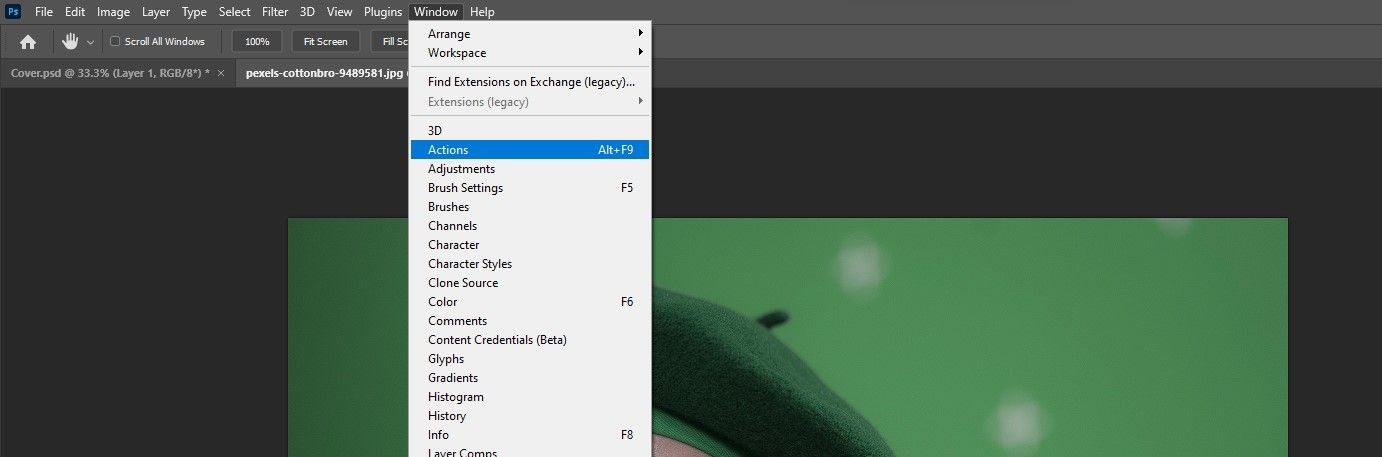
- Go to the Actions icon, press Previous + F9or go to window > Actions.
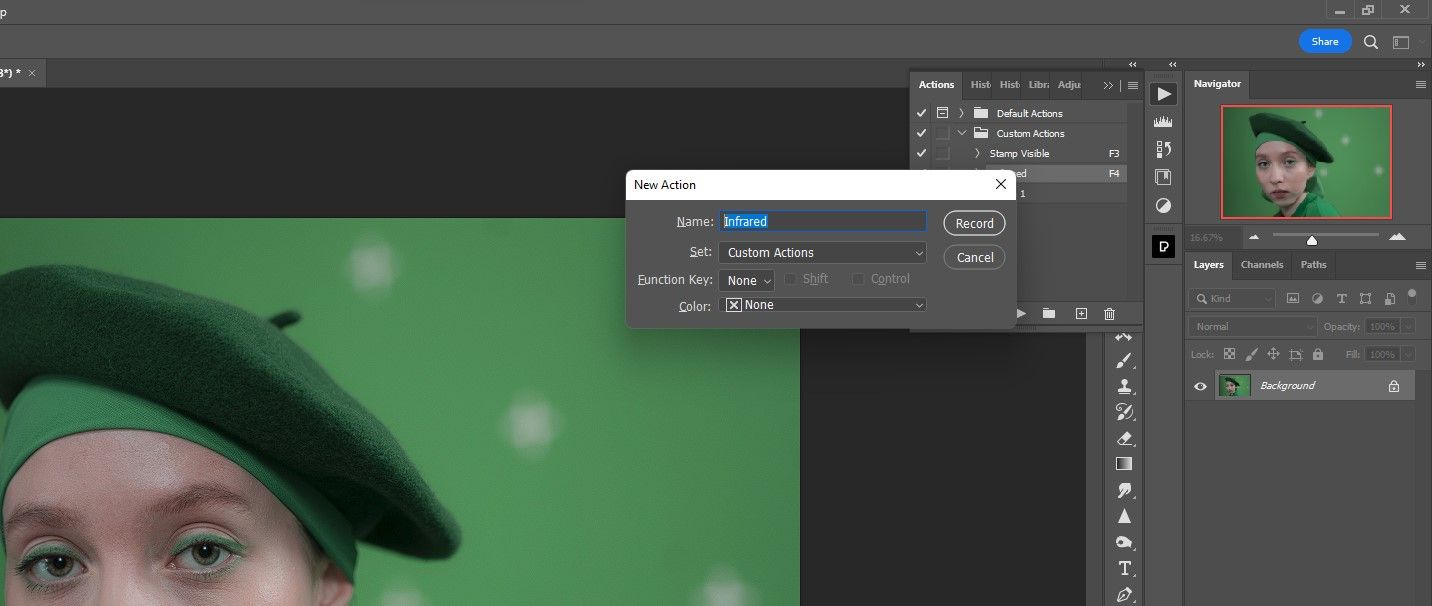
- Click on on that Create new motion image (+).
- Identify the motion Infrared. The opposite fields are optionally available relying on how you utilize actions. Then press recording.
- Repeat the entire directions from steps 1 and 2.
- While you’re finished, click on the cease icon (the sq.).
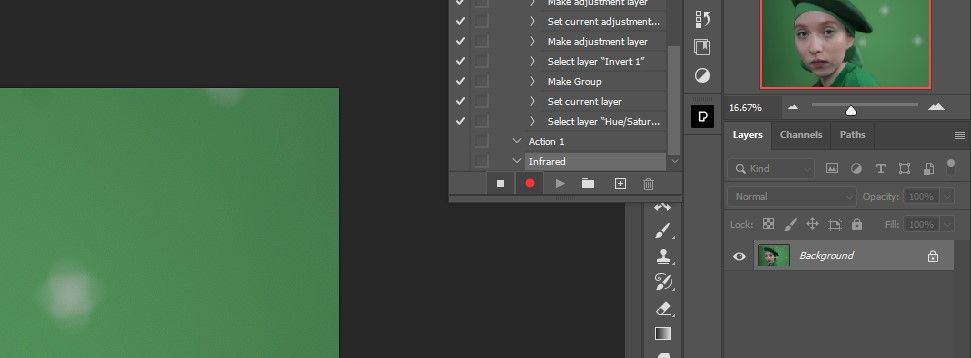
Necessary Word: You could return to the Purple Channel Hue and Saturation sliders to make changes for every infrared picture you create in Photoshop. However apart from that, a lot of the work is completed for you.
The Infrared Photoshop motion would then be out there for any picture that you simply selected to transform to infrared within the Actions menu. You’d simply have to search out it and press play.
Uncover the world of infrared in Photoshop
If you do not have the fitting gear to seize infrared photos, that is not an issue when you have Photoshop at your disposal. We confirmed you how you can replicate the false colour infrared impact for photos that present shades of inexperienced. And with our helpful Photoshop motion, you’ll be able to create spectacular infrared photos in Photoshop with out breaking the financial institution to purchase new gear.
