Find out how to Create a Fantasy Map of Your Personal Fictional World

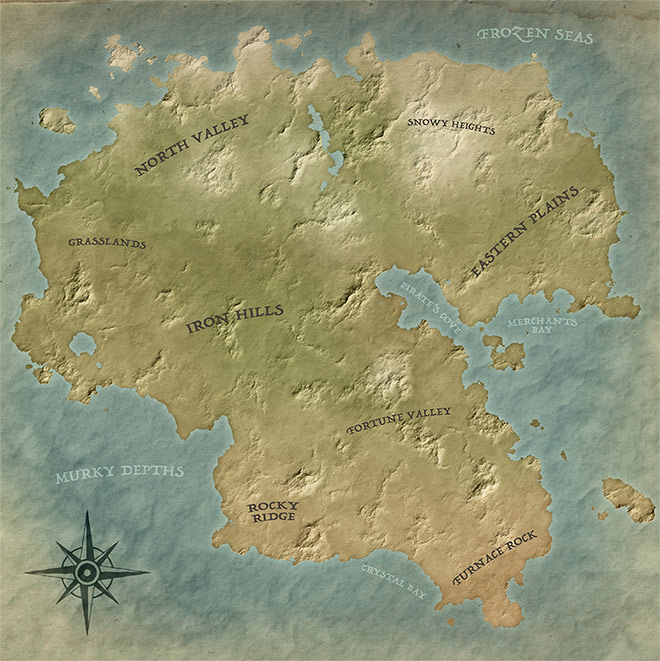
Follow today's Photoshop tutorial to create your own fantasy world, just like in the fictional story settings from Neverland, Middle-Earth or Westeros. We'll use Photoshop's built-in tools to determine landmass and sea, and then construct hills, mountains, and deserts with some simple filter combinations before finishing the artwork with a vintage paper texture and place names to simulate an old world map.
This type of fantasy world map is ideal for picture book art, tabletop games or party invitations for children. The shape and geography of your landscape is largely determined at random. It is therefore interesting to see how your fictitious card develops over the course of the process. If you follow the same steps, you can create a unique world every time!
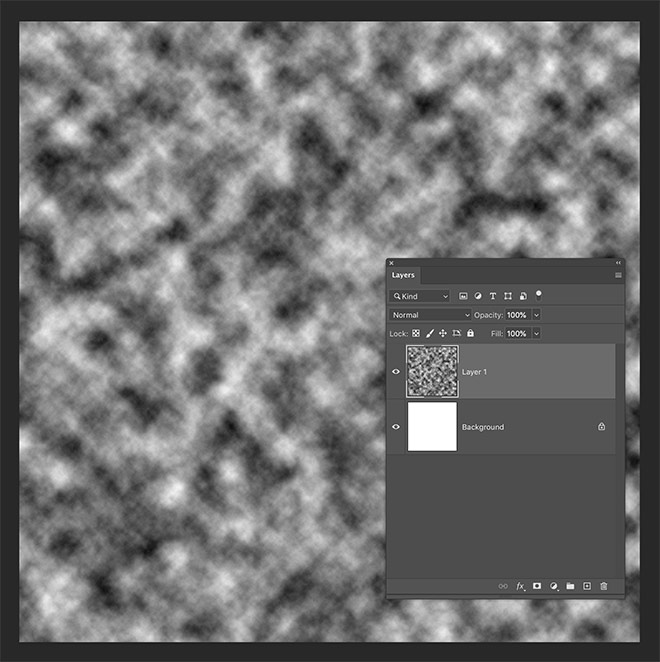
Start creating a new document in Adobe Photoshop. I'm using a 3000×3000 pixel canvas, but your map can be made in any size. Add a new layer and fill it with the Filters> Render> Clouds menu.
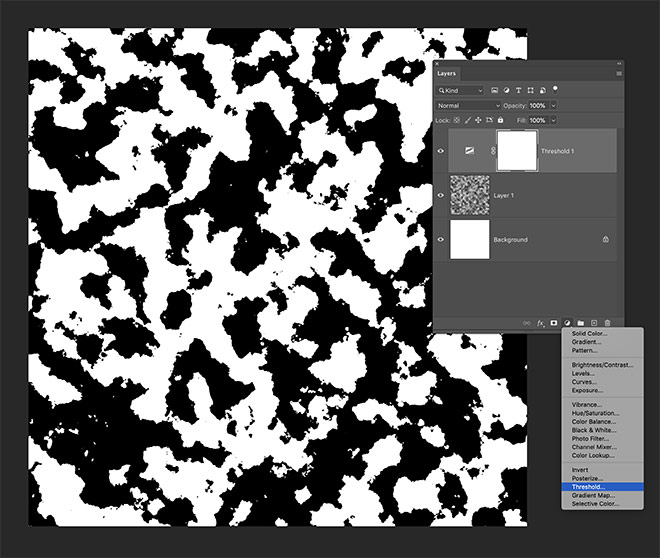
Add a threshold setting layer that converts the clouds into clearly defined shapes.
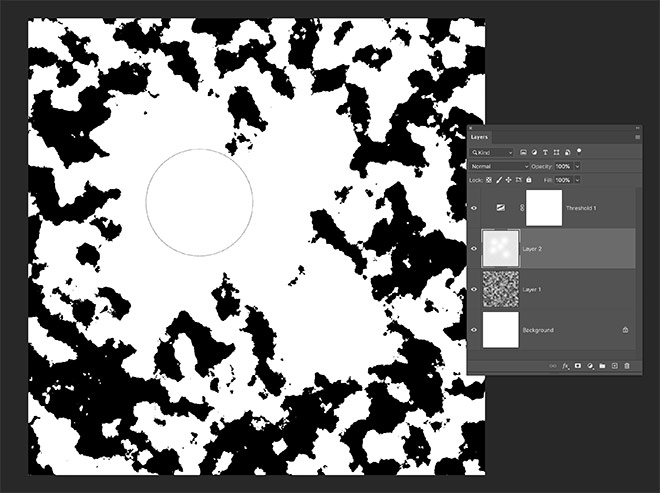
Select the cloud layer again and add a new layer above it. Use the brush tool with a soft tip to paint white areas and assemble groups of shapes into a larger land mass.
Use the X button to swap the foreground and background colors and paint around the edges with black to effectively shape the sea. Leaving small isolated white areas creates small islands, while black areas within the main landmass represent lakes.
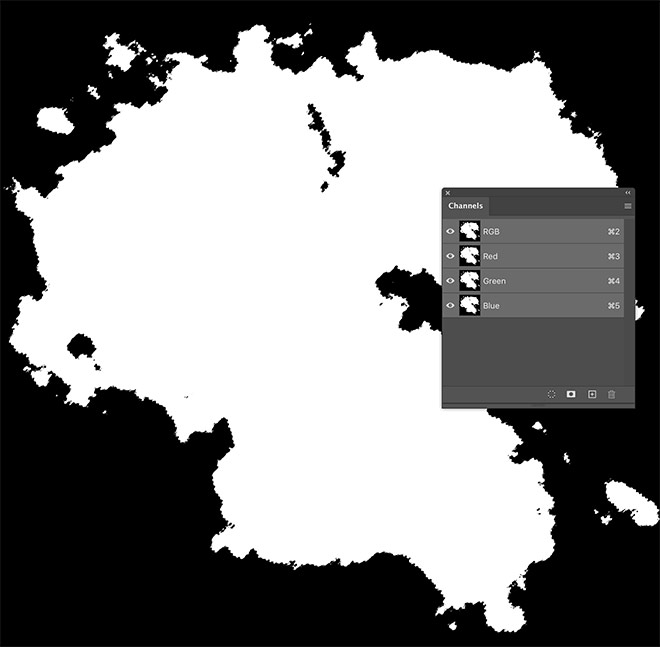
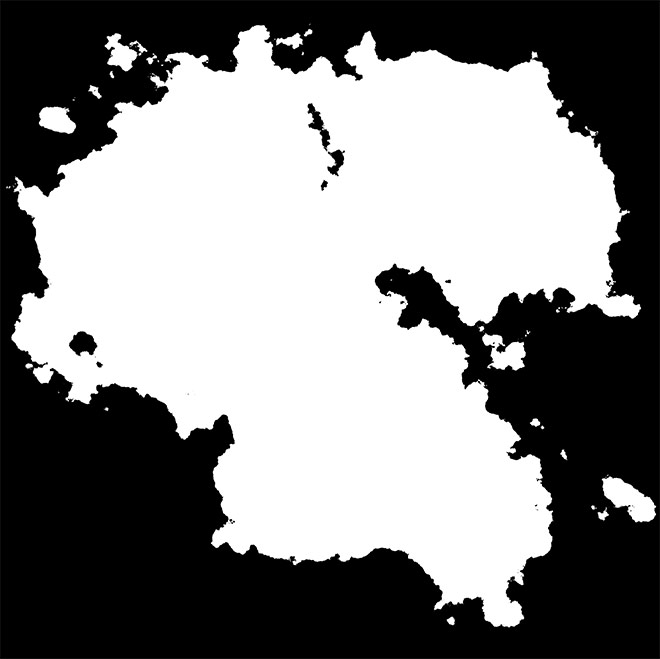
Open the Channels panel, hold down the CMD key (or the CTRL key on Windows) and click the thumbnail of the RGB layer to load the selection.
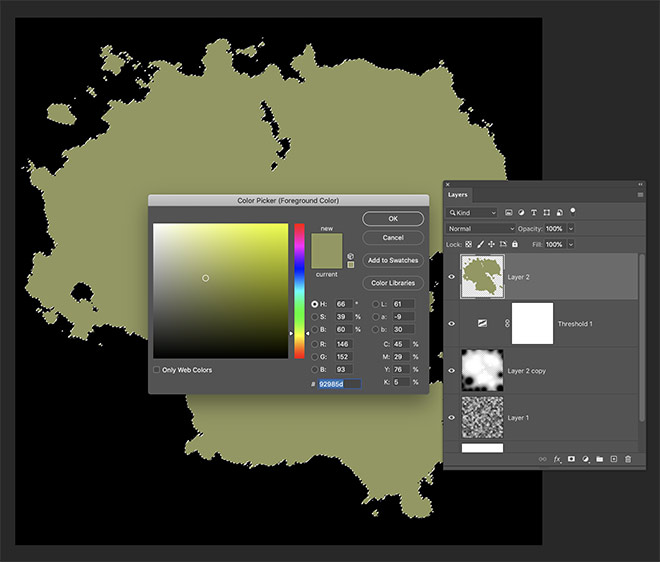
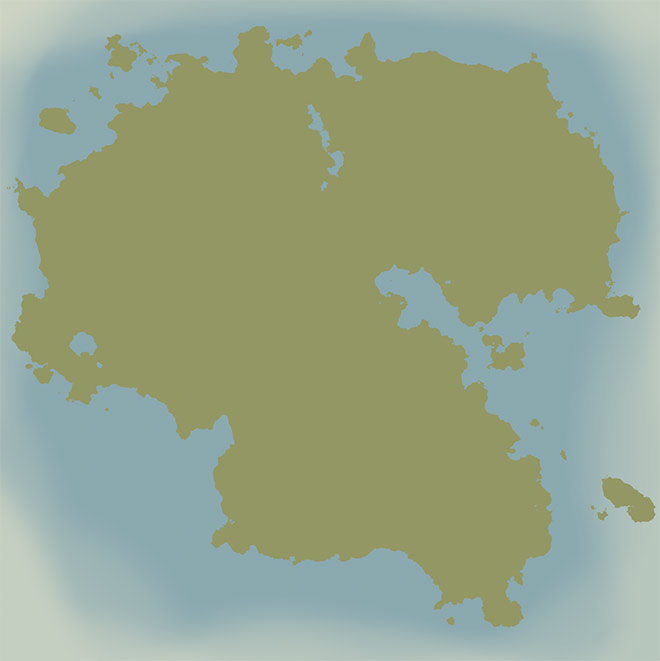
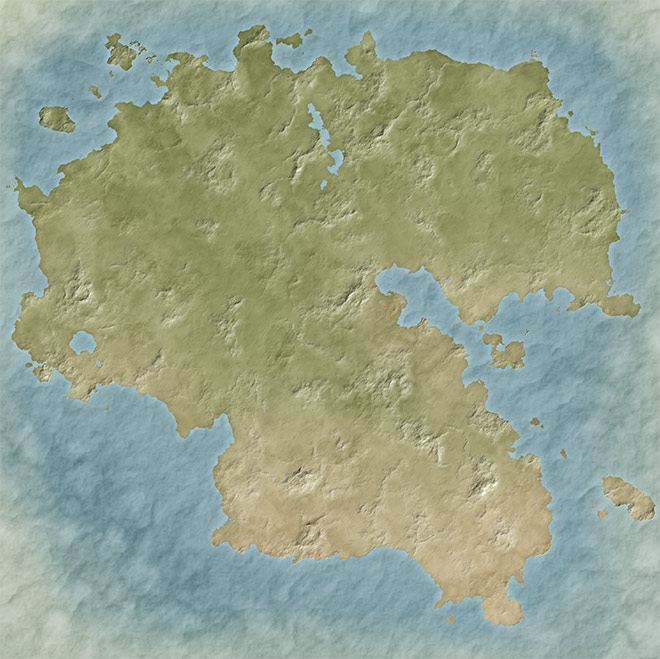
Add a new layer in the Layers panel and fill the selection with an earthy green color, e.g. B. # 92985D. Press CMD + D to deselect.
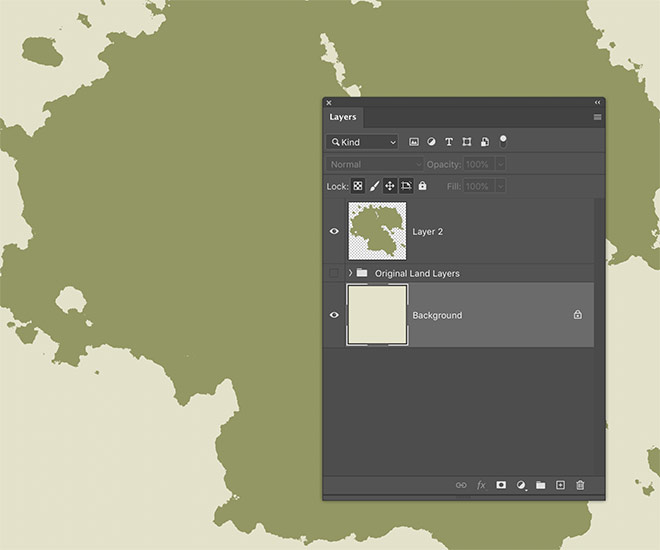
Also give the background layer a new fill using a value like # E3E2C8 to represent the color of the old paper. Group and hide the original levels that formed the land as they are no longer needed.
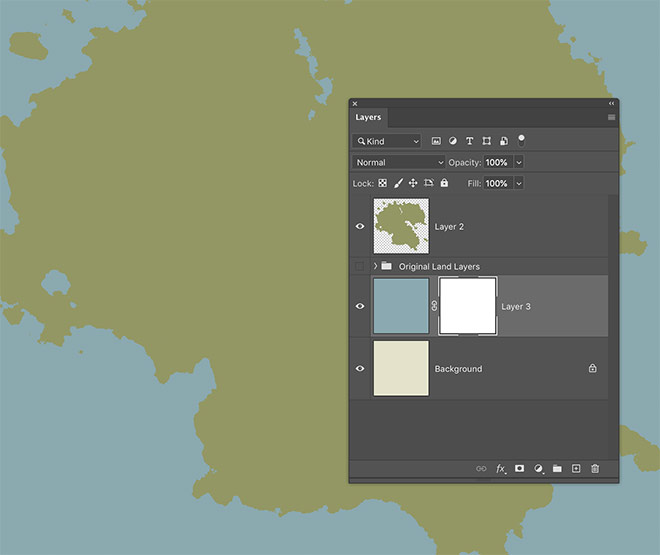
Add a new layer and fill it with a blue of # 83AAB1 to represent the sea. Apply a layer mask to that layer and then select the brush tool.
Reduce the Brush Capacity setting to about 30%, then lightly paint in black on the edge of the document. Follow the outline of the country to hide the sea.
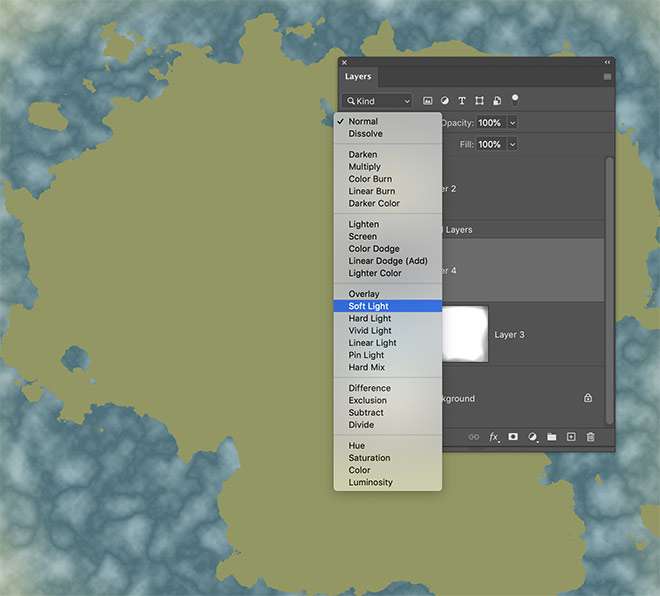
Reset the foreground and background colors to black and white. Add a new layer and go to Filters> Render> Clouds, followed by Filters> Render> Difference Clouds. Set the blending mode of this layer to "soft light" and reduce the opacity to about 50%.
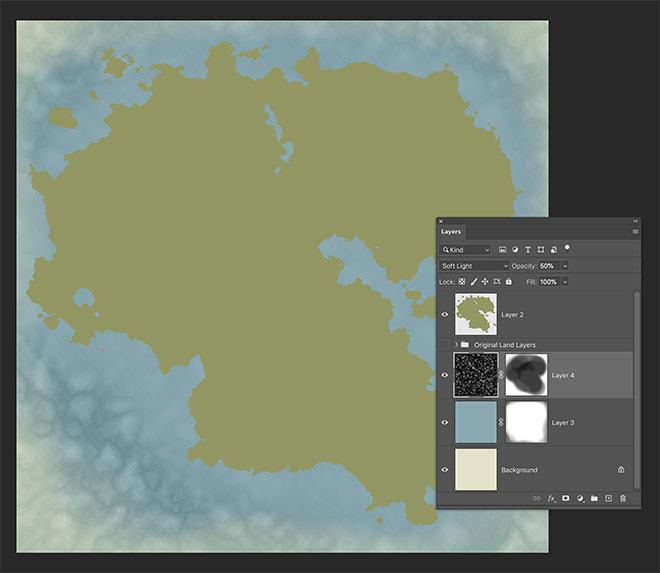
Apply a layer mask to this cloud layer and use the brush tool to hide the texture to create shallower waters, especially on the coast.
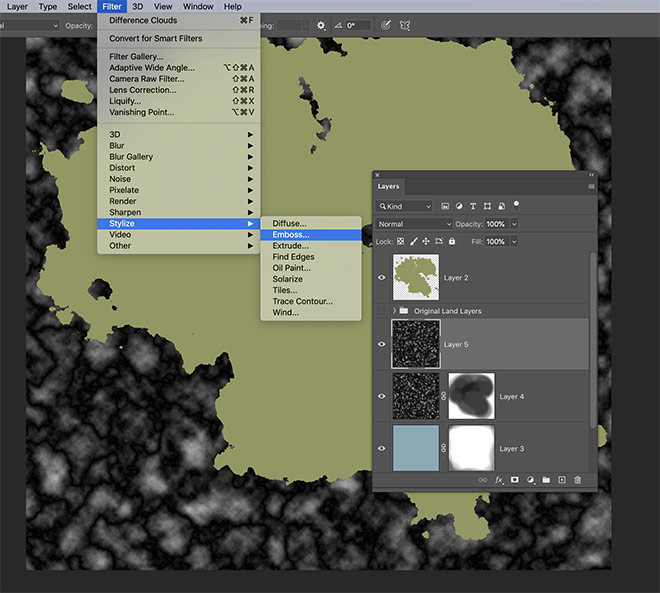
Add another layer and reapply the Clouds and Difference Clouds filters. This time go to Filter Stylize> Emboss.
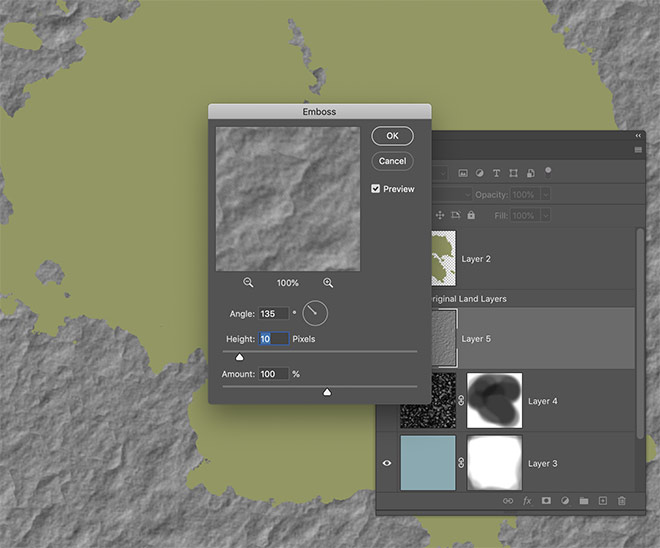
Configure the settings to a height of approx. 10 pixels with a value of 100%.

Set this embossed texture layer to soft light to add some waves to the ocean.
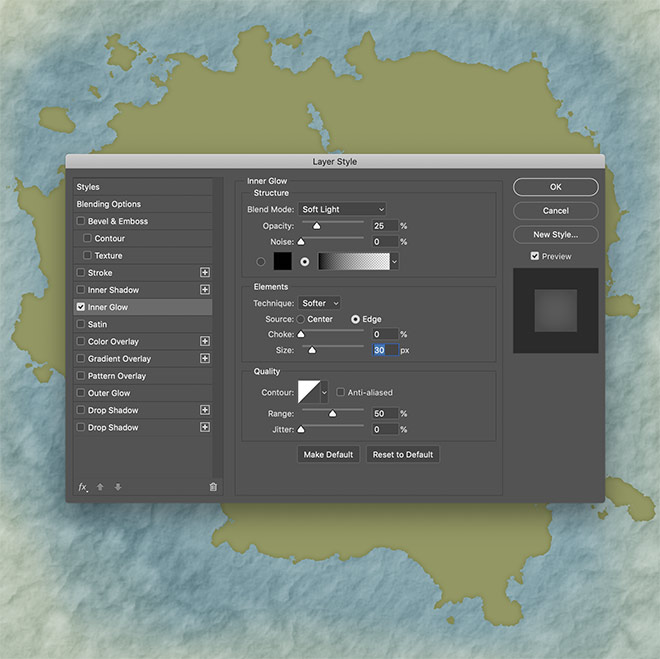
Double-click the main layer to add some layer style effects. Start with an inner glow. Reset to default values, then configure the blending mode to soft light, choke to 0, size to 30 pixels and reduce the opacity to about 25%.
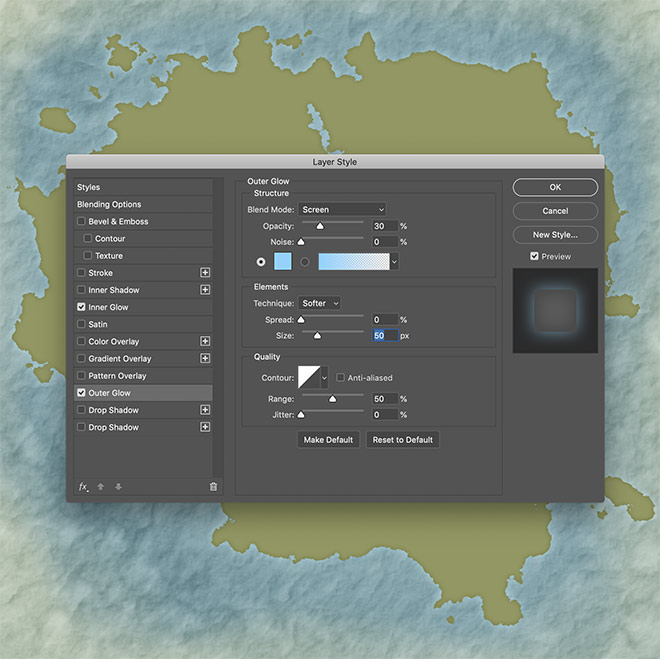
Add an outside glow and configure the settings to a shade of # 80D4FF, a size of 50px and an opacity of 35% to make the ocean look flat on the coast.
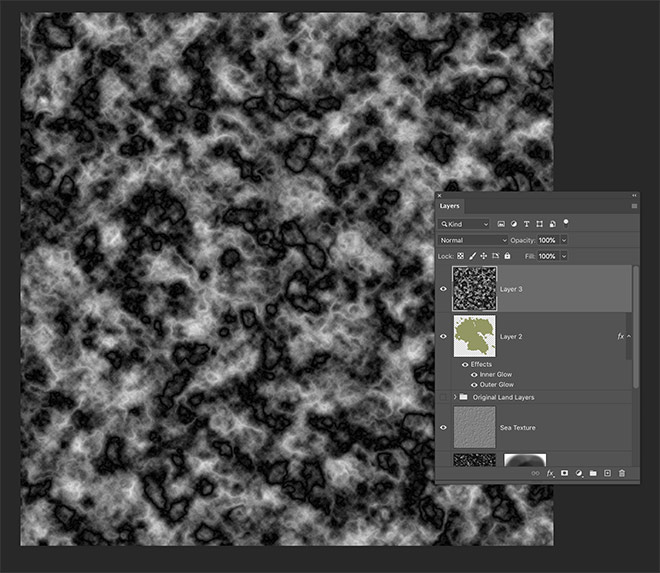
Let's use the same differential cloud effects to give the country a texture. Apply the filters to a new level. You can use the CMD + F link to regenerate different cloud formations and further sort the result randomly.
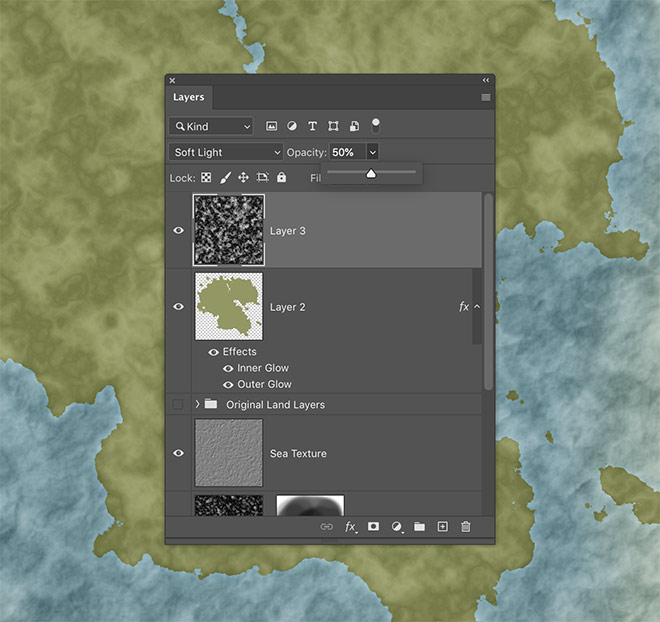
Set the blending mode of this layer to Soft Light and reduce the opacity to 50%.
Hold down the CMD key and click on the thumbnail of the country level to load its selection. Apply a layer mask to effectively delete the texture from the marine area with this selection.
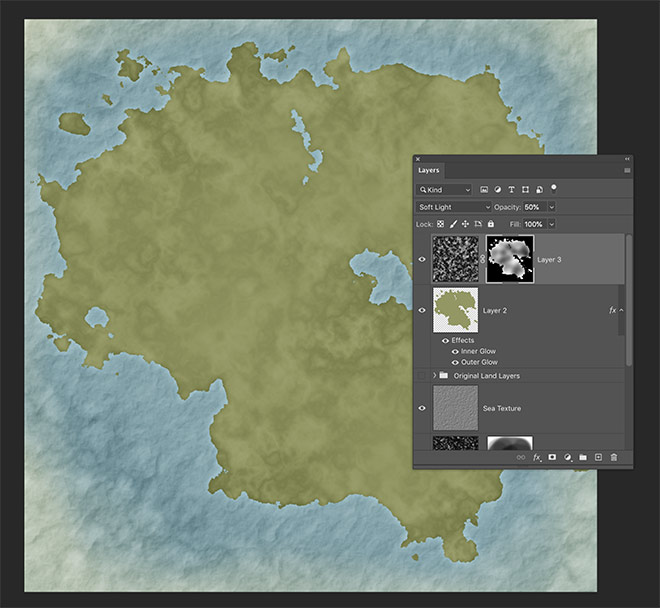
Paint inside the mask with the brush tool to reduce the highlighting of the texture in certain areas and make the land look flatter.
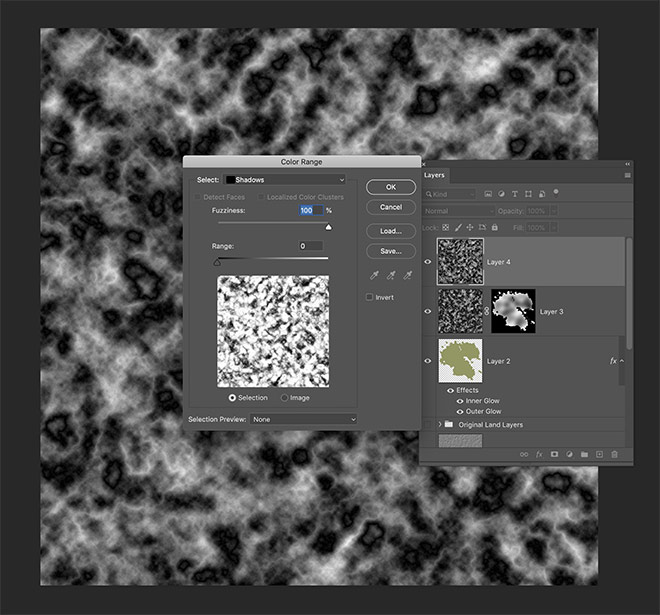
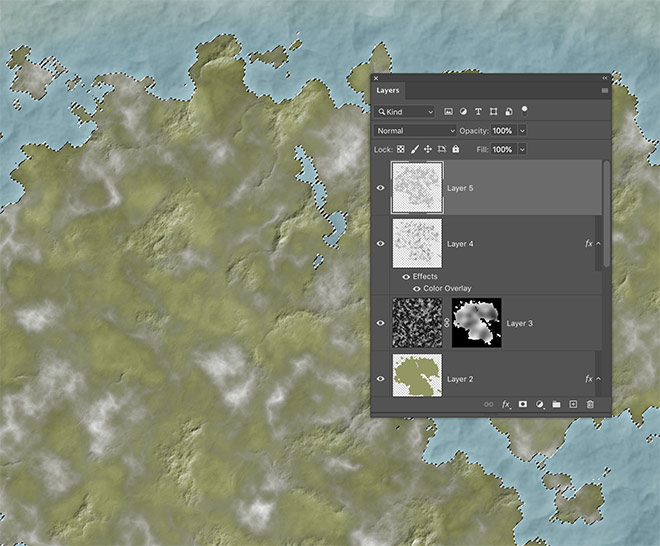
Use the Clouds and Difference Clouds filter to add another new layer. This time go to Select> Color Range. Select shadow, set the blur to 100% and the area to 0. Use the backspace key to delete this area.
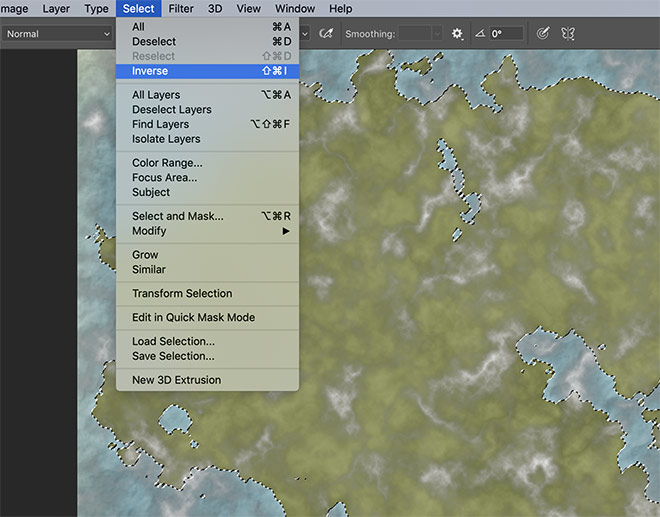
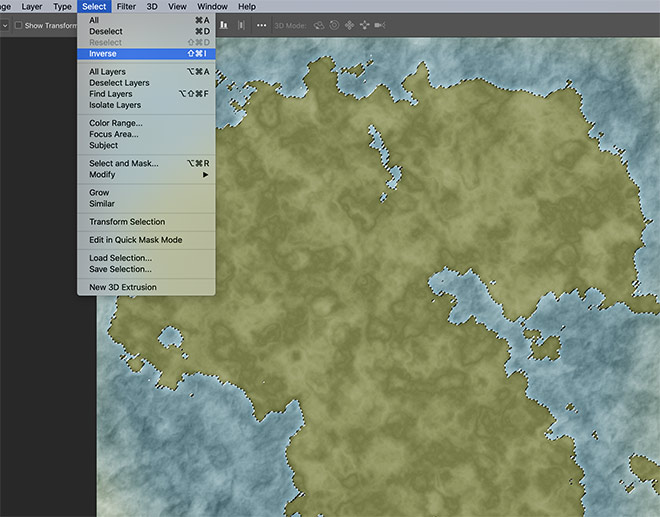
CMD + Click the country level to reload the selection, then go to Select> Inverse. Press the backspace key to clear the clouds outside the land area.
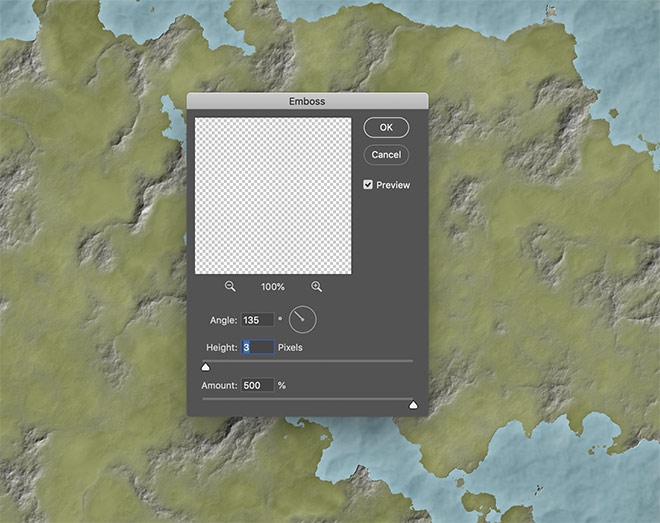
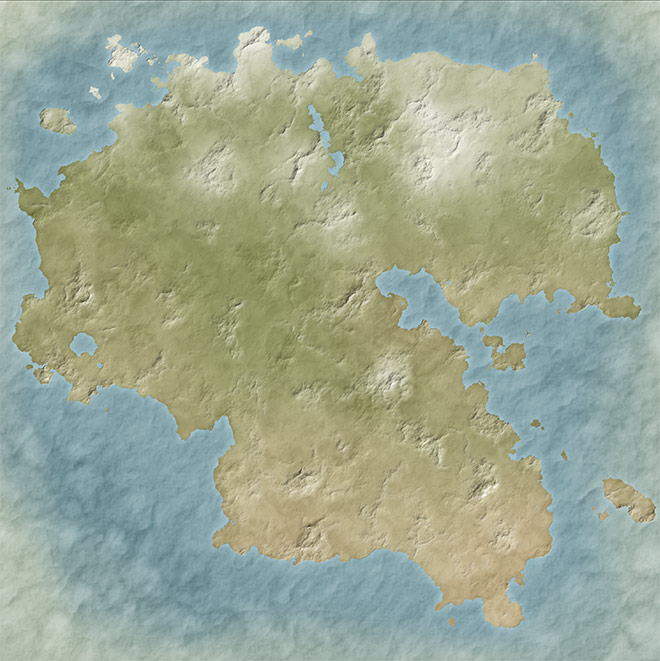
Go to Filters> Stylize> Emboss. Reduce the elevation to 3 pixels, but maximize the amount to 500% to create mountain ranges around the world.
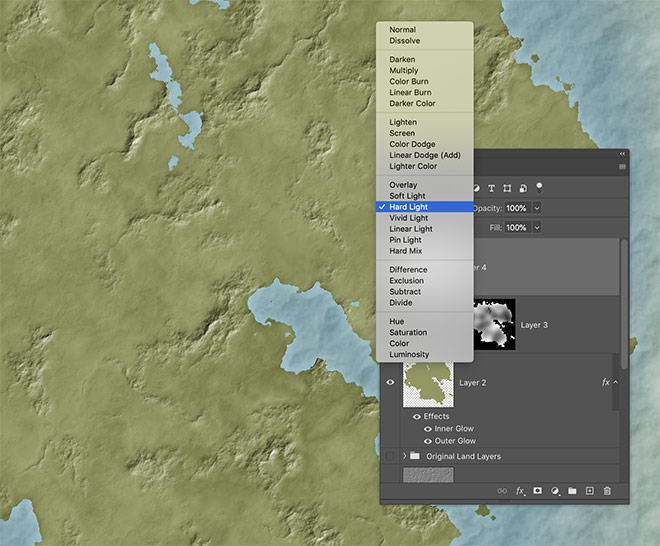
Change the blend mode of the mountain to "Hard Light" or "Linear Light" depending on how mountainous you want your mountains to be!
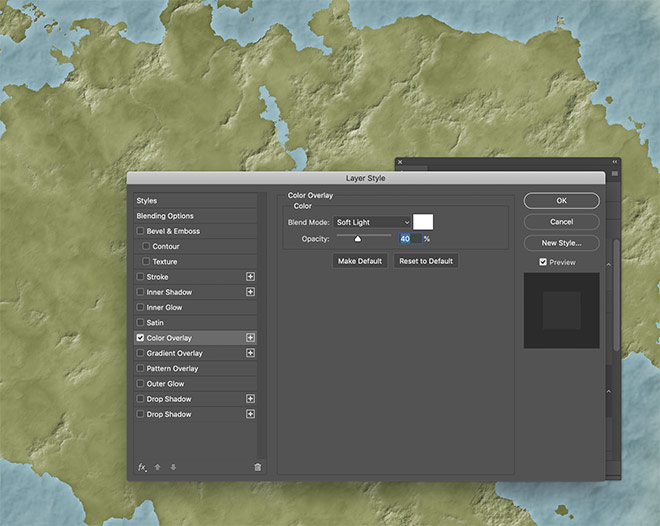
Double-click the ridge and add a color overlay. Set the blending mode to soft light with white and reduce the opacity to 40%. This white overlay makes snowy peaks appear.

Use the Clouds and Difference Clouds filter to add another new layer. Use the Select> Color Range menu again to make a selection with the same values. Press the backspace key to clear the background of the clouds.
Invert the selection and delete the excess. Only leave the clouds over the land area.
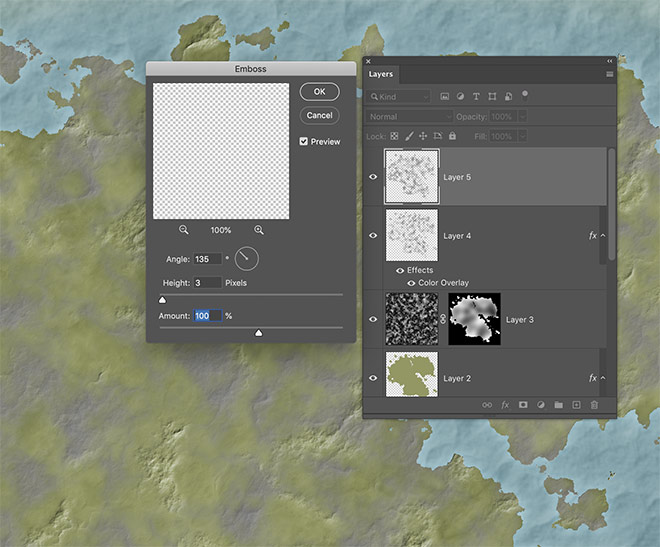
Apply a filter> Stylize> Emboss effect again. This time set the amount with 3px height to 100%.
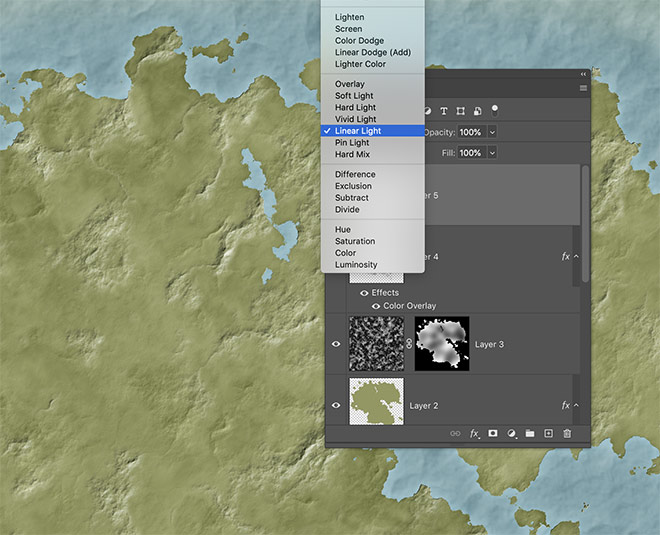
Change the blend mode of this layer to Linear Light to add more terrain effects to the landscape.
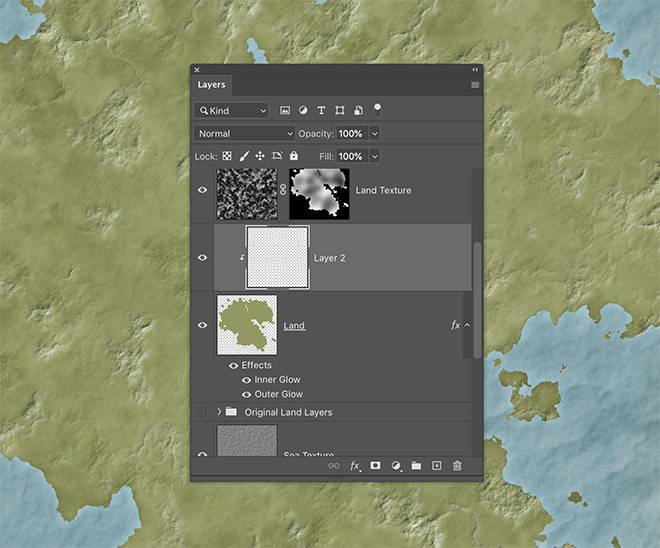
Add a new layer and drag it over the land layer. Hold down the ALT key and click between the layers to create a clipping mask.
Set up the brush tool with a sand brown of # CAB88F. Paint across the country to form beaches and deserts.
Change the foreground color to white and paint in snowy areas.
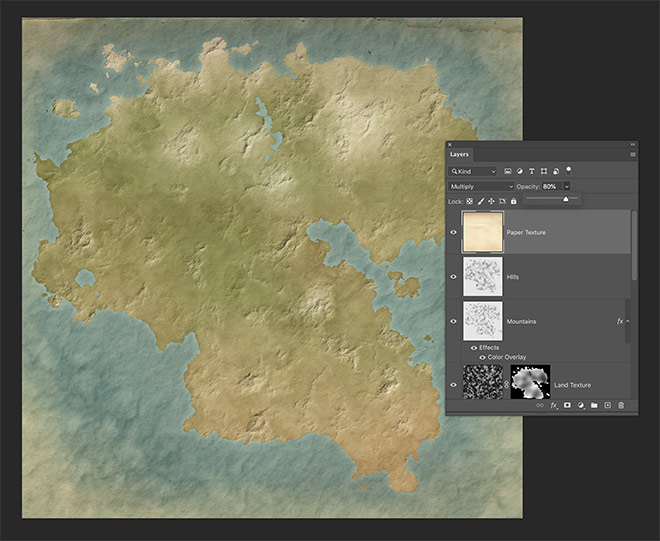
Overlay an old paper texture to achieve an aged card look. Here I use a picture from the Vintage Paper Book Cover Bundle, in which the mixing mode is multiplied and the opacity is reduced to 80%.
 Access this download
